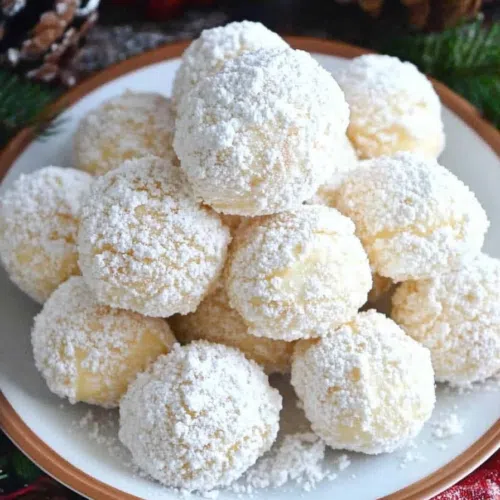
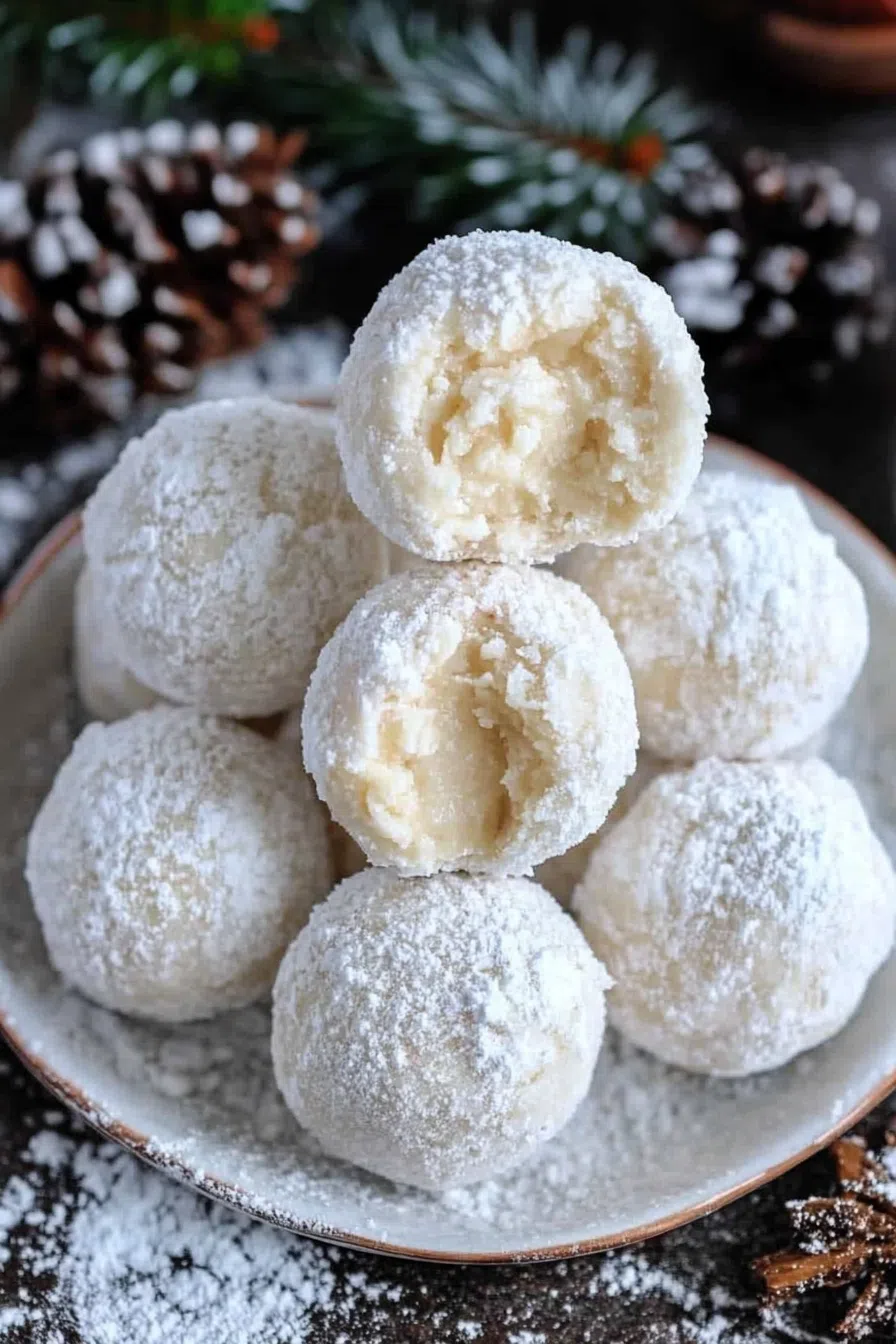
These Sweetened Condensed Milk Snowballs are soft, buttery, and melt-in-your-mouth delicious! Made with butter, condensed milk, flour, and sugar, they’re the easiest holiday treat ever.
You ever bite into something and instantly feel like you’re wrapped in a warm, cozy hug? That’s exactly what happened the first time I made these Sweetened Condensed Milk Snowballs.
I was deep in my annual holiday baking spree—flour all over the counters, a sink full of dishes, and about three different timers going off at once. You know, the usual chaos. But then, I pulled these out of the oven, dusted them with powdered sugar, and something magical happened.

Remember it later!
Planning to try this recipe soon? Pin it for a quick find later!
Remember it later!
Planning to try this recipe soon? Pin it for a quick find later!
One bite, and I was transported back to childhood, sitting at my grandma’s kitchen table, sneaking extra cookies when she wasn’t looking. These cookies taste like home—simple, soft, buttery, and just sweet enough to make you close your eyes for a second and enjoy the moment.
And the best part? They’re ridiculously easy to make. No chilling, no fancy techniques, and only five ingredients. Even if you’re not a baker, you can absolutely pull these off. And trust me—you’ll want to.
Here’s a quick peek at what’s inside:
Table of content
Why You’ll Love This Sweetened Condensed Milk Snowballs Recipe?
- Only 5 ingredients – Nothing complicated, just pantry staples.
- Melt-in-your-mouth texture – So soft, they almost disappear.
- No eggs required – Great for those with allergies!
- No chilling, no rolling – Just mix, scoop, and bake.
- Perfect for gifting – They look like little edible snowballs!
- One bowl, minimal cleanup – Because no one likes doing dishes.
Ingredient Notes:
These cookies are as simple as it gets, but each ingredient plays a big role.
- Butter – The base of everything good in life. Use real butter, not margarine, for that rich, melt-in-your-mouth texture.
- Sweetened Condensed Milk – The secret to their soft, slightly chewy texture and subtle sweetness.
- All-Purpose Flour – Keeps everything together. Just measure it correctly—no one likes a dry cookie!
- Baking Powder – Just a tiny bit for a little lift.
- Confectioners’ Sugar – The “snow” that makes them extra magical.
How To Make Sweetened Condensed Milk Snowballs?
Step 1: Whip the Butter Until It’s Fluffy
Start by creaming your softened butter in a mixing bowl for about 3 minutes. And yes—3 full minutes. Don’t rush this step! The fluffier your butter, the lighter your cookies will be.
Step 2: Add the Sweetened Condensed Milk
Pour in the sweetened condensed milk and mix until everything is smooth and dreamy. At this point, it’ll look like the best frosting ever (try not to eat it all with a spoon).
Step 3: Mix in the Dry Ingredients
Slowly add your flour and baking powder, stirring until just combined. The dough will be soft and slightly sticky—perfect for a delicate, buttery cookie.
Step 4: Scoop and Shape
Using a cookie scoop or a spoon, drop portions of dough onto a parchment-lined baking sheet. Space them out—they spread just a little.
Step 5: Bake Until Just Set
Pop the tray into a 320°F oven and bake for 12 minutes. They should be pale, soft, and just set in the center. Don’t wait for them to turn golden brown—they’re meant to stay light!
Step 6: The Snowball Magic
Let them cool for about 5 minutes, then dust them generously with confectioners’ sugar while they’re still warm. The sugar melts slightly, creating that perfect, snowy finish.
Step 7: Let Them Cool Completely
Want To Save This Recipe?
Enter your email below and we'll send the recipe straight to your inbox.
Move them to a wire rack and try not to eat five in a row (good luck with that).
Storage Options:
Room Temperature:
Keep them in an airtight container for up to 5 days.
Freezer:
Yes! Freeze them in a sealed container, separating layers with
Variations and Substitutions:
Want to mix things up? Here are some delicious twists:
- Add Vanilla or Almond Extract – A teaspoon makes a world of difference.
- Mix in Nuts – Finely chopped pecans or almonds add a little crunch.
- Coconut Snowballs – Roll them in shredded coconut for a tropical twist.
- Chocolate-Dipped – Half-dip them in melted chocolate for extra indulgence.
What to Serve with Sweetened Condensed Milk Snowballs?
These cookies belong next to a warm drink. Here’s what I recommend:
- Hot Chocolate – Because cookies + cocoa = pure happiness.
- Coffee or Espresso – The buttery richness pairs beautifully with a strong brew.
- Chai Tea – Warm spices make these even cozier!
- A Glass of Cold Milk – Because, obviously.
Frequently Asked Questions:
Why are my cookies too dense?
Make sure to whip the butter long enough and don’t overmix the dough!
Can I use margarine instead of butter?
Technically, yes—but they won’t taste as rich. Butter is always the best choice!
Do I need to chill the dough?
Nope! These cookies go straight from mixing bowl to oven.
If you’re looking for an easy, buttery, melt-in-your-mouth cookie, Sweetened Condensed Milk Snowballs are IT. Whether it’s for the holidays, a tea party, or just because you need something sweet, these little snowball cookies never disappoint.
So tell me—are you making these today? Let me know in the comments!
Remember it later!
Planning to try this recipe soon? Pin it for a quick find later!
Remember it later!
Planning to try this recipe soon? Pin it for a quick find later!
Keep the Flavor Coming – Try These:
Sweetened Condensed Milk Snowballs
Ingredients
- 1 c butter softened
- 1/2 c sweetened condensed milk
- 2 c all-purpose flour
- 3 tsp baking powder
- 1/2 c confectioners' sugar
Instructions
- Whip the butter until it becomes light and creamy, which usually takes around 3 minutes.
- Blend in the sweetened condensed milk.
- Gradually incorporate the flour, and baking powder into the mixture ensuring they are well combined.
- Using a spoon or a scoop drop portions of dough onto a baking sheet lined with parchment paper. Leave two inches of space between each portion.
- Place the baking sheet in an oven preheated to 320°F. Bake for 12 minutes.
- Allow the cookies to cool for 5 minutes then sprinkle them with confectioners' sugar.
- Transfer the cookies to a wire rack. Let them cool completely. Enjoy!
Notes

I’m Bitty, owner of nodashofgluten.com, where I share simple, delicious recipes for all tastes, including gluten-free. Check out my “About Me” page for more info!











4 Responses
Hi there, wondering how many cookies this yields? I’m making now but not sure how big to make them.
Thanks :))
Hi Alyssa! This recipe should yield about **22 cookies** if you make them around standard cookie size. I’d suggest using about a tablespoon of dough per cookie—just enough to create those perfect, bite-sized snowballs! They’ll spread a little, so give each one some space on the baking sheet. Hope you enjoy making (and tasting) these little snowy treats! 😊
Hello! Can you freeze these?
Hi Tara,
Yes, you can freeze these Sweetened Condensed Milk Snowballs! Here’s how:
Before Baking: Scoop the dough into balls, place them on a baking sheet lined with parchment paper, and freeze until solid. Once frozen, transfer them to an airtight container or freezer bag. When you’re ready to bake, you can bake them straight from the freezer—just add 1-2 extra minutes to the baking time.
After Baking: Let the baked cookies cool completely, then place them in a single layer in an airtight container with parchment paper between layers to prevent sticking. They can be frozen for up to 3 months. When you’re ready to enjoy, let them thaw at room temperature and dust with a fresh layer of powdered sugar if needed.
Hope this helps! Let me know if you have more questions. 😊