

A no-bake Reese Peanut Butter Cups Pie loaded with chocolate, crunchy peanut butter, powdered sugar, and graham crackers. Dangerously easy.
Okay, listen. I didn’t mean to invent a pie that would basically ruin all other pies for me. Honestly, it started as a joke. I was at home, in sweatpants, after one of those chaotic weeks where nothing goes right—forgotten appointments, lost keys, the kind of week where dinner is cereal and you high-five yourself for putting it in a bowl.


And then I found one lonely Reese’s peanut butter cup at the back of the pantry. It was smushed, maybe a little dusty, but it was hope. I unwrapped it like it was a golden ticket, popped it in my mouth, and thought—why isn’t this bigger? Like, pie-sized bigger?
And that was it. That was the moment. One hour, two bowls, and a little kitchen chaos later, this Reese Peanut Butter Cups Pie came to life. It’s sweet. It’s rich. It’s slightly unhinged in how indulgent it is. And if I’m being totally honest? It got me through that week. And a few more after that.
Why You’ll Love This Reese Peanut Butter Cups Pie Recipe?
I know, I know. It’s pie. But it’s also kind of a hug in dessert form. If you grew up sneaking peanut butter cups from your sibling’s Halloween stash (guilty) or buying the king-size ones “for later” and eating them in the car (also guilty), then this hits different.
It’s not fancy. There are no caramel swirls or crushed pretzel crusts (unless you want them, of course). It’s just honest-to-goodness peanut butter and chocolate with that hint of childhood joy—plus a crunchy layer from graham crackers that I didn’t expect to love, but now can’t live without.
You don’t need a mixer. Or an oven. Just a microwave, a spatula, and maybe a little patience. (Or not. I cut into mine early once and honestly? Still amazing.)
Ingredient Notes:
Let’s walk through this together, because I’ve definitely made all the weird substitutions and lived to tell the tale.
-
Milk chocolate chips (2½ cups): I tried dark chocolate once. It was fine, but didn’t hit the nostalgic note I wanted. Stick with milk if you can.
-
Vegetable oil (1½ tbsp): This helps the chocolate melt smoother. I used coconut oil once—gave it a little tropical edge that was oddly nice?
-
Powdered sugar (1⅓ cups): I once ran out and tried brown sugar. Do not recommend. It gets gritty.
-
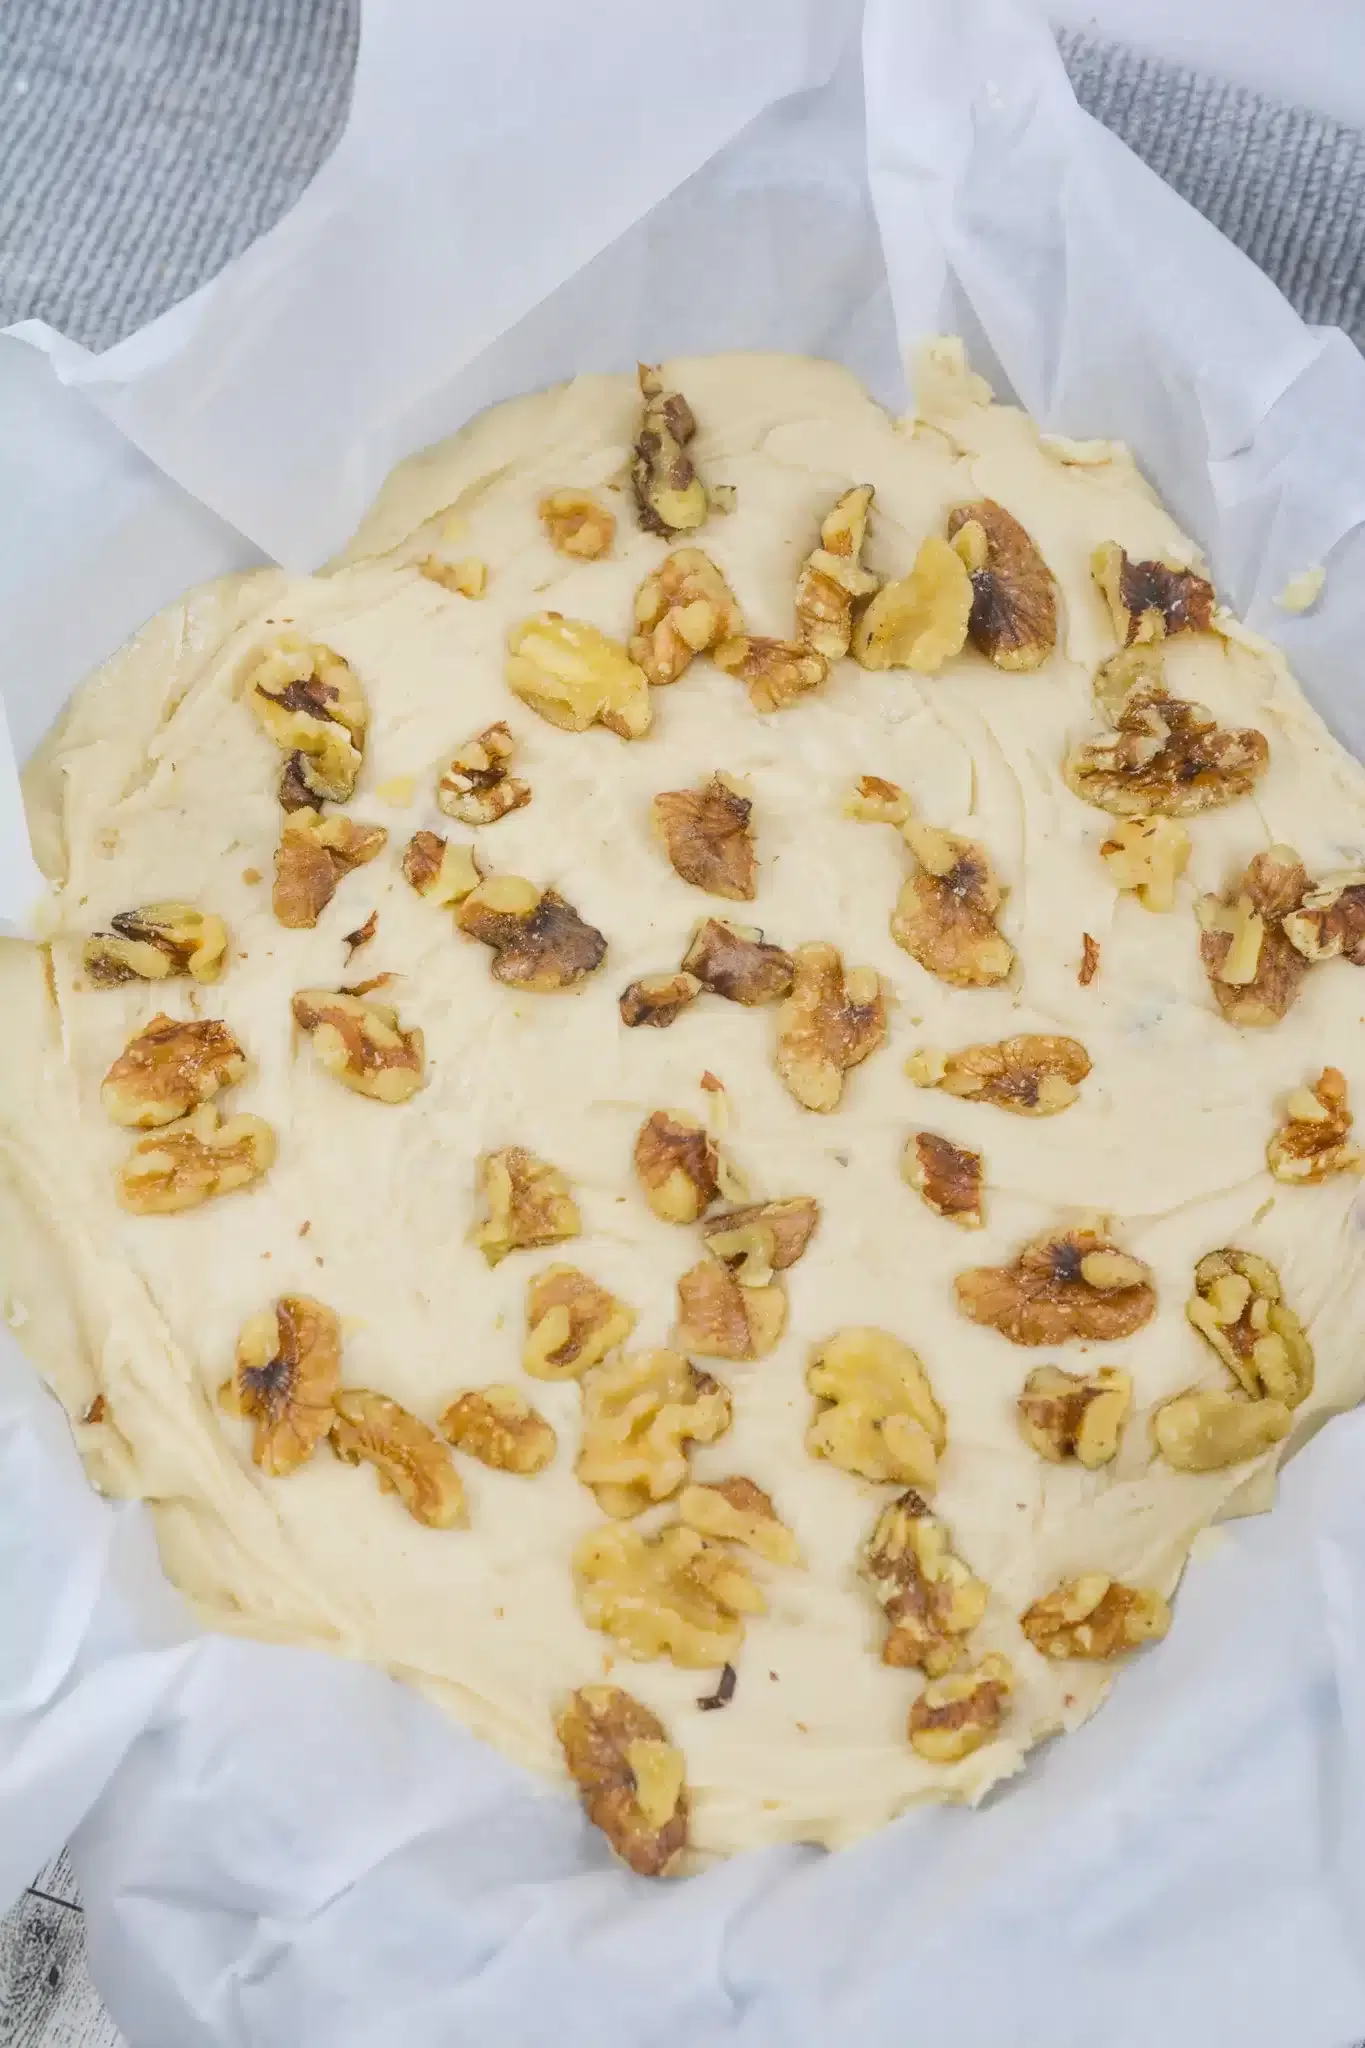
Graham cracker crumbs (1 cup): These make the filling feel like the real Reese’s texture. I crushed them with a rolling pin in a Ziploc bag because the food processor was too far away.
-
Crunchy peanut butter (1¼ cups): I will die on this hill. Crunchy adds texture. But creamy totally works if that’s your jam (pun… intended?).
-
Salted butter (½ cup): Don’t skip the salt. The balance matters more than you’d think. If you’ve only got unsalted, throw in a generous pinch of sea salt.
How To Make Reese Peanut Butter Cups Pie?
Step 1: Prep your pan.
Use a 9-inch tart pan if you have one. If not, a pie dish works just fine—it’ll just look a little more rustic. Spray it with cooking spray and line the bottom with a parchment circle. Not essential, but it makes your life easier later.
Step 2: Melt the chocolate.
Microwave the chocolate chips and oil in a big bowl, 30 seconds at a time, stirring until smooth. Don’t overdo it. Chocolate turns on you fast. I once tried to rush it and ended up with chocolate cement. Sad times.
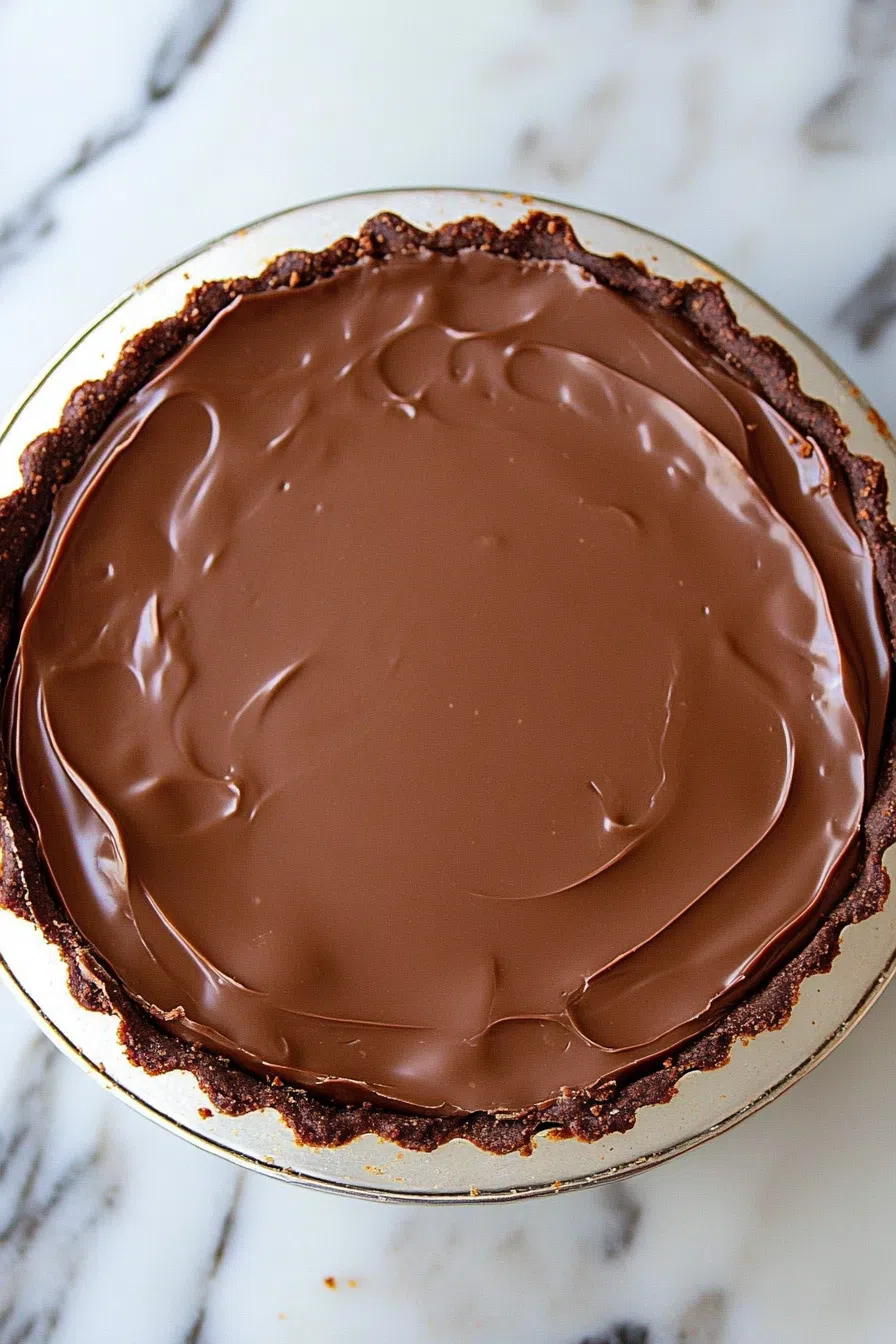
Step 3: Chocolate base.
Spread half of that melted chocolate into the pan. Try to get it up the sides too—it doesn’t have to be perfect. Chill it in the fridge while you mix the filling. I sometimes sneak a spoonful of the leftover chocolate during this part. You know. For quality control.
Step 4: Make the peanut butter layer.
Microwave the butter and peanut butter together until smooth. In a separate bowl, mix the powdered sugar and graham crumbs. Then combine everything until it looks like thick cookie dough. And yes, you’ll be tempted to eat it straight. I do. Every time.
Step 5: Assemble the pie.
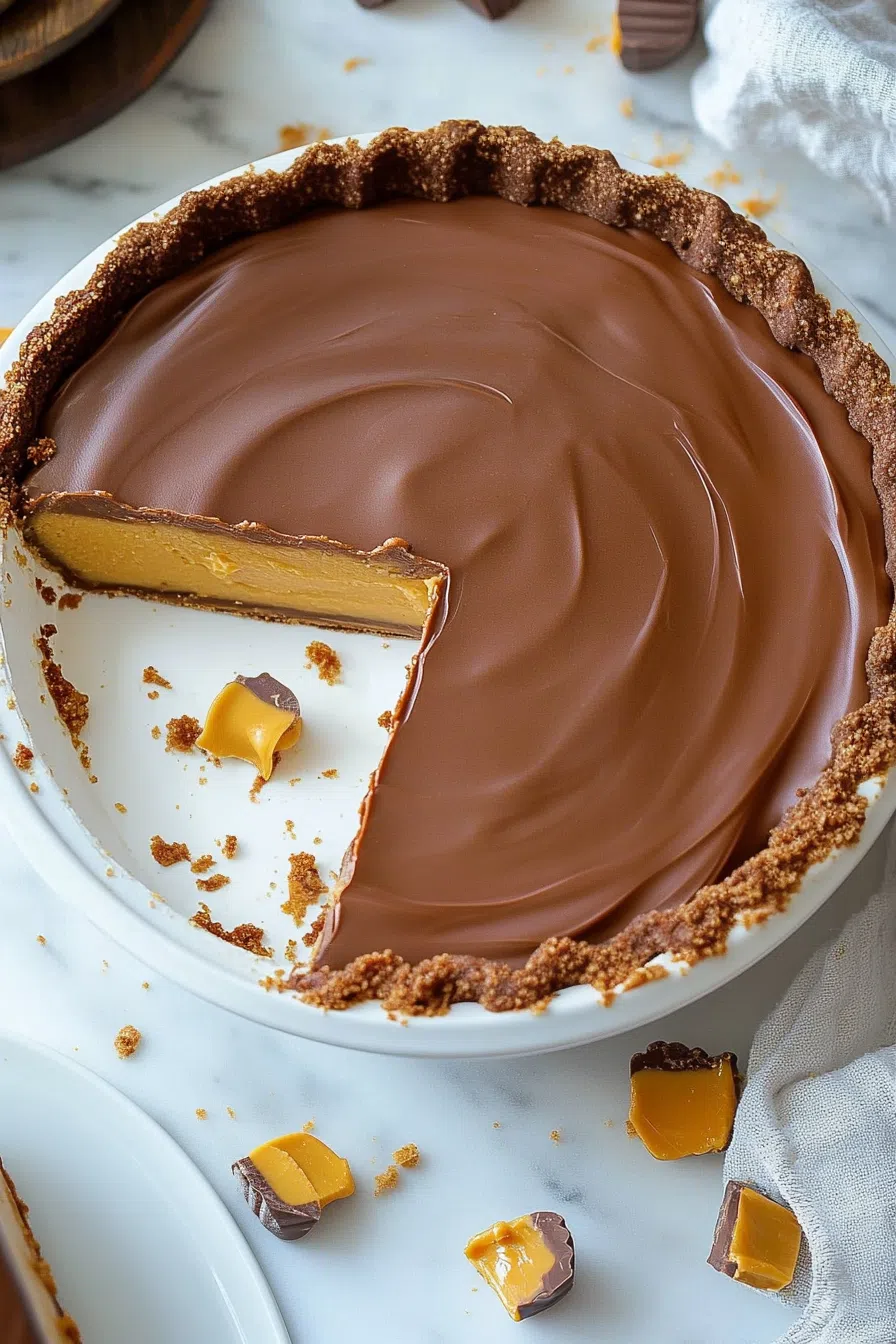
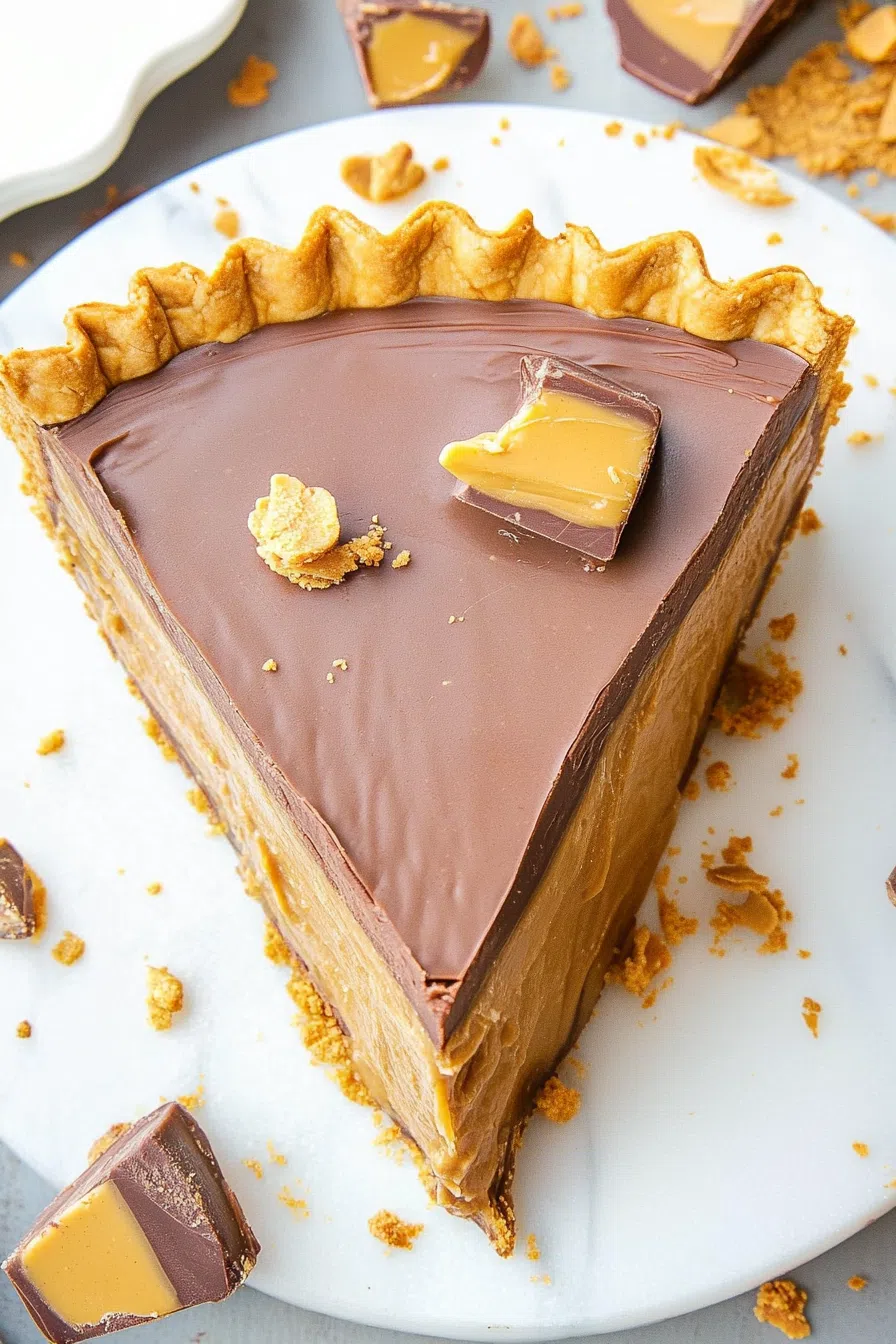
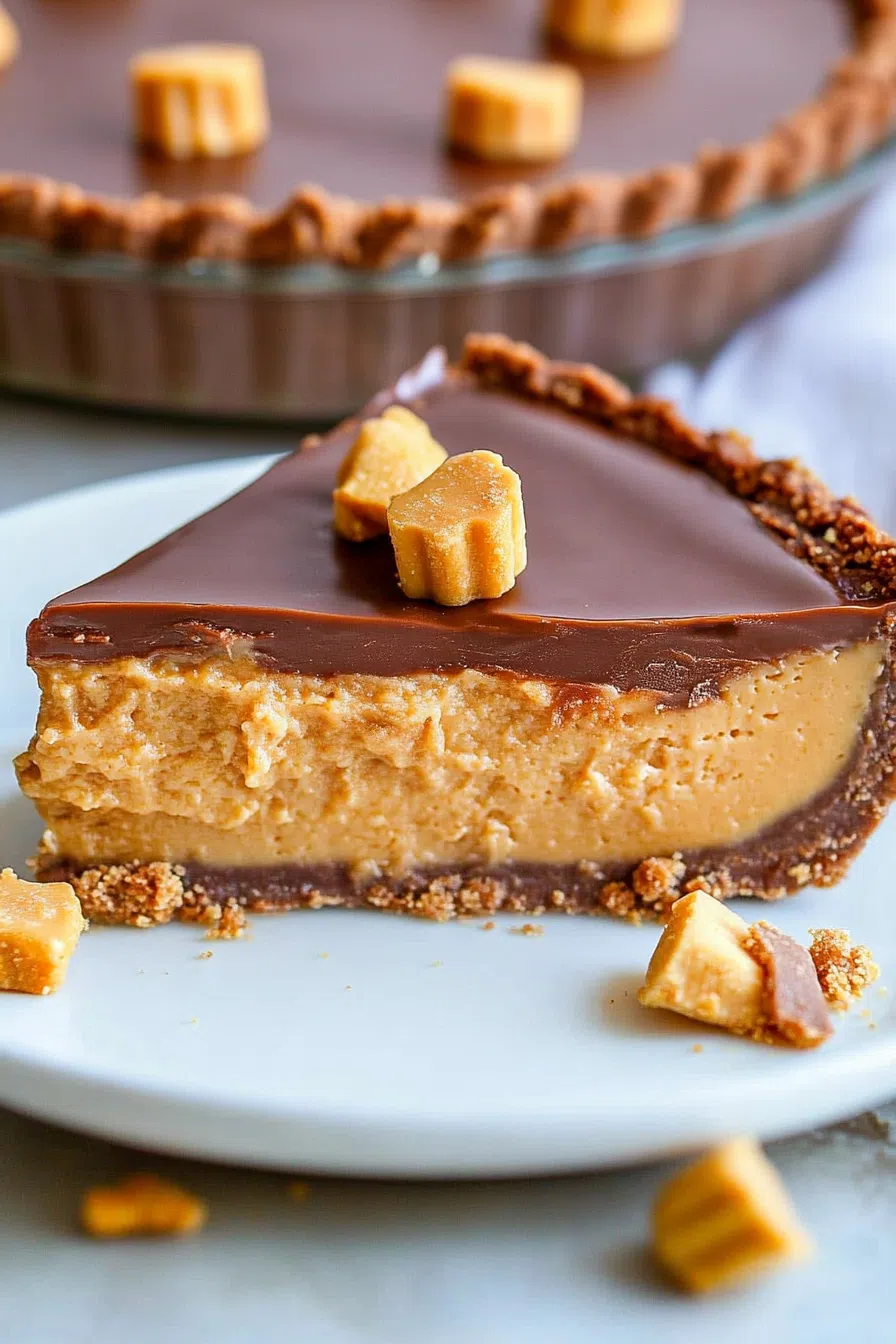
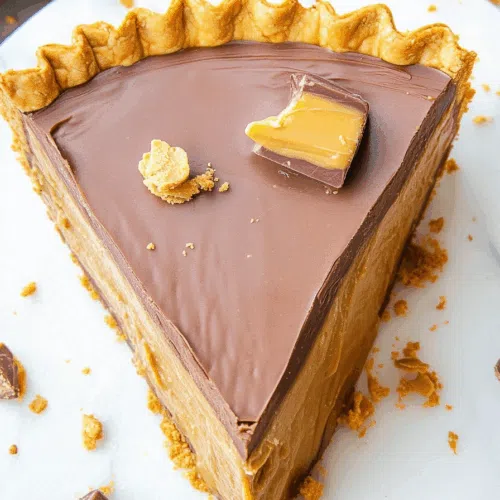
Gently press the peanut butter mixture into the chilled chocolate layer. Smooth it out with a spatula or your fingers if you’re brave (and clean). Then pour the rest of the chocolate on top and smooth it all the way to the edges. Try not to cry from joy. Chill it again for at least 4 hours, but overnight is even better.
Step 6: Slice and live your best life.
Once it’s set, slice it like a pie, eat it like cake, and don’t apologize if it gets a little messy. That’s part of the magic.
Storage Options:
This pie holds up like a champ. Keep it in the fridge, covered, and it’ll last about 4–5 days. If you’re thinking ahead, wrap individual slices and freeze them. They’re weirdly good half-thawed on a hot day—like a peanut butter cup popsicle, kind of? No rules here.
Want To Save This Recipe?
Variations and Substitutions:
Let’s face it, we don’t always have everything on hand. Here’s what’s worked for me (and what hasn’t):
-
Use almond butter? Sure. Still good. Still rich. Totally different vibe.
-
Want it less sweet? Go for dark chocolate or cut the sugar a little.
-
More texture? Add chopped peanuts. Or a graham cracker crust if you’re over chocolate.
-
Mini pies? Try muffin tins with liners. Great for parties or just freezing for one-at-a-time indulgence.
What to Serve with Reese Peanut Butter Cups Pie?
-
Cold milk: Like, ice cold. Preferably in a slightly chipped glass.
-
Hot coffee or espresso: Cuts the sweet in the best way.
-
Berries: Strawberries + chocolate + peanut butter = yep.
-
A little whipped cream or a sprinkle of flaky sea salt: Not necessary, but wildly appreciated.
Frequently Asked Questions:
Can I make it ahead of time?
Yes. And you should. It’s even better the next day.
Can I use natural peanut butter?
Maybe. It depends how oily it is. If it’s super runny, you might want to skip it—it could mess with the texture.
Do I have to chill it for 4 hours?
Technically no, but cutting it early means messier slices and soft chocolate. Still delicious, just… less Instagrammable.
This Reese Peanut Butter Cups Pie is comfort food disguised as candy. Or maybe it’s candy disguised as pie. I don’t know. I just know it makes people smile. It’s messy and sweet and deeply nostalgic. It reminds me of sleepovers and lunchboxes and stealing candy from the freezer when no one was looking.
So if you’ve got chocolate chips, peanut butter, and ten minutes of patience? You’ve got something kind of magical.
If you try it, let me know what you think—or what you changed. Add crushed pretzels? Swirl in caramel? Eat it in bed at 2am with no regrets? Same. Let’s talk about it.
Keep the Flavor Coming – Try These:


Reese Peanut Butter Cups Pie
Ingredients
- 2½ cups milk chocolate chips
- 1½ tablespoons vegetable oil
- 1⅓ cups confectioners’ sugar
- 1 cup graham cracker crumbs
- 1¼ cups crunchy peanut butter
- ½ cup salted butter
Instructions
Prepare the tart pan:
- Lightly spray a 9-inch tart pan with nonstick cooking spray. Line the bottom with a circle of parchment paper and spray the parchment lightly as well. Set the prepared pan aside.
Melt the chocolate:
- In a large microwave-safe bowl, combine the milk chocolate chips and vegetable oil. Heat the mixture in the microwave in 30–45 second increments on HIGH power, stirring thoroughly after each interval. Continue this process until the chocolate is fully melted and smooth.
Form the chocolate base:
- Pour approximately half of the melted chocolate into the tart pan. Using an offset spatula or the back of a spoon, spread the chocolate evenly across the bottom and up the sides of the pan. Transfer the pan to the refrigerator to chill until the chocolate layer has set.
Prepare the filling:
- In a separate microwave-safe bowl, combine the crunchy peanut butter and salted butter. Microwave the mixture in short intervals of 30–45 seconds, stirring between each, until both are fully melted and smooth.
Combine the dry ingredients:
- In a large mixing bowl, whisk together the confectioners’ sugar and graham cracker crumbs until well blended. Pour the warm peanut butter mixture into the dry ingredients and stir until a cohesive filling is formed.
Assemble the pie:
- Remove the tart pan from the refrigerator. Spoon the peanut butter mixture into the chocolate shell, pressing gently to create an even layer. Pour the remaining melted chocolate over the peanut butter layer and spread it evenly, ensuring the top is smooth and the chocolate reaches the edges.
Chill and serve:
- Return the pie to the refrigerator and chill for a minimum of 4 hours, or until fully set. Once chilled, slice and serve. Store any leftovers refrigerated.
Notes
I’m Bitty, owner of nodashofgluten.com, where I share simple, delicious recipes for all tastes, including gluten-free. Check out my “About Me” page for more info!

