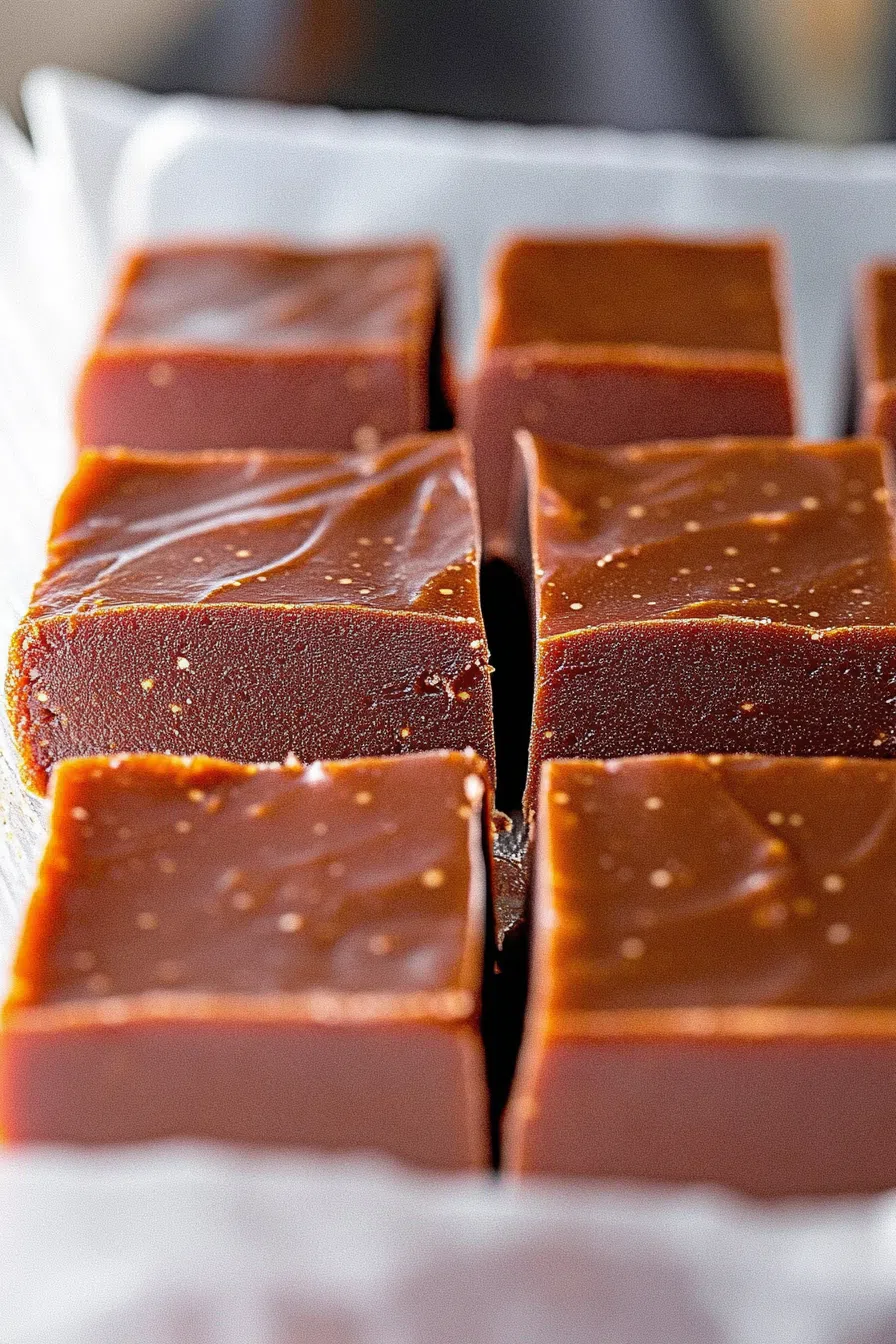
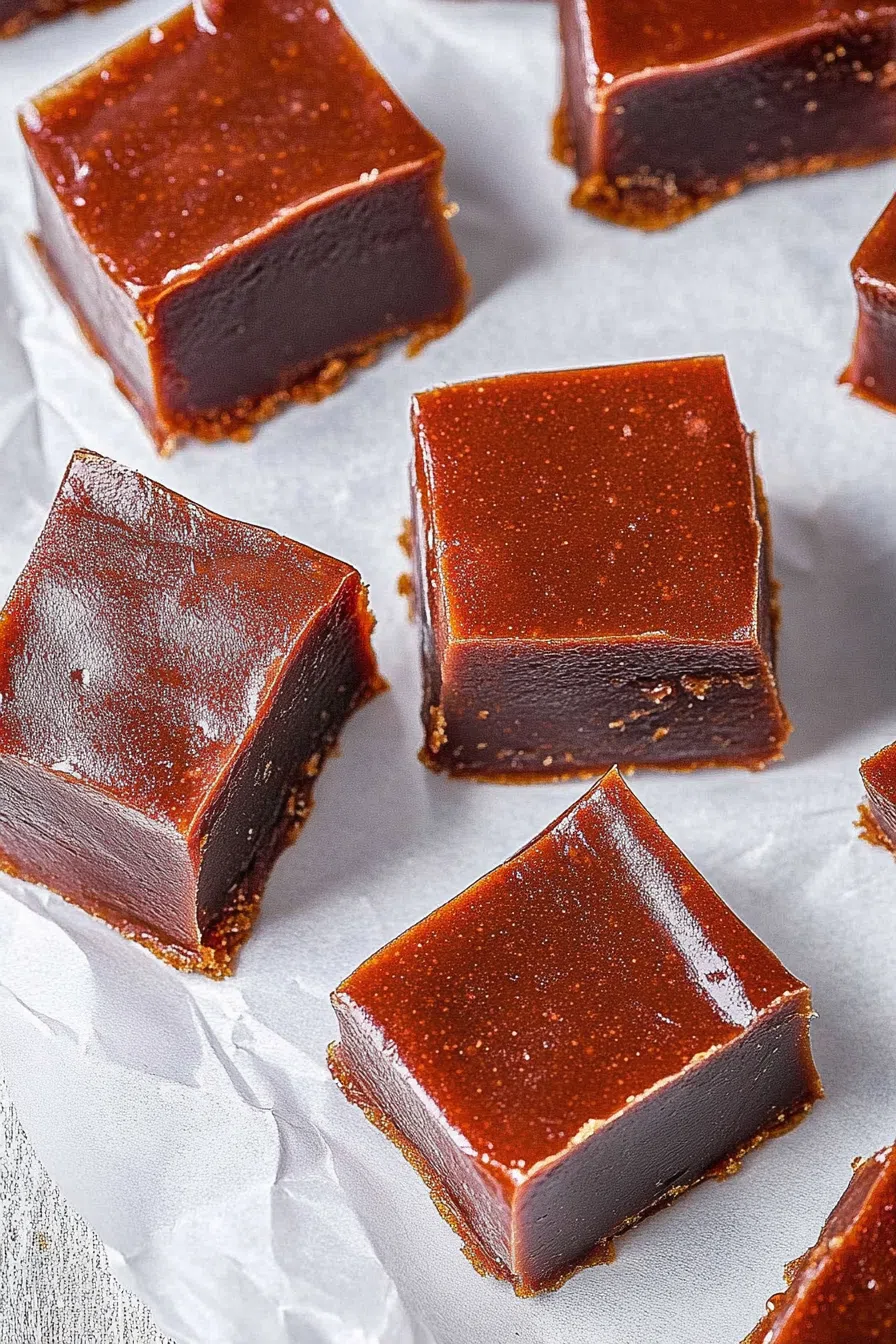
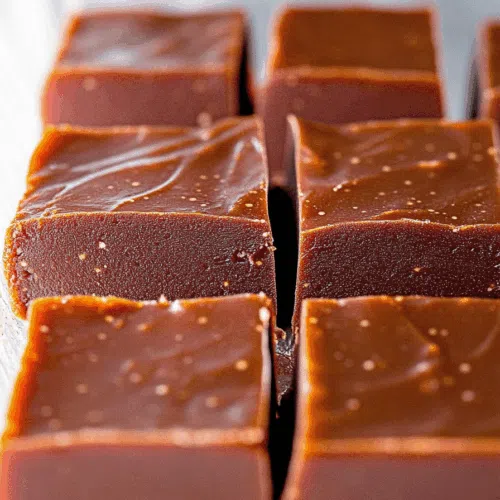
This old-school fudge recipe uses butter, sugar, evaporated milk, marshmallow fluff, chocolate chips, and vanilla. Simple, rich, unforgettable.
You know how certain smells just slam you straight back to childhood? Like stepping into your mom’s kitchen after school in December, coat half unzipped, backpack still on, and there it is—that warm, chocolatey smell that lets you know fudge happened while you were gone.


That’s my mom’s fudge for me. It wasn’t a holiday thing, or a birthday thing. It was more like a “she felt like making something sweet and happened to have marshmallow fluff in the cupboard” thing. Some kids grew up with store-bought cookies. I had fudge in a foil-lined 9×9 pan cooling on the counter more often than not.
And let’s be clear—this wasn’t some picture-perfect, gourmet fudge situation. The corners were never quite square, and there was always a little swirl from the spatula on top because my mom refused to smooth it down properly. “It’s fudge, not a wedding cake,” she’d say. And she was right.
Why You’ll Love This My Mom’s Fudge Recipe?
So here’s the deal: I’ve tried “fancy” fudge. You know the kind—salted caramel bourbon swirl or double-dark raspberry truffle with toasted coconut dust or whatever. But those never hit me like this one does.
My mom’s fudge is soft but not mushy, firm but still melts on your tongue. It’s that perfect middle ground. And it’s stupid easy to make. No candy thermometers. No expensive ingredients. No existential dread about getting it to “the right stage.” Just stir, boil, mix, and pour.
And maybe this is just me being weirdly nostalgic, but it tastes like comfort. Like that feeling when you put on socks fresh out of the dryer or hear your mom call you by a nickname only she uses.

Ingredient Notes:
The magic of this recipe is in how little it asks of you. Here’s what you’ll need:
-
¾ cup unsalted butter: Though my mom definitely used salted more than once and never apologized for it.
-
2½ cups granulated sugar: Yeah, it’s a lot. It’s fudge. That’s literally the point.
-
⅔ cup evaporated milk: NOT sweetened condensed. Learned that one the hard way.
-
12 oz bag of semi-sweet chocolate chips: I usually go Nestlé, but I’ve used the store brand. Still awesome.
-
7 oz jar of marshmallow fluff: It’s messy and sticky and a little chaotic. Embrace it.
-
1 tsp vanilla extract: Optional in a pinch, but it does round things out. My mom used the cheap stuff and nobody complained.
How To Make My Mom’s Fudge?
Step 1: Throw the butter, sugar, and evaporated milk in a saucepan.
Use a medium-to-large one. Bigger than you think you need. Fudge boils up like it’s got something to prove.
Step 2: Crank the heat to high and whisk.
Stay close. Stir often. Pretend you’re on a cooking show. Once it boils, turn it down to medium and set a timer for five minutes. Stir the whole time unless you enjoy scraping burnt sugar off your stove.
Step 3: Take it off the heat and dump in the chocolate chips.
Stir like your life depends on it. They’ll melt fast and the mixture will look like chocolate lava.
Step 4: Add in the fluff and vanilla.
This part gets messy. The fluff sticks to everything, including your sleeve. Just go with it.
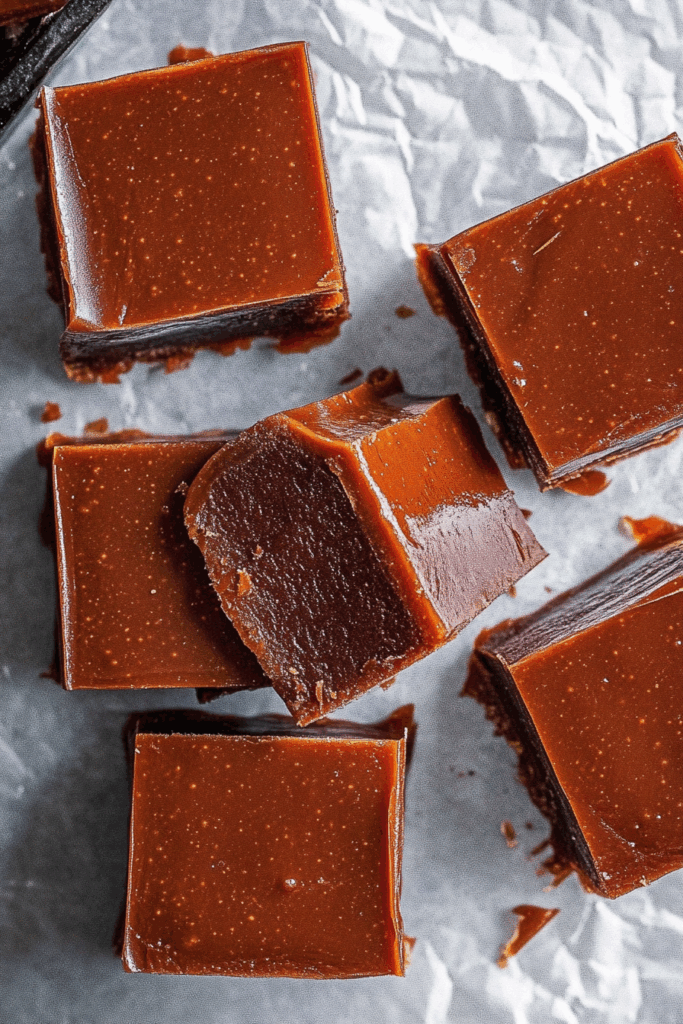
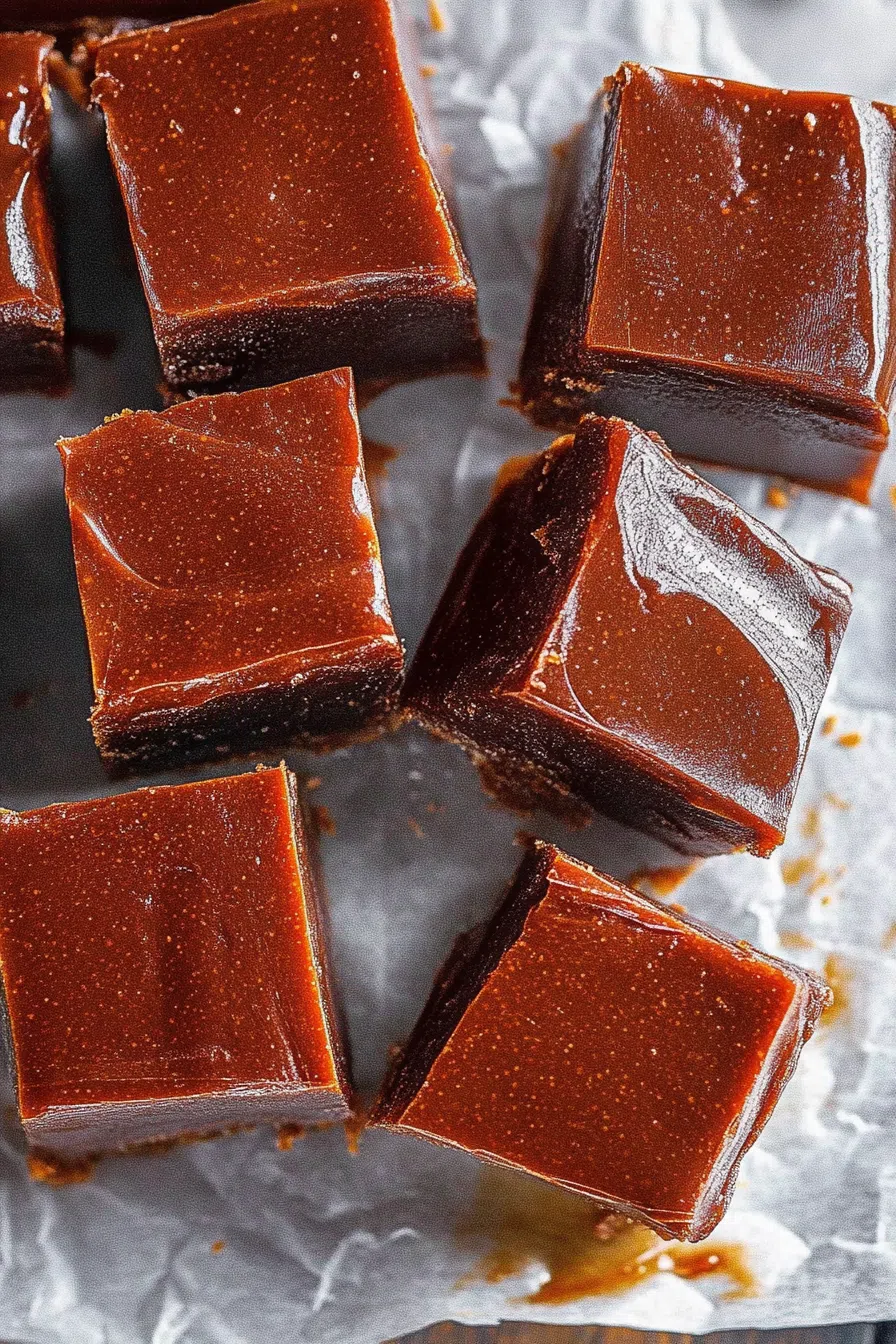
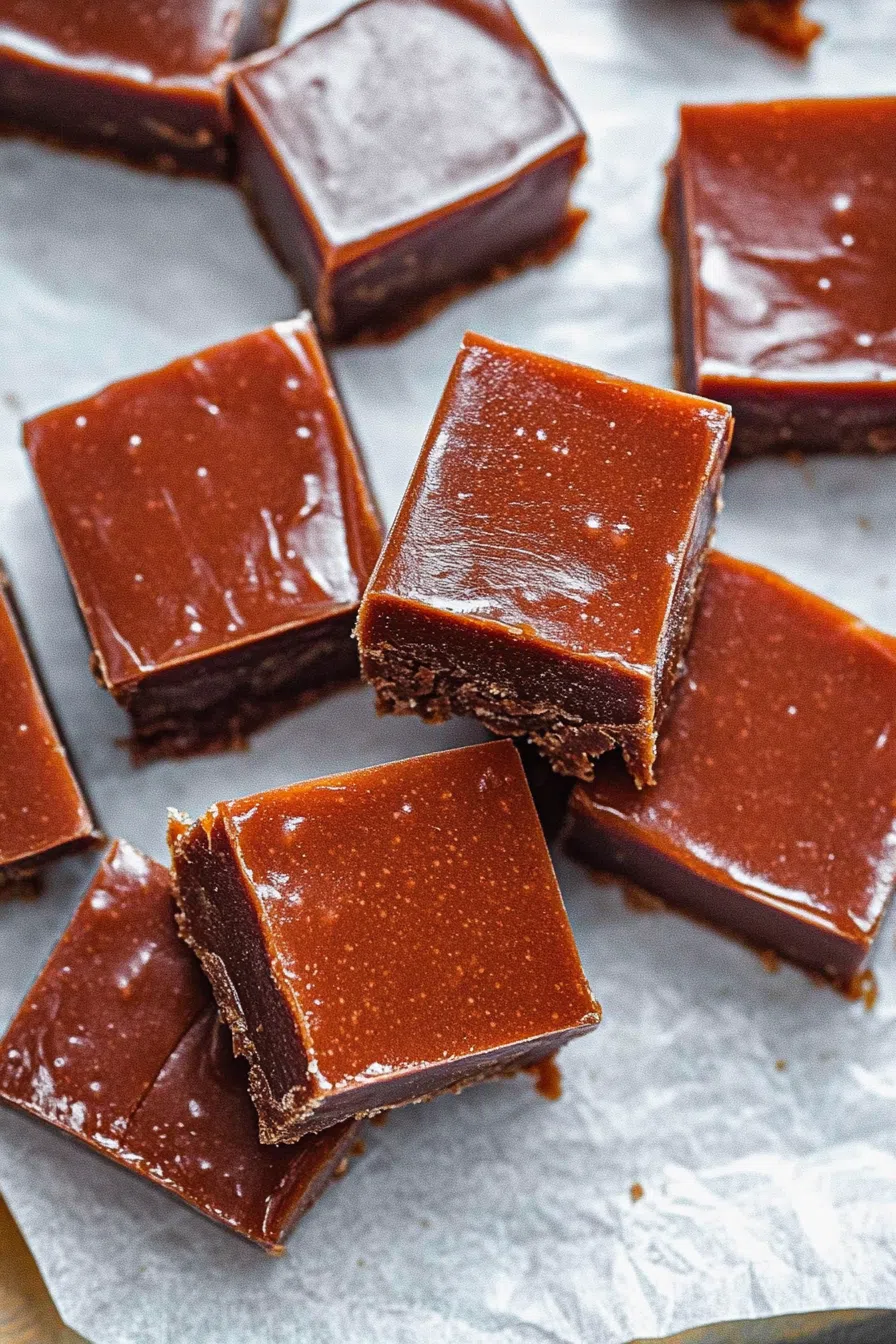
Step 5: Pour into a foil-lined, greased 9×9 pan.
Use a spatula if you want to smooth it. Or leave the peaks and swirls like my mom did. That was kinda her signature move.
Step 6: Chill it.
Fridge for a few hours. Or if you’re impatient like me, stick it in the freezer for 45 minutes and pretend that was always the plan.
Then slice. Eat one. Eat another. Wrap some up for a friend if you’re feeling generous. Or, you know, don’t.
Want To Save This Recipe?
Storage Options:
Store it in an airtight container in the fridge and it’ll stay fresh for at least a week. You can leave it out at room temp, but it gets a little softer—especially if your kitchen is as warm as mine always is because I forget to turn off the oven. You can also freeze it. Just wrap squares in wax paper and tuck them into a freezer bag. One bite of cold fudge on a random Tuesday? Highly recommend.
Variations and Substitutions:
-
Add walnuts—classic move, and my dad’s favorite version.
-
Use dark chocolate chips if you want a deeper flavor. Still works great.
-
Add crushed candy canes in December. It’s festive and weirdly addictive.
-
Sprinkle sea salt on top. Fancy vibes, minimal effort.
-
Swirl in peanut butter just before it sets. Chaotic, messy, and delicious.
What to Serve with My Mom’s Fudge?
-
With strong coffee or a double shot of espresso. Because balance.
-
Crumbled over vanilla ice cream. You’ll never go back to chocolate syrup.
-
Paired with a salty snack, like pretzels. Sweet and salty forever.
-
In holiday tins with a handwritten note. Everyone will ask for the recipe—and yes, you should pretend it’s your own.
Frequently Asked Questions:
Can I use marshmallows instead of fluff?
Yes, technically. But melt them first or you’ll end up with chocolate rock.
Can I double it?
Absolutely. Just use a bigger pan and double the joy.
Does it have to be refrigerated?
Not really, but it helps it set faster and keeps it firm. Plus, cold fudge? Kinda amazing.
My mom’s fudge isn’t just a recipe—it’s the thing she made when words weren’t enough. It showed up on birthdays, after bad days, and in cookie tins with no labels because everyone already knew what it was. It’s simple. It’s messy. It’s a little too sweet and just the right amount of nostalgic.
So make it. Make it for someone you love. Or just for yourself, because you’ve had a week and you deserve fudge. And if you make it a little messy or forget the vanilla or eat half the batch before it sets? Honestly, that just makes it even more yours.
If you try it, let me know—especially if you spill fluff on your sleeve. It’s tradition.
Keep the Flavor Coming – Try These:


My Mom’s Fudge
Ingredients
- ¾ cup unsalted butter
- 2½ cups granulated sugar
- ⅔ cup evaporated milk
- 12 ounces semi-sweet chocolate chips
- 7 ounces marshmallow fluff
- 1 teaspoon vanilla extract
Instructions
Prepare the pan:
- Line a 9×9-inch baking dish with aluminum foil and lightly coat with non-stick cooking spray. Set aside.
Heat base ingredients:
- In a medium saucepan, combine the butter, granulated sugar, and evaporated milk. Place over high heat and whisk occasionally until the mixture comes to a boil.
Boil and time the mixture:
- Once boiling, reduce heat to medium and continue to boil for exactly 5 minutes, stirring frequently to prevent scorching.
Incorporate the chocolate:
- Remove the saucepan from heat. Immediately add the chocolate chips and whisk until they are fully melted and the mixture is smooth and glossy.
Add marshmallow and vanilla:
- Stir in the marshmallow fluff and vanilla extract. Continue mixing until fully incorporated and the mixture is uniform in texture.
Pour and chill:
- Pour the fudge into the prepared pan. Use a spatula to smooth the surface, if desired. Refrigerate for a minimum of 2–3 hours or until fully set.
Slice and serve:
- Once firm, remove the fudge from the pan, peel away the foil, and cut into squares. Store in an airtight container in the refrigerator.
Notes
I’m Bitty, owner of nodashofgluten.com, where I share simple, delicious recipes for all tastes, including gluten-free. Check out my “About Me” page for more info!