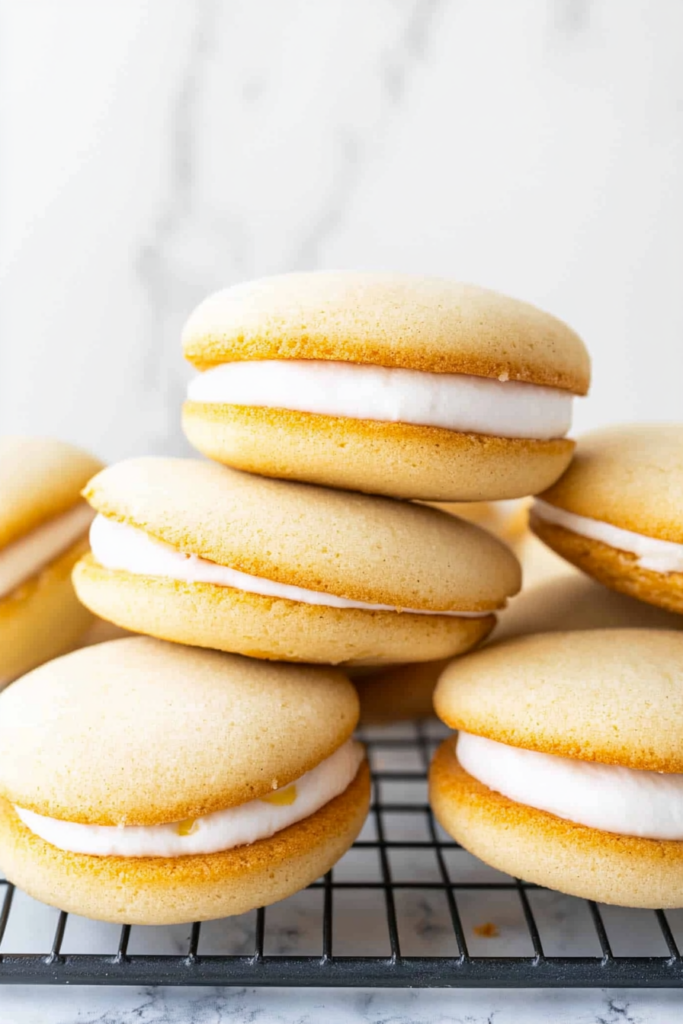
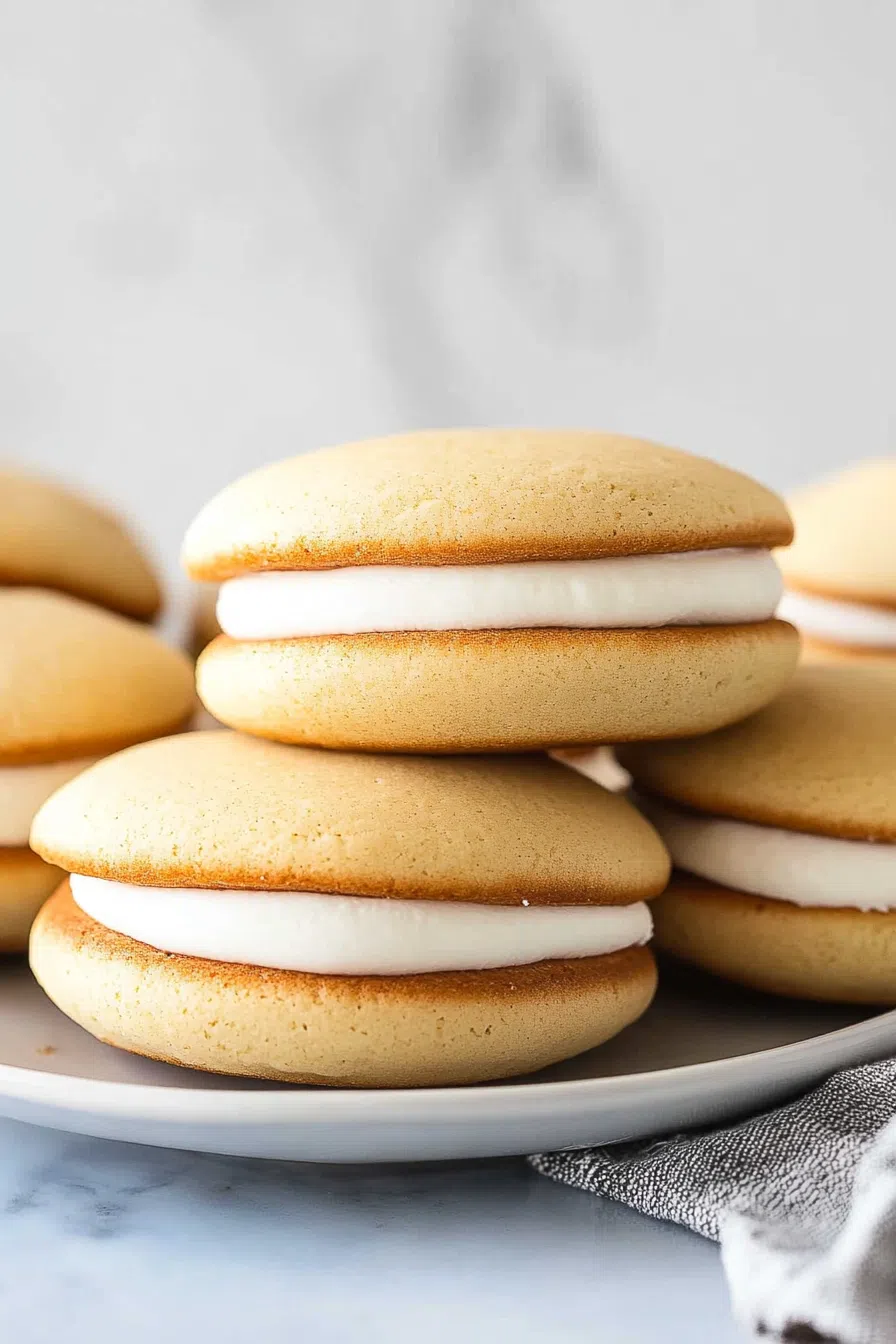
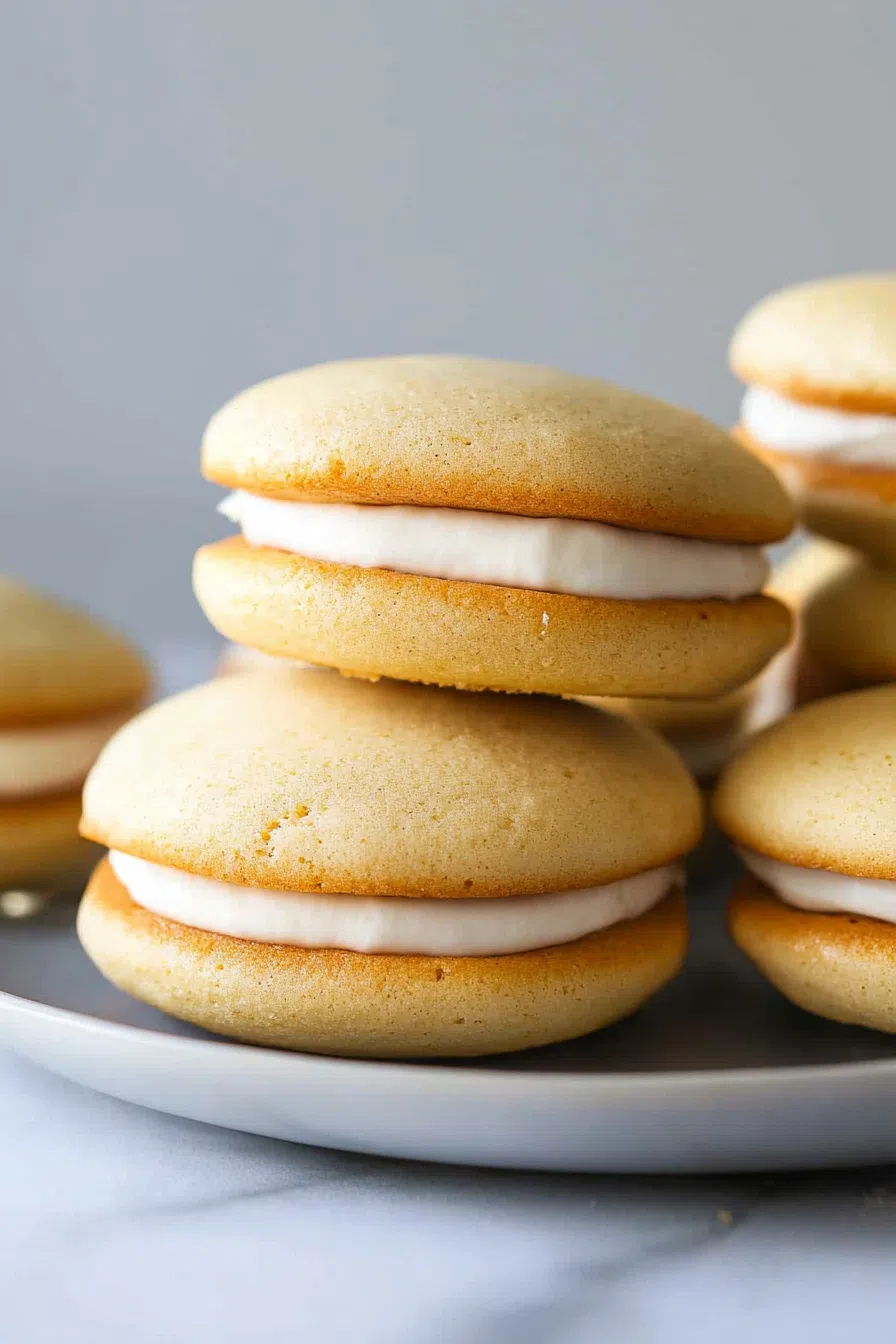
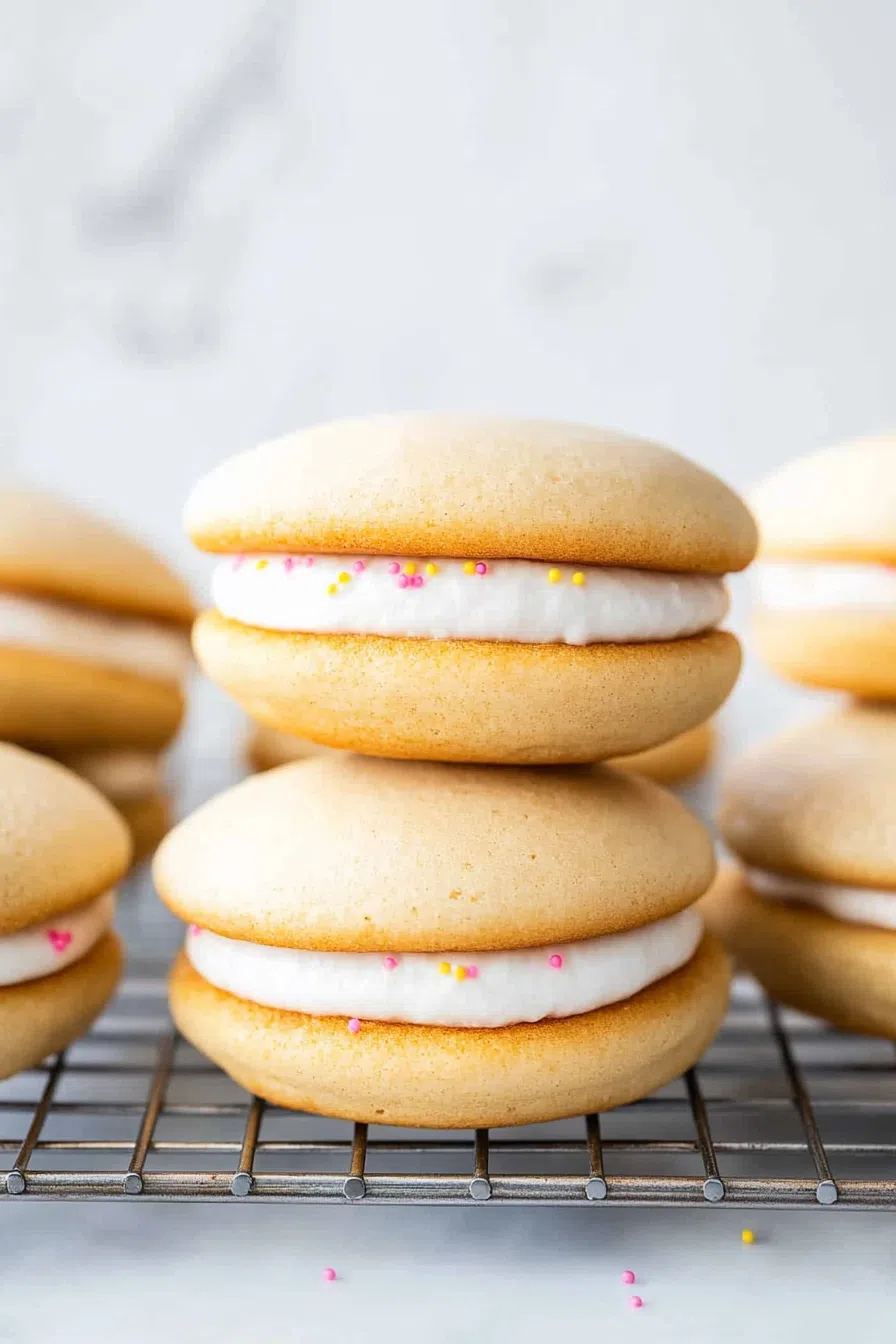
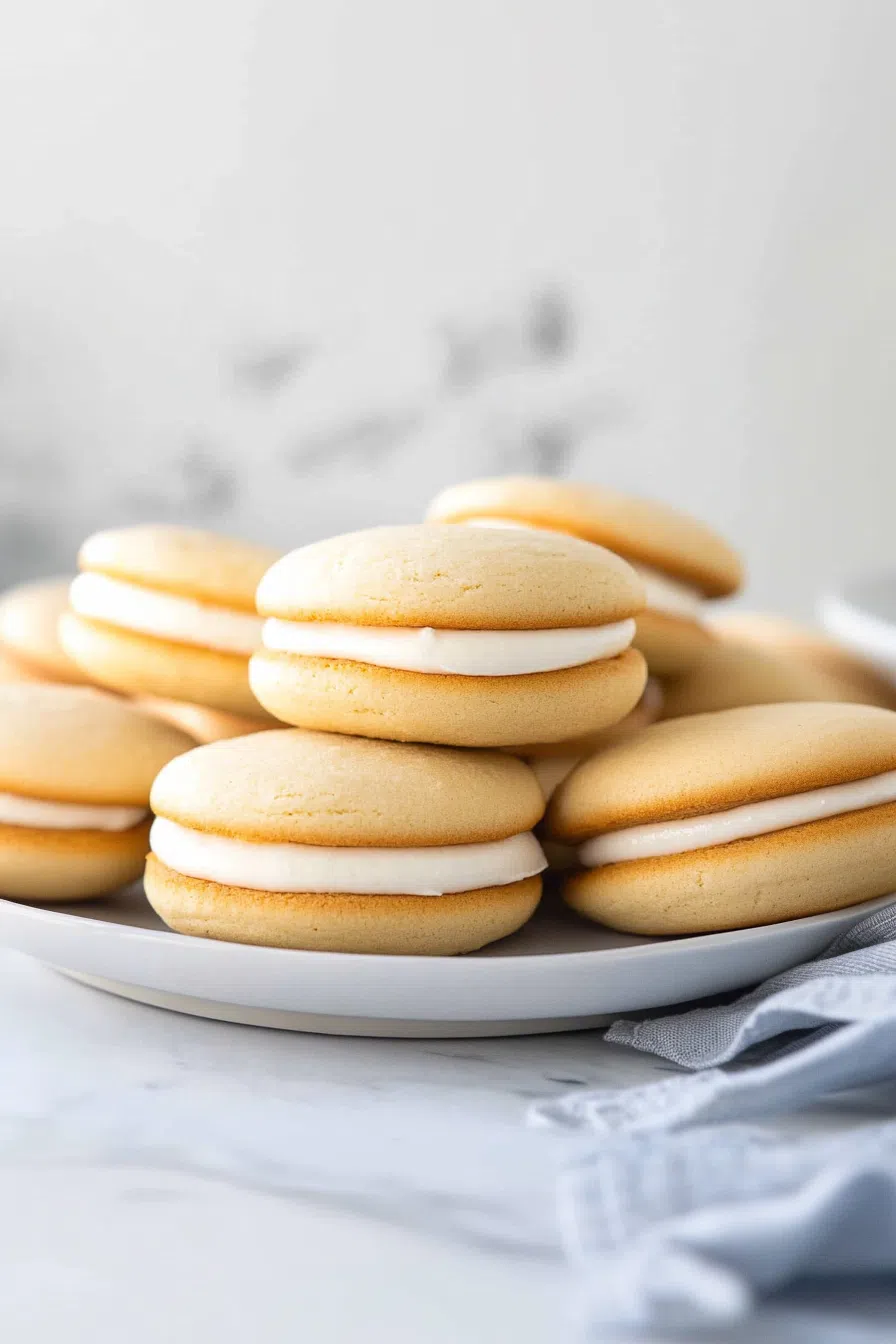
This Vanilla Whoopie Pie Recipe makes soft, fluffy, cake-like cookies sandwiched with a creamy vanilla filling. A nostalgic, homemade favorite!
Let me set the scene: It’s summer. I’m maybe seven years old, sitting at my grandma’s kitchen table, swinging my legs under the chair while she carefully pipes a cloud of frosting onto a golden, fluffy little cake. She presses another one on top and hands it to me with a wink.
First bite? Pure bliss. Soft, buttery, slightly sweet, and filled with the most perfect creamy vanilla goodness. That was my first-ever whoopie pie, and I was hooked.


Fast forward to today, and I still get that same warm, happy feeling every time I make these. They’re fun, nostalgic, and ridiculously delicious. And while chocolate whoopie pies might get more attention, there’s something so classic about vanilla ones. They’re light, delicate, and perfect with a cup of coffee or a tall glass of milk.
If you’ve never made whoopie pies before, don’t worry—they’re easy! And if you have? Well, you already know how good these are gonna be.
Why You’ll Love This Vanilla Whoopie Pie Recipe?
- Soft & fluffy – Think cake meets cookie. Light, airy, and absolutely perfect.
- Classic vanilla flavor – Simple, sweet, and nostalgic.
- Made with everyday ingredients – No fancy stuff required!
- Creamy homemade filling – No store-bought frosting here—this is the real deal.
- Great for sharing – Or, you know, keeping all to yourself. No judgment.
- Customizable – Want to mix things up? Try a fun flavor twist!

Ingredient Notes:
For the Whoopie Pie Cakes
These little cakes are light, sweet, and incredibly soft.
- Shortening – Helps keep the cakes tender and fluffy.
- Sugar – Just enough to sweeten things up.
- Eggs – Essential for that light, cake-like texture.
- Vanilla Extract – The star of the show. Use real vanilla for the best flavor!
- Hot Water – Helps create a smooth batter and keeps the cakes moist.
- Flour – The base of the batter, giving the cakes their soft, cake-like structure.
- Baking Powder & Baking Soda – The magic combo for a perfect rise.
- Salt – A tiny pinch balances the sweetness.
For the Vanilla Cream Filling
This light, fluffy, and just-sweet-enough filling takes these to the next level.
- Shortening – Makes the filling smooth and stable.
- Powdered Sugar – Gives it that silky, melt-in-your-mouth texture.
- Water & Milk – Adjusts the consistency so it’s spreadable but not runny.
Pro Tip: Want extra fluffy filling? Whip it for a full 10 minutes. It makes a huge difference!
How To Make Vanilla Whoopie Pie?
Step 1: Make the Batter
Preheat your oven to 425°F. Line a baking sheet with
In a large mixing bowl, cream together the shortening, sugar, eggs, and vanilla until smooth and fluffy.
In a separate bowl, whisk together the flour, salt, baking soda, and baking powder.
Gradually mix the dry ingredients into the wet ingredients in two batches. Stir until just combined.
Finally, add the hot water and mix until the batter is smooth but not runny.
Pro Tip: Overmixing = dense whoopie pies. Mix just until everything is combined!
Step 2: Scoop & Bake
Use a cookie scoop to drop 2-inch mounds of batter onto the baking sheet. Space them out—they’ll spread a little!
Bake for 6 to 7 minutes, until the tops are set and lightly golden.
Let them cool on the baking sheet for a few minutes, then transfer to a wire rack to cool completely.
Pro Tip: If the cakes spread unevenly, use a round cookie cutter to trim them into perfect circles!
Step 3: Make the Filling
In a large bowl or stand mixer, beat the shortening and powdered sugar together on low speed.
Add powdered sugar 1 cup at a time, alternating with 2 tablespoons of water per cup.
Want To Save This Recipe?
Once all the sugar is mixed in, add the milk and whip on medium-high for 5 minutes.
Scrape down the sides, then mix on high speed for another 5 minutes. The filling should be light, fluffy, and silky smooth.
Pro Tip: If the filling is too thick, add 1 teaspoon of milk at a time until you get the perfect consistency.
Step 4: Assemble the Whoopie Pies
Spread or pipe a generous amount of filling onto half of the cakes.
Top with the remaining cakes, gently pressing down to create the perfect whoopie pie sandwich.
Pro Tip: For cleaner edges, pipe the filling in a spiral starting from the center!
Storage Options:
Good news—whoopie pies store beautifully, so you can enjoy them later!
- Room Temperature: Store in an airtight container for up to 2 days.
- Fridge: Keep them chilled for up to 5 days—just let them sit at room temp before eating.
- Freezer: Wrap each whoopie pie individually in plastic wrap and store in a freezer-safe bag for up to 2 months.
Pro Tip: Want bakery-soft whoopie pies? Microwave a frozen one for 10 seconds.
Variations and Substitutions:
Want to switch things up? Here are some easy ways to customize these!
- Lemon Whoopie Pies – Swap vanilla extract for lemon extract and add some zest to the batter.
- Chocolate Filling – Add ¼ cup cocoa powder to the frosting for a rich, chocolatey twist.
- Mini Whoopie Pies – Use a teaspoon-sized scoop for bite-sized versions.
- Sprinkle Edges – Roll the sides in sprinkles, crushed nuts, or mini chocolate chips for extra fun!
What to Serve with Vanilla Whoopie Pie?
Whoopie pies = amazing on their own. But if you wanna go all out, try pairing them with:
- A hot cup of coffee or tea – The best cozy afternoon treat.
- Vanilla ice cream – Turn them into whoopie pie ice cream sandwiches.
- A drizzle of caramel sauce – Because why not?
Frequently Asked Questions:
Can I make these ahead of time?
Yep! Store them in the fridge or freezer until you’re ready to eat them.
Why are my whoopie pies flat?
It could be overmixing or expired baking soda/powder.
Can I use butter instead of shortening?
Yes, but the texture will be a little different—still delicious, just a bit denser.
These Vanilla Whoopie Pies are soft, fluffy, and ridiculously good. Whether you grew up with them or are trying them for the first time, you’re gonna love them.
So, are you making a batch? Drop a comment and let me know!
Keep the Flavor Coming – Try These:


Vanilla Whoopie Pie Recipe
Ingredients
For the Whoopie Pie Cakes:
- ½ cup shortening
- 1 cup granulated sugar
- 3 large eggs
- 2 teaspoons vanilla extract
- ½ cup hot water
- 2 cups all-purpose flour
- ½ teaspoon salt
- 1 teaspoon baking soda
- ½ teaspoon baking powder
For the Vanilla Icing Filling:
- 1 cup shortening
- 4 cups powdered sugar
- 4 tablespoons water
- 2 tablespoons milk
Instructions
Preparing the Cake Batter
- Preheat the oven to 425°F (218°C). Line a baking sheet with parchment paper or lightly grease it to prevent sticking.
- In a large mixing bowl, combine the shortening, sugar, eggs, and vanilla extract. Mix thoroughly until smooth and creamy.
- In a separate medium-sized bowl, whisk together the flour, salt, baking soda, and baking powder.
- Gradually add half of the dry ingredients into the wet ingredients and mix until incorporated. Add the remaining dry ingredients and continue to mix until fully combined.
- Slowly pour in the hot water and mix until the batter becomes smooth and uniform.
Baking the Whoopie Pie Cakes
- Using a 2-inch cookie scoop, drop evenly sized portions of batter onto the prepared baking sheet, spacing them at least 2 inches apart to allow for slight spreading.
- Bake for 6 to 7 minutes, or until the tops are set and lightly golden brown.
- Once baked, allow the cakes to cool on the baking sheet for 2 minutes, then transfer them to a wire rack to cool completely before assembling.
Preparing the Vanilla Icing Filling
- In a large mixing bowl or stand mixer, beat the shortening and powdered sugar on low speed until combined.
- Gradually add the powdered sugar, one cup at a time, alternating with 2 tablespoons of water after each addition.
- Once all the powdered sugar has been incorporated, add the milk and increase the speed to medium-high, mixing for 5 minutes until smooth.
- Scrape down the sides of the bowl, then continue to beat on high speed for another 5 minutes until the icing becomes light and fluffy.
Assembling the Whoopie Pies
- Once the cakes have completely cooled, spread or pipe a generous amount of icing onto one half of the cakes.
- Place the remaining cakes on top, pressing gently to create a sandwich-like structure.
- For best results, allow the assembled whoopie pies to set for 10 minutes before serving.
Notes
I’m Bitty, owner of nodashofgluten.com, where I share simple, delicious recipes for all tastes, including gluten-free. Check out my “About Me” page for more info!