

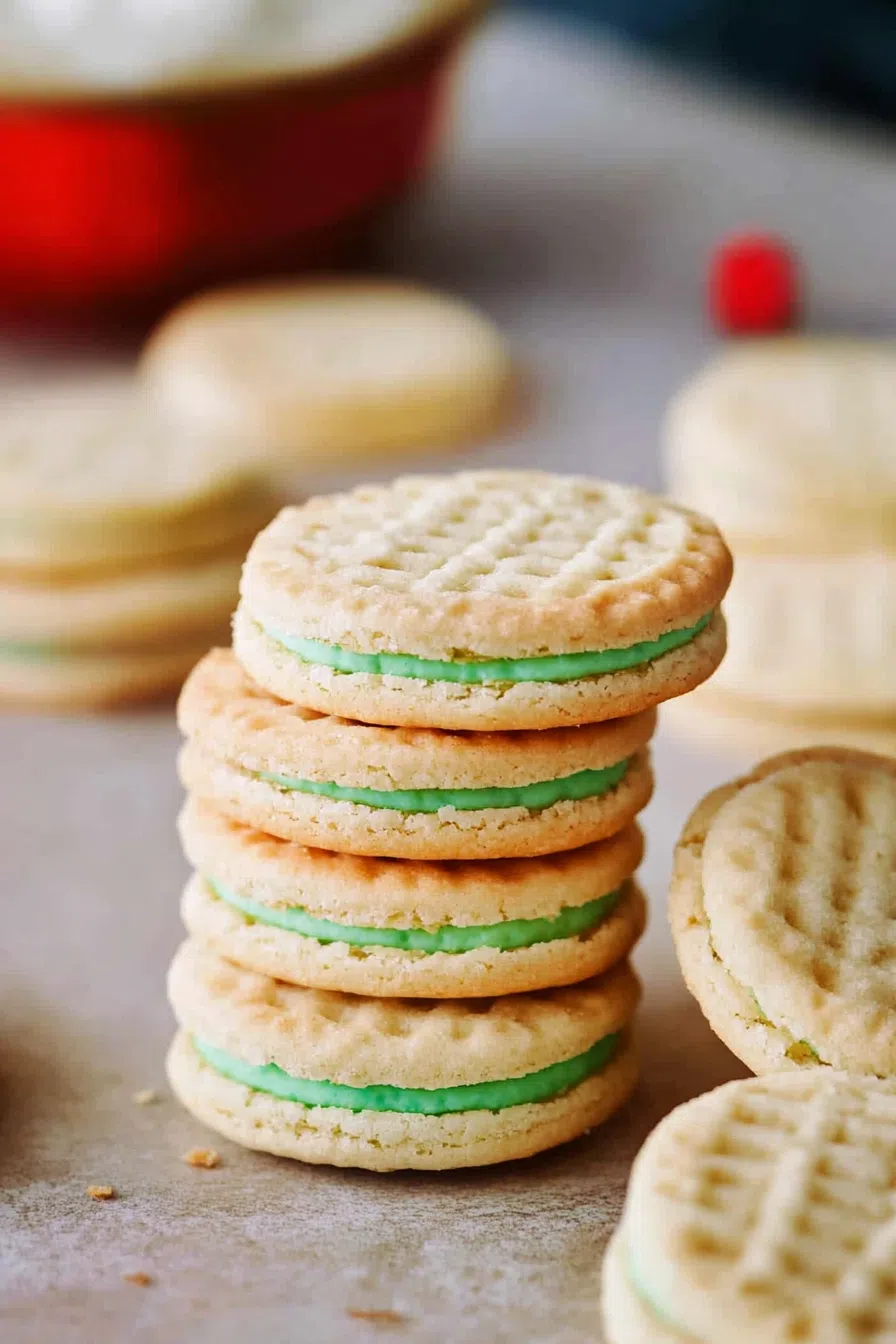
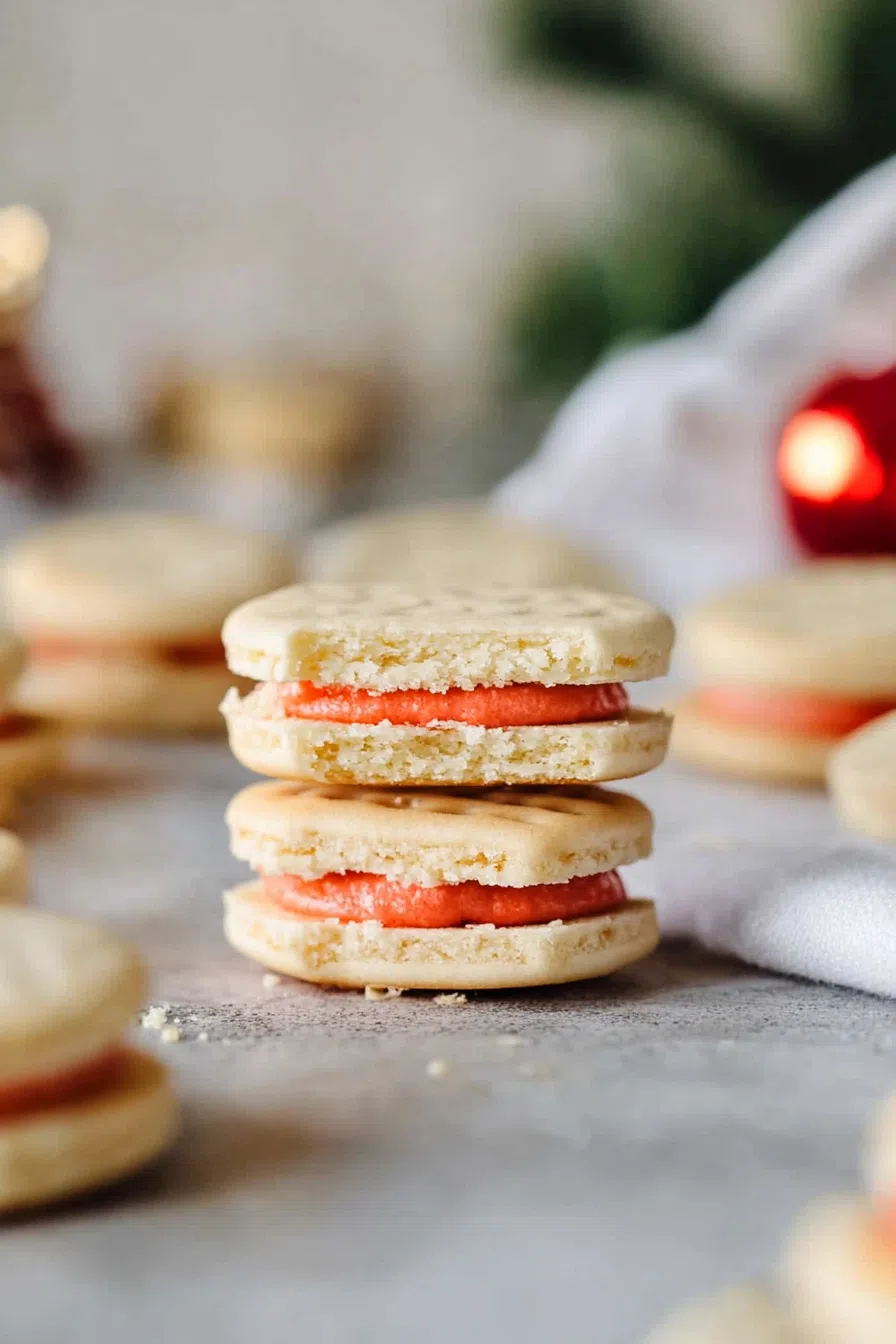
Flaky cream wafers made with butter, flour, cream, and filled with pastel frosting—like something out of Grandma’s cookie tin.
You ever bite into something and it instantly takes you back? Like you’re standing in your childhood kitchen again, stealing cookies off a tray while pretending to “help”? Yeah… cream wafers do that to me. Every single time.


They remind me of my Aunt Sharon. She made them every Christmas, always with pale pink peppermint filling (she called them her “blush babies”—I still don’t know why). She’d blast Nat King Cole in the background, flour in her hair, yelling at the dog to stay out of the powdered sugar. The house always smelled like butter and vanilla—and somehow, even chaos.
I didn’t touch this recipe for years after she passed. It just felt too close. But one random December, I pulled out her old recipe card (complete with powdered sugar stains and one scribbled “use more extract!” in her handwriting), and… I went for it. The first bite? I cried. Then I laughed. Then I ate six more, because honestly, they’re dangerous.
Why You’ll Love This Cream Wafers Recipe?
They’re not your average cookie, let’s just start there. First of all, they flake. Like buttery, pie crust-level flake. Then you’ve got this sparkly sugar crust that crunches a little when you bite in. And then—surprise!—a creamy, frosting-y center that hits you with vanilla, lemon, or peppermint, depending on your mood.
They’re fancy without being fussy. You can tint the filling, shape the cookies however you want, and they’re always the first thing to vanish from a dessert table. And people will ask you if you bought them from a bakery. Promise.
Ingredient Notes:
You don’t need anything wild here, but the ingredients do need to be treated right. Here’s the rundown, just like I’d explain it to a friend standing in my kitchen.
-
All-Purpose Flour: Basic, yes, but essential. Keep it light—don’t pack it in or you’ll get tough cookies.
-
Unsalted Butter: Use the real stuff. This isn’t the moment for margarine or “light” anything.
-
Heavy Whipping Cream: This is what gives the dough that magic texture. It’s soft, almost like play-dough when it’s chilled.
-
Decorating Sugar: It’s not just for looks—it gives a sparkle and a crunch.
-
Powdered Sugar + More Butter: For the filling, obviously. Frosting is love.
-
Extracts: I usually go for vanilla, but peppermint is dreamy around the holidays. Lemon? Great for spring brunches.
-
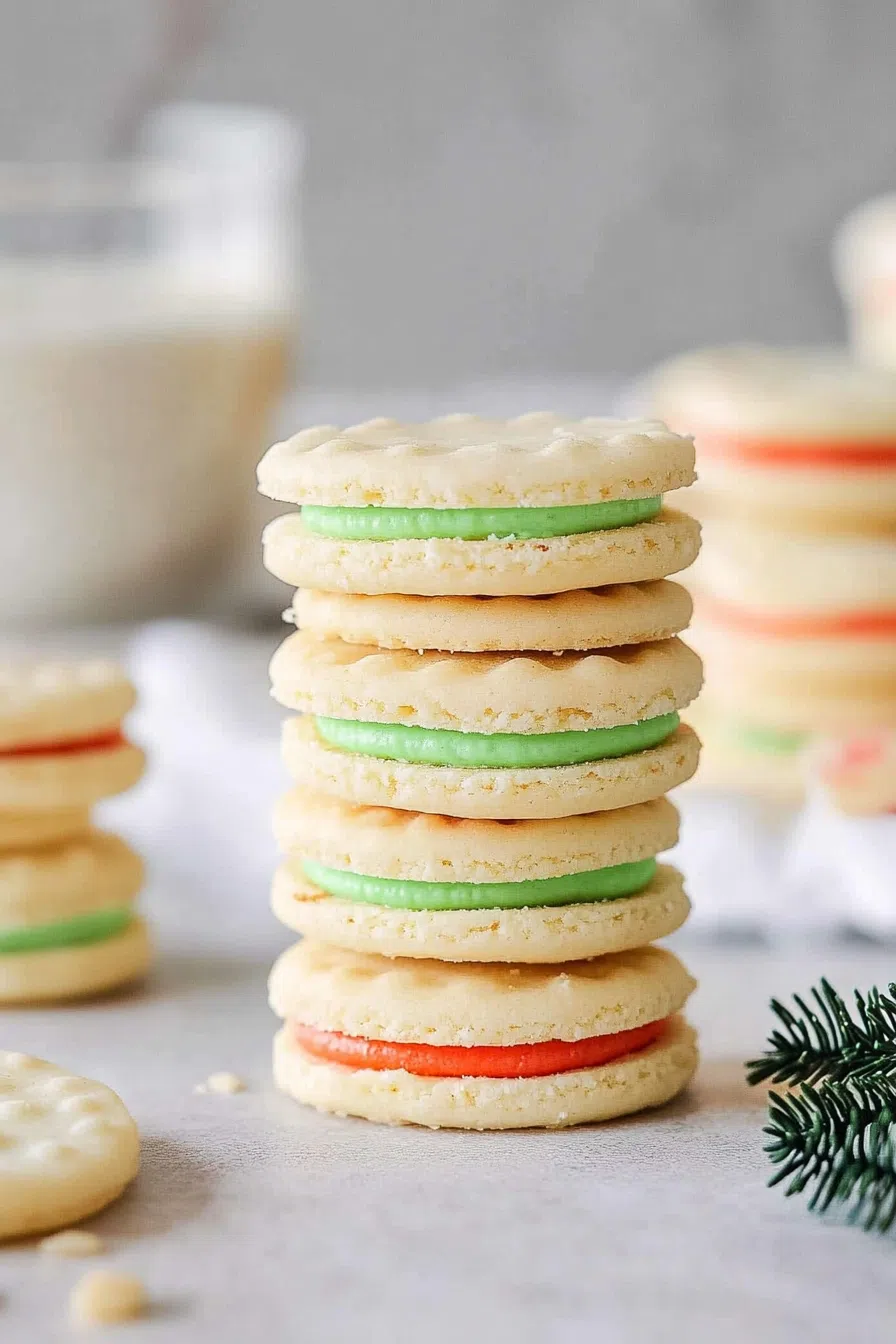
Food Coloring: Not necessary, but let’s be real—pastel pink cream wafers just hit different.
How To Make Cream Wafers?
- First thing: don’t rush the dough. You’re going to mix the flour, butter, and cream together until it forms a soft, buttery blob. It’ll look a little ragged, but that’s okay. Wrap it in plastic, divide into thirds, and let it rest in the fridge for at least an hour. I know, chilling feels like a chore, but trust me—it’s what makes the dough rollable and keeps the cookies from melting into blobs.
- Next up: roll & cut. Pull out one section of dough (leave the rest chilling), and roll it out on a floured surface until it’s about 1/8 inch thick. Choose a small cutter—I love hearts, but stars or circles work too. Then—and this is the fun part—dip them into colored sugar. Both sides. It’s messy, and your fingers will look like disco balls. Worth it.
- Bake them at 375°F for 7 to 9 minutes. Don’t overbake. These cookies shouldn’t brown. You’re looking for set and puffed, not golden. Let them cool completely on a wire rack. Like… completely. Otherwise, you’ll melt the filling and regret all your life choices.
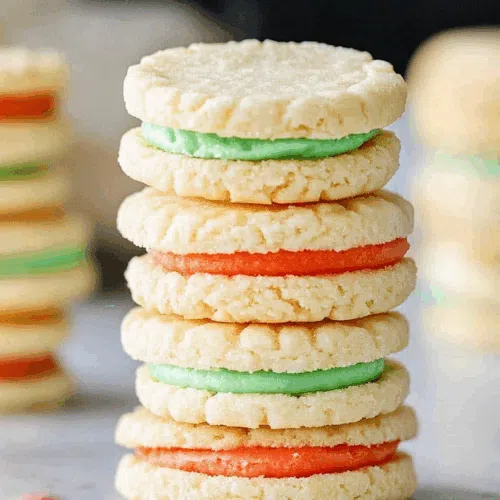
- Now for the frosting! Mix up powdered sugar, butter, and your extract of choice until it’s smooth and spreadable. Add food coloring if you want them to be party-ready. Pipe a little dollop onto the bottom of one cookie, top with another, and there you have it: a cream wafer sandwich you might want to eat immediately.
Storage Options:
Cream wafers can be stored in an airtight container at room temp for 3–4 days, or in the fridge for about a week. But let’s be honest—if they last more than 48 hours, you have more willpower than me. I sometimes freeze the unfilled wafers and just whip up frosting when I need a quick cookie fix. It works like a charm.
Variations and Substitutions:
Let’s mix it up a bit:
-
Lemon Extract + Yellow Tint: Tastes like sunshine.
-
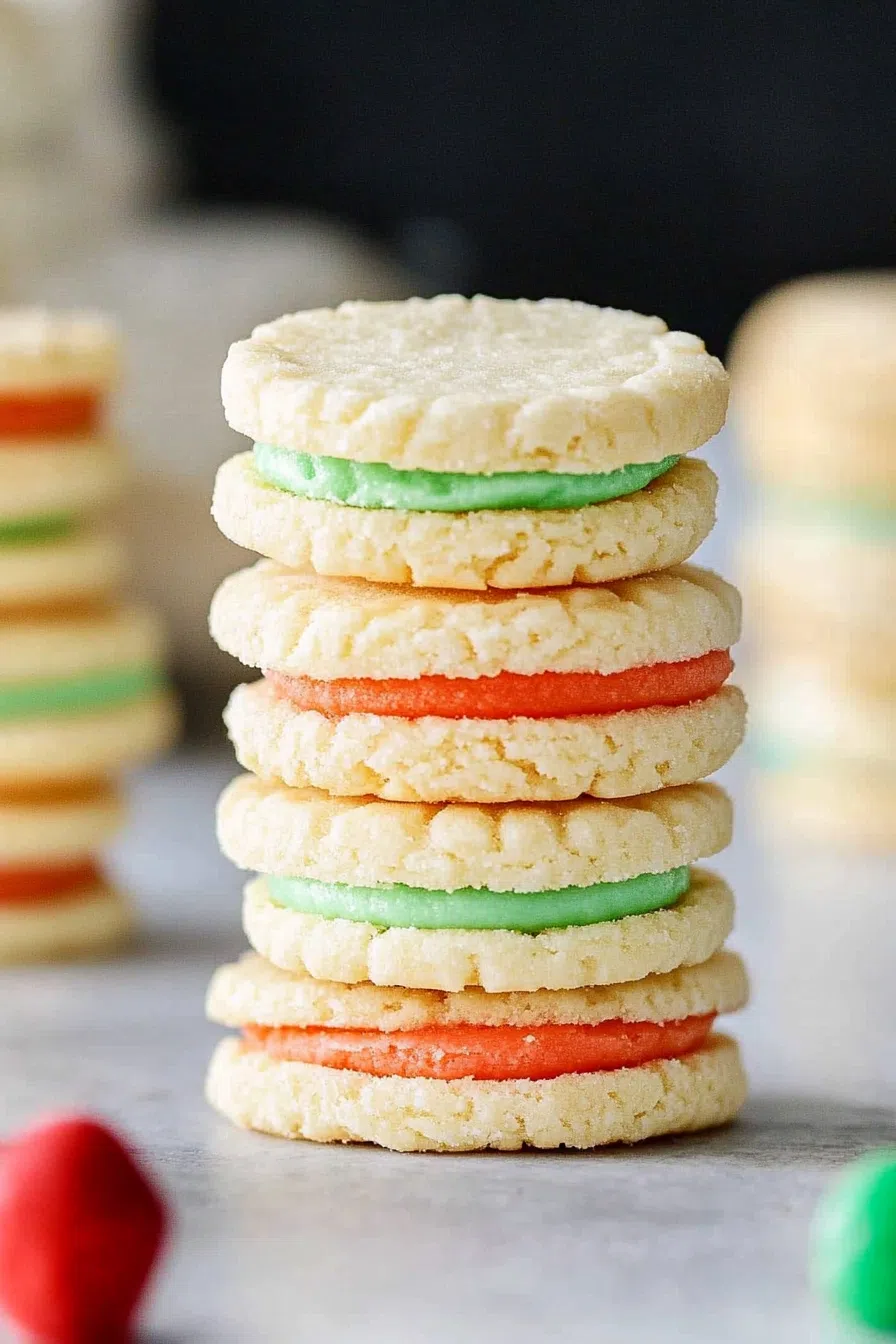
Peppermint + Pink: Classic Christmas combo.
-
Almond + Green: Subtle but so good.
-
Heart Shapes for Valentine’s, Trees for Christmas: Go full seasonal.
-
Sprinkles instead of sugar? Not traditional, but hey—your kitchen, your rules.
Want To Save This Recipe?
What to Serve with Cream Wafers?
-
Tea parties (obviously).
-
Hot cocoa, warm cider, or espresso. They hold their own next to any drink.
-
A fruit platter or bowl of berries. Balance the sugar. Kinda.
-
Ice cream sandwiches?! I mean… I haven’t done it, but now I need to.
Frequently Asked Questions:
Can I freeze them filled?
Technically yes, but the filling might get weirdly soft when thawed. I prefer freezing just the wafers.
Do I have to chill the dough?
Yes. Please. Don’t skip it unless you’re going for pancake cookies.
Can I double the recipe?
You should. Especially if you’re hosting. Or stress baking.
There’s something almost sacred about recipes like this. They’re old-school, handmade, and feel like a warm hug from someone you miss. Cream wafers might look delicate, but they’re bold in flavor and packed with heart. If you make them, I hope they bring you the same kind of joy they brought me—maybe even a few happy tears and a new favorite holiday tradition.
Can’t wait to hear what you think.
Keep the Flavor Coming – Try These:


Cream Wafers
Ingredients
For the Wafers:
- 2 cups all-purpose flour
- 1 cup unsalted butter softened
- 1/3 cup heavy whipping cream
- Decorating sugar for coating
For the Cream Filling:
- 3/4 cup powdered sugar
- 1/4 cup unsalted butter softened
- 1 teaspoon vanilla lemon, or peppermint extract
- Food coloring optional
Instructions
Prepare the Dough:
- In a medium-sized mixing bowl, combine the flour, softened butter, and heavy cream. Mix until a soft dough forms. Divide the dough into three equal portions, wrap each in plastic wrap, and refrigerate for at least 1 hour, or until the dough is firm.
Preheat and Prepare:
- Preheat the oven to 375°F (190°C). Line two baking sheets with parchment paper. Set aside.
Roll and Cut the Dough:
- Remove one portion of dough from the refrigerator. On a lightly floured surface, roll it to approximately 1/8 inch thickness. Keep the remaining dough refrigerated until needed. Cut the dough using 1 1/2-inch cookie cutters into desired shapes.
Coat in Sugar:
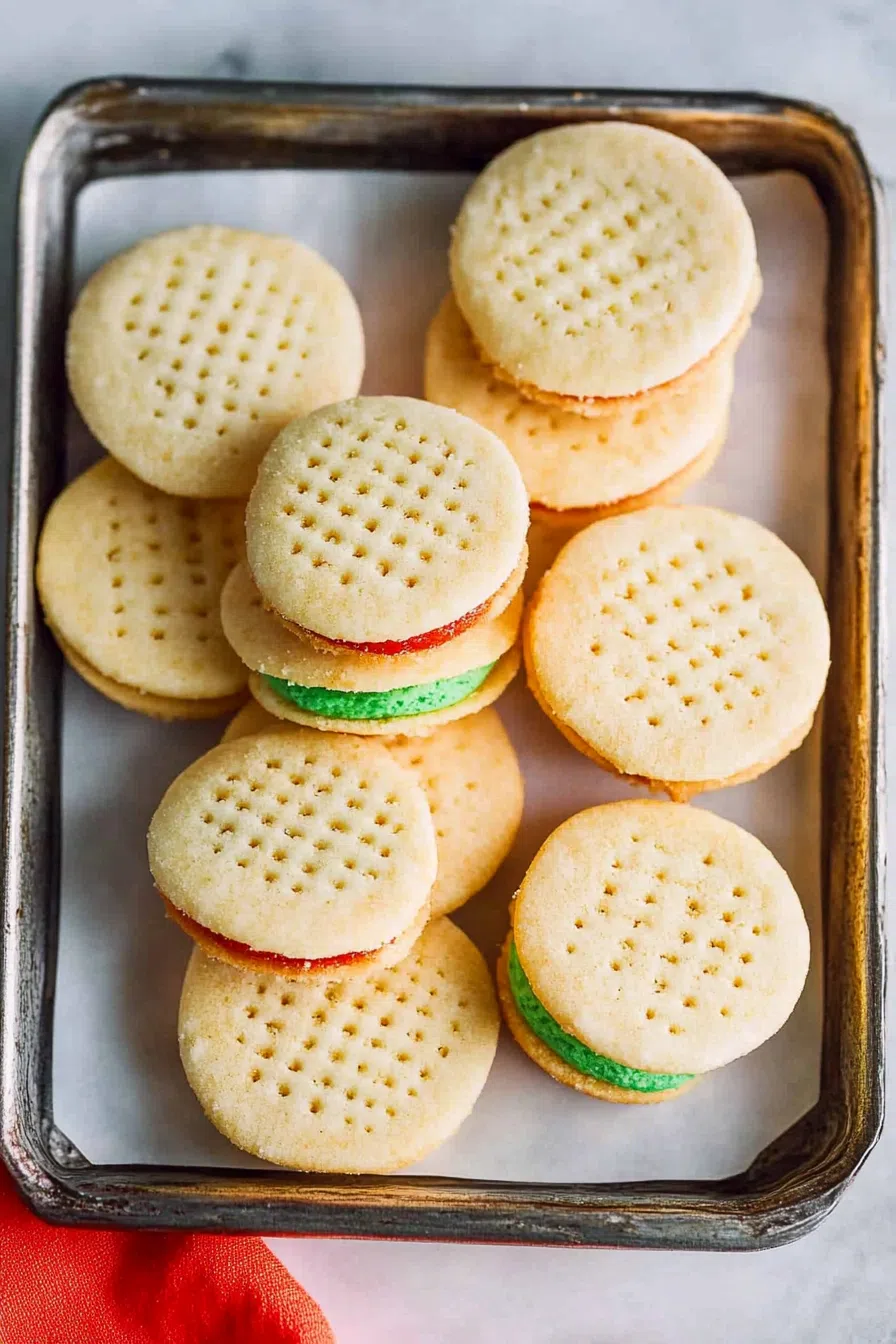
- Place a generous amount of decorating sugar on a sheet of waxed paper. Coat both sides of each cookie cutout in the sugar by pressing lightly into the surface. Transfer cookies to the prepared baking sheet and prick each one with a fork 3–4 times to prevent puffing.
Bake the Wafers:
- Bake in the preheated oven for 7 to 9 minutes, or until the cookies are set but not browned. Remove from oven and allow them to cool completely on a wire rack—about 1 hour.
Prepare the Filling:
- In a small bowl, beat together the powdered sugar, softened butter, and chosen extract until smooth and creamy. Add a drop or two of food coloring if desired.
Assemble the Cream Wafers:
- Pair the cooled cookies by size. Pipe or spread a small amount of the filling onto the flat side of one cookie, then gently press another cookie on top to form a sandwich. Repeat with remaining cookies.
Notes
I’m Bitty, owner of nodashofgluten.com, where I share simple, delicious recipes for all tastes, including gluten-free. Check out my “About Me” page for more info!

