

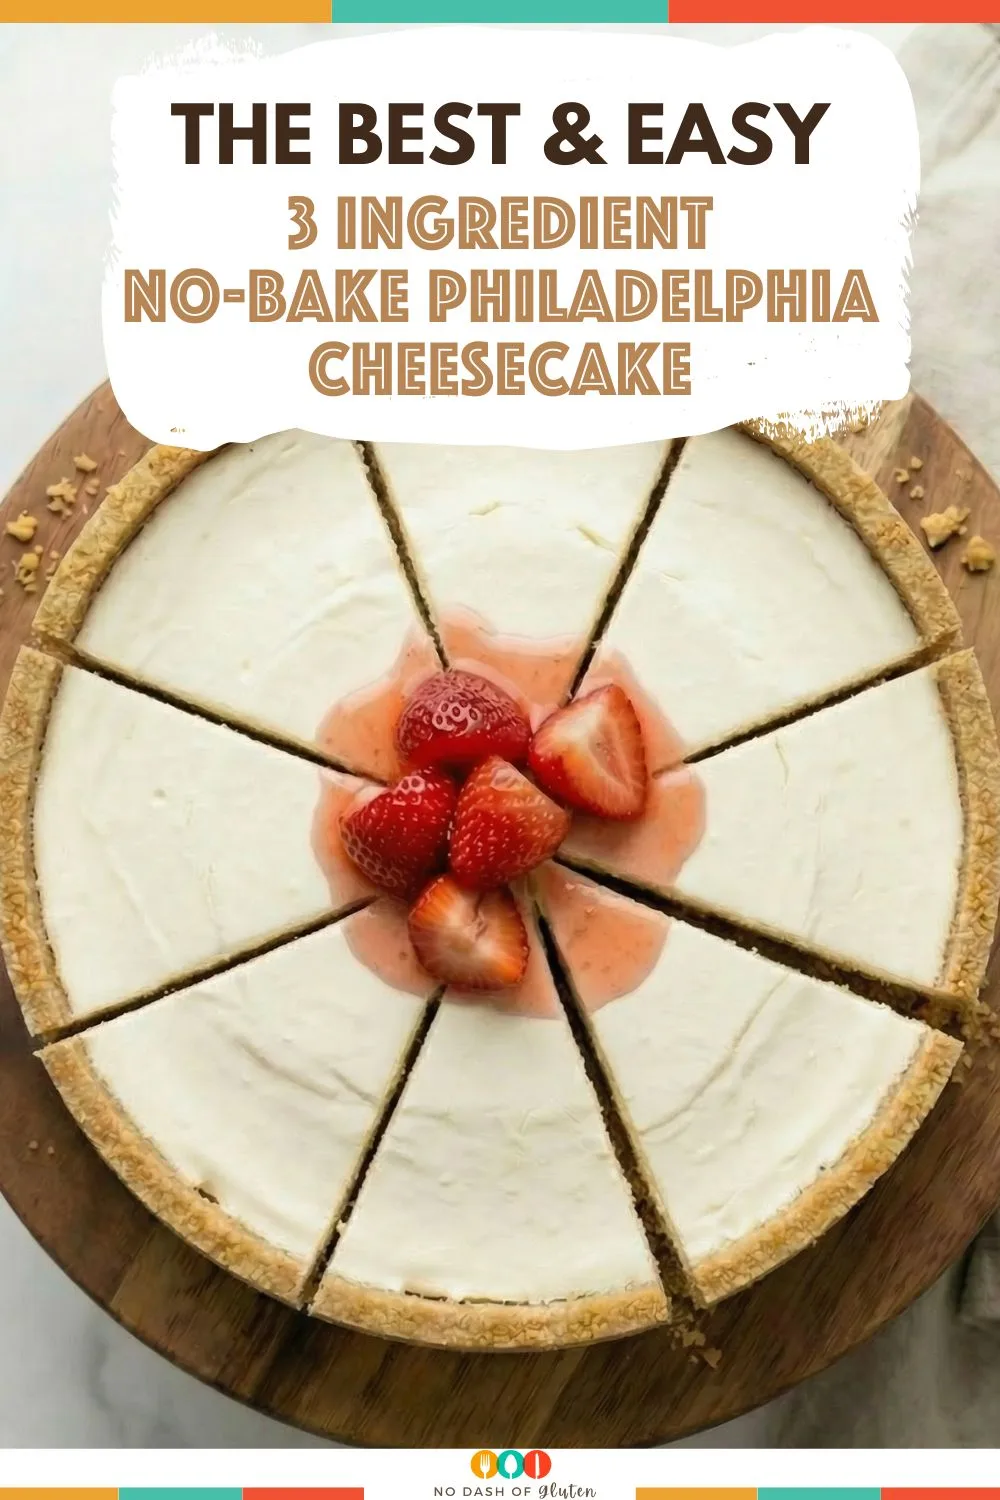
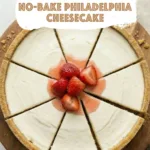
This Philadelphia 3 Ingredient Cheesecake (No-Bake & Creamy!) is unbelievably smooth and rich. No baking required—just cream cheese, sweetened condensed milk, and heavy cream for a perfectly luscious dessert!
Let me tell you a little secret: this cheesecake was an accident.
It started one night when I had a serious cheesecake craving but zero interest in baking. You know that moment when you’re standing in the kitchen, staring at the fridge like it’s gonna magically hand you dessert? That was me.
I had cream cheese, a can of sweetened condensed milk, and some heavy cream left over from my coffee stash. And I thought, Well, let’s just throw it together and see what happens.
What happened was cheesecake magic. No eggs, no baking, no complicated steps. Just a silky, rich, ridiculously easy cheesecake that tasted like something I bought from a fancy bakery. Except, you know, I made it in my pajamas.

That first time, I didn’t even use a crust—just poured it straight into a dish, let it chill overnight, and ate it with a spoon like it was my own personal cheesecake pudding. Zero regrets.
Now, this is my go-to no-bake dessert, and once you try it, I bet it’ll be yours too.
Why You’ll Love This Philadelphia 3 Ingredient Cheesecake Recipe?
- Only 3 Ingredients – No eggs, no gelatin, no stress.
- Ultra-Creamy & Smooth – Perfectly rich without feeling heavy.
- No Oven Needed – Just mix, pour, and chill.
- Impossible to Mess Up – Seriously. If I can wing it and make it work, so can you.
- Customizable – Add toppings, a crust, or eat it straight from the dish. No rules here.
Ingredient Notes:
Even with just three ingredients, each one is doing some serious heavy lifting.
- Philadelphia Cream Cheese – The heart and soul of the cheesecake. This is what gives it that thick, creamy, slightly tangy flavor that makes cheesecake cheesecake.
- Sweetened Condensed Milk – This does double duty: it sweetens the cheesecake and gives it that smooth, velvety texture without needing sugar or eggs.
- Heavy Cream (Cold) – This is the magic ingredient that makes the cheesecake extra luscious and stable without the need for gelatin.
Pro Tip: If you’re feeling fancy, grab a graham cracker crust (store-bought or homemade). But honestly? This cheesecake holds its own even without one.
If you want to go homemade, it’s a breeze: just toss about 10 graham crackers into a food processor, add 5 tablespoons of melted butter and ¼ cup of sugar, and blend until you’ve got fine crumbs. Press the mixture into your pie dish—no need to bake, just let it chill in the fridge while you whip up that dreamy cheesecake batter.
How To Make a Homemade Graham Cracker Crust
If you’re feeling extra, making your own graham cracker crust is wildly simple—no culinary degree required. Here’s how it goes:
- Crush the graham crackers. You’ll need about 10 sheets (think: one standard sleeve). Toss them in a zip-top bag and bash them with a rolling pin, or blitz them in a food processor until you have fine crumbs.
- Mix with melted butter and sugar. Combine your crumbs with 5 tablespoons of melted butter and 1/4 cup of granulated sugar. Stir until the mixture feels like wet sand (the magic kind that actually sticks together).
- Press into your pan. Pour the crumbly goodness into your pie dish and press it down firmly with the bottom of a glass or your trusty fingers. You want a nice, compact layer—no gaps!
- Chill. Pop it in the fridge for a bit while you prep the cheesecake filling. No baking needed—the crust will set up perfectly in the cold.
That’s it! Homemade, buttery graham cracker crust, ready for all the creamy cheesecake you’re about to pile on top.
Do You Need Vanilla Extract?
You might be wondering: should I add vanilla extract? Totally optional! I love tossing in a splash for a classic cheesecake note, but if you’re after something brighter, a squeeze of fresh lemon juice does the trick, too. Honestly, your cheesecake will still be delicious either way—go with whatever matches your dessert mood.
How To Make Philadelphia 3 Ingredient Cheesecake?
Step 1: Whip It Good
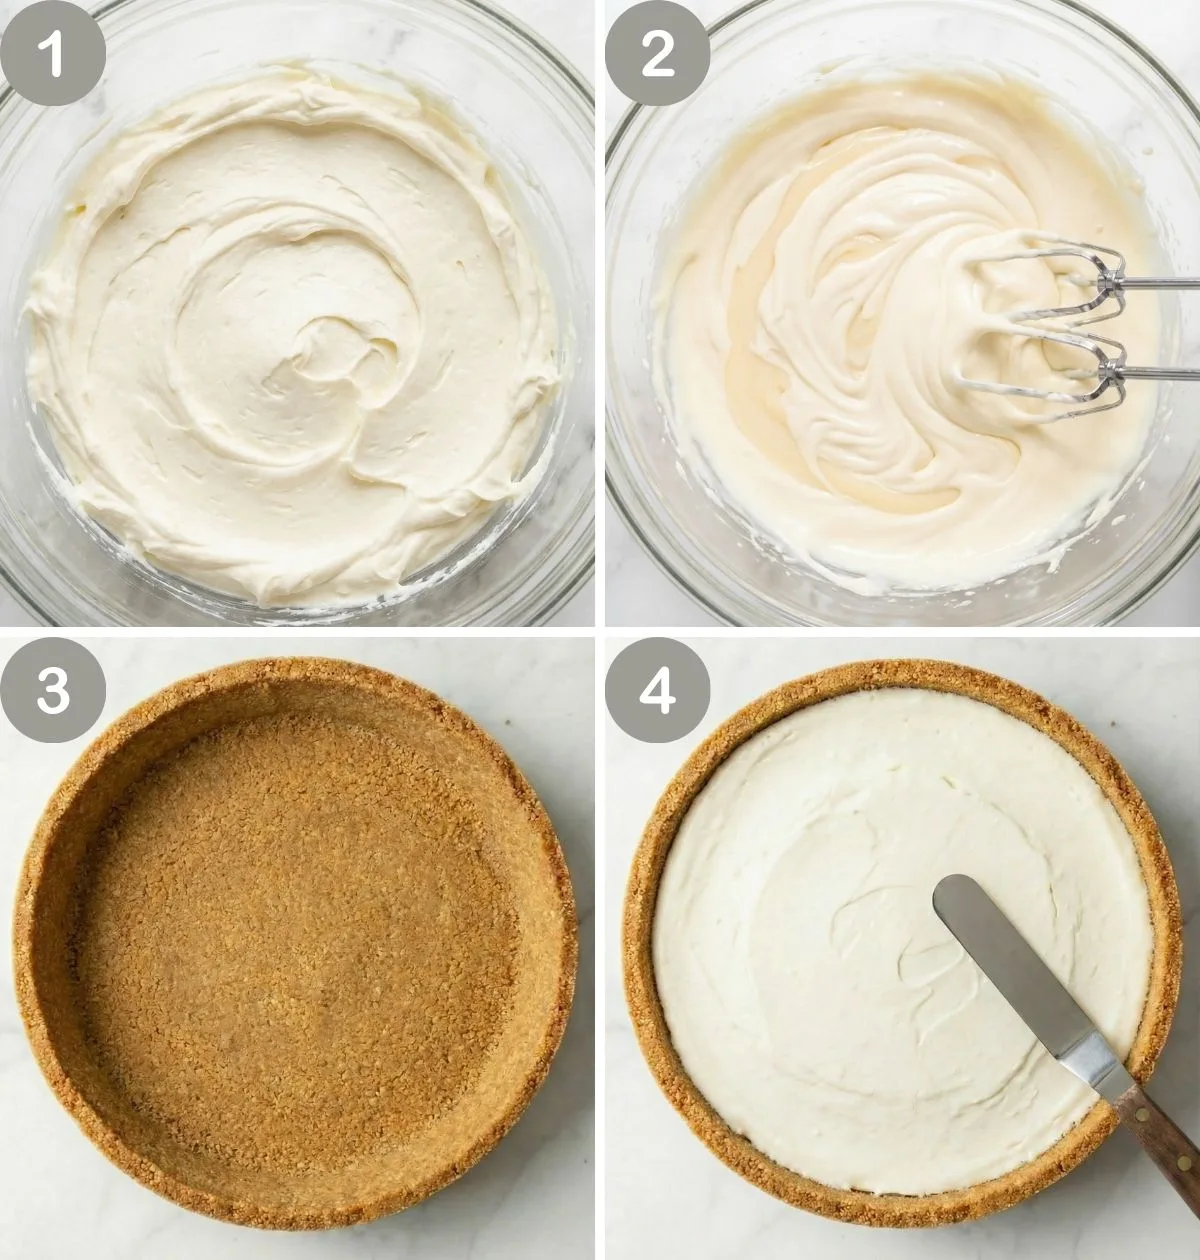
First, make sure your cream cheese is at room temperature—this is key for avoiding lumps. Use a hand mixer to beat it for 1-2 minutes until smooth and fluffy. To further ensure a perfectly creamy texture, scrape down the sides of the bowl a few times while mixing; this helps incorporate any bits stuck along the edges and prevents sneaky lumps from forming.
Next, slowly pour in the sweetened condensed milk while mixing. This keeps it silky instead of clumpy. Taking these extra steps means your cheesecake filling will be smooth and luscious, with no pesky pockets of unmixed cream cheese.
Then, add the cold heavy cream and whip for another 2-3 minutes until the mixture thickens slightly.
Step 2: Assemble Like a Pro
If using a graham cracker crust, pour the cheesecake mixture in and smooth it out with a spatula.
Going crustless? Just pour it into a dish or individual cups (because personal cheesecakes = a great idea). Gently tap the dish to remove any air bubbles.
Step 3: Chill & Wait (The Hardest Part)
Want To Save This Recipe?
Cover and refrigerate for at least 4 hours (overnight is even better). This is when the magic happens—it sets into the perfect creamy texture.
Step 4: Serve & Enjoy
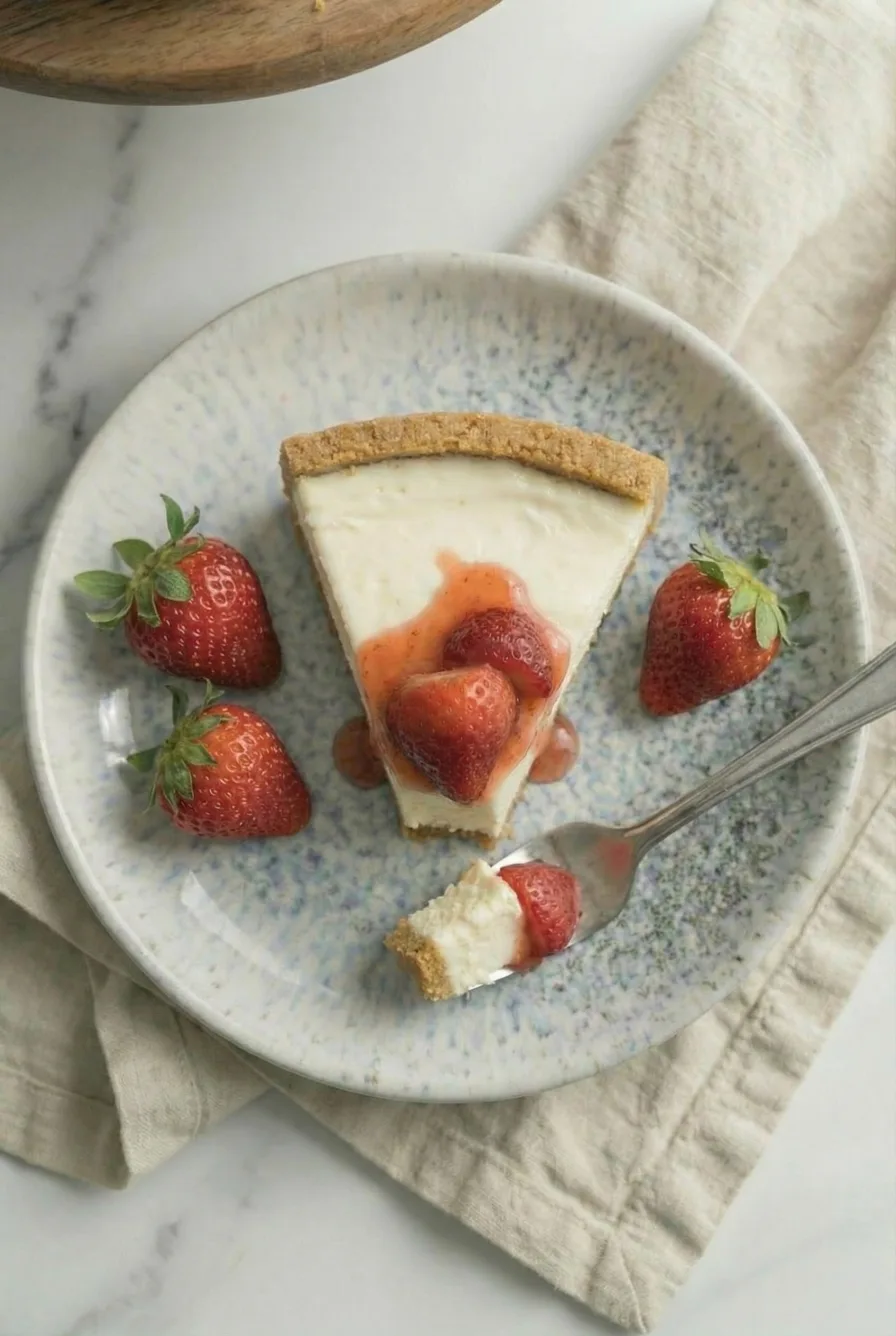
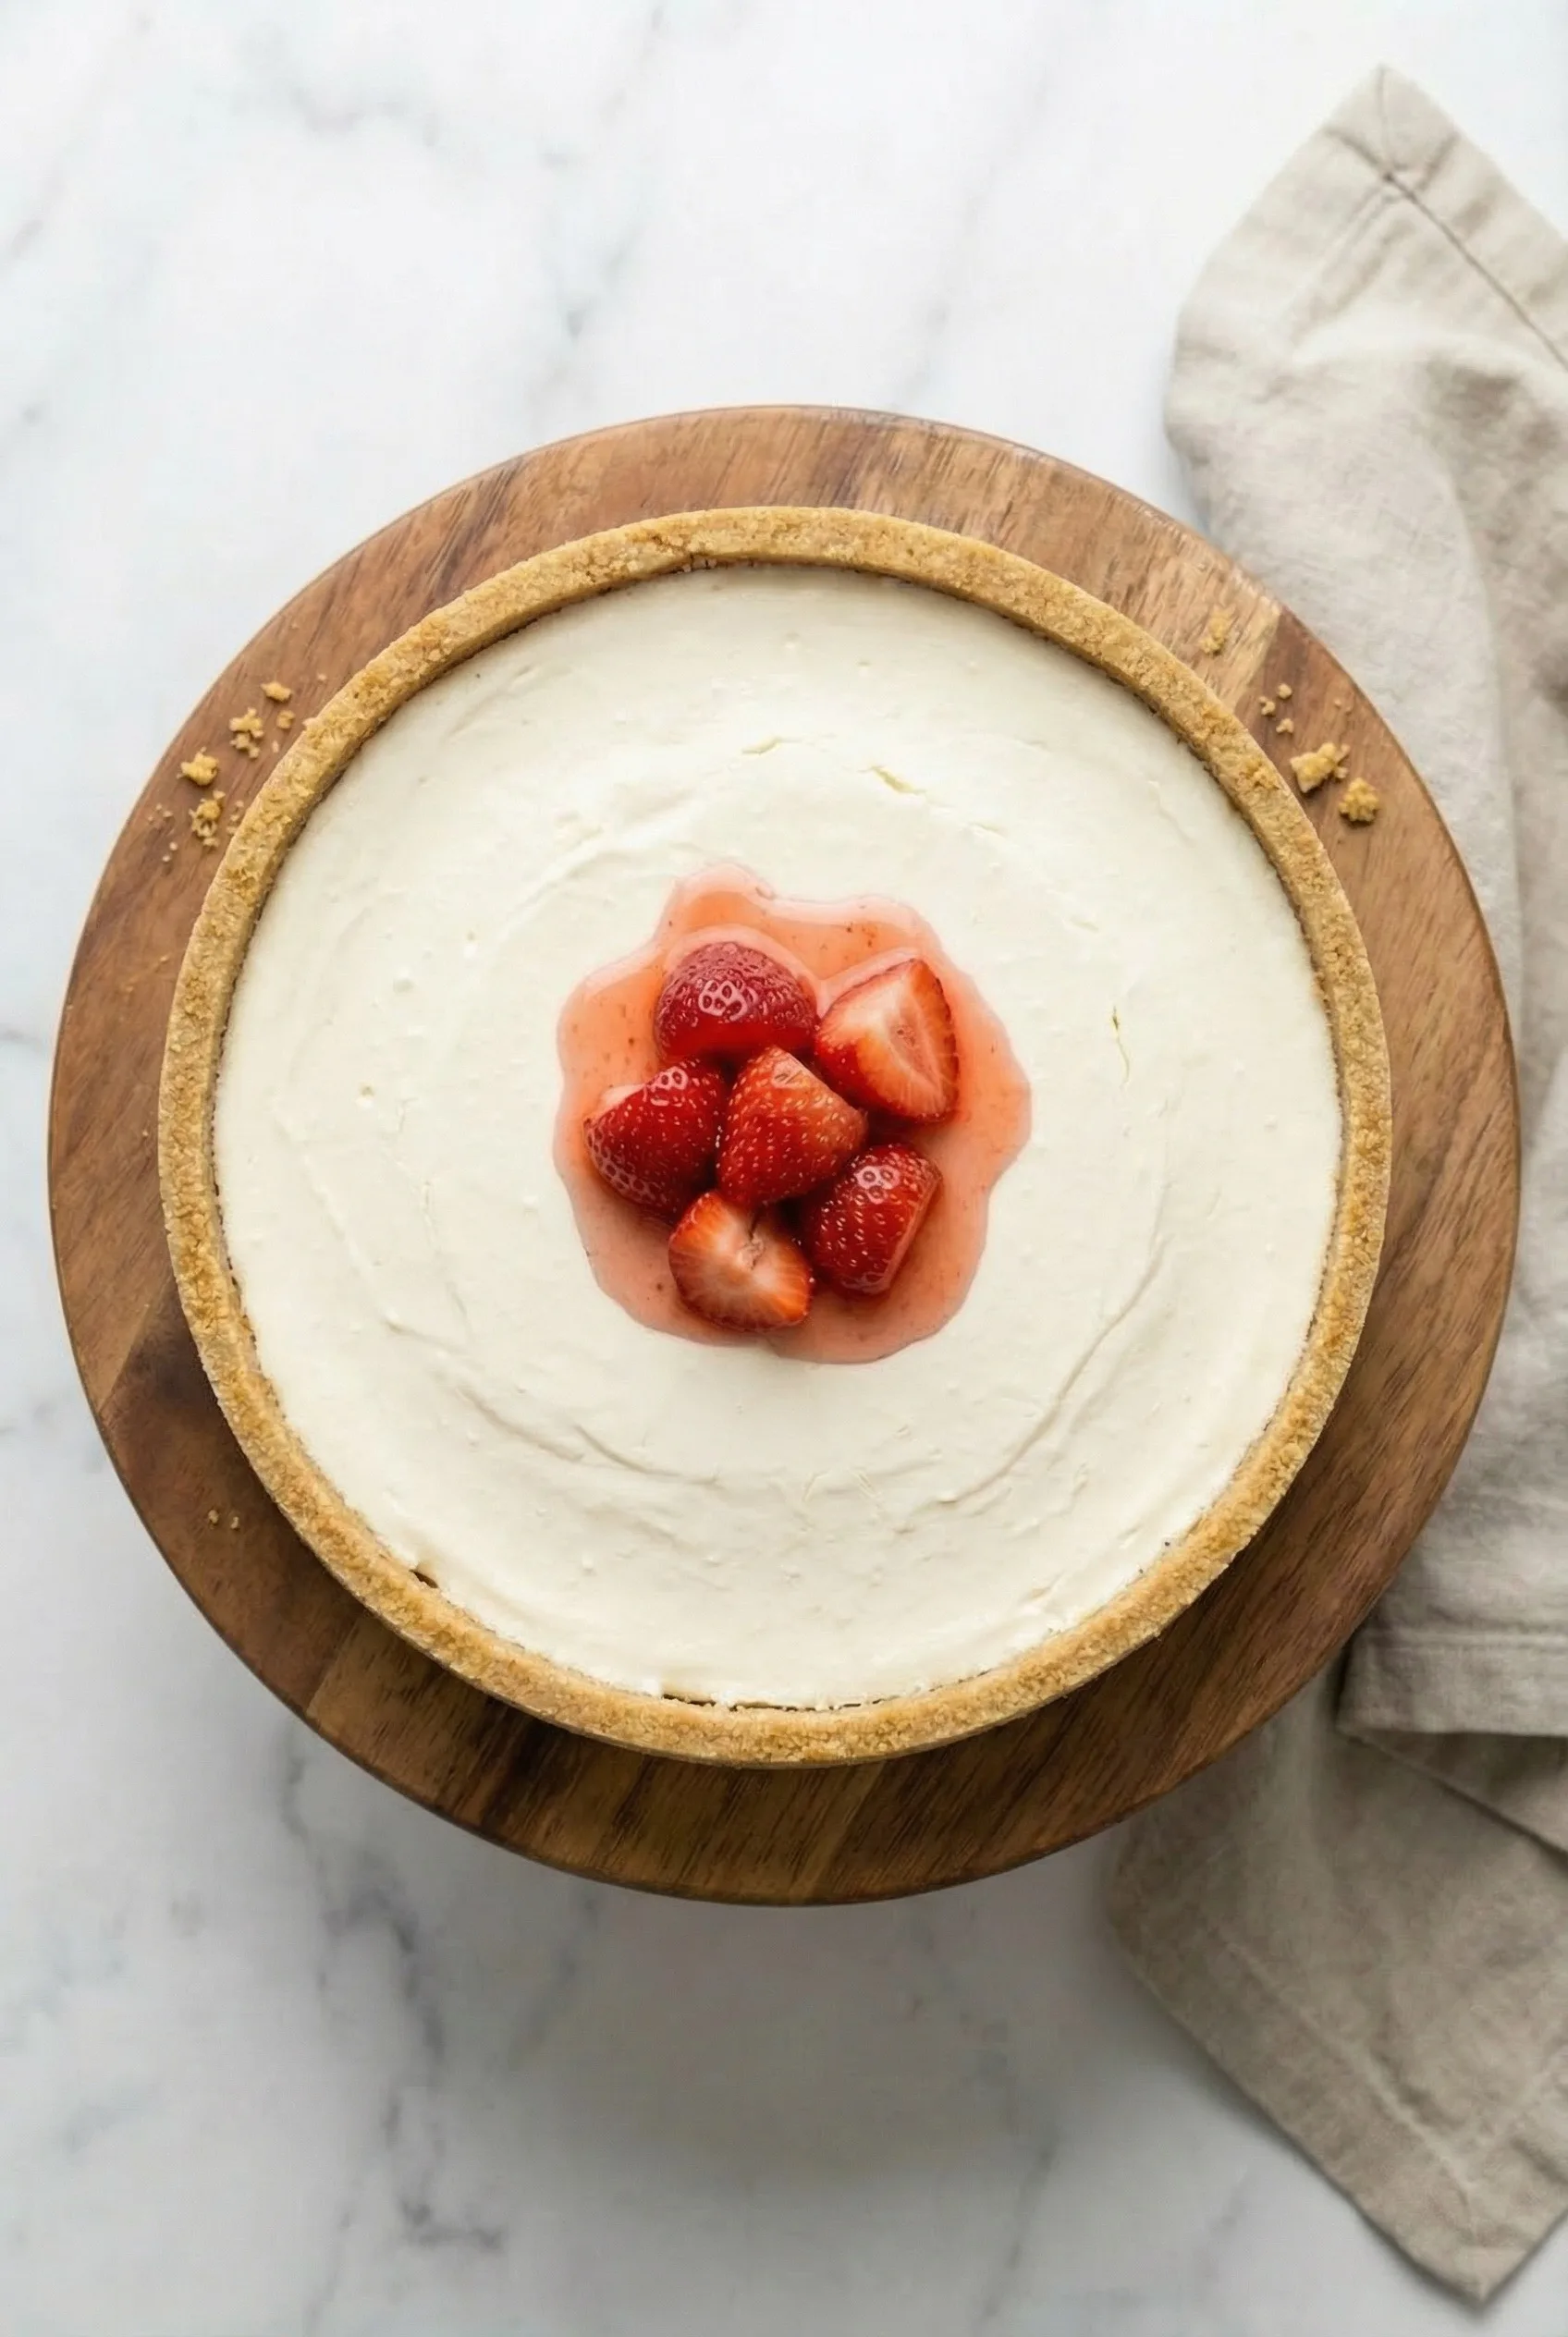
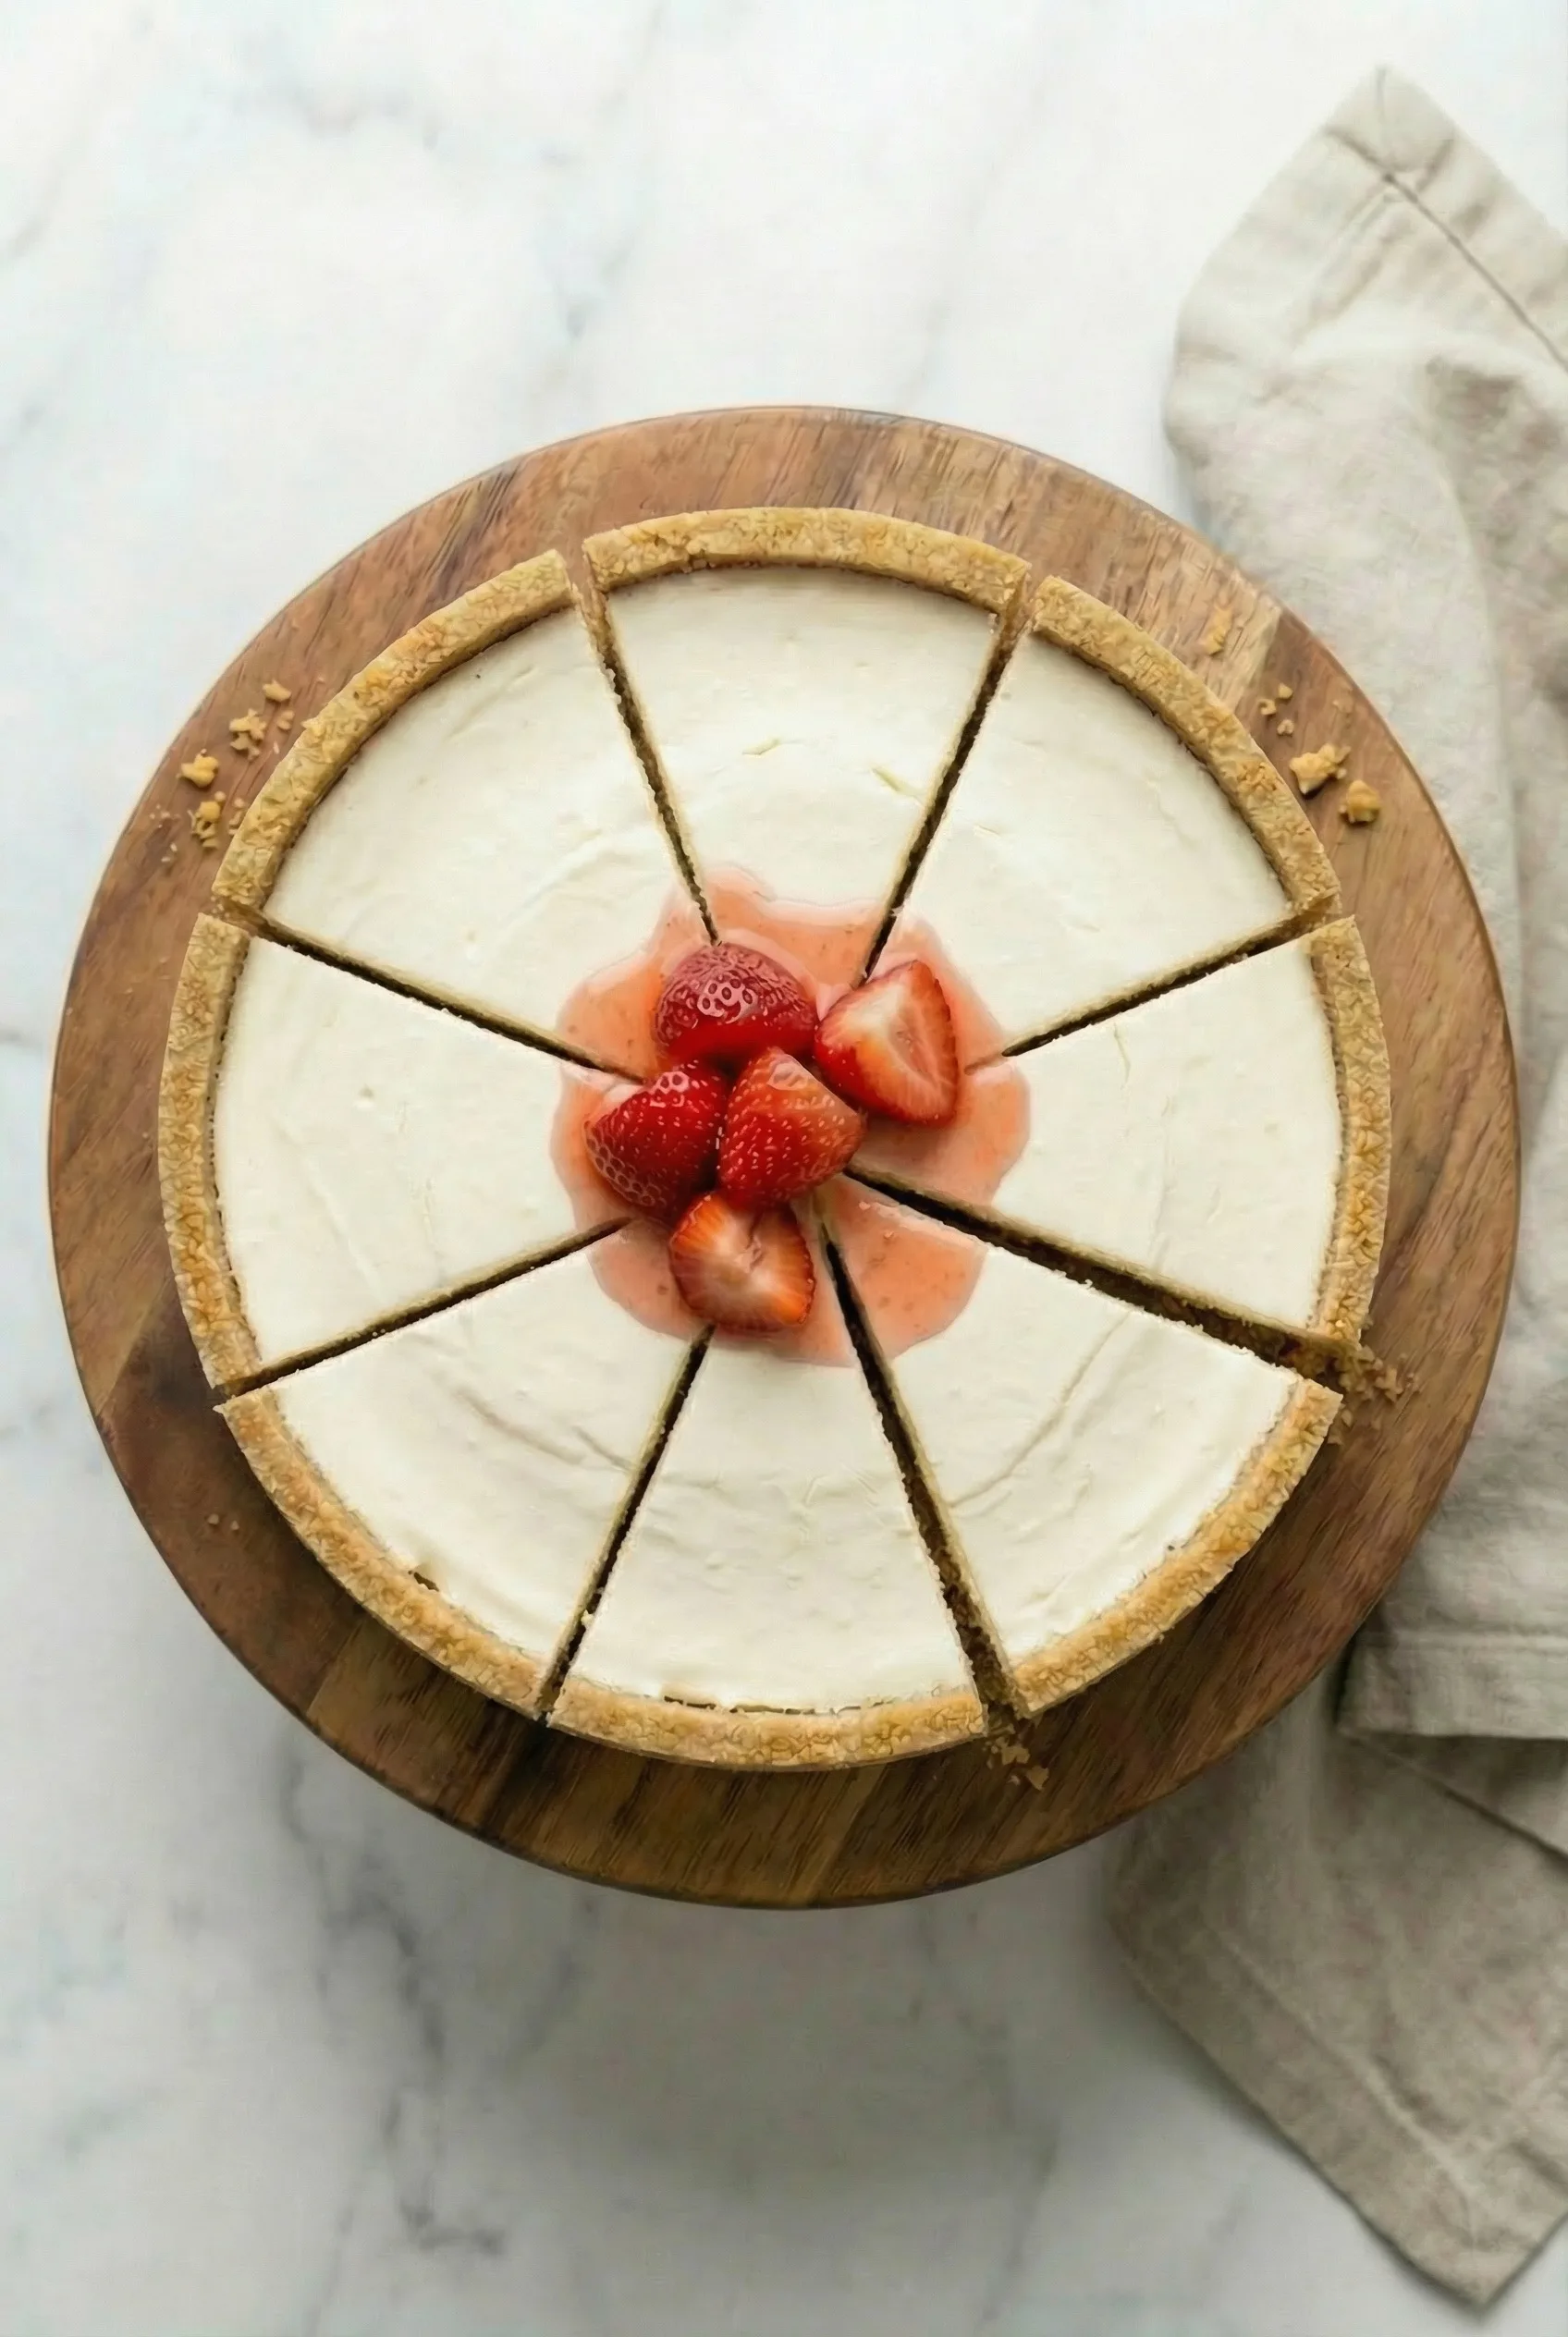
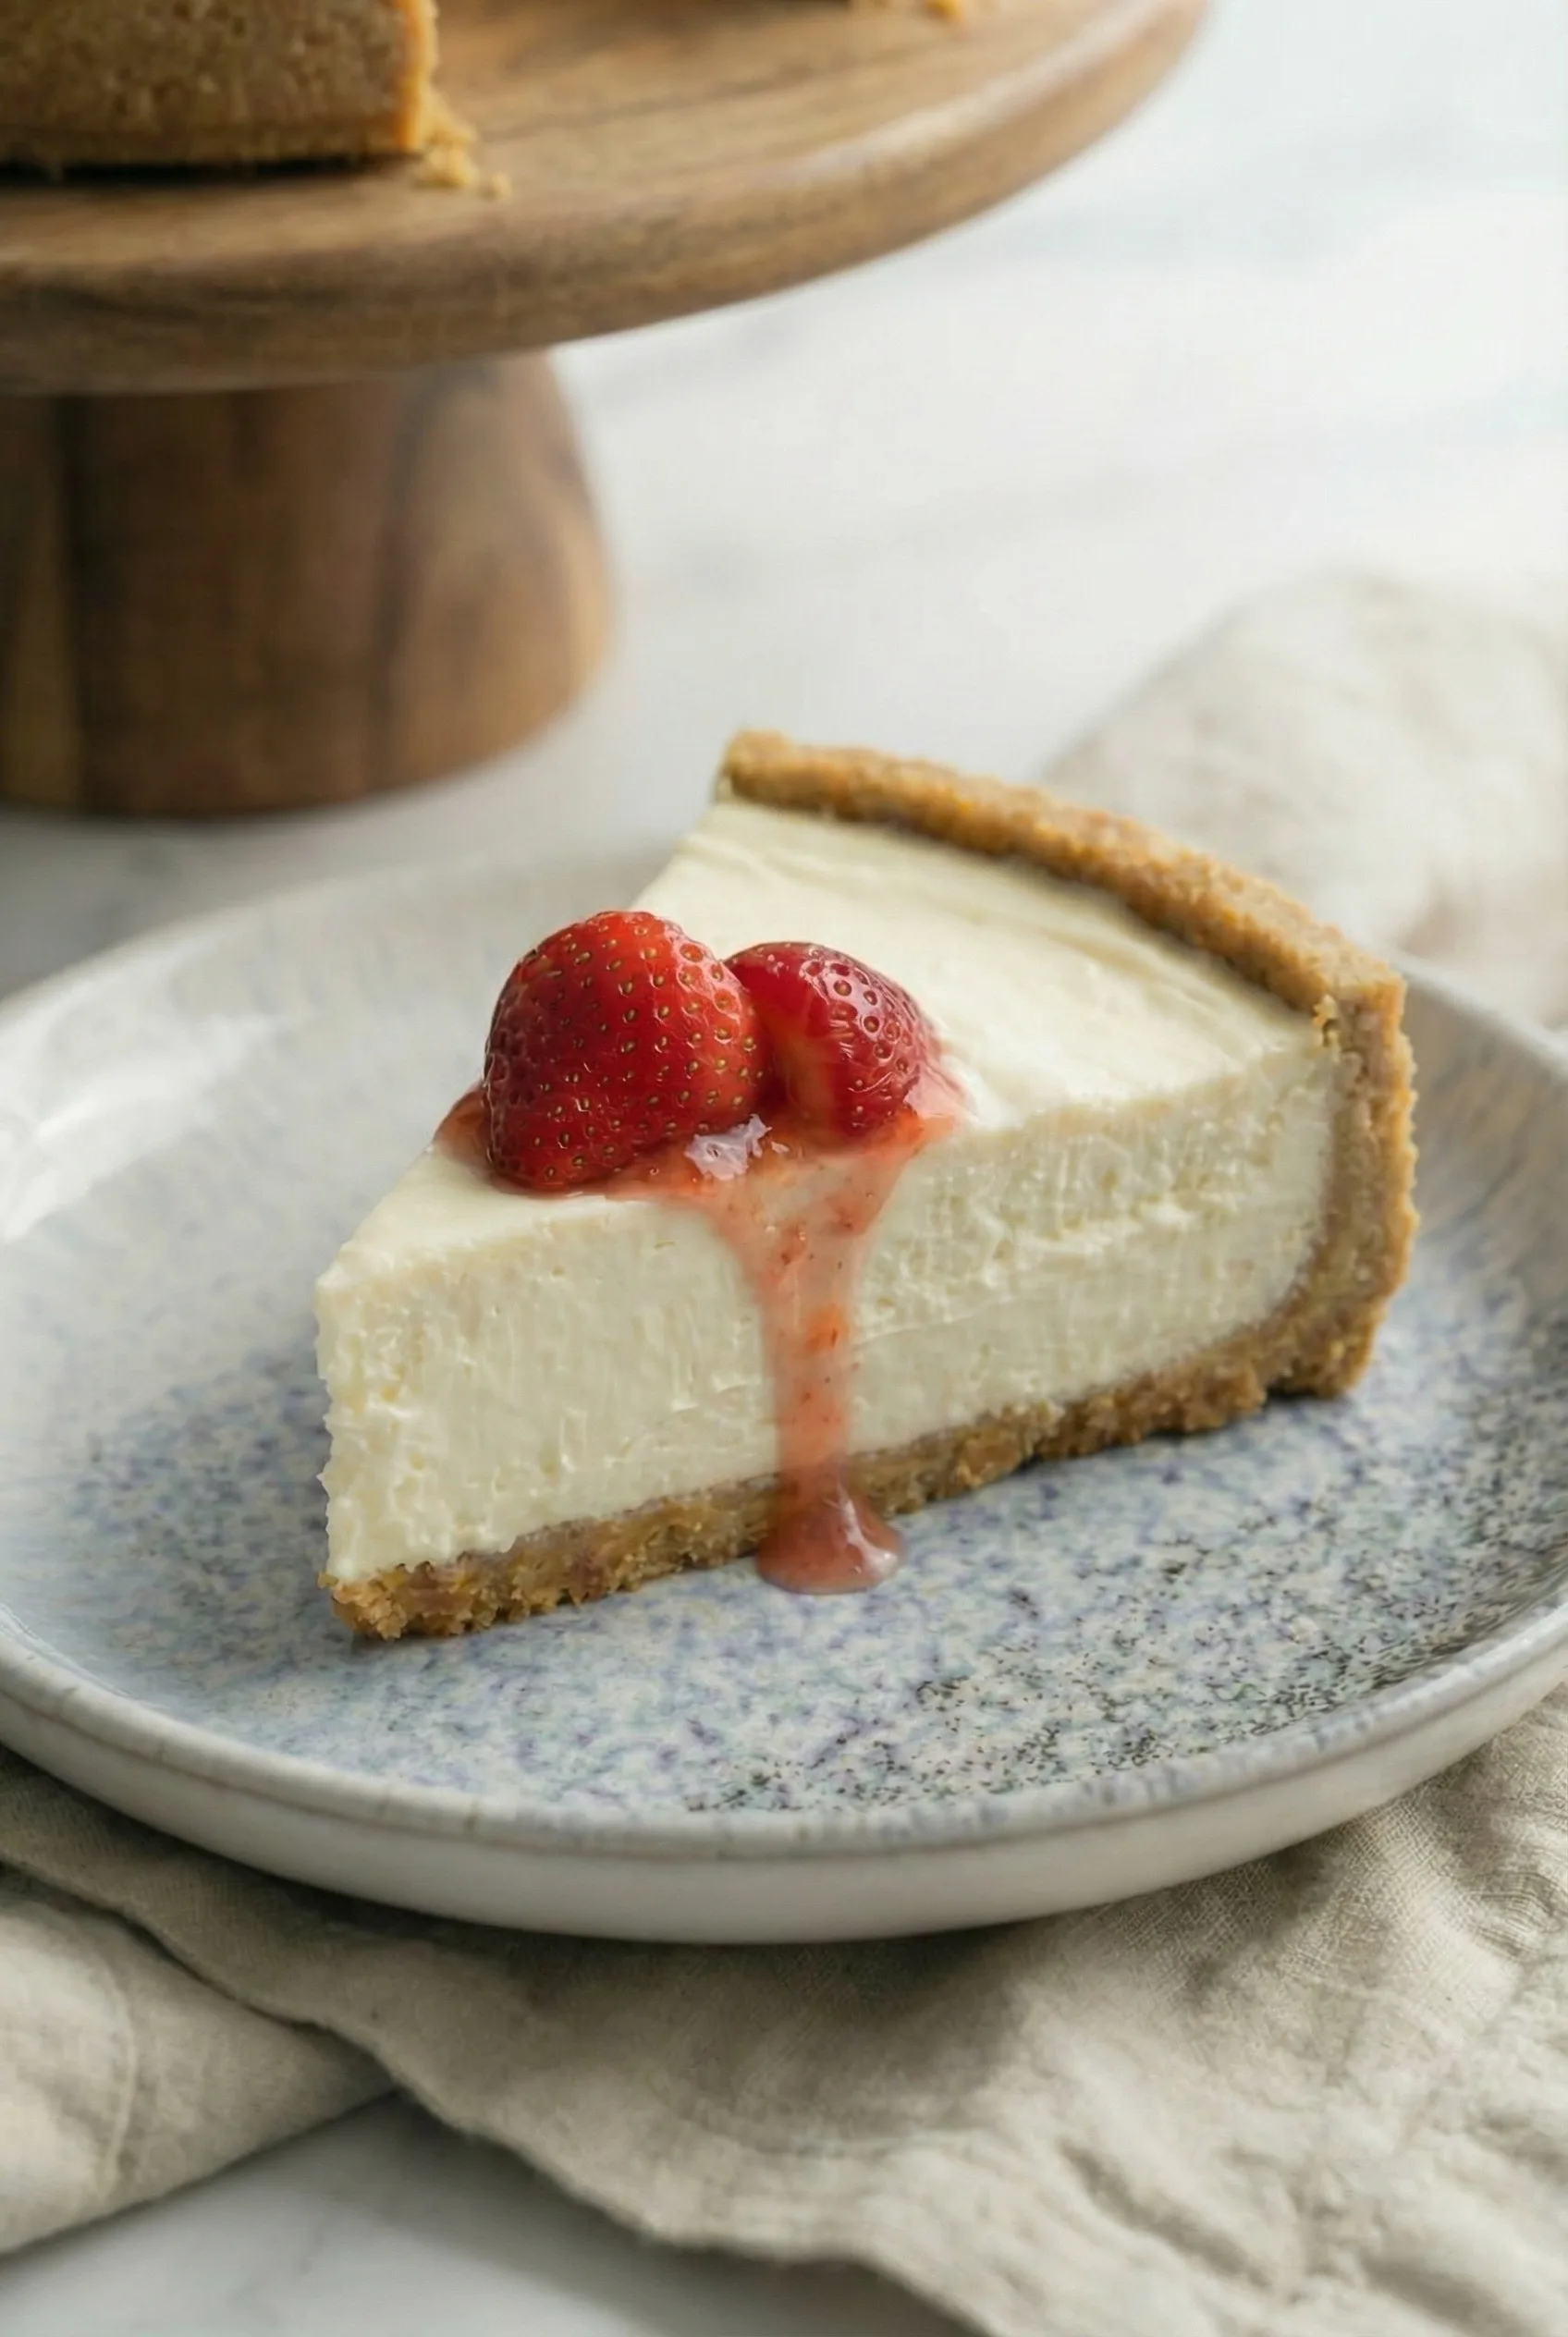
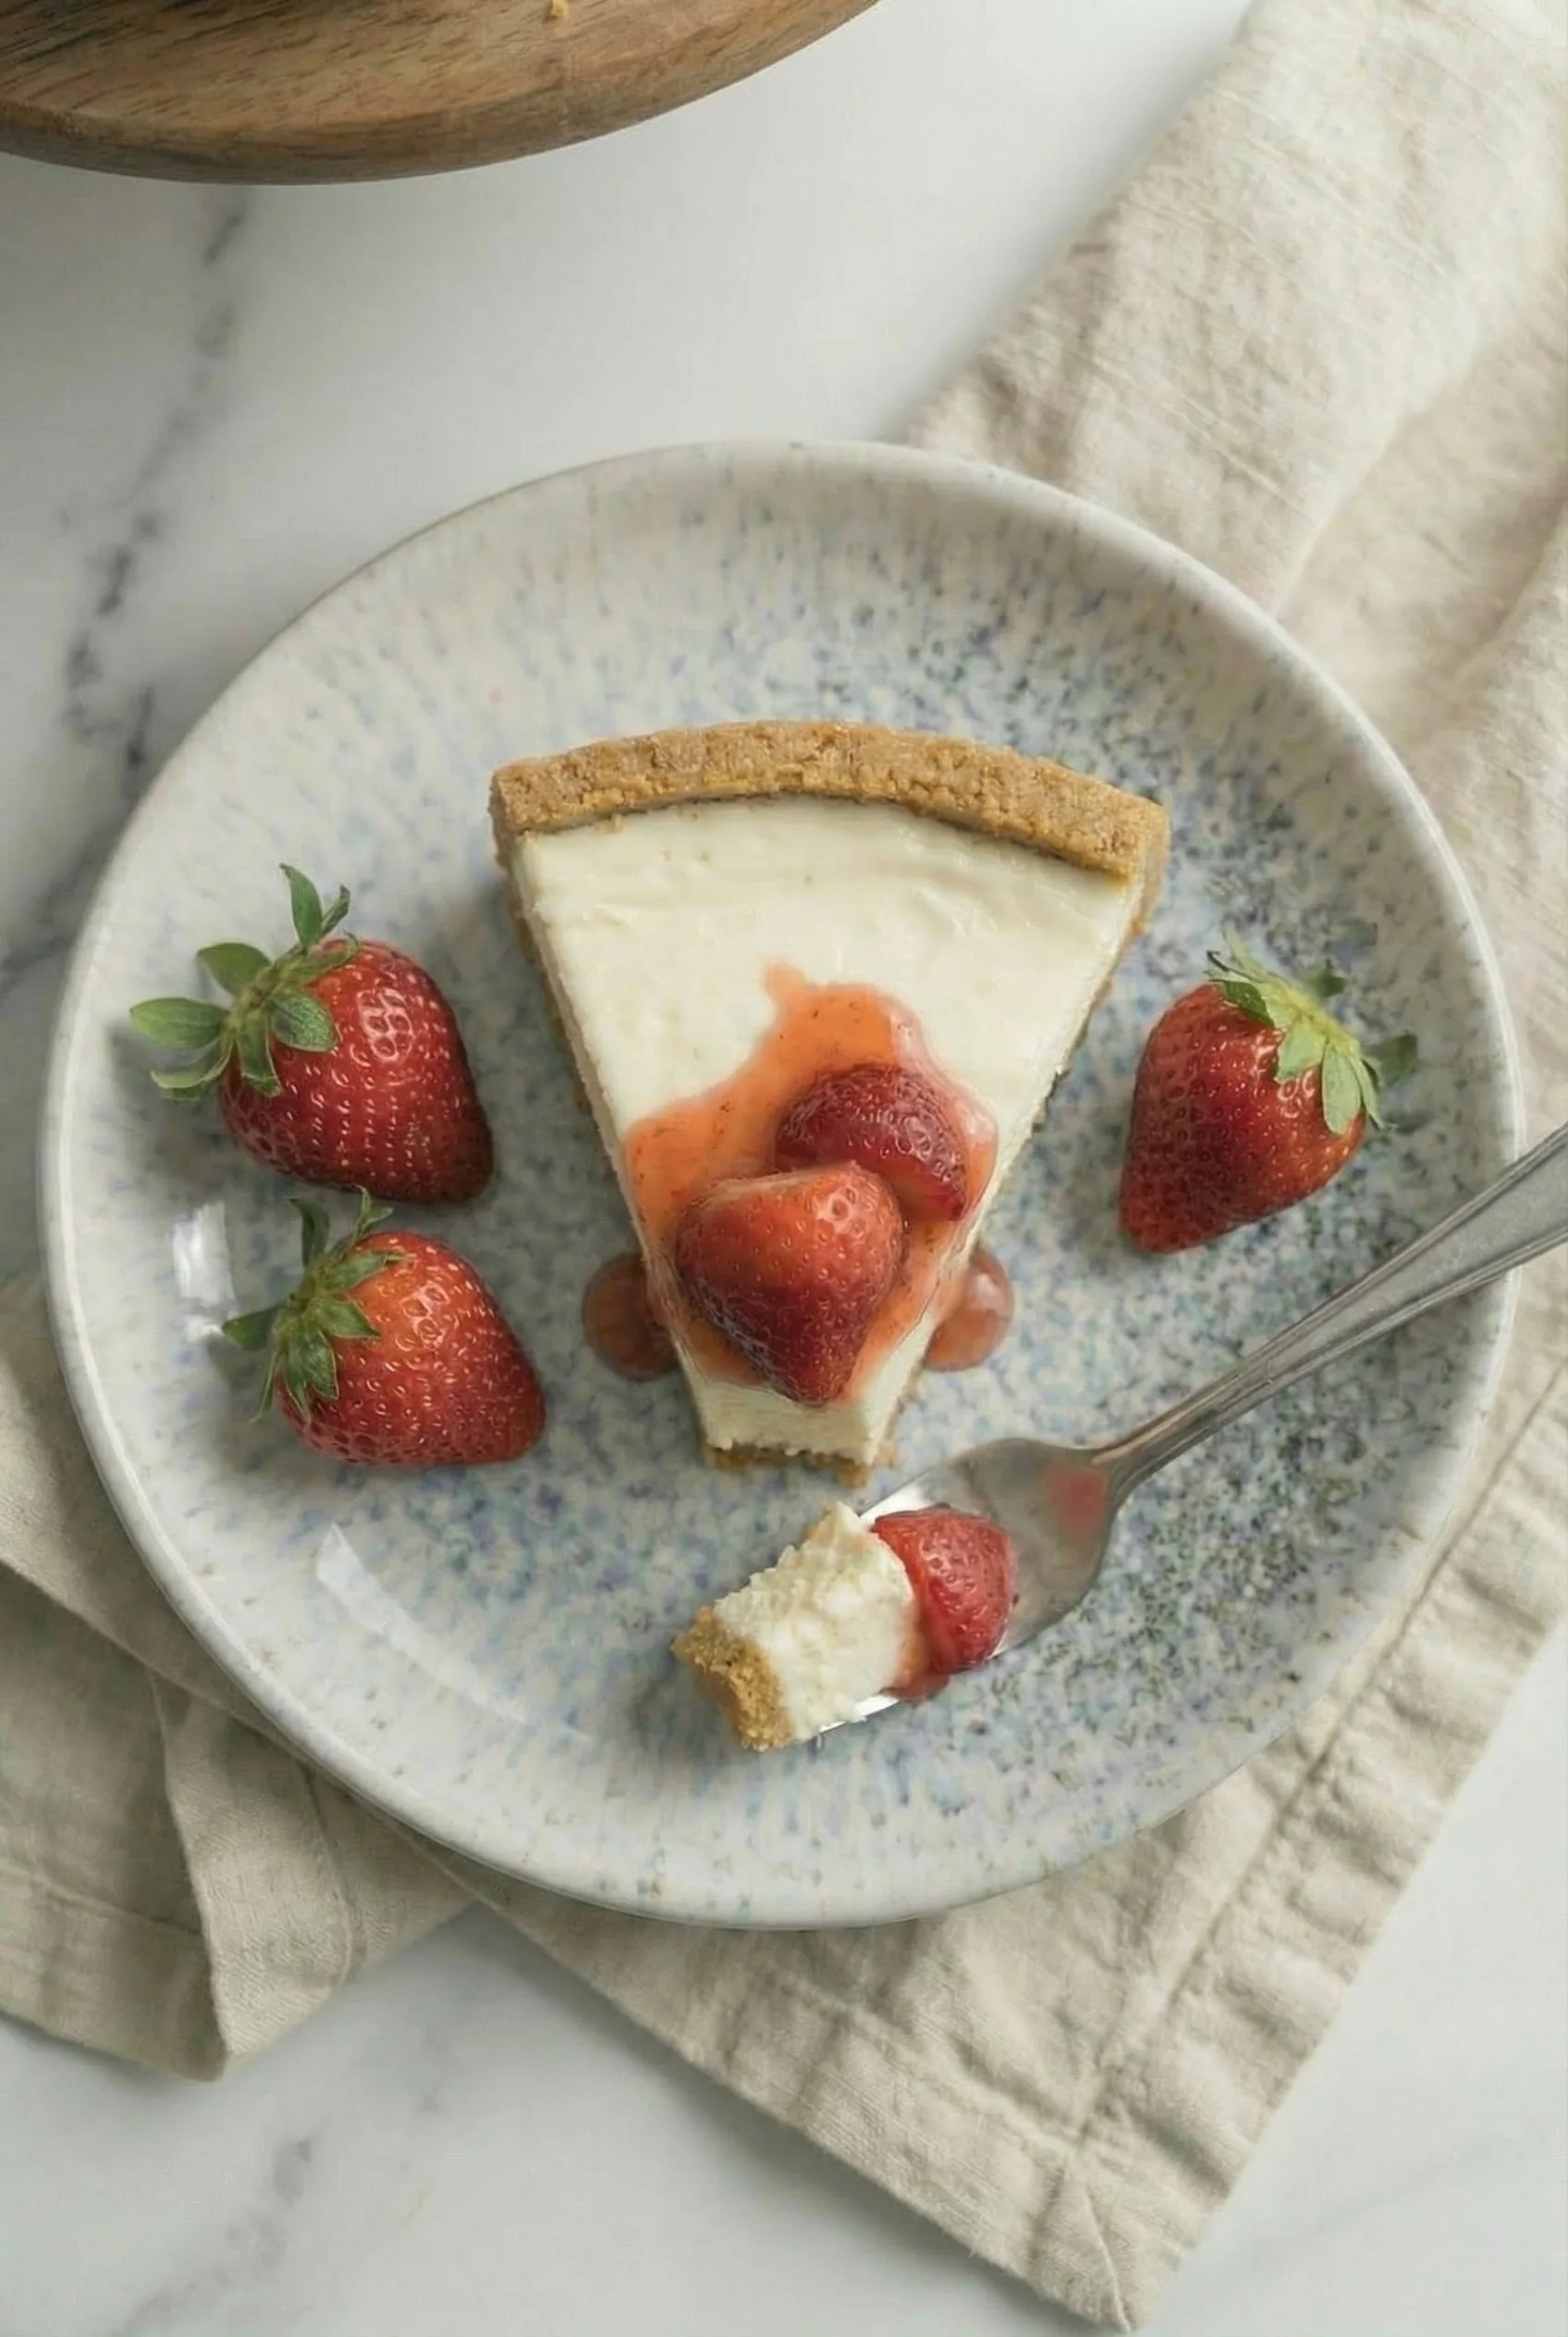
Once chilled, slice and serve as is or get creative with toppings like fruit, chocolate, caramel, or whipped cream.
Honestly? It’s so good, you might not even wait for toppings.
Storage Options:
- Fridge: This no-bake cheesecake is perfect for making ahead! Simply keep it covered in the refrigerator, and it will stay fresh for up to 5 days. You can even prepare it up to three days in advance if you like to get ahead on dessert duty—just chill until you’re ready to serve.
- Freezer: Yep, this cheesecake freezes beautifully. Wrap it tightly and store for up to 3 months. Thaw in the fridge before serving.
Pro Tip: If freezing individual slices, separate them with parchment paper so you can grab one whenever a cheesecake craving hits.
How to Thaw Your No-Bake Cheesecake Like a Pro
So, the cheesecake cravings have officially struck, and all you’ve got is a frosty slice (or, let’s be real, half a pan) in the freezer. Here’s how to bring it back to its full, creamy glory:
- Transfer to the Fridge: Move your cheesecake from the freezer to the refrigerator. Leave it covered to prevent it from picking up any mysterious fridge flavors (we see you, leftover garlic bread).
- Wait It Out: Let it thaw slowly for several hours or overnight. This gentle approach keeps it ultra-smooth and prevents any sad, soggy surprises.
- Serve Up: Once it’s fully thawed, slice and enjoy as usual—no one will ever guess it was frozen in the first place.
Pro tip: Avoid thawing at room temperature or in the microwave—patience pays off with perfectly creamy results!
Variations and Substitutions:
Feel like getting creative? Try these tweaks:
- Chocolate Cheesecake – Add ¼ cup cocoa powder for a chocolatey kick.
- Lemon Cheesecake – Mix in 1 tablespoon lemon zest and 1 teaspoon lemon juice.
- Peanut Butter Swirl Cheesecake – Swirl in ¼ cup peanut butter for a nutty twist.
- Berry Bliss Cheesecake – Blend in ½ cup pureed strawberries or raspberries.
- Oreo Cheesecake – Crush Oreo cookies and fold them into the batter (because why not?).

What to Serve with Philadelphia 3 Ingredient Cheesecake?
This no-bake cheesecake is already amazing, but if you want to pair it with something, here are a few ideas:
- Fresh Berries – A little tanginess balances out the rich creaminess.
- Whipped Cream – Because more cream is always a good idea.
- Chocolate or Caramel Sauce – A drizzle of either takes this to another level.
- Espresso or Coffee – The bitter contrast makes the cheesecake even more indulgent.
- Graham Crackers or Wafers – Perfect for dipping if you skipped the crust.
Frequently Asked Questions:
Can I use low-fat cream cheese?
I wouldn’t. Full-fat cream cheese is what gives this cheesecake that thick, creamy texture. Low-fat versions tend to be softer and can make the filling too loose.
Does it really set without gelatin?
Yep! The combination of cream cheese, sweetened condensed milk, and heavy cream thickens beautifully as it chills. No gelatin needed at all.
What if my cheesecake mixture is too thin?
First, make sure your cream cheese is fully softened, your heavy cream is cold, and you’ve whipped the mixture long enough. Those small details really matter. Also double-check that you’re using full-fat cream cheese—low-fat or fat-free versions don’t set the same way and can leave the filling runny, even after chilling. If it still seems loose, pop it in the fridge for a bit. Sometimes the cream cheese just needs time to firm up.
If you’ve ever thought making cheesecake was too much work, this Philadelphia 3 Ingredient Cheesecake (No-Bake & Creamy!) is here to prove you wrong.
It’s smooth, rich, ridiculously easy, and requires zero baking. Whether you’re making dessert for a party or just want a sweet treat without the hassle, this foolproof cheesecake is about to become your new favorite thing.
So, are you making this today? Drop a comment and let me know! And if you come up with a fun variation, I need to hear about it.
Keep the Flavor Coming – Try These:

Philadelphia 3 Ingredient Cheesecake (No-Bake & Creamy!)
Ingredients
- 16 oz 2 blocks Philadelphia cream cheese, softened
- 1 can 14 oz sweetened condensed milk
- ½ cup heavy cream chilled
- Optional: 1 pre-made graham cracker crust store-bought or homemade
Instructions
Prepare the Cheesecake Filling
- In a large mixing bowl, use a hand mixer to beat the softened cream cheese for 1-2 minutes until smooth and creamy.No stand mixer? No problem! An electric hand mixer works perfectly, just make sure your bowl is big enough to handle a little splatter.
- Slowly add the sweetened condensed milk while mixing on medium speed to ensure a silky consistency without lumps. Whip until the mixture is fully combined and glossy.
- Pour in the cold heavy cream and continue whipping for 2-3 minutes until the mixture thickens slightly. This step enhances the texture, making it creamier and more stable.Whether you’re using a stand mixer or a trusty hand mixer, the goal is a luscious, lump-free cheesecake base that’s ready for your favorite crust or to be served crustless in ramekins.
Assemble the Cheesecake
- If using a graham cracker crust, pour the cheesecake mixture into the prepared crust and smooth the top using a spatula.
- For a crustless cheesecake, pour the mixture into a serving dish or individual ramekins. Lightly tap the dish on the counter to release any air bubbles.
Chill & Set
- Cover the cheesecake with plastic wrap or foil and place it in the refrigerator for a minimum of 4 hours. For optimal results, allow it to chill overnight to achieve the perfect texture.
Serve & Enjoy
- Once set, slice the cheesecake into portions and serve as is, or garnish with toppings such as fresh fruit, chocolate drizzle, caramel, or whipped cream.
Notes
Nutrition
More Easy Treats with Minimal Ingredients
Still hungry? If you’re hooked on the whole “3 ingredient magic” theme, you’re in luck. Here are a few more sweet, no-fuss ideas to keep your dessert game strong:
- Nutella Cookie Bites – All you need is Nutella, flour, and an egg. Mix, bake, done. Chocolate hazelnut heaven in every bite!
- Creamy Rice Pudding – Simmer cooked rice, milk, and sugar for a dreamy, cozy bowlful (bonus: sprinkle cinnamon for extra comfort).
- Peanut Butter Blossoms – Just peanut butter, sugar, and an egg. Press a chocolate kiss on top while they’re warm for that perfect finishing touch.
- Pumpkin Chocolate Chip Cookies – Combine pumpkin puree, spice cake mix, and chocolate chips. Stir, scoop, bake—fall flavors in under 20 minutes.
Minimal effort, maximum results—your sweet tooth will thank you.
I’m Bitty, owner of nodashofgluten.com, where I share simple, delicious recipes for all tastes, including gluten-free. Check out my “About Me” page for more info!

One Response
The easiest and best I have ever made.This recipe is much cheaper than store bought,you should get two for the price of one by just double the ingredients.JH