

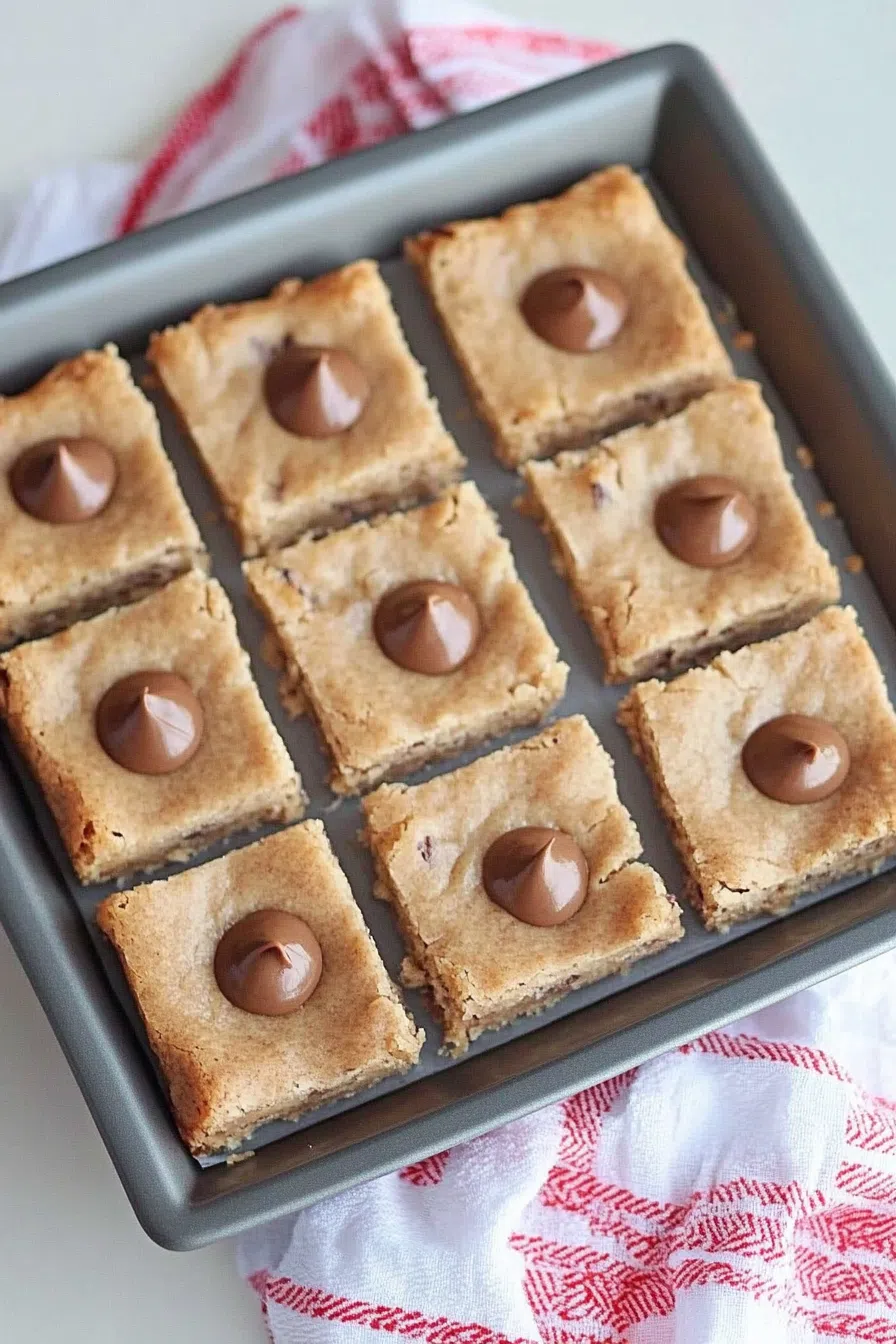
Soft peanut butter cookie bars with creamy peanut butter, brown sugar, and topped with Hershey’s Kisses. The perfect crowd-pleaser!


You know that feeling when you have the absolute best intentions to bake something cute and festive, but life’s just not cooperating? Yeah, that was me. I had promised peanut butter blossoms for a last-minute bake sale, but after wrangling two kids into the car (one with mismatched socks… I noticed too late), and surviving an emergency detour for the forgotten science project, I realized I had zero energy left for rolling and dipping cookie balls.
Cue these Peanut Butter Blossom Bars. Born from a desperate moment—and, honestly, a tiny rebellion against perfection—they’re now one of my favorite go-tos. They’ve saved my sanity more than once, and I promise they’ll do the same for you. No rolling, no flour-dusted countertops. Just one pan, simple ingredients, and all the peanut butter-chocolate goodness you love.
Why You’ll Love This Peanut Butter Blossom Bars Recipe?
Let me tell you why these are more than just your average peanut butter dessert.
- They’re low-fuss. One bowl, one pan. No fancy mixer needed.
- They taste like childhood. Peanut butter cookies + melty chocolate kisses = nostalgia city.
- They’re great for any occasion. Bake sales, potlucks, holiday trays, random Tuesday… you name it.
- They freeze like a dream. I always stash a few in the freezer for late-night cravings. (And yes, they’ve saved me from many questionable snacking choices.)
- Everyone loves them. I’ve never had anyone stop at just one. Not even my picky uncle who swears he’s “not a dessert guy.”

Ingredient Notes:
These bars come together with pantry staples—and no, you don’t need anything fancy here. But I’ll give you the lowdown anyway.
- Granulated & Brown Sugar: The brown sugar keeps these soft and chewy. I like dark brown for more flavor, but light works fine!
- Salted Butter: You could use unsalted, but I love the contrast salted butter gives to the sweet. No need to get fancy, just whatever’s in the fridge.
- Peanut Butter: I go for creamy because it’s smooth, but chunky works if you like surprises. Natural peanut butter doesn’t behave well here… trust me.
- Egg: The binder. Room temp makes things mix smoother, but if you forget? Don’t sweat it.
- Milk: Helps loosen the dough. I use whole milk, but any kind will do in a pinch.
- Flour, Baking Soda, Salt: Your basics. I’ve even used self-rising in a moment of “oops,” and it worked out fine.
- Hershey’s Kisses: Unwrap these ahead of time. I once made the mistake of waiting until after baking and wound up peeling foil like a maniac while the bars cooled. Rookie move.

How To Make Peanut Butter Blossom Bars?
Step 1. Preheat and Prep
Crank up your oven to 350°F. Grease a 9×13-inch pan (or line it with parchment if you’re into less cleanup). Oh, and clear a little space in your freezer—you’ll need it later.
Step 2. Mix It Up
Grab a big bowl. Cream the white sugar, brown sugar, butter, and peanut butter together until they look fluffy and smell like heaven.
Add in your egg, milk, and vanilla extract. Stir it all together—you want smooth and creamy.
Step 3. Add Dry Ingredients
Mix in the flour, baking soda, and salt. It’ll get thick (and you’ll be tempted to eat some dough… no judgment if you do).
Step 4. Spread and Bake
Press that dough evenly into your pan. Don’t overthink it. Bake for about 20 minutes, or until the edges get golden and the center is set.
Step 5. Top with Kisses
As soon as it comes out of the oven, start pressing Hershey’s Kisses into the top. Work fast—the pan’s hot, and you want those chocolates to stick.
Step 6. Freeze (Yep, Freeze!)
Pop the whole pan in the freezer for about 30 minutes. This step makes slicing easier and keeps those kisses from melting into sad puddles.
Want To Save This Recipe?
Step 7. Slice & Serve
Take ‘em out, slice into 40 bars (or fewer if you like them chunkier), and boom—you’re done. High five!
Storage Options:
These bars are super chill (pun intended).
- Room Temp: Airtight container on the counter = good for 3-4 days.
- Fridge: They’ll keep for a week, but honestly, they never last that long at my house.
- Freezer: Yep. They freeze beautifully for up to 3 months. Stack ‘em with parchment so they don’t stick.
Variations and Substitutions:
Feel like mixing it up? I’ve played around, and here’s what works:
- Almond Butter or Sunflower Butter: Nut-free option that still brings the flavor.
- Different Chocolates: Swap Hershey’s Kisses for chocolate chunks, peanut butter cups, or even Rolo candies (I’m telling you, it’s worth a try).
- Gluten-Free Flour: A good 1-to-1 baking blend works great here.
- Add Chocolate Chips to the Dough: More chocolate? Yes, please.

What to Serve with Peanut Butter Blossom Bars?
Besides eating them straight from the pan? Here are a few ideas:
- Cold Glass of Milk: Classic and perfect.
- Coffee or Latte: The bitterness of coffee balances the sweet.
- Vanilla Ice Cream: Warm up a bar, top with a scoop… chef’s kiss.
- Holiday Cookie Trays: These always steal the show next to sugar cookies and fudge.
Frequently Asked Questions:
Can I use crunchy peanut butter?
Yep! It gives the bars a little extra texture, which I love. Just avoid natural kinds that separate.
Do I have to freeze the bars?
You don’t have to, but it really helps the kisses stay intact and makes cutting cleaner. So… do it!
Why are my bars dry?
They’re probably overbaked. Check early—every oven’s different! You want them just golden, not brown.

So, there you have it—Peanut Butter Blossom Bars that’ll win you fans and make your kitchen smell amazing. I hope you give them a try soon. They’re perfect for bake sales, family get-togethers, or honestly just when you need a pick-me-up.
And if you do bake them, tell me how they turned out! Did you add your own twist? I love hearing your baking stories.
Happy baking, friend!
Keep the Flavor Coming – Try These:

Peanut Butter Blossom Bars
Ingredients
- ½ c granulated white sugar
- ½ c packed brown sugar
- ½ c 1 stick salted butter, at room temperature
- ½ c creamy or chunky peanut butter
- 1 large egg
- 2 tbsp milk
- 1 tsp vanilla extract
- 1¾ c all purpose flour
- 1 tsp baking soda
- ½ tsp salt
- 40 Hershey's Kisses unwrapped
Instructions
- Before you begin make sure to preheat your oven to 350F and grease a 9x13-inch pan. Ensure that there is space, in your freezer for later use.
- To start take a bowl. Beat together the white sugar, brown sugar, butter and peanut butter until well combined. Then add in the egg, milk and vanilla extract while continuing to mix.
- Gradually incorporate the flour, baking soda and salt into the mixture until everything is thoroughly combined.
- Next evenly press the dough into the pan. Bake it for about 19 to 24 minutes or until it sets and turns lightly golden.
- Out of the oven immediately press rows of Hershey's Kisses into the dough.
- Now comes a crucial step – place the pan in the freezer until both the cookies are chilled and the kisses become firm.
- Finally remove the pan from the freezer. Cut the dough into 40 bars. You can store them in a container. Keep them frozen, for future enjoyment.
Notes
I’m Bitty, owner of nodashofgluten.com, where I share simple, delicious recipes for all tastes, including gluten-free. Check out my “About Me” page for more info!

