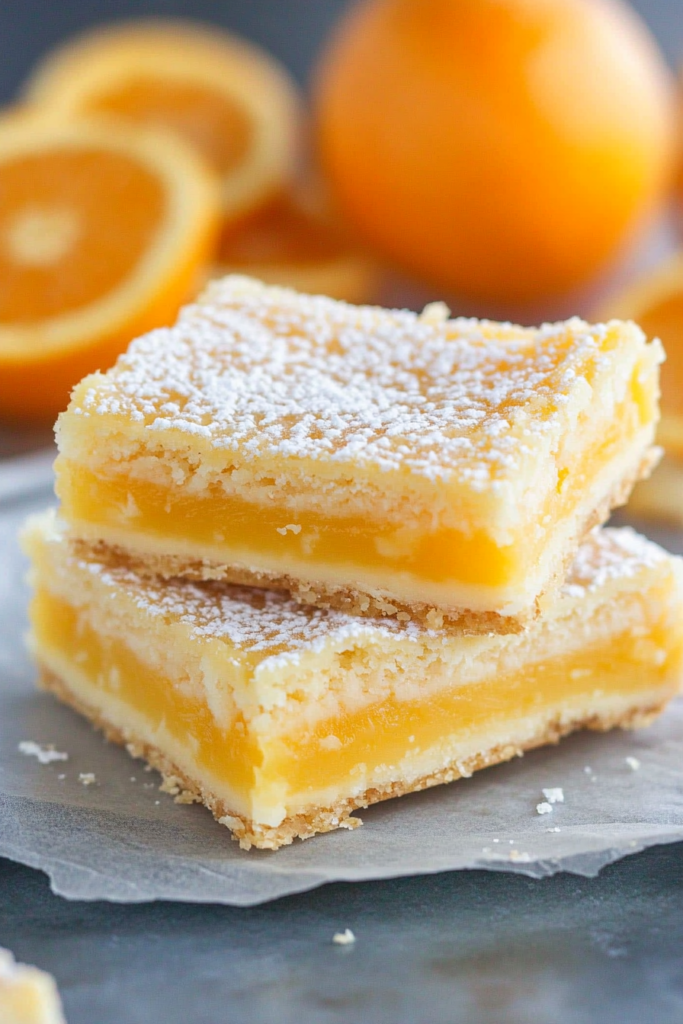
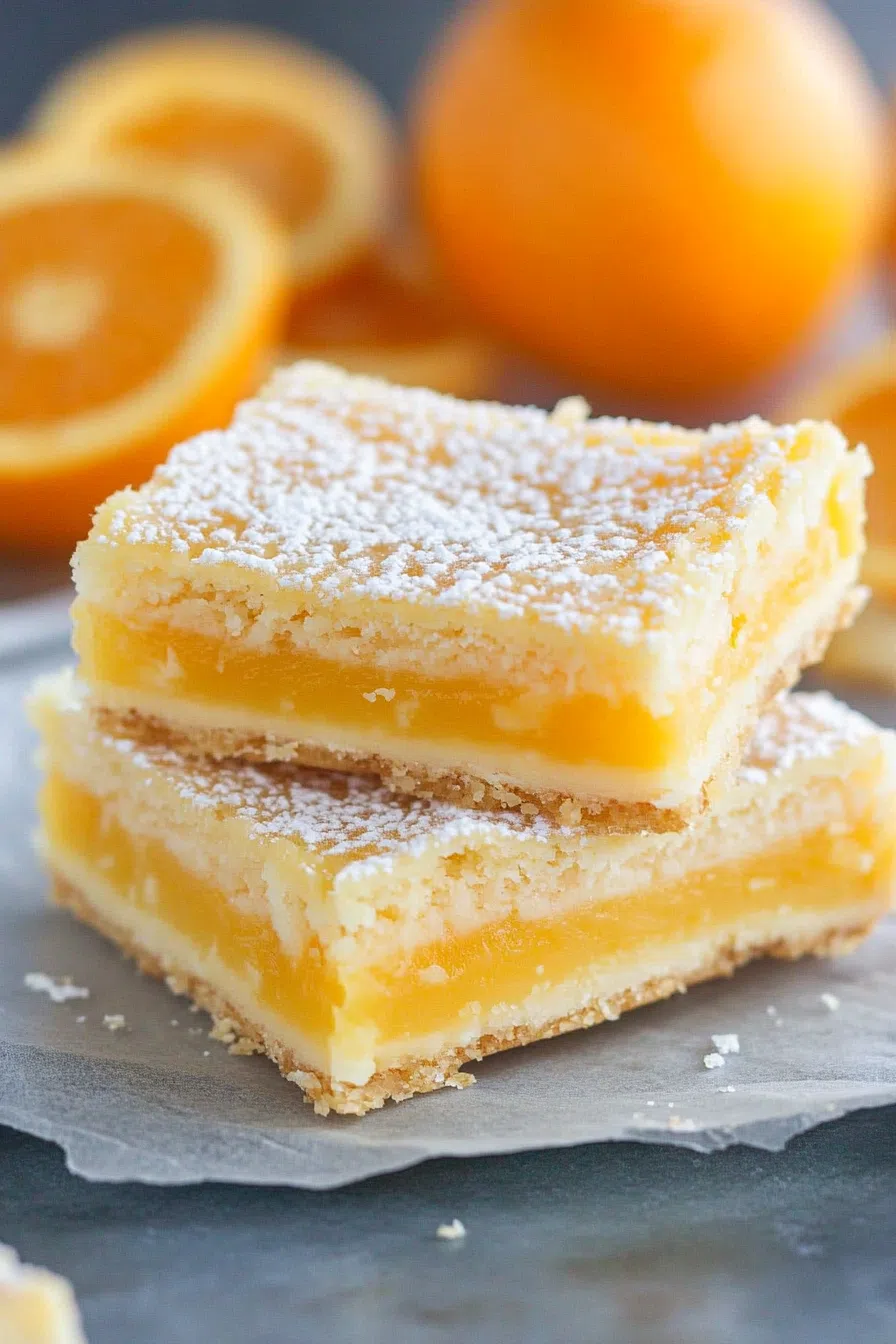
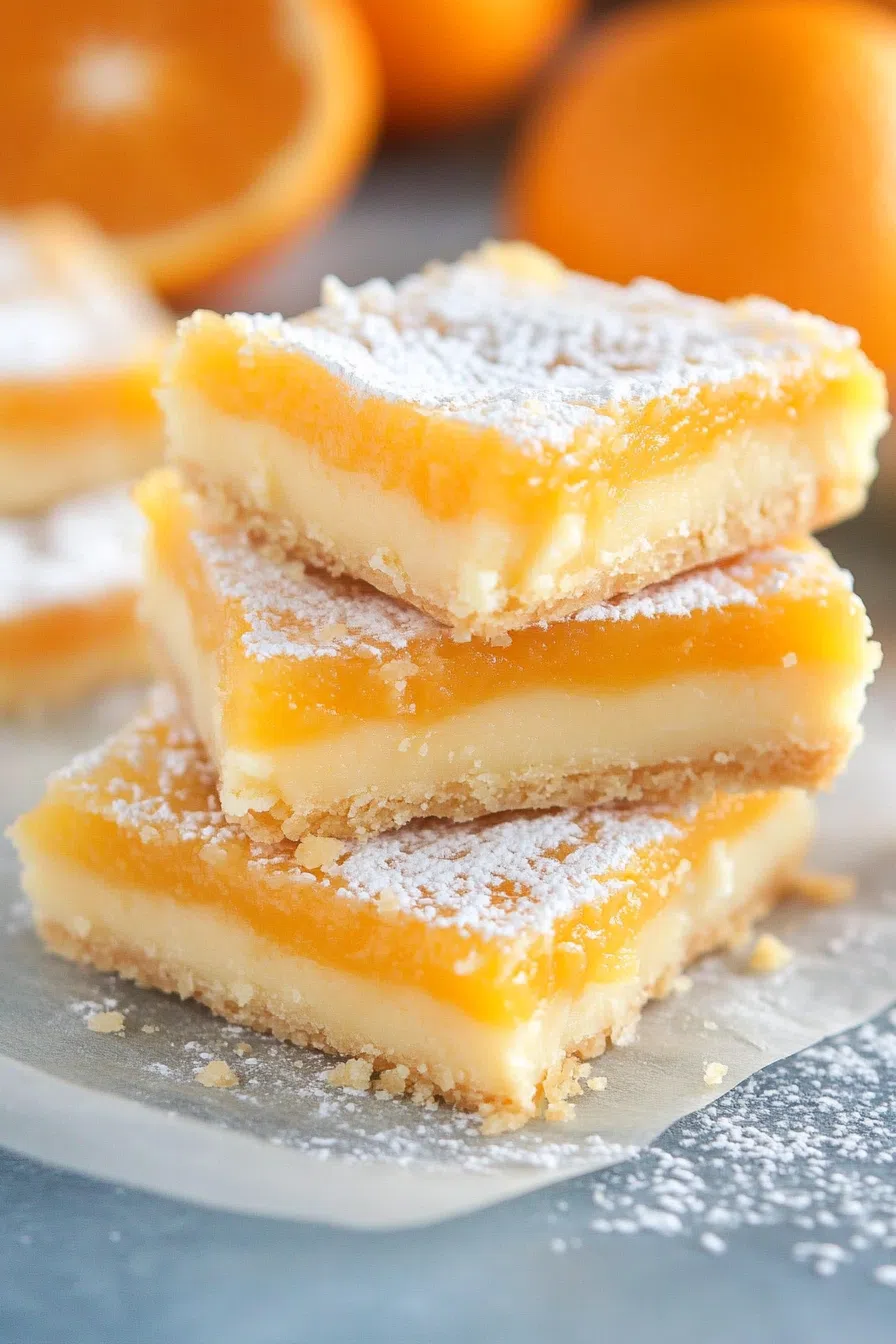
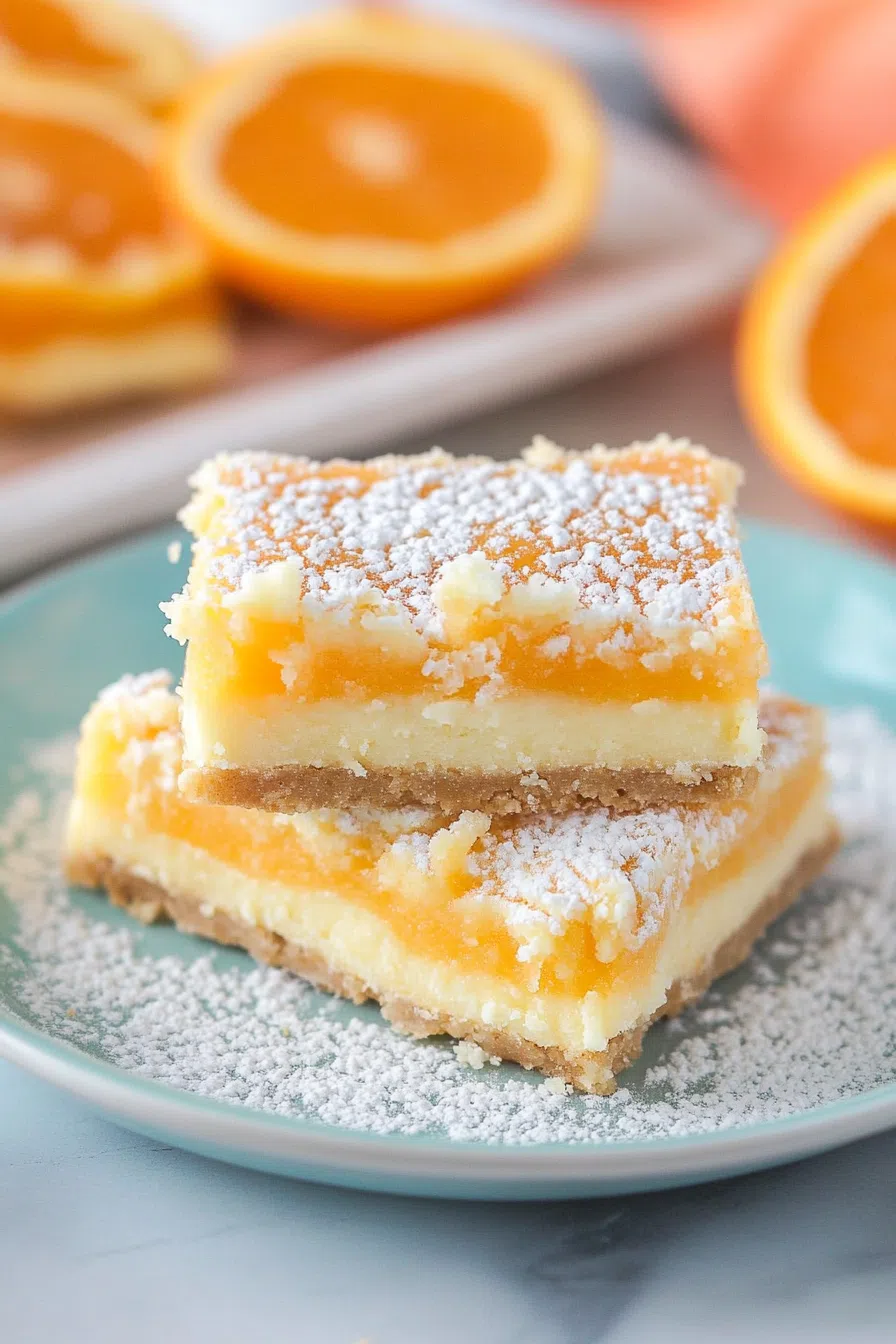
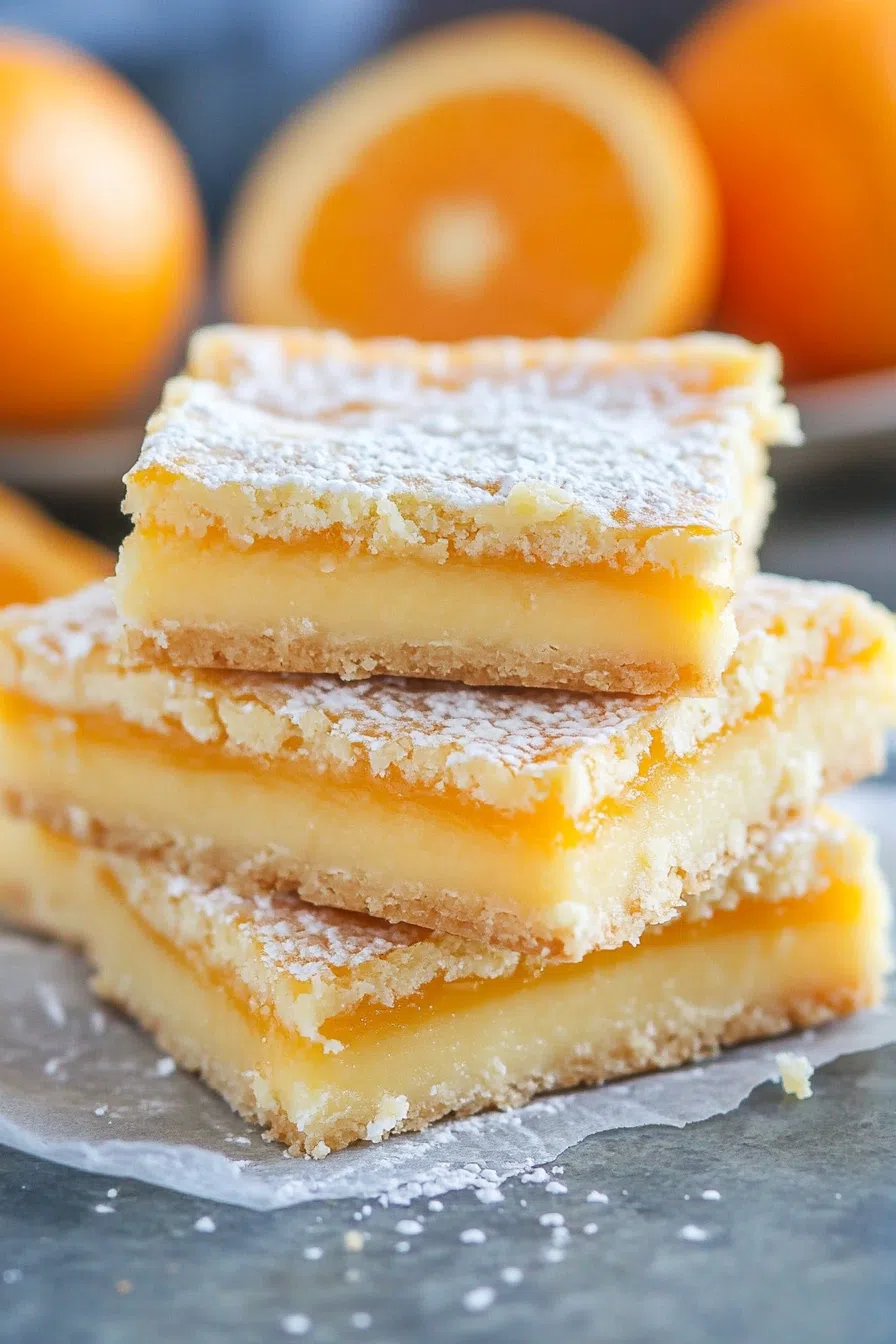
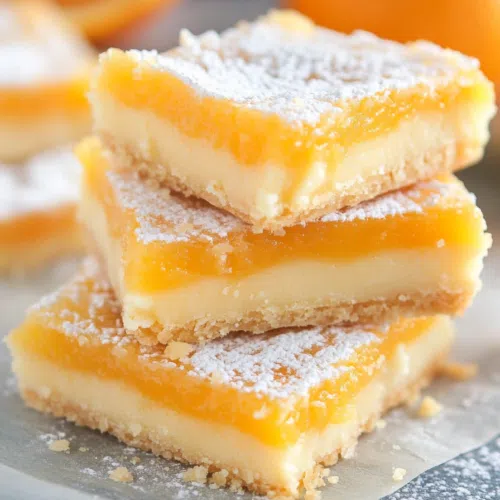
These Orange Bars feature a buttery shortbread crust with a smooth, citrusy orange filling. A bright, tangy dessert that’s easy to make and hard to resist!
You know that feeling when you bite into something and it instantly transports you to a memory? That’s exactly what happened the first time I made these Orange Bars.


It was a rainy afternoon, and I was in the mood to bake. I usually go for the classic lemon bars, but I had a bunch of oranges sitting on my counter, looking way too good to ignore. So, I thought—why not? A little tweak to my go-to recipe, and boom. The first batch came out of the oven, filling the kitchen with the sweetest citrusy aroma. One bite and I was hooked.
They were bright, tangy, and just the right amount of sweet. The buttery shortbread crust was the perfect balance to the soft, creamy orange filling. I took them to a family gathering, and let’s just say… they disappeared fast. Now, every time I make these, I can’t help but think of that cozy, rainy day and how something so simple turned into a favorite.
Why You’ll Love This Orange Bars Recipe?
- A fresh twist on a classic. Love lemon bars? These are even better—brighter, sweeter, and bursting with orange flavor.
- That buttery shortbread crust. It stays crisp under the custard-like filling, giving you the perfect bite every time.
- Super easy to make. No complicated steps, just mix, bake, chill, and enjoy.
- They store beautifully. These bars taste even better after chilling, making them ideal for make-ahead treats.
- Perfect for any occasion. Whether it’s a summer picnic, a holiday dessert, or just a random Tuesday, these bars always feel like a treat.
Ingredient Notes:
Every ingredient in this recipe has a role to play. Here’s why each one matters:
- Unsalted Butter – The key to a rich, melt-in-your-mouth shortbread crust.
- Granulated Sugar – Sweetens both the crust and filling just right.
- All-Purpose Flour – Gives the crust structure and thickens the filling.
- Cornstarch – A secret weapon for making the filling silky smooth instead of gummy.
- Fresh Orange Juice & Zest – The star of the show! Freshly squeezed juice adds natural brightness, and zest amplifies the citrus flavor.
- Eggs – Helps set the filling, giving it that soft, custard-like texture.
- Almond Extract – A tiny touch of this takes the flavor from good to next level.
- Powdered Sugar – A light dusting on top makes these bars look bakery-worthy!
How To Make Orange Bars?
Step 1: Make the Shortbread Crust
Preheat your oven to 350°F (175°C). Line a 9×13-inch baking dish with
In a bowl, mix together the melted butter, sugar, vanilla, flour, and salt until a soft dough forms. Press it evenly into the prepared baking dish, making sure it’s packed down well. Prick the surface with a fork—this helps prevent bubbling while it bakes.
Bake for 15-18 minutes, or until the edges start to turn a light golden brown. The crust should be fully baked before adding the filling so it stays crisp!
Step 2: Make the Orange Filling
While the crust is baking, grab another bowl and whisk together eggs, sugar, cornstarch, orange juice, zest, and almond extract until smooth. You want everything to be fully combined with no lumps.
Once the crust comes out of the oven, immediately pour the filling over the hot crust—this helps everything set properly and prevents the layers from separating.
Step 3: Bake Until Just Set
Return the baking dish to the oven and bake for 20-22 minutes. The filling will puff up slightly and then settle down as it cools. You’ll know it’s done when the center is just barely jiggly but no longer liquid.
Let the bars cool at room temperature for about 30 minutes, then transfer to the fridge for at least 2 hours to fully set. The longer they chill, the better they taste!
Step 4: Slice & Serve
Once chilled, dust the bars with powdered sugar for that final bakery-style touch. Use a sharp knife to cut them into squares, wiping the blade between cuts for cleaner edges.
Now, take a bite and enjoy that perfect mix of buttery crust and zesty orange filling!
Want To Save This Recipe?
Storage Options:
If you have leftovers (which, let’s be honest, you probably won’t), here’s how to keep them fresh:
- Fridge: Store in an airtight container for up to 5 days. They actually taste even better the next day!
- Freezer: Wrap individual bars in plastic wrap and freeze for up to 3 months. Thaw in the fridge before serving.
Variations and Substitutions:
Want to mix things up? Here are a few fun ways to tweak this recipe:
- Try a different citrus. Swap the orange juice for lemon, lime, or grapefruit for a whole new flavor.
- Make them dairy-free. Use plant-based butter in the crust.
- Add some crunch. Stir in chopped almonds or pecans to the crust for extra texture.
- Give it a tropical twist. Add a little shredded coconut to the filling for a fun flavor boost.
What to Serve with Orange Bars?
These bars are amazing on their own, but if you want to take your dessert game up a notch, try these pairings:
- A cup of tea or coffee. The bright citrus cuts through the richness perfectly.
- Vanilla ice cream. A warm bar + a cold scoop = pure magic.
- Fresh berries. Blueberries and raspberries complement the orange beautifully.
Frequently Asked Questions:
Can I use store-bought orange juice?
You can, but fresh juice makes a huge difference in flavor. Bottled juice is often too acidic or flat.
How do I know when they’re fully baked?
The center should have a slight jiggle, but not look wet. It’ll firm up as it cools!
Can I double this recipe?
Absolutely! Just use a larger pan and increase the bake time by a few minutes.
Brighten Your Day with These Orange Bars!
If you’re looking for a dessert that’s easy, bright, and totally irresistible, this Orange Bars Recipe is it. They’re zesty, creamy, and guaranteed to put a smile on your face.
So go ahead—grab some fresh oranges, preheat that oven, and let’s bake some sunshine! ☀️🍊
And hey, if you make these, I’d love to hear what you think! Drop a comment below or tag me on social media. Happy baking!
Keep the Flavor Coming – Try These:
Orange Bars Recipe
Ingredients
For the Shortbread Crust:
- 1 cup 226g unsalted butter, melted
- ½ cup 100g granulated sugar
- 2 cups 250g all-purpose flour
- ¼ teaspoon salt
- ½ teaspoon vanilla extract
For the Orange Filling:
- 4 large eggs
- ¾ cup 150g granulated sugar
- ¼ cup 30g cornstarch
- ⅔ cup 160ml fresh orange juice
- 1 tablespoon finely grated orange zest
- ½ teaspoon almond extract
For Garnish:
- Powdered sugar optional, for dusting
Instructions
Prepare the Shortbread Crust
- Preheat the oven to 350°F (175°C). Line a 9x13-inch baking dish with parchment paper, ensuring some overhang on the sides for easy removal.
- In a mixing bowl, combine the melted butter, granulated sugar, vanilla extract, flour, and salt. Stir until the mixture forms a cohesive dough.
- Press the dough evenly into the prepared baking dish, ensuring a firm and level surface. Use a fork to gently prick the dough in several places to prevent bubbling.
- Bake for 15-18 minutes, or until the edges are lightly golden brown. Remove from the oven and set aside.
Prepare the Orange Filling
- While the crust is baking, whisk together the eggs, granulated sugar, cornstarch, orange juice, orange zest, and almond extract in a separate mixing bowl. Ensure the mixture is smooth and fully combined.
- Once the crust has finished baking, immediately pour the prepared orange filling over the warm crust. This allows the filling to adhere properly and prevents separation between the layers.
Bake the Orange Bars
- Return the baking dish to the oven and bake for 20-22 minutes, or until the filling is set. The center should have a slight jiggle but should not appear liquid.
- Remove the baking dish from the oven and allow the bars to cool at room temperature for 30 minutes. Then, transfer the dish to the refrigerator and chill for at least 2 hours to allow the filling to set completely.
Slice and Serve
- Once fully chilled, carefully lift the bars from the baking dish using the parchment paper overhang. Place on a cutting board and slice into 12 squares using a sharp knife, wiping the blade clean between cuts for precise edges.
- If desired, dust the bars lightly with powdered sugar before serving.
Notes
I’m Bitty, owner of nodashofgluten.com, where I share simple, delicious recipes for all tastes, including gluten-free. Check out my “About Me” page for more info!