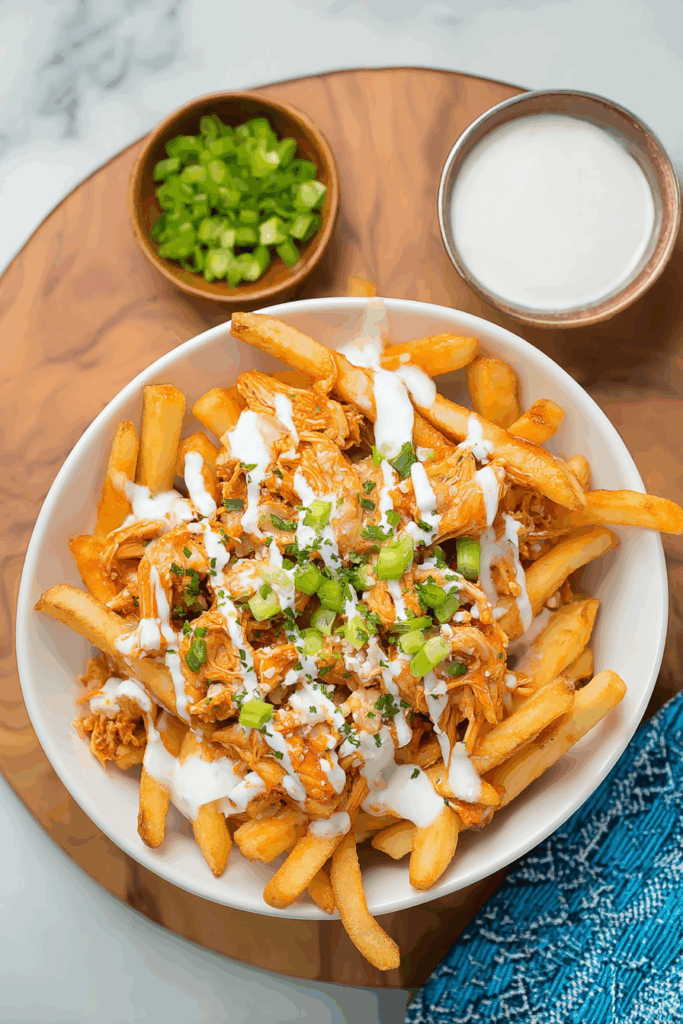
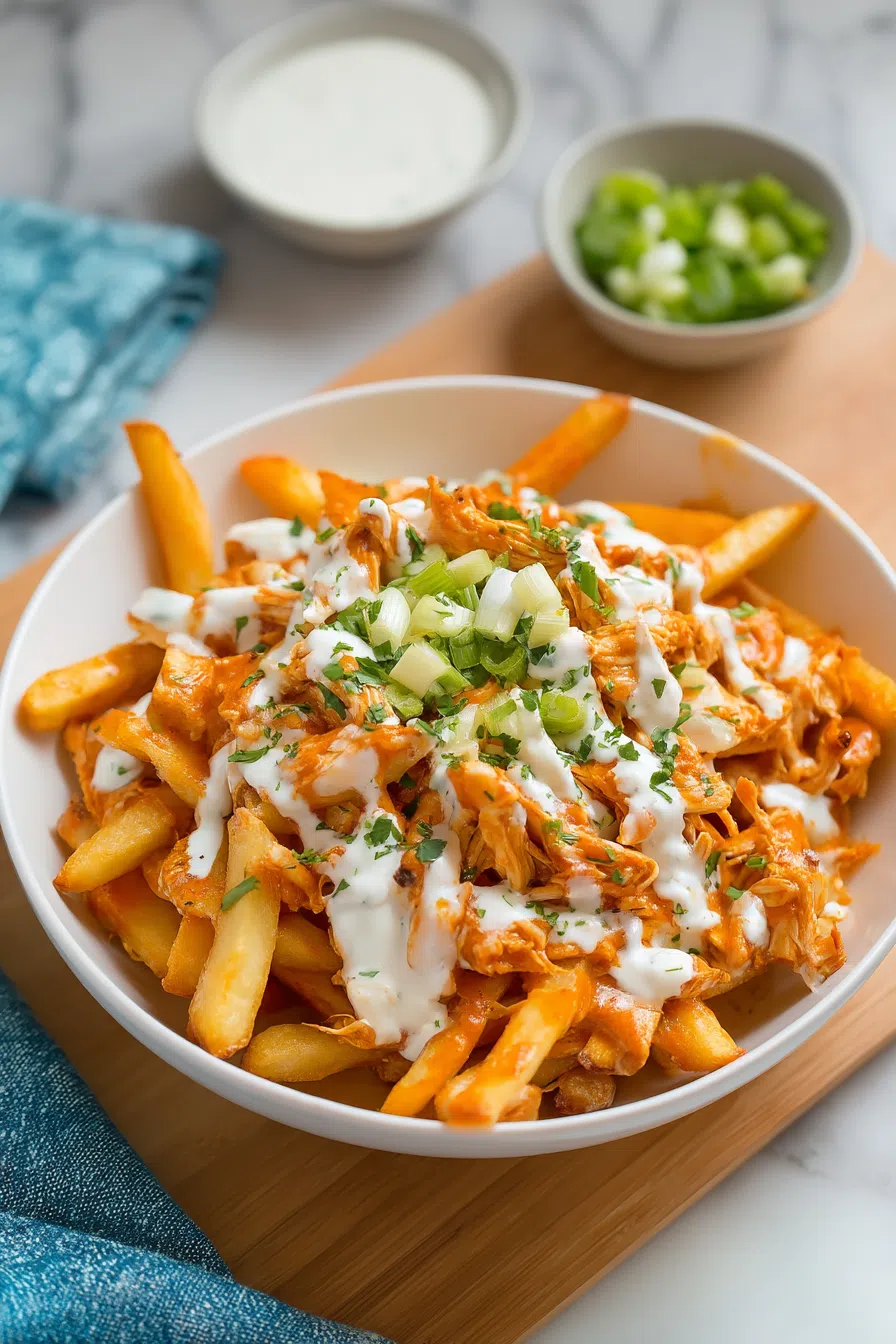
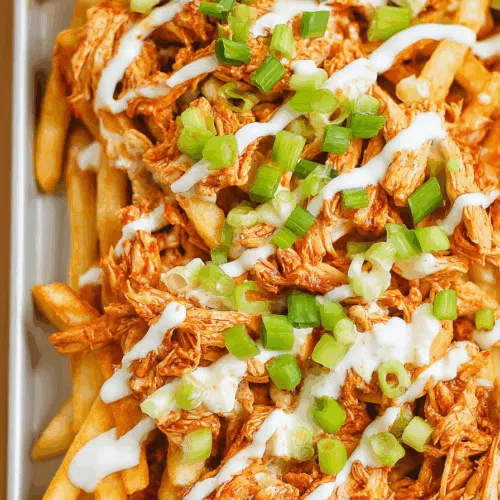
Fries, cheddar, Buffalo sauce, blue cheese, and ranch—this Loaded Buffalo Fries recipe is the spicy, cheesy snack you’ll keep craving.
I wasn’t planning on creating anything magical. In fact, I was planning on skipping dinner altogether and calling a bag of chips “enough.” It was one of those evenings. You know the kind—where your socks don’t match, the sink’s full of dishes, and the fridge has… vibes but no actual meals?


Anyway, I spotted this lonely bag of frozen fries in the freezer door and figured, “Fine. I’ll bake these, toss some salt on them, and call it dinner.” But then—I saw the bottle of Buffalo sauce peeking out behind the pickles. Then some shredded cheddar. And, miraculously, a half bottle of ranch (thank you, past me).
Somewhere between “let’s just eat these before they burn” and “wait, should I broil this?” I created something that tasted like it came from a bar kitchen at midnight after two beers and a bad day. It was messy, spicy, cheesy, and kind of perfect. I didn’t mean to love them. But I did. And now they’re a regular thing in my house. Even when I do have dinner plans.
Why You’ll Love This Loaded Buffalo Fries Recipe?
Let’s get real. These fries aren’t fancy. There’s no truffle oil or duck fat or aged cheddar that was sung to in a cave. These are real fries, with cheese that comes in a zip-top bag (sometimes), a sauce that’s basically vinegar and hot pepper magic, and the kind of ranch that makes you want to dip everything you’ve ever eaten.
But it’s the way it comes together. The hot-and-cold contrast, the sharpness of cheddar against the heat of the Buffalo, the unexpected funk of the blue cheese (if you’re into that), and then the ranch just brings it all home.
It’s snack food that says “I needed comfort and flavor, and I needed it fast.” And sometimes, that’s exactly what you need, right?

Ingredient Notes:
This isn’t a long list. You’ve probably got most of this stuff already—or something close enough.
-
Frozen Fries – Use what you love. I’ve tried crinkle-cut, curly, waffle (so good), and even sweet potato. Waffle’s the MVP for holding toppings.
-
Olive Oil – Not the fancy kind. Just something to help them crisp up in the oven.
-
Garlic Powder, Salt, Pepper – Simple seasoning. I always eyeball it, and honestly, it’s never the same twice.
-
Cheddar Cheese – Sharp is best. Grate it yourself if you’ve got time. If not? Bagged is fine.
-
Blue Cheese Crumbles – Optional but adds depth. I’ve had friends say “ew” and then ask for seconds.
-
Buffalo Sauce – Frank’s RedHot is my ride-or-die. Feel free to go milder, or, if you’re a heat-chaser, crank it up.
-
Ranch Dressing – Store-bought, homemade, leftover from that salad you didn’t finish—doesn’t matter. You need it.
-
Green Onions or Chives – Totally optional. I usually add them if I’m trying to feel like I made something with effort.
How To Make Loaded Buffalo Fries?
Step 1: Crank the heat.
Preheat your oven to 450°F. Line a baking sheet (or two, if your fries always crowd each other like mine do) with parchment paper. That stuff is magic for lazy cleanup.
Step 2: Dress the fries.
Toss your frozen fries in a big bowl with olive oil, garlic powder, salt, and pepper. Spread them out in a single layer. Don’t stack them, or they’ll steam instead of crisp.
Step 3: Roast until golden.
Bake for 25–30 minutes, flipping halfway. Sometimes I forget to flip and just shake the tray violently halfway through. It works.
Step 4: Turn on the broiler.
Once your fries are crispy, take them out. Sprinkle with cheddar and blue cheese while they’re hot. Drizzle on Buffalo sauce like you mean it. Pop the tray back in under the broiler for 2–3 minutes, until the cheese is melty and starting to brown in places.
Step 5: Finish and devour.
Pull them out, drizzle with ranch, top with green onions if you have ’em, and dive in. No need for plates. Paper towels count as plating if you’re feeling rebellious.
Storage Options:
Store any extra fries in an airtight container in the fridge. Honestly, they’re never as crispy the next day, but the flavor’s still there. I’ve reheated them in the oven, air fryer, even microwave (yes, they go a little limp—but it’s Buffalo fries, not crème brûlée).
Sometimes I eat them cold and kind of love it. It’s a vibe.
Want To Save This Recipe?
Variations and Substitutions:
This is the fun part. There’s no Buffalo fry lawbook, so tweak away.
-
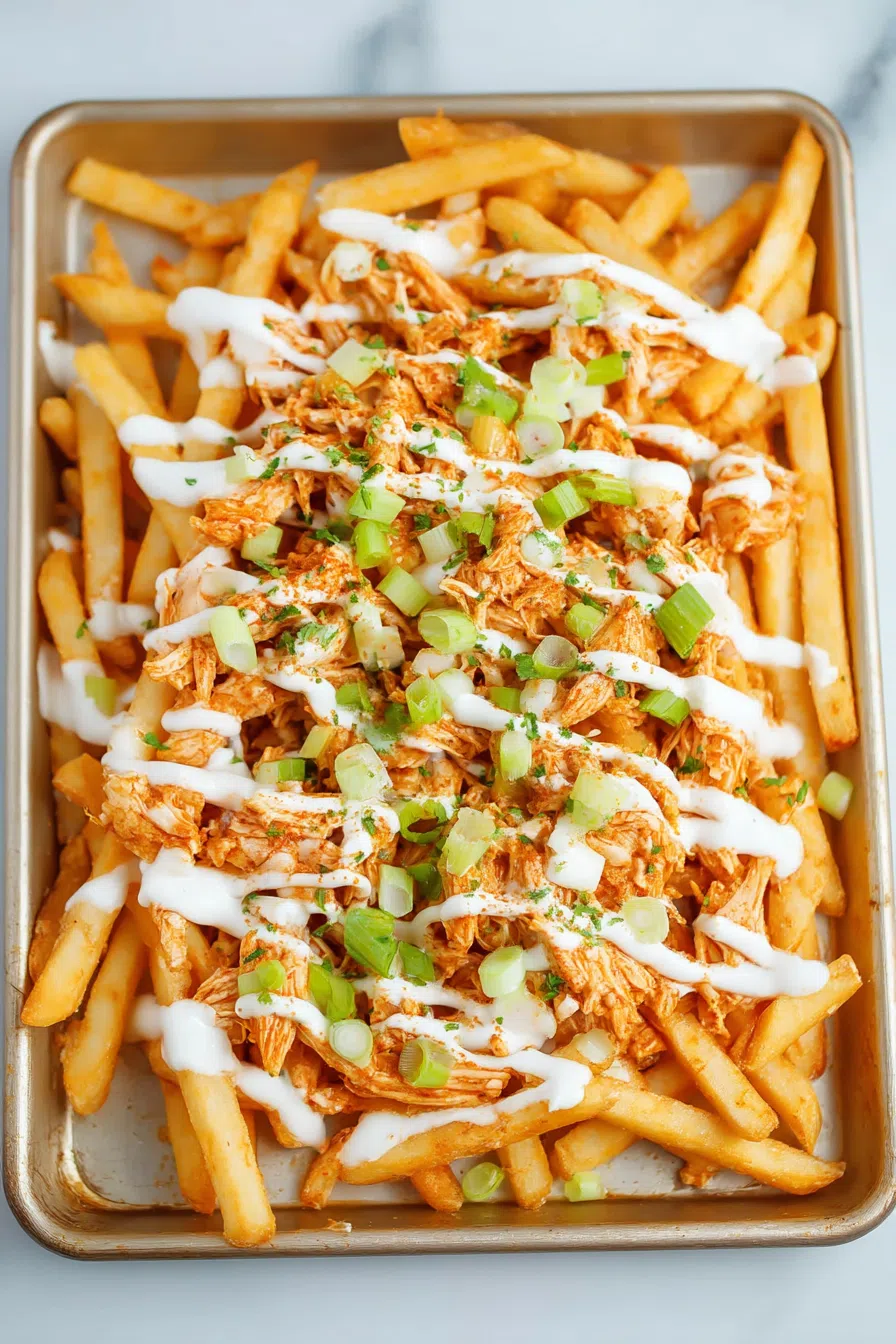
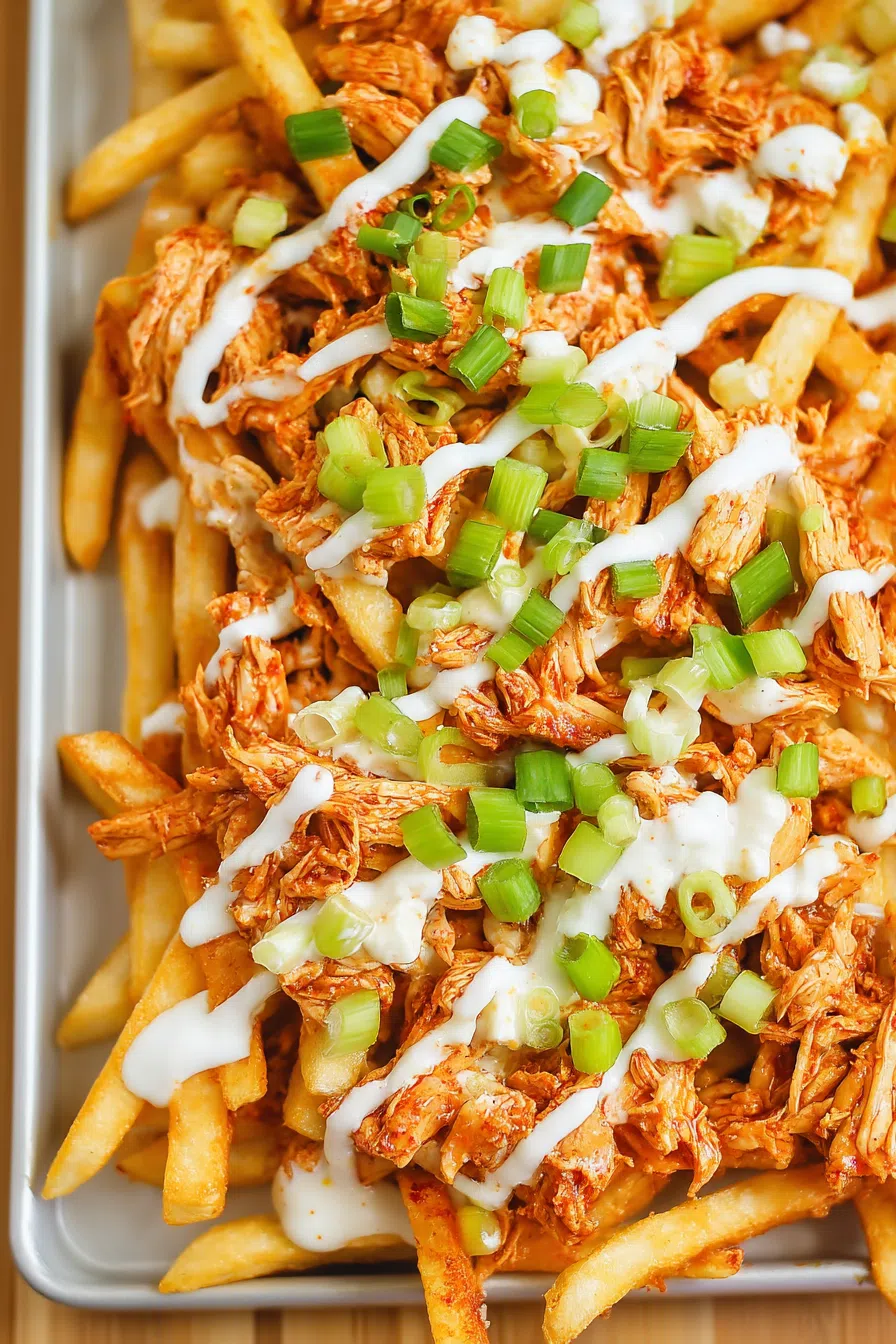
Top with shredded chicken – Think Buffalo chicken fries. Or rotisserie. Or even tofu if that’s your vibe.
-
Try other cheeses – Pepper Jack, feta, smoked Gouda… why not?
-
Go meatless – Skip the cheese if you want, or load it up with veggies like diced tomatoes or sautéed mushrooms.
-
Make it a meal – Add a fried egg. Seriously. It sounds weird but just try it.
-
Want extra heat? – Toss some jalapeños on there. Or crushed red pepper. Or a dash of hot honey. (Okay now I’m hungry.)
What to Serve with Loaded Buffalo Fries?
They’re kind of a meal in themselves. But if you’re feeling ambitious (or cooking for more than just yourself on the couch):
-
Ice cold beer
-
Celery sticks (if you want to pretend this is balanced)
-
A green salad with ranch because ranch
-
More dipping sauces—ranch, blue cheese, heck, even BBQ
Frequently Asked Questions:
Can I air fry them?
Yep! They’ll get crispier. Just keep an eye on them. Same toppings apply.
Is there a blue cheese alternative?
Skip it or try feta. Or just use extra cheddar and don’t overthink it.
Do I have to broil them?
Not really. But it melts the cheese faster and gives that little golden edge. Totally worth the extra two minutes.

Honestly? Yeah. Whether you’re feeding a crew on game day, trying to impress absolutely no one (just yourself, and you deserve it), or looking for something loud and satisfying at the end of a long day—these Loaded Buffalo Fries deliver.
They’re messy, spicy, cheesy, slightly unhinged, and deeply comforting. Kinda like the best people, right?
Make ’em your way. Add bacon. Lose the ranch. Skip the fancy garnish. Or go all out and turn them into a whole event.
And if you do? Tag me. Text me. Shout into the void. I wanna know how your version turned out.
Can’t wait to hear what you think.
Keep the Flavor Coming – Try These:


Loaded Buffalo Fries
Ingredients
- 1 32-ounce bag frozen French fries
- 2 tablespoons olive oil
- 1 teaspoon garlic powder
- 1/2 teaspoon salt
- 1/2 teaspoon black pepper
- 1 cup sharp cheddar cheese freshly grated
- 1/4 cup blue cheese crumbled
- 1 cup Buffalo wing sauce e.g., Frank’s RedHot
- 1/4 cup ranch dressing
- Sliced green onions or chives for garnish (optional)
Instructions
Preheat the Oven
- Preheat the oven to 450°F (232°C). Line a large baking sheet with parchment paper to prevent sticking and ensure even browning.
Season the Fries
- In a large mixing bowl, combine the frozen French fries with olive oil, garlic powder, salt, and black pepper. Toss until the fries are evenly coated with the seasoning mixture.
Bake the Fries
- Arrange the seasoned fries in a single layer on the prepared baking sheet. Bake for 25 to 30 minutes, flipping the fries halfway through the cooking time, until they are golden brown and crisp.
Prepare for Broiling
- Remove the fries from the oven and adjust the oven setting to broil on medium-high.
Add Toppings
- While the fries are still hot, evenly sprinkle the shredded cheddar cheese and crumbled blue cheese over the top. Drizzle the Buffalo sauce across the surface of the fries.
Broil to Melt Cheese
- Place the baking sheet under the broiler for 2 to 3 minutes, or until the cheese is fully melted and slightly bubbly. Monitor closely to avoid burning.
Finish and Serve
- Remove from the oven. Immediately drizzle the fries with ranch dressing and garnish with sliced green onions or chives, if using. Serve hot with additional ranch or blue cheese dressing on the side, if desired.
Notes
I’m Bitty, owner of nodashofgluten.com, where I share simple, delicious recipes for all tastes, including gluten-free. Check out my “About Me” page for more info!