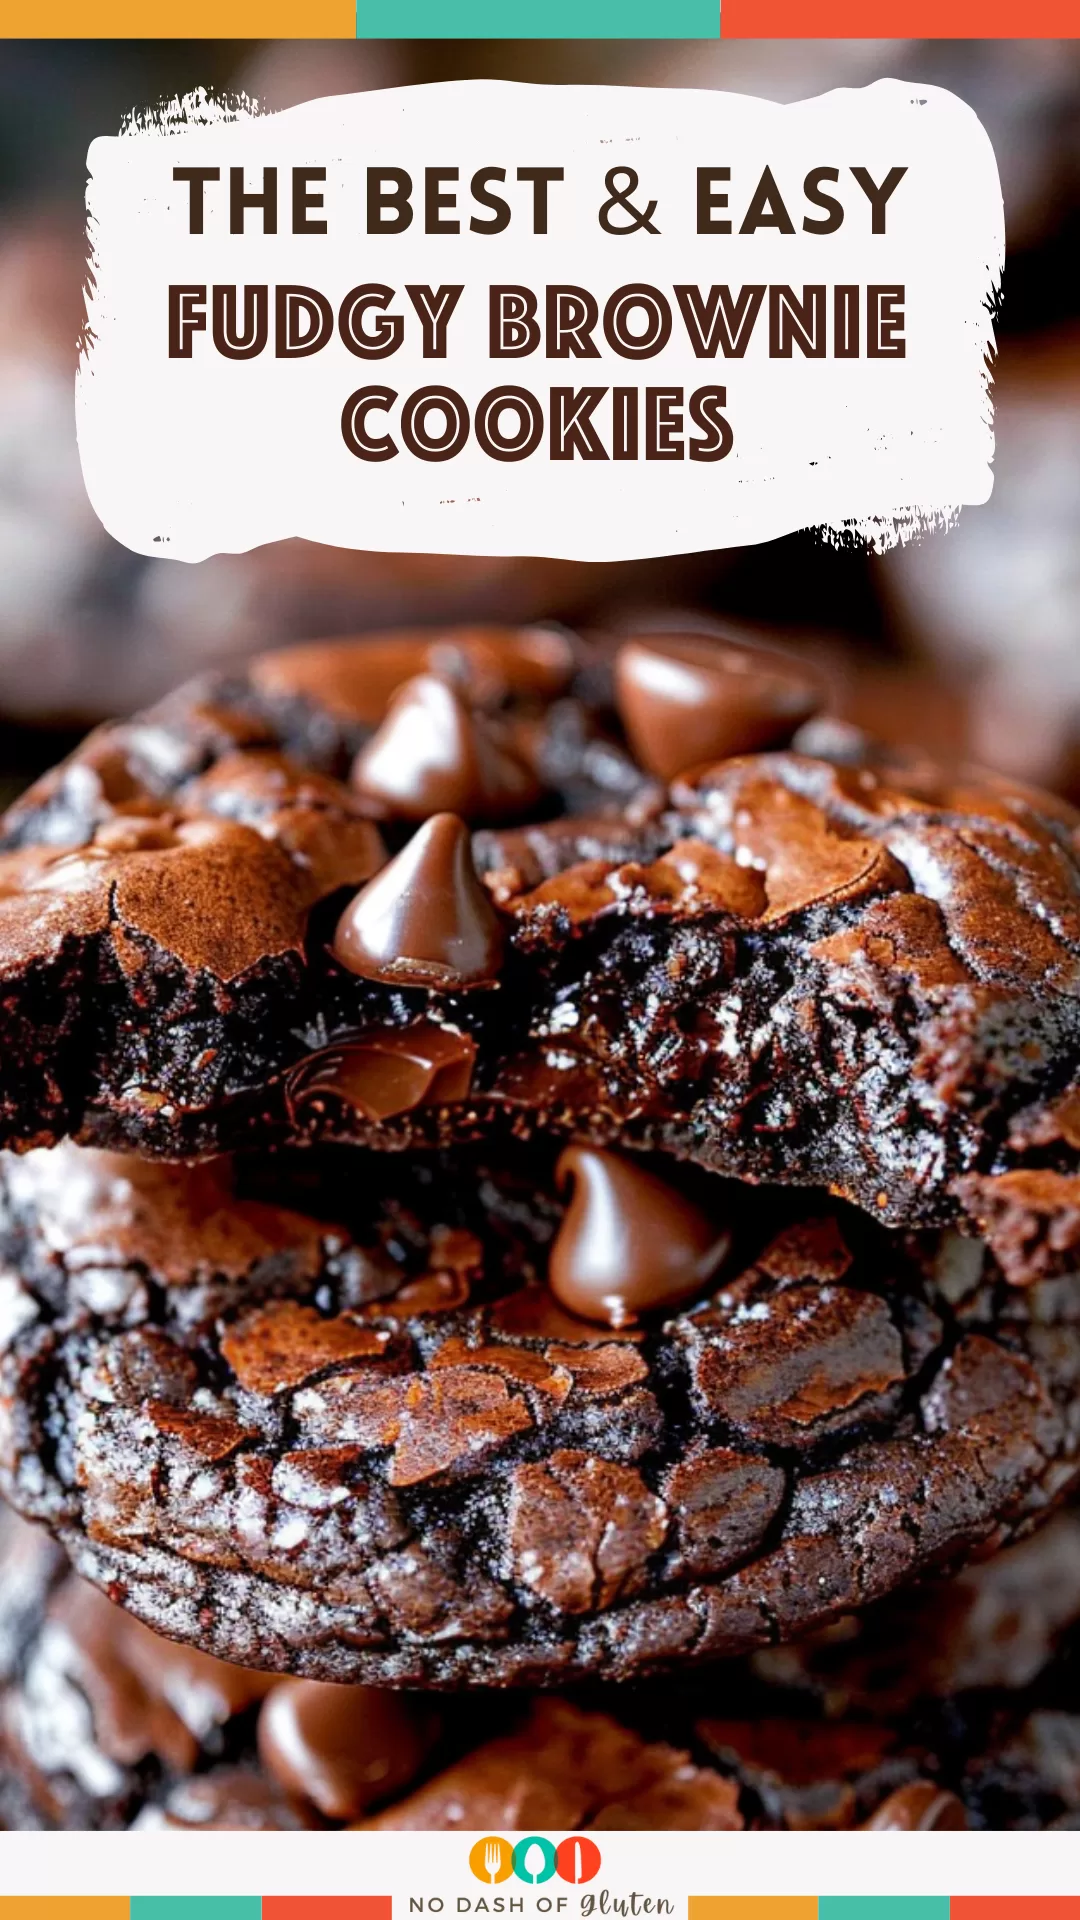
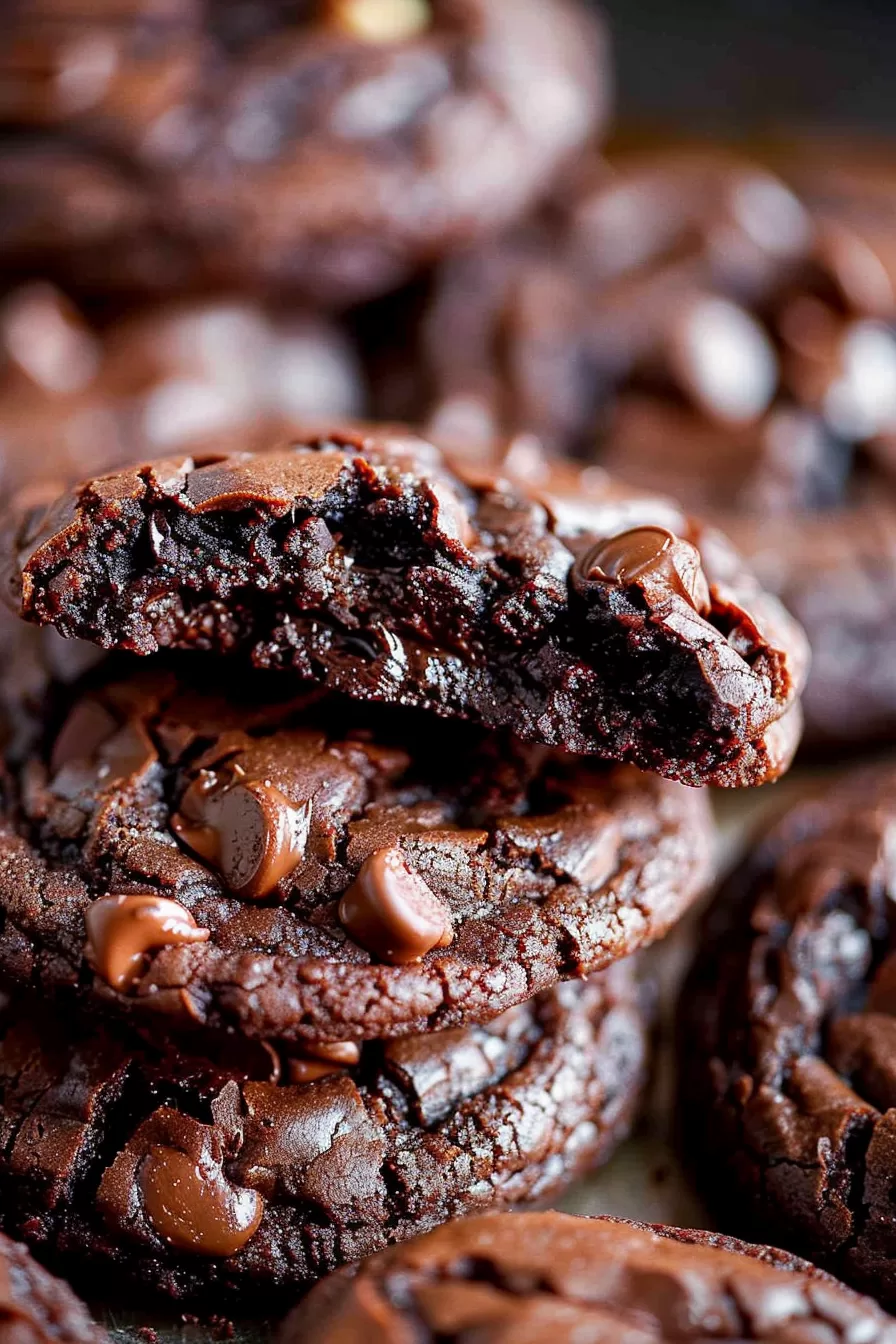
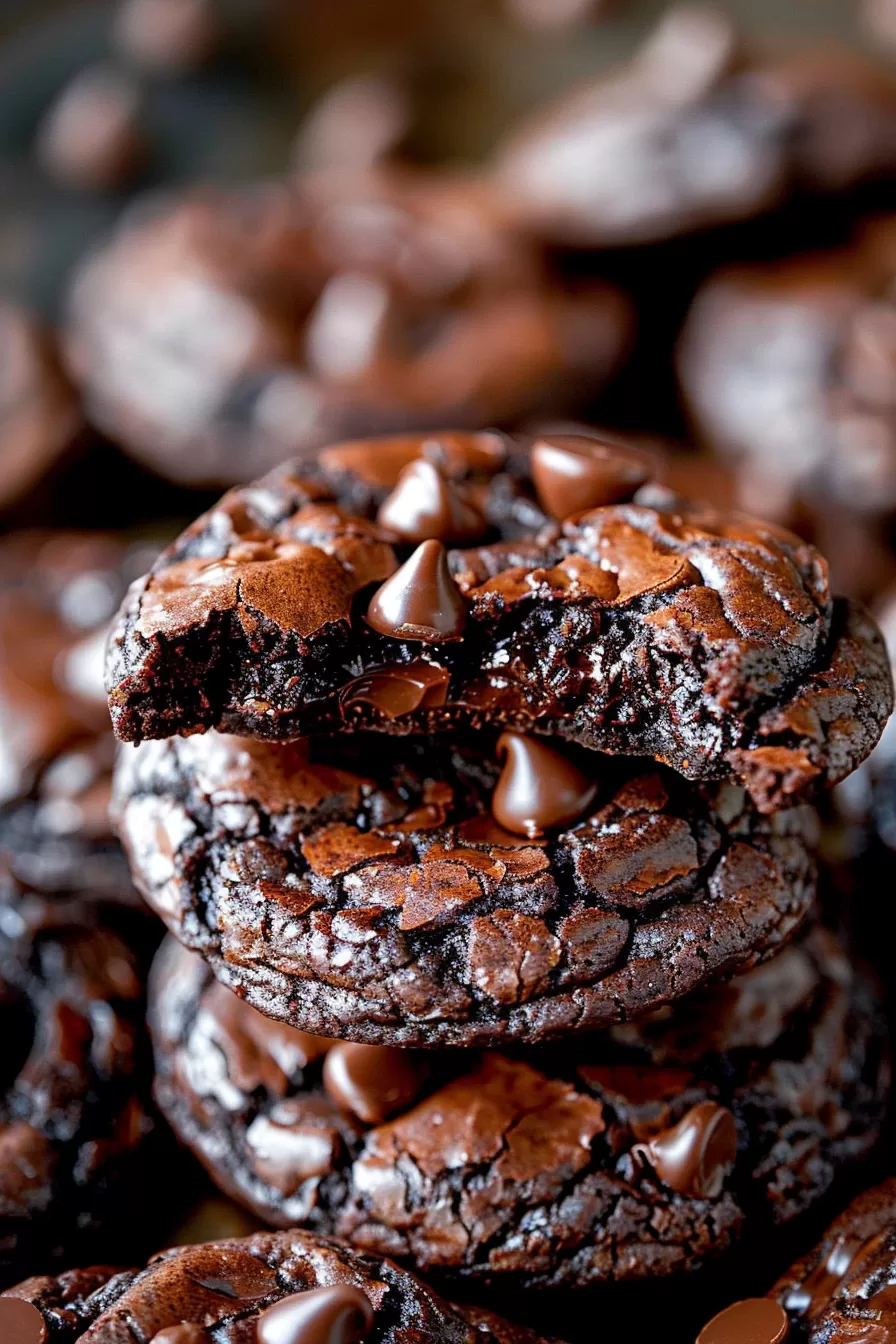
Rich and decadent Fudgy Brownie Cookies made with dark chocolate, cocoa powder, butter, and sugar. Crispy on the edges, gooey in the middle—pure indulgence.
You know those rare moments when you’re hit with a genius idea in the kitchen? That’s how these Fudgy Brownie Cookies came to life. I’d love to say it was a well-thought-out plan, but honestly, it was more of a chocolate emergency.


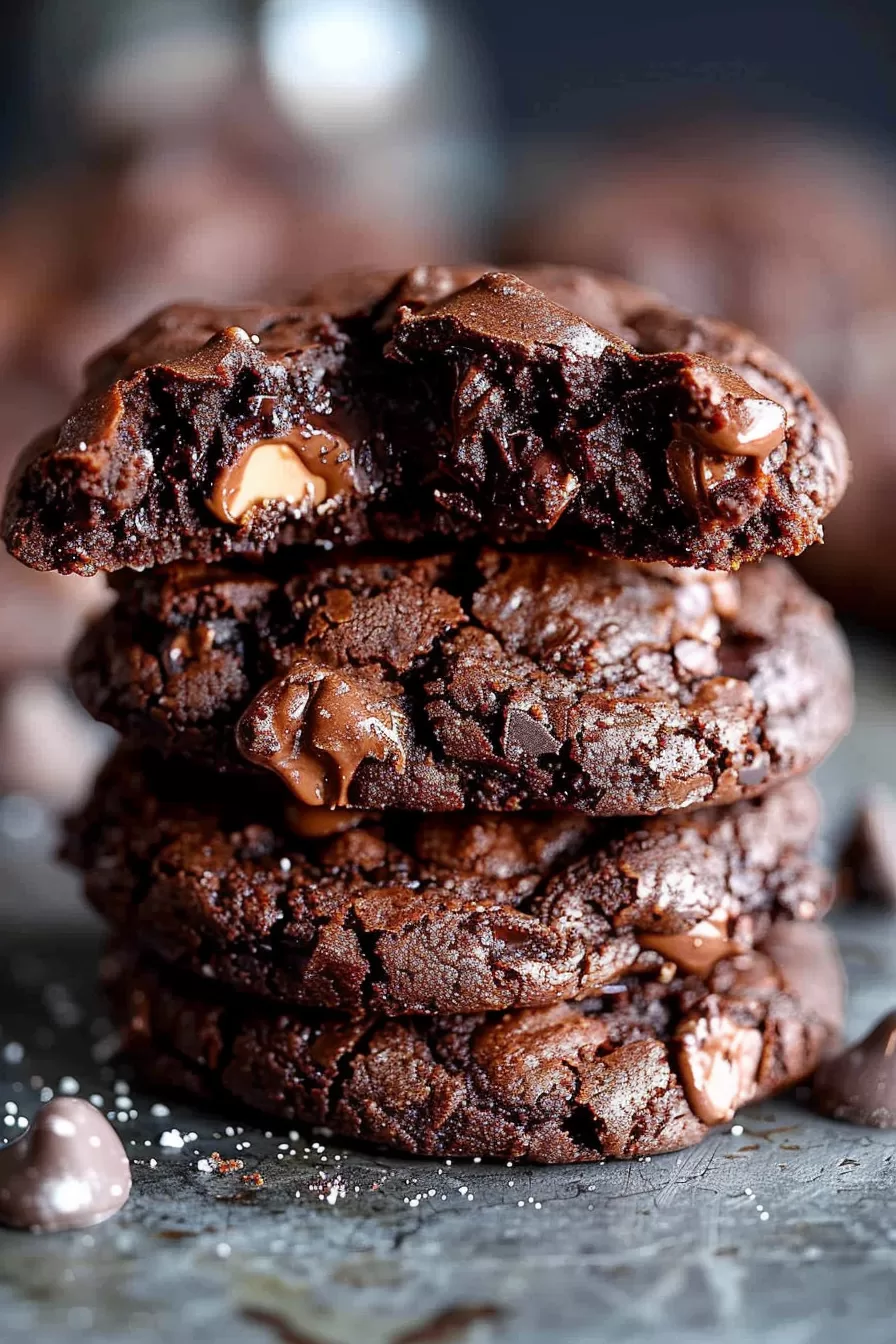
It was a rainy weekend, the kind where all you want is a cozy treat, but I couldn’t decide between brownies or cookies. So, I thought, why not both? The first batch? Total chaos. The batter was too runny, and they turned into one giant cookie blob on the tray. But by batch three (or maybe four?), I’d finally cracked the code. The result? These cookies that are exactly what you’d hope for—crispy edges, a crackly top, and a fudgy, gooey center.
Now, they’re my go-to for everything: family movie nights, last-minute gifts, or just when life calls for chocolate (which is, let’s be honest, pretty often). If you’ve ever been torn between a brownie and a cookie, these are for you.
Why You’ll Love This Fudgy Brownie Cookies Recipe?
- The perfect hybrid: It’s like a brownie and a cookie got together and made the ultimate dessert baby.
- Incredible texture: Crackly on top, chewy in the middle, with just the right amount of crisp on the edges.
- Quick to make: From start to finish, you’re only 30 minutes away from chocolate bliss.
- Guaranteed crowd-pleaser: Whether it’s a party or just a quiet night in, these cookies hit the spot.
Ingredient Notes:
Let’s break down the magic behind these Fudgy Brownie Cookies. Each ingredient plays a key role in making them irresistibly delicious.
- Unsalted Butter: Adds richness and that melt-in-your-mouth texture.
- Dark Chocolate: The real star here. Use a good-quality block for that deep, intense chocolate flavor.
- Brown Sugar: Keeps the cookies moist and adds a subtle caramel undertone.
- Caster Sugar: Helps create that iconic crackly top. If you don’t have it, granulated sugar works, but caster is better.
- Eggs: They bring everything together and give the cookies structure. Room temperature eggs work best.
- Vanilla Extract: Just a teaspoon, but it makes a big difference in enhancing the chocolate flavor.
- Plain Flour: Just enough to hold everything together without losing that fudgy texture.
- Cocoa Powder: Adds an extra layer of chocolatey goodness.
- Baking Powder: Gives a slight lift to the cookies.
- Salt: Balances out the sweetness and makes the chocolate shine.
How To Make Fudgy Brownie Cookies?
These cookies might sound fancy, but they’re surprisingly simple to whip up. Let’s break it down:
- Preheat Your Oven: Start by setting your oven to 170°C (340°F). Line two baking trays with
parchment paper . Trust me, it’ll save you from scrubbing later. - Melt the Chocolate and Butter: Combine the chopped dark chocolate and butter in a microwave-safe bowl. Heat in 30-second bursts, stirring in between, until smooth. Don’t rush this part—burnt chocolate is not what we’re going for.
- Mix the Wet Ingredients: Add the brown sugar, caster sugar, eggs, and vanilla extract to the melted chocolate mixture. Stir until everything’s well combined. It’ll smell amazing already—good luck not licking the spoon.
- Add the Dry Ingredients: Sift in the flour, cocoa powder, baking powder, and salt. Fold everything together gently until you have a thick, glossy batter. It should look like brownie batter—that’s the goal!
- Scoop the Cookies: Use a tablespoon to drop spoonfuls of batter onto the prepared baking trays. Leave enough space between each one because they’ll spread a bit. Don’t stress if they’re not perfect circles—rustic is charming.
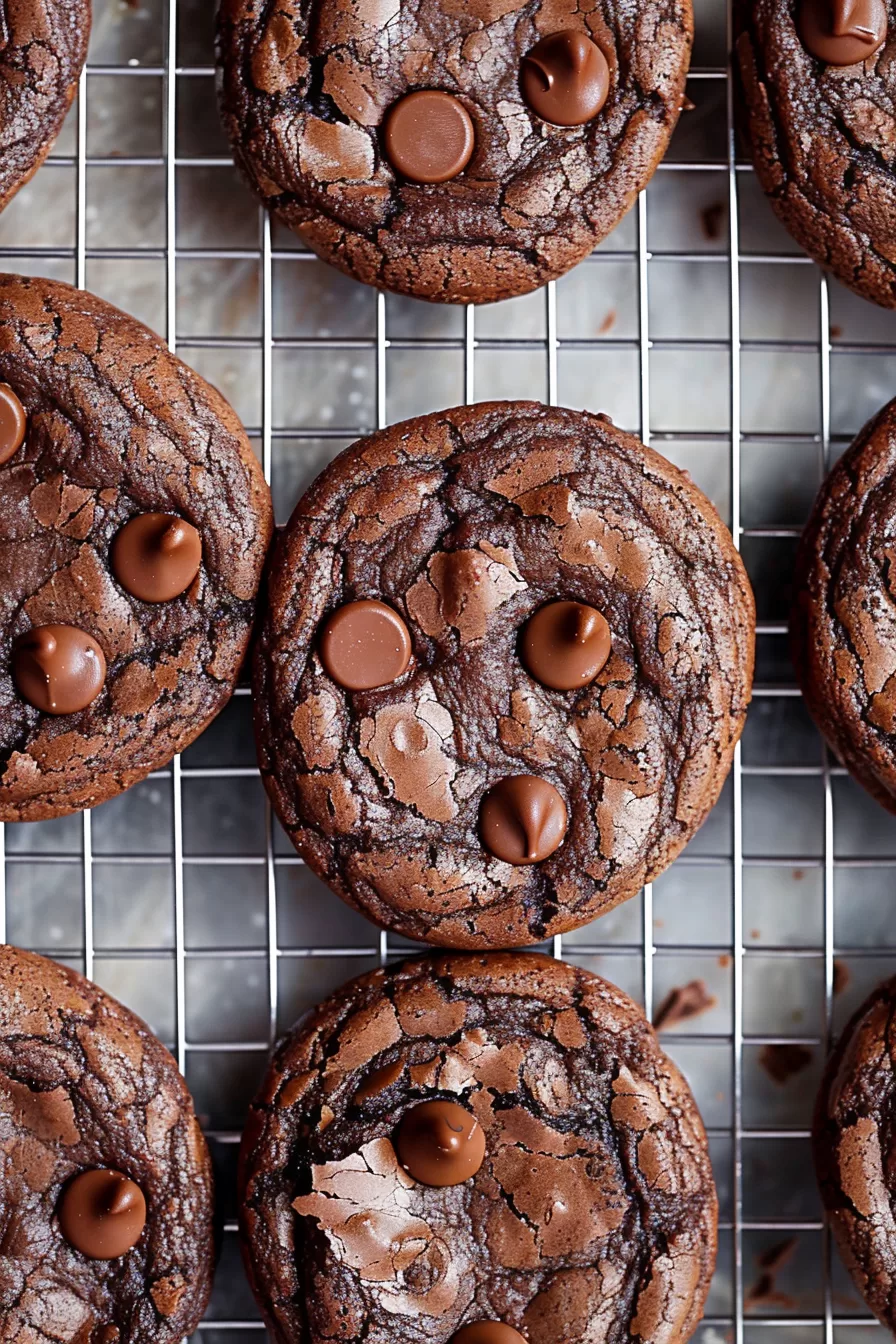
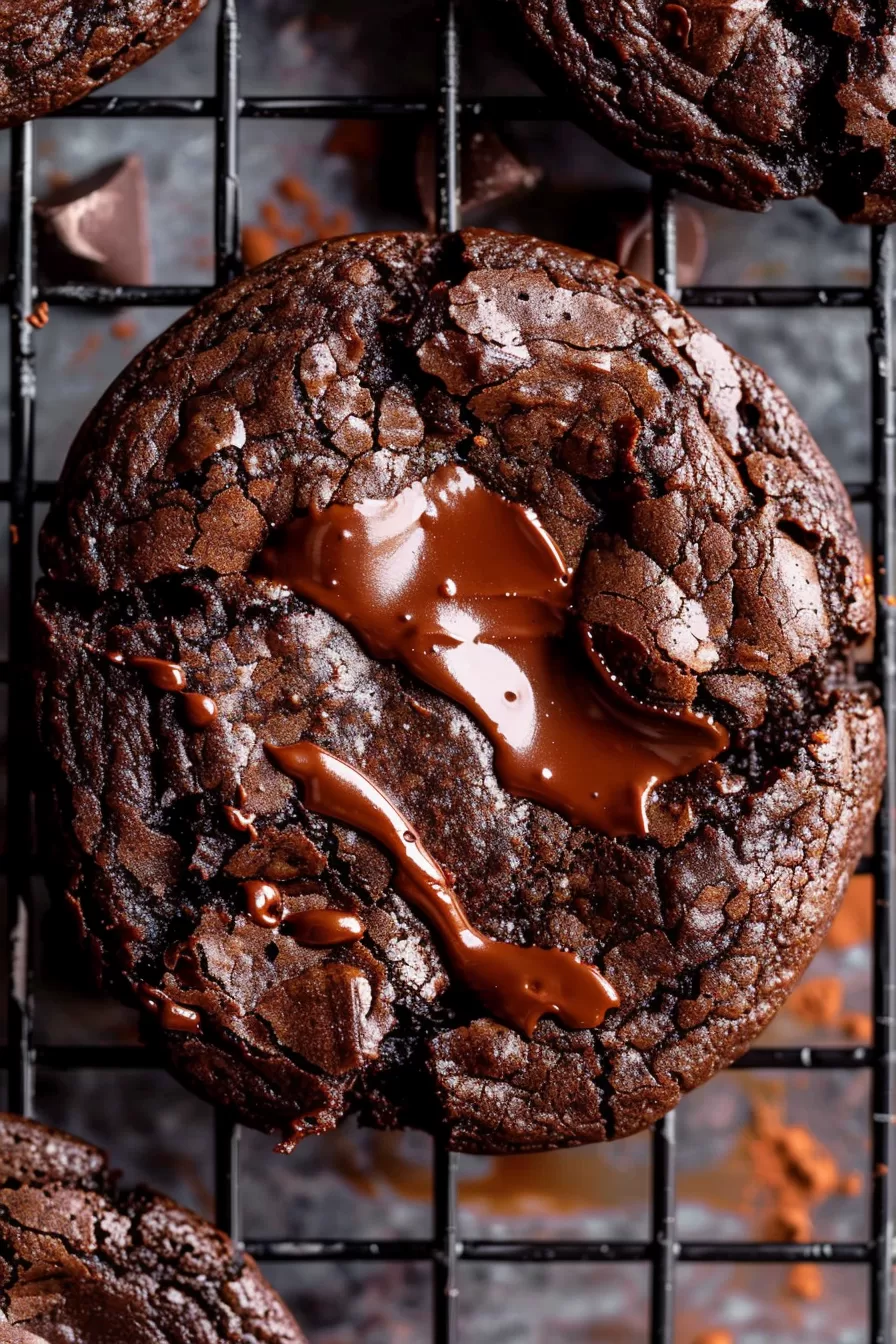
- Bake: Pop them in the oven and bake for 10-12 minutes. Look for crackly tops and slightly soft centers. Resist the urge to overbake—fudgy is the name of the game here.
- Cool and Enjoy: Let the cookies cool on the tray for 10 minutes before transferring them to a wire rack. They’ll firm up as they cool, but the centers will stay perfectly gooey.
Storage Options:
If you somehow don’t eat them all in one sitting (impressive!), here’s how to keep them fresh:
- Room Temperature: Store in an airtight container for up to 5 days. Adding a slice of bread to the container helps keep them soft.
- Freeze: Let the cookies cool completely, then freeze in a single layer on a baking sheet. Once frozen, transfer them to a freezer bag. They’ll keep for up to 2 months. Thaw at room temp when you’re ready for a treat.
Variations and Substitutions:
Want to switch things up? Here are a few fun ideas:
- Add-ins: Toss in some chopped nuts, chocolate chips, or even crushed pretzels for extra texture.
- Spicy Kick: Add a pinch of cayenne or chili powder for a subtle heat that pairs beautifully with the chocolate.
- Gluten-Free: Use a gluten-free all-purpose flour blend. They’ll still be just as fudgy.
- Mint Chocolate: Swap the vanilla for peppermint extract for a festive twist.
- Salted Caramel Drizzle: Once the cookies cool, drizzle caramel sauce on top and sprinkle with flaky sea salt.
What to Serve with Fudgy Brownie Cookies?
These cookies are amazing on their own, but pairing them with something extra takes them to the next level:
Want To Save This Recipe?
- Cold Milk: A classic combo that never fails.
- Ice Cream: Make cookie sandwiches with vanilla or salted caramel ice cream. So indulgent!
- Coffee or Hot Chocolate: Perfect for cozy afternoons or a post-dinner treat.
Frequently Asked Questions:
Can I make the batter ahead of time?
Definitely! You can refrigerate the batter for up to 24 hours. Just let it sit at room temperature for 10-15 minutes before scooping.
Can I use milk chocolate instead of dark chocolate?
You can, but the cookies will be sweeter and less intense. Dark chocolate gives that perfect balance of richness.
My cookies didn’t crackle on top—what happened?
The batter might not have been mixed enough, or the oven wasn’t fully preheated. Try giving the sugars a good stir into the chocolate mixture, and make sure your oven is hot before baking.
So, are you ready to bake the ultimate Fudgy Brownie Cookies? Whether you stick to the recipe or add your own twist, I’d love to hear how they turn out. Got a favorite variation? Share it in the comments—I’m always looking for new ideas.
Keep the Flavor Coming – Try These:

Fudgy Brownie Cookies
Ingredients
- 125 grams 4.5 oz / ½ cup of unsalted butter, roughly chopped
- 200 grams 8 oz of dark chocolate block, roughly chopped
- 1 cup 175 grams of brown sugar, loosely packed
- ½ cup 120 grams of caster sugar / superfine sugar
- 2 large eggs
- 1 tsp 5 grams of vanilla extract
- ½ cup 75 grams of plain flour / all-purpose flour
- ½ cup 50 grams of unsweetened cocoa powder
- 1 tsp 4 grams of baking powder
- ½ tsp 3 grams of salt
Instructions
- Preheat your oven to 170°C (340°F). Line two baking trays, with parchment paper.
- In a heat-proof bowl combine the chopped unsalted butter and dark chocolate. Heat the mixture in the microwave stirring every minute until the chocolate is melted and smooth.
- To the melted chocolate mixture add the sugar, caster sugar, eggs and vanilla extract. Stir well to ensure everything is thoroughly mixed together.
- Incorporate the flour, cocoa powder, baking powder and salt into the mixture. Mix until you have a batter resembling brownie consistency.
- Using a tablespoon drop spoonfuls of batter onto the trays while shaping them into rough circles. Remember to leave some space between each cookie to allow for spreading during baking.
- Bake for 10 to 12 minutes. Until the tops of the cookies crackle. Once done let them cool on the tray for 10 minutes before transferring them to a wire rack for cooling. Enjoy these treats, with their combination of fudgy centers and crispy edges!
Notes
I’m Bitty, owner of nodashofgluten.com, where I share simple, delicious recipes for all tastes, including gluten-free. Check out my “About Me” page for more info!