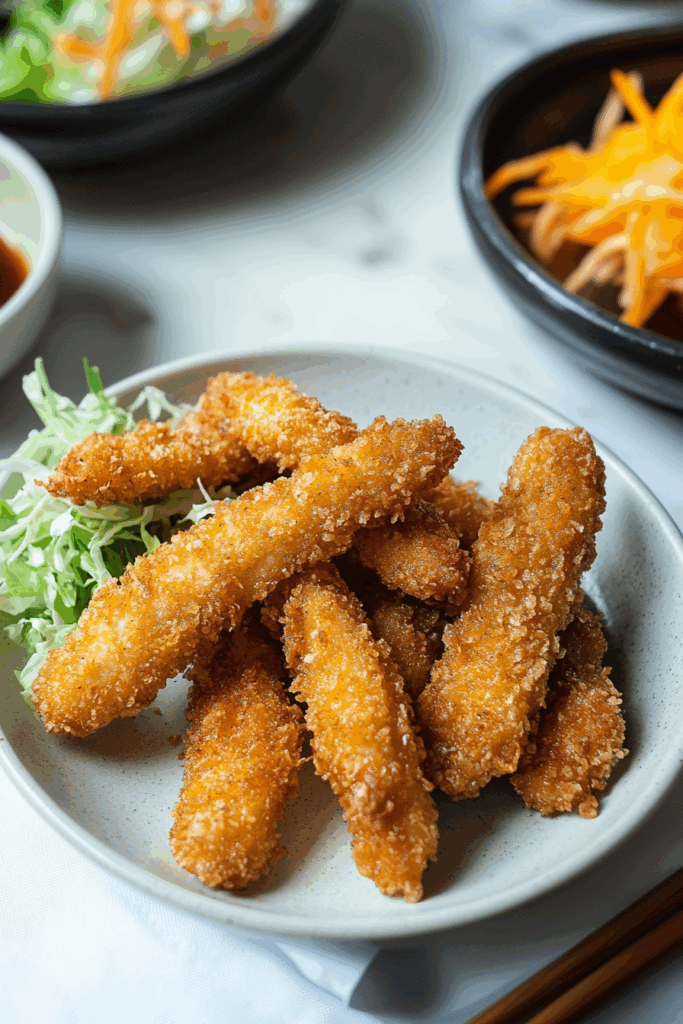
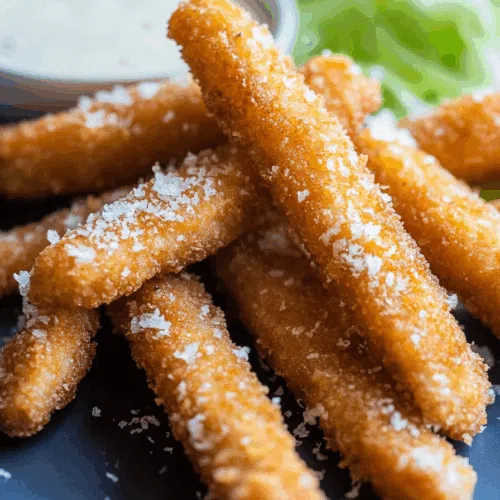
Crispy Chicken Katsu Tenders made with panko, Dijon, eggs, Parmesan, and chicken breasts. Crunchy, juicy, and made for dipping.
I don’t know what it is about chicken tenders, but they’ve followed me through every stage of life—kind of like an embarrassing childhood nickname you eventually grow into and reclaim. When I was a kid, they were my fallback at restaurants. In college, they were the hangover cure of choice. And now, as a full-grown adult with bills and a car that makes weird noises? They’re still my go-to comfort food. Except now I make them myself.
But not just any tenders. I’m talking about Chicken Katsu Tenders—a crispy, golden twist on the classic that came to me after a trip to a neighborhood Japanese diner where the floor creaked and the tea was always way too hot (but comforting, somehow). I ordered a simple katsu curry, and it came with this chicken that was so shatteringly crisp on the outside and ridiculously juicy inside, I honestly thought about canceling the rest of my day to just sit with it. Maybe journal.


Naturally, I came home and messed with the recipe until I had something I could eat with my hands, dip in ranch, and serve to my family without anyone asking, “What is this?”
And this—this is that recipe.
Why You’ll Love This Chicken Katsu Tenders Recipe?
You ever make something that just works every time? Even when you’re distracted or your kid is asking 37 questions about dinosaurs while you’re frying chicken? That’s these Chicken Katsu Tenders.
They’ve got this light, crunchy panko crust with a sneaky bit of Parmesan that gets golden and toasty when you fry it. The batter’s not just eggs—it’s a mix of Dijon, garlic powder, and onion powder too, which sounds like a lot, but it’s easy. And flavorful. So flavorful, it honestly makes me feel like I planned dinner, even when I didn’t.
Also, I love that these feel a little fancy—like you could serve them with a cute side of slaw and rice and pretend you went out for dinner. But also? You can just eat them cold out of the fridge with your fingers while hiding from your responsibilities. Balance.

Ingredient Notes:
I won’t pretend this is a complicated shopping list, because it’s not. That’s part of the charm. But there are a few things I’ve learned along the way—mostly the hard way—that make a difference.
-
Chicken Breasts – I always pound them out under some plastic wrap because 1) it helps them cook evenly and 2) it lets me get out any stress I’ve been holding onto. You know what I mean?
-
Eggs + Flour – The base of the batter. But don’t skip the flour here—it helps thicken things up just enough to make the breadcrumbs stick without sliding off like a sad sweater on a rainy day.
-
Dijon Mustard – I resisted this at first. Felt too…French? But it adds this mellow tang that makes people go, “What’s in this?!” in a good way.
-
Garlic & Onion Powder – I’ve tried it without, and it was fine. But not wow. These add the wow.
-
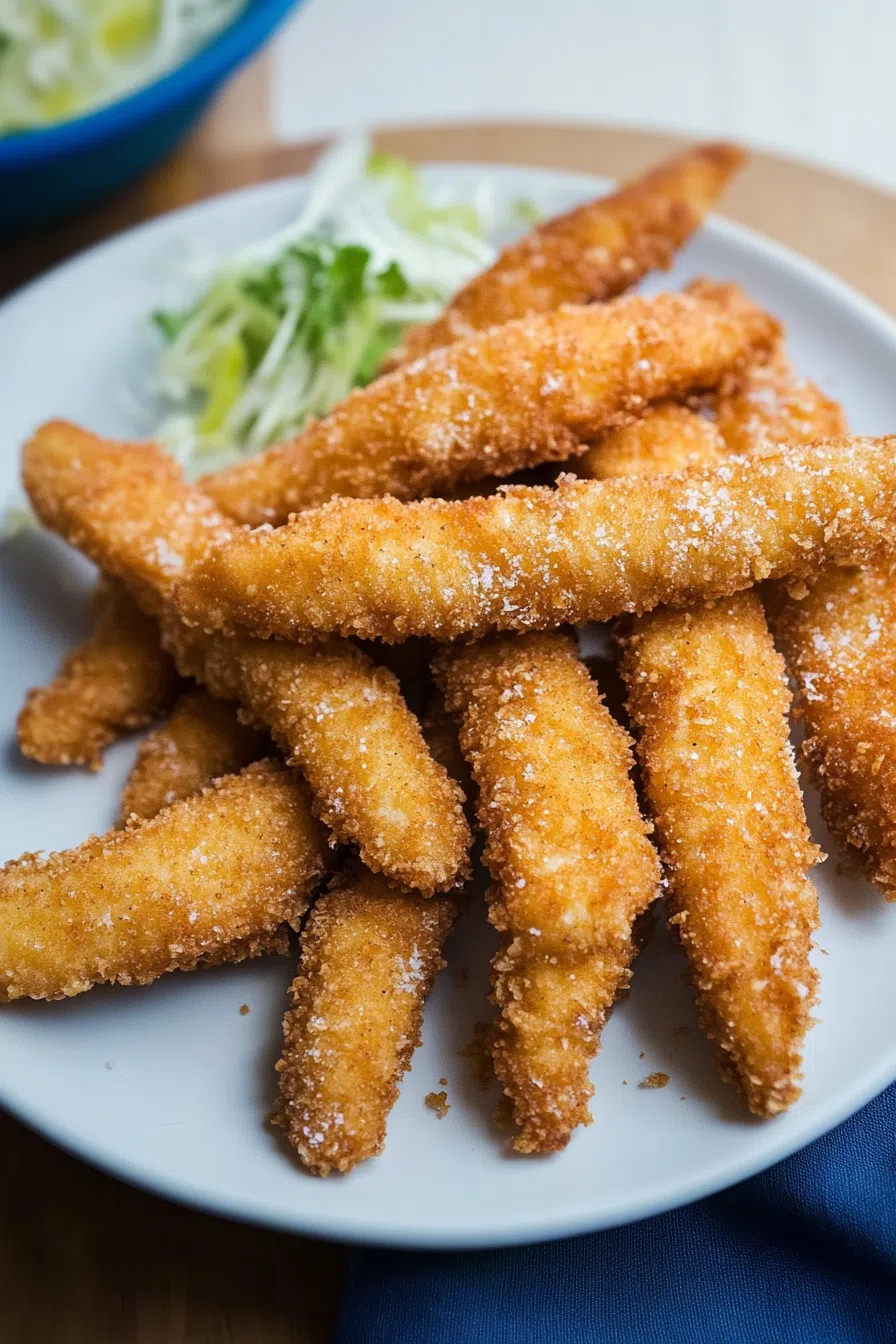
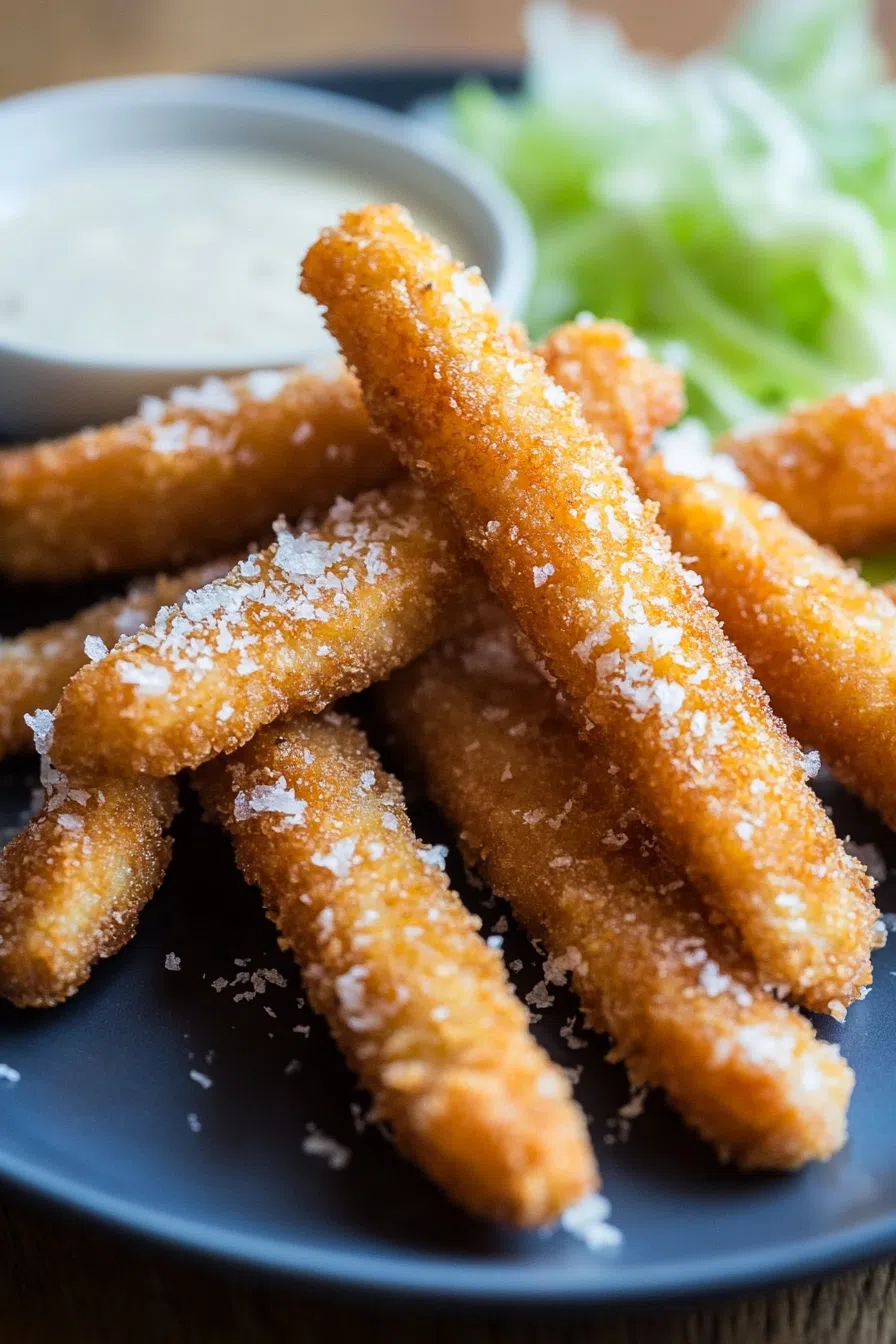
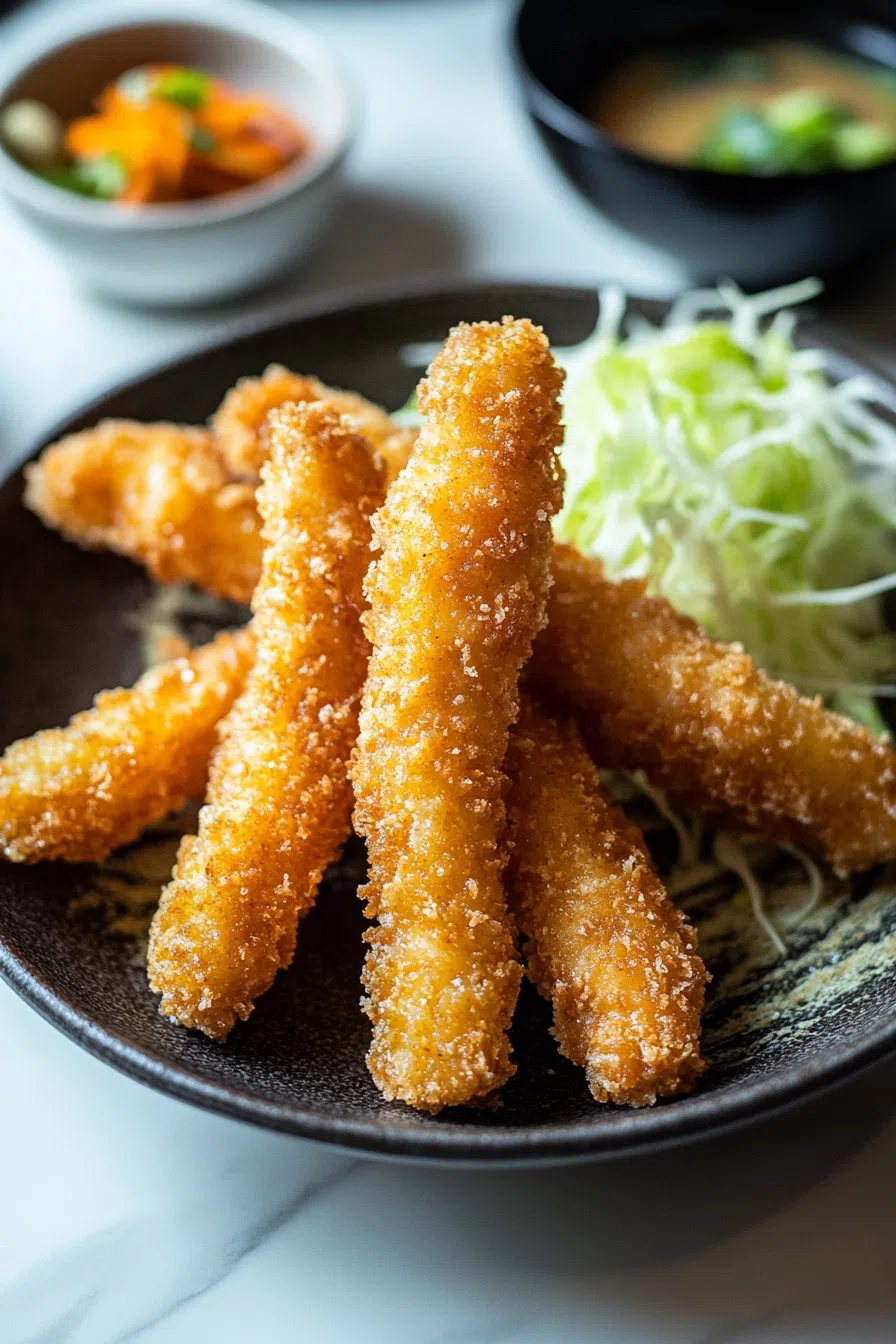
Panko Breadcrumbs – Not up for debate. Regular breadcrumbs get soggy. Panko makes it crisp, like restaurant-style.
-
Parmesan Cheese – A little goes a long way. Adds flavor and helps the crust go that perfect golden-brown.
-
Oil for Frying – I usually use vegetable oil, but you do you. Just make sure it’s hot enough or the crust won’t crisp. (Been there. Still hurts.)
-
Salt + Ranch – The unsung heroes of post-fry happiness.

How To Make Chicken Katsu Tenders?
Step 1: Make your batter
Whisk the eggs, flour, Dijon, garlic powder, and onion powder in a big bowl. It’ll look weirdly thick and lumpy at first—don’t panic. Just keep whisking. You want it kinda smooth but not perfect. This is not soufflé.
Step 2: Mix up the coating
In another bowl, stir together the panko and Parmesan. Break up the clumps with your fingers if you need to. This is the fun part. You can even pretend you’re on a cooking show. I do.
Step 3: Pound and slice
Wrap each chicken breast in plastic wrap and give it a few solid whacks with a meat mallet (or the bottom of a pan if your mallet is MIA like mine usually is). Cut into strips—like big, hearty tenders.
Step 4: Dip and press
Dip each strip into the batter and then press it into the panko-Parmesan coating. Press hard. This isn’t a light dusting—you want full coverage. You want people to hear the crunch from across the room.
Step 5: Heat the oil
Pour about 1 inch of oil into a pan and heat to 350°F. I use a thermometer now because I got tired of guessing and ruining things. If you don’t have one, toss in a breadcrumb—if it sizzles and floats, you’re ready.
Step 6: Fry in batches
Want To Save This Recipe?
Don’t crowd the pan. Fry each piece 3–5 minutes, flipping once. They’ll be golden and crispy and smell amazing. You’ll want to eat one immediately. You’ll burn your mouth. You’ll do it anyway.
Step 7: Drain, salt, serve
Let them hang out on a rack or some paper towels. Sprinkle a little salt while they’re hot. Serve immediately with something to dip in. Or, honestly, nothing at all. They’re that good.
Storage Options:
If by some miracle you have leftovers, stick them in a container in the fridge. Reheat them in the oven or air fryer to get the crisp back. Do not microwave unless you like disappointment.
Freezing? Yup. Let them cool first, then freeze on a tray until solid. Toss into a freezer bag. Reheat from frozen in the oven or air fryer. They’ll taste like you just made them—almost.
Variations and Substitutions:
-
Spicy Version: Add a dash of cayenne to the batter or mix sriracha into your dipping sauce.
-
Air Fryer Option: 400°F, 10–12 minutes, flip halfway. Not as golden but still good.
-
Gluten-Free Friendly: Use a 1:1 gluten-free flour and GF panko. Easy swap.
-
Different Cheese: Pecorino works. Or skip it if you’re dairy-free. It’s still solid.
-
Chicken Thighs: Yes. They’re juicier. Some people prefer them. I switch it up depending on the mood.
What to Serve with Chicken Katsu Tenders?
-
Sticky rice + a drizzle of katsu sauce – because tradition.
-
A shredded cabbage slaw – adds crunch on crunch.
-
Sweet potato fries – balance, right?
-
Japanese curry – it’s indulgent, messy, and absolutely worth it.
-
A cold drink and quiet moment alone – just saying.
Frequently Asked Questions:
Can I make these ahead?
Totally. Bread them in the morning, cover, refrigerate, and fry later. They’ll be even better.
Do I have to fry them?
Not really. Oven or air fryer works, but you’ll miss that deep-fried magic. Sometimes it’s worth it.
How do I know the oil is hot enough?
Breadcrumb test. If it floats and sizzles—go. If it sinks and sulks—wait.
These Chicken Katsu Tenders are more than just dinner. They’re comfort food with a crunchy twist. They’re easy enough for a weeknight, but impressive enough for guests. Or in my case, for eating in sweatpants at 9 p.m. because I forgot to eat dinner.
Make a batch. Make two. Then come back and tell me what you dipped them in. Or what you paired them with. Or if your kid finally ate something without complaining (small wins count).
Can’t wait to hear your take.
Keep the Flavor Coming – Try These:
Chicken Katsu Tenders
Ingredients
- 3 boneless skinless chicken breasts
- 3 large eggs beaten
- ¼ cup all-purpose flour
- 1 teaspoon garlic powder
- 1 teaspoon onion powder
- 1 teaspoon Dijon mustard
- 3 cups panko breadcrumbs
- ½ cup grated Parmesan cheese
- Neutral oil for frying (e.g., vegetable or canola oil)
- Salt to taste
- Ranch dressing or preferred dipping sauce for serving
Instructions
Prepare the Batter
- In a large mixing bowl, whisk together the beaten eggs, all-purpose flour, garlic powder, onion powder, and Dijon mustard. Mix until the batter is smooth and well combined. Set aside.
Mix the Coating
- In a separate shallow bowl, combine the panko breadcrumbs and grated Parmesan cheese. Mix thoroughly to ensure the cheese is evenly distributed throughout the coating.
Pound and Slice the Chicken
- Place each chicken breast between two sheets of plastic wrap or parchment paper. Using a meat mallet or rolling pin, gently pound each breast to an even thickness. Then, slice each breast into thick strips, approximately the size of standard chicken tenders.
Coat the Chicken
- Dip each chicken strip into the prepared egg mixture, ensuring it is fully coated. Then transfer to the breadcrumb mixture and press firmly to adhere the coating. Repeat with all remaining strips and place them on a tray.
Heat the Oil
- Pour approximately 1 inch of oil into a large, heavy-bottomed skillet or deep frying pan. Heat the oil to 350°F (175°C). A kitchen thermometer is recommended, but alternatively, test the temperature by dropping a breadcrumb into the oil—if it sizzles and floats, it is ready.
Fry the Tenders
- Working in batches to avoid overcrowding, carefully place the coated chicken strips into the hot oil. Fry for 3 to 5 minutes, turning once halfway through, or until golden brown and cooked through. Internal temperature should reach 165°F (74°C).
Drain and Serve
- Remove the tenders from the oil and place them on a wire rack or paper towels to drain excess oil. While still hot, season with a light sprinkle of salt. Serve immediately with ranch dressing or your preferred dipping sauce.
Notes
I’m Bitty, owner of nodashofgluten.com, where I share simple, delicious recipes for all tastes, including gluten-free. Check out my “About Me” page for more info!