
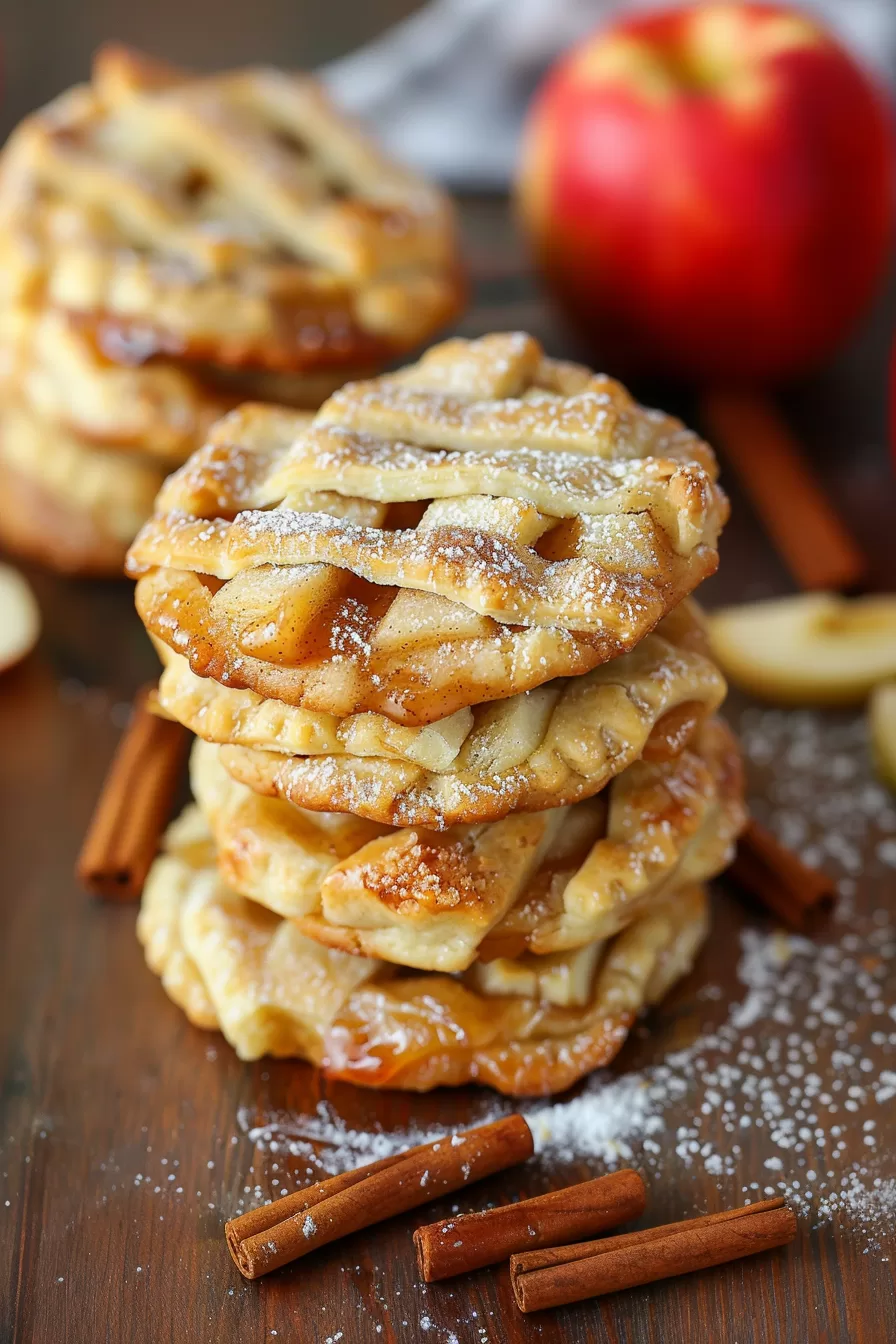
Chewy Apple Pie Cookies – Ever wish you could have apple pie in a cute, bite-sized cookie form? Well, that’s exactly what these Chewy Apple Pie Cookies are all about! Imagine everything you love about apple pie—sweet, spiced apples, flaky crust, and warm cinnamon glaze—all packed into one chewy, adorable cookie. These little guys are perfect for fall gatherings, after-dinner treats, or honestly, just because. And the best part? They’re super easy to make!


The first time I made these, I had a serious apple pie craving but zero patience for rolling out dough, crimping edges, and waiting for an entire pie to bake. I thought, “Why not make a mini version?” My husband and kid love apple pie, so I figured they’d enjoy this twist. Let me tell you, it was a hit! My husband said they tasted exactly like a slice of apple pie, but even better because you get to eat them with your hands. And my kid? He ate three before I even had a chance to sit down. Now, these cookies are a must every fall—quick, cute, and so satisfying!
What makes this Chewy Apple Pie Cookies truly special?
You’re going to love these cookies because they bring all the flavors of a classic apple pie without the hassle. The chewy texture combined with the spiced apple filling is pure comfort food in every bite. Plus, they look pretty darn cute with that lattice top, don’t they? The cinnamon glaze drizzled on top gives it that sweet, bakery-style finish that feels like a warm hug. These cookies are perfect for when you want something special but don’t have the time (or energy) to make an entire pie. Why spend hours on a whole pie when you can have the same flavor in a cookie?

What You Need To Make This Chewy Apple Pie Cookies Recipe?
Apples: I like to use a mix of sweet and tart apples—think Honeycrisp or Granny Smith. It gives the cookies a perfect balance of flavors. Just make sure to dice them small enough so they soften quickly and fit perfectly into your little pie bites!
Brown & White Sugar: The combo of both sugars gives the filling that rich, caramel-like sweetness. Brown sugar adds that deep, molasses-like flavor, while the white sugar helps with caramelization and keeps things light and sweet.
Cinnamon, Nutmeg, Allspice, Cloves: These spices are the heart and soul of this recipe! They add warmth and that cozy, spiced apple pie flavor we all love. Don’t skip the cloves—they give that little extra depth that makes everything pop.
Pie Crust: You can totally use store-bought pie crust for convenience, or if you’re feeling ambitious, go ahead and make your own. Either way, the crust gives that classic apple pie vibe without all the effort.
Cornstarch: This is the thickening agent for the filling. It helps everything come together into that perfect, sticky apple mixture without being runny. Trust me, you don’t want soggy cookies!
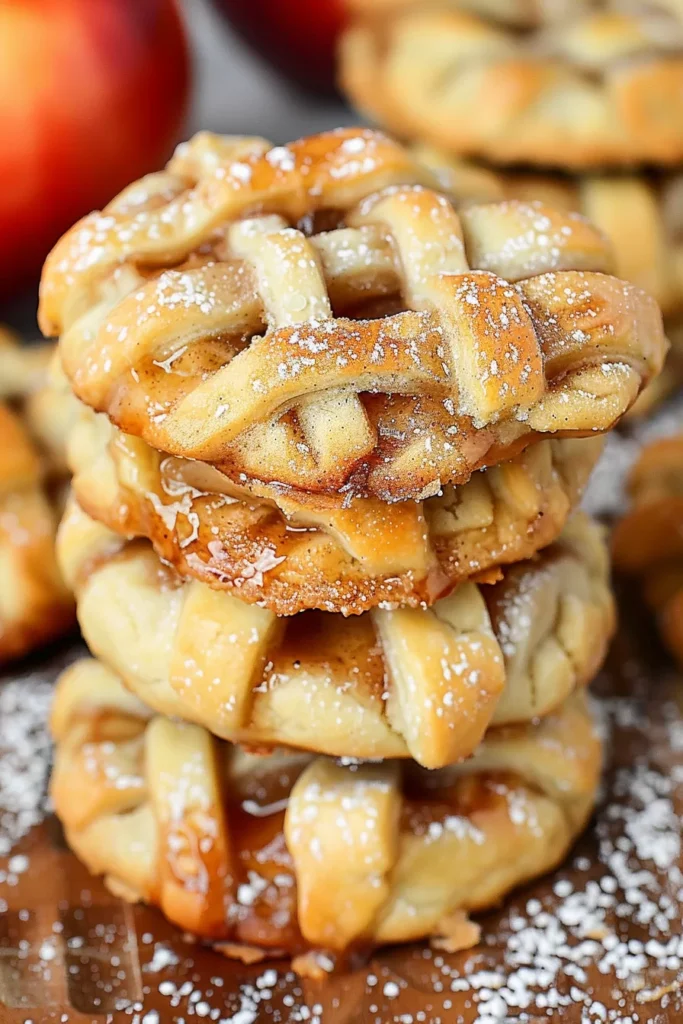
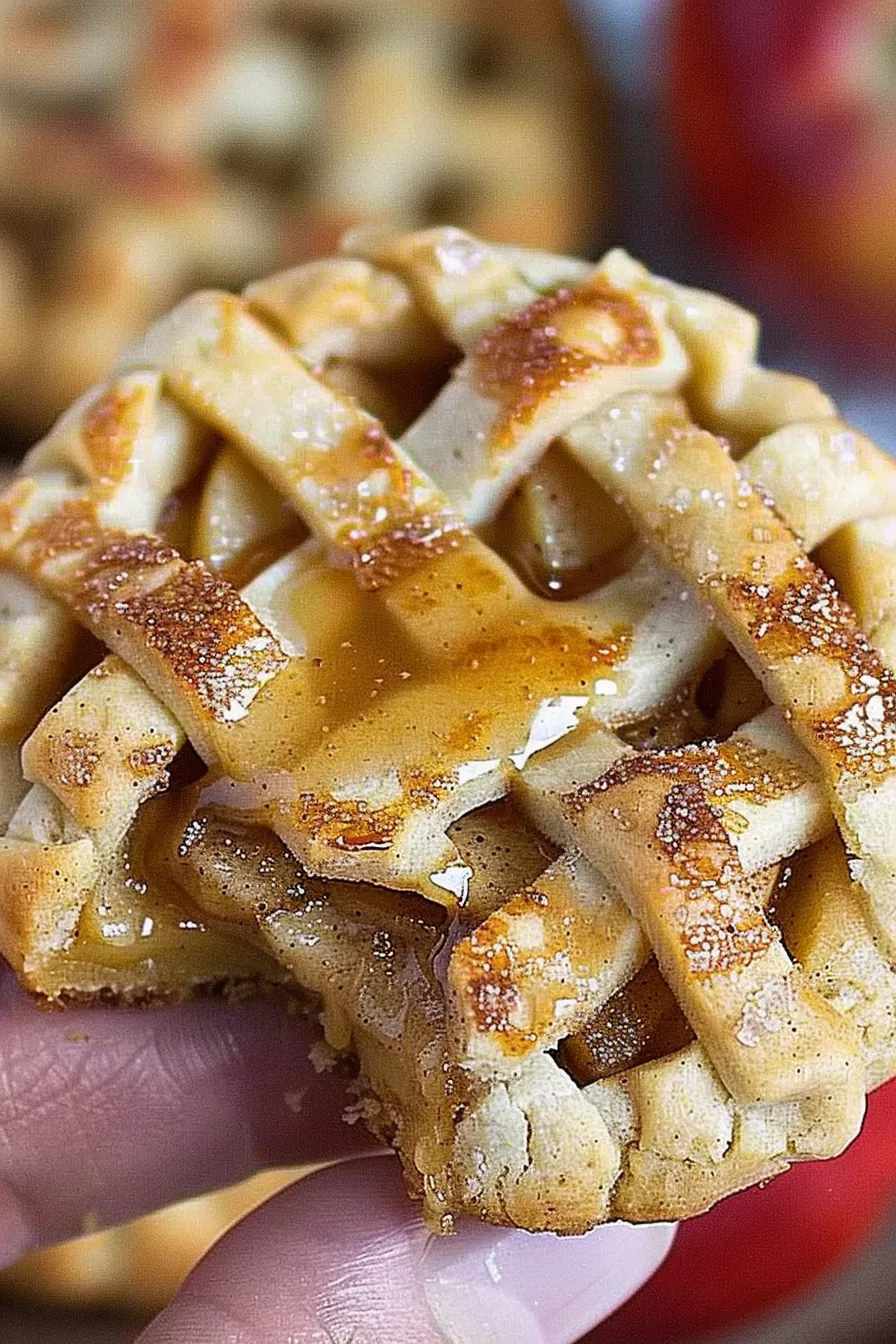
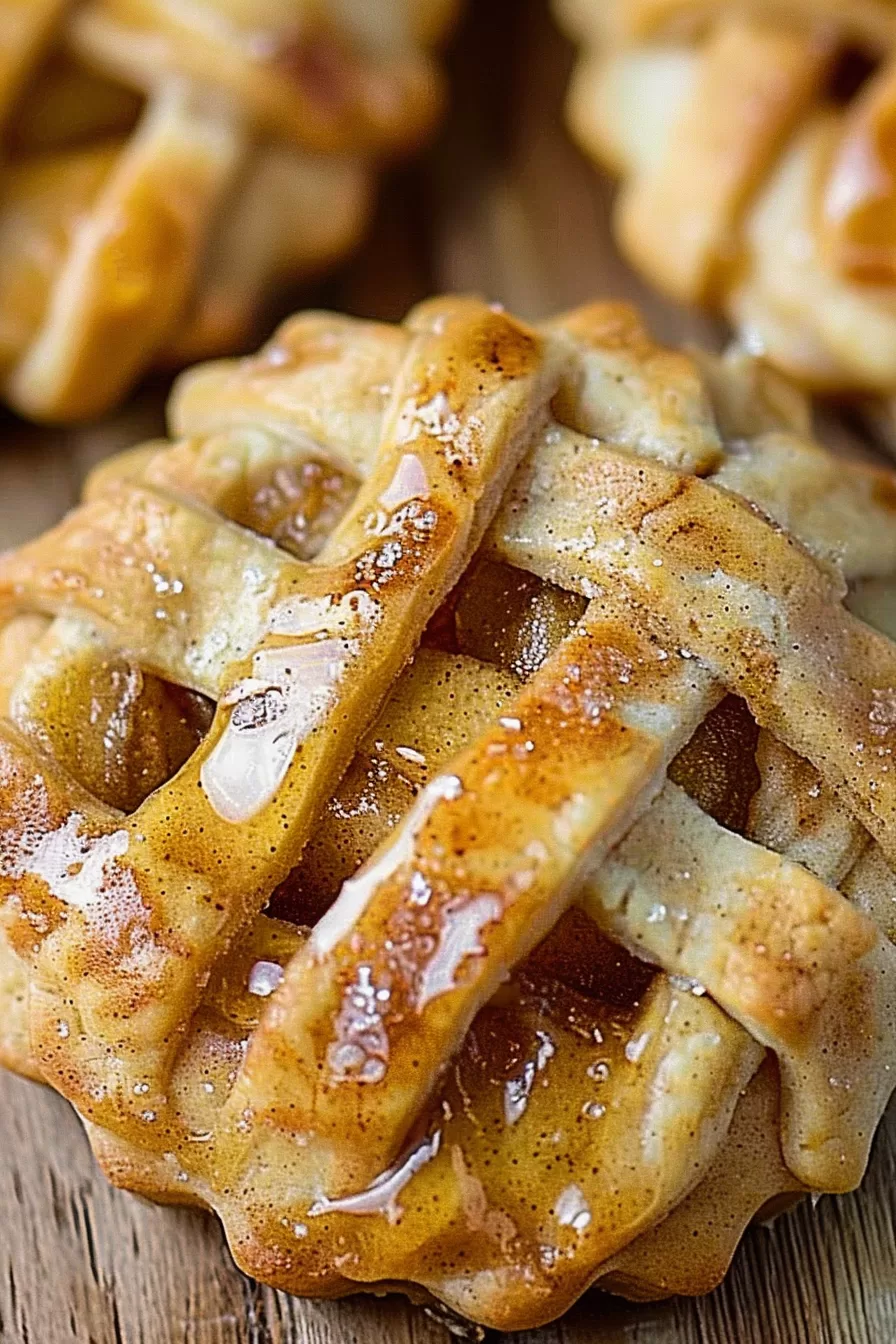
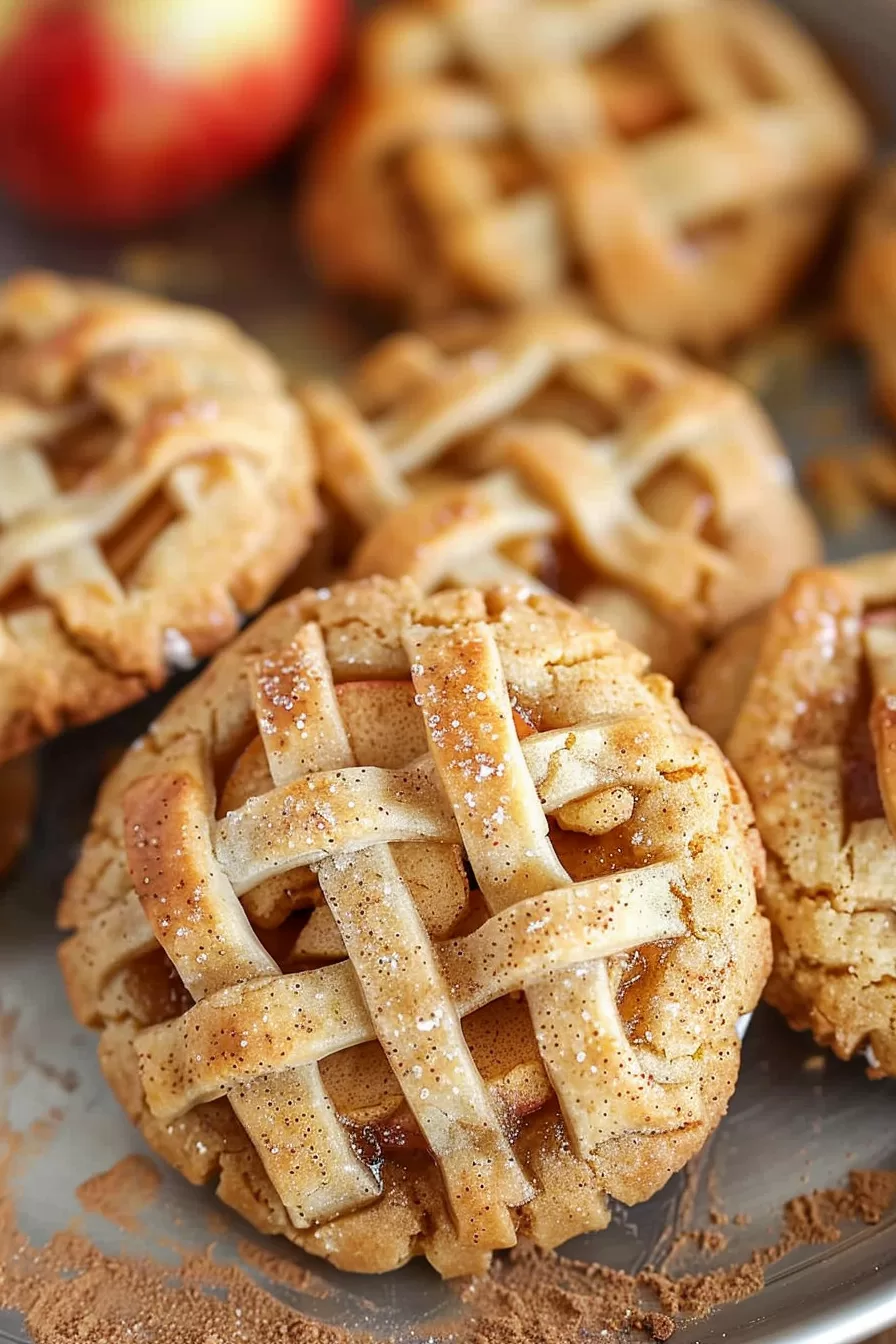
Cinnamon Glaze: A sweet, simple glaze made with powdered sugar, cinnamon, vanilla, and milk. Drizzling this over the cookies makes them look (and taste) like something you’d find in a bakery—seriously, it’s the cherry on top!
Steps To Make Chewy Apple Pie Cookies:
Start by preheating your oven to 350°F (175°C) so it’s ready to go. While that’s heating up, grab a saucepan and melt the butter over medium heat. Once it’s melted, toss in your diced apples and give them a good stir so they’re all coated in that buttery goodness.
Now, add in your brown sugar, white sugar, lemon juice, cinnamon, vanilla extract, salt, nutmeg, allspice, and cloves. Keep stirring while the apples soften and the sugars melt into a sweet, sticky sauce—it’ll smell amazing. This should only take about 5 minutes, and you want to bring it to a gentle boil.
In a small bowl, mix the water and cornstarch together, then stir it into your apple mixture. This is going to help thicken everything up. Let it cook for another 5 minutes, stirring the whole time, until it’s nice and thick. Then, take it off the heat and let it cool for about 20 minutes.
While that’s cooling, roll out one of your pie crusts on a floured surface. Spread half of the cooled apple mixture over it. Now, roll out the second pie crust and slice it into strips about ½-inch wide. Here comes the fun part—lay the strips over the apple mixture to create a lattice top, like a mini pie!
Using a round cookie cutter or even a drinking glass, cut out little pie-shaped rounds. You should get about 12. Transfer them to a baking sheet, and pop them in the oven for about 20 minutes, or until the crust is golden brown.
Want To Save This Recipe?
While those are baking, repeat the process with the remaining pie crust and apple filling. Once your first batch is done, let them cool on a wire rack for about 10 minutes.
Finally, whisk together the confectioners’ sugar, cinnamon, vanilla, and milk to make that delicious glaze. Once your cookies have cooled a bit, drizzle it over the top. And there you go—your chewy, apple pie cookies are ready to be devoured!
Tip:
If you want to take these Chewy Apple Pie Cookies up a notch, here’s a little secret: use a mix of apples! Combining sweet apples like Fuji with tart ones like Granny Smith gives your filling a perfect balance of flavors. Another tip? Make the filling a day ahead and let it chill in the fridge overnight. This not only enhances the flavor but also makes it easier to handle when you’re ready to assemble. And don’t forget—before you bake, brush the tops with a little melted butter. It helps give the cookies a beautiful golden color and a buttery finish that takes them over the top!
Frequently Asked Questions:
Can I use pre-made pie crust for these cookies?
Absolutely! Store-bought pie crust is a total time-saver and works perfectly for this recipe. It gives you that classic pie texture without all the effort. But if you’re in the mood to make your own, homemade pie crust will definitely add a personal touch.
What’s the best way to store these cookies?
Once they’ve cooled completely, you can store them in an airtight container at room temperature for about 2-3 days. If you want to keep them longer, pop them in the fridge—they’ll stay fresh for up to a week. Just warm them up a bit before eating to bring back that fresh-baked taste!
Can I freeze these cookies?
Yes, you can! After baking and cooling, place the cookies in a single layer on a baking sheet and freeze until firm. Then transfer them to a freezer-safe bag or container. They’ll last for up to a month. To enjoy, just let them thaw at room temperature or warm them up in the oven.
Keep the Flavor Coming – Try These:


Chewy Apple Pie Cookies
Ingredients
- ¼ c butter
- 4 apples peeled and diced into ¼-inch cubes
- ½ c brown sugar
- ¼ c white sugar
- 1 ½ tsp lemon juice
- 1 ½ tsp ground cinnamon
- ½ tsp vanilla extract
- ¼ tsp salt
- ¼ tsp ground nutmeg
- ¼ tsp ground allspice
- ⅛ tsp ground cloves
- 2 tbsp water
- 1 tbsp cornstarch
- 4 sheets pie crust pastries
- 1 tsp all-purpose flour
Cinnamon Glaze:
- ¾ c confectioners' sugar
- 1 tsp ground cinnamon
- 1 tsp vanilla extract
- 1 ½ tbsp milk
Instructions
- Start by preheating your oven to 350°F (175°C) so it’s ready to go when you are. In the meantime, melt the butter in a saucepan over medium heat. Once the butter is melted, toss in the diced apples and give them a stir so they’re nicely coated. Now, add in the brown sugar, white sugar, lemon juice, cinnamon, vanilla, salt, nutmeg, allspice, and cloves. Stir everything together, letting the apples soften and the sugars melt into a delicious sauce—this should take about 5 minutes. Bring it to a gentle boil.
- In a small bowl, mix the water and cornstarch together until smooth, then stir that into the apple mixture. Keep cooking and stirring for another 5 minutes until the mixture thickens up nicely. Once it’s done, take it off the heat and let it cool completely, which should take about 20 minutes.
- While the apple mixture is cooling, roll out one sheet of pie crust on your work surface. Spread half of the cooled apple filling evenly on top. Then, roll out the second sheet of pie crust and cut it into ½-inch wide strips. Lay the strips over the filling in a crisscross pattern to create a lattice top.
- Next, grab a round cookie cutter (or even a drinking glass works!) and press it through the dough to cut out 12 little pie rounds. Transfer them to a baking sheet.
- Bake for about 20 minutes, or until the crust is golden brown and cooked through. Once done, move the pies to a wire rack and let them cool for about 10 minutes.
- Now, repeat the process with the remaining pie crusts and apple filling. Bake those for another 20 minutes, until golden brown, and let them cool as well.
- For the finishing touch, mix the confectioners' sugar, cinnamon, vanilla, and milk together in a bowl. Drizzle this cinnamon glaze over the cooled pies, and you’re all set!
Notes
I’m Bitty, owner of nodashofgluten.com, where I share simple, delicious recipes for all tastes, including gluten-free. Check out my “About Me” page for more info!

