
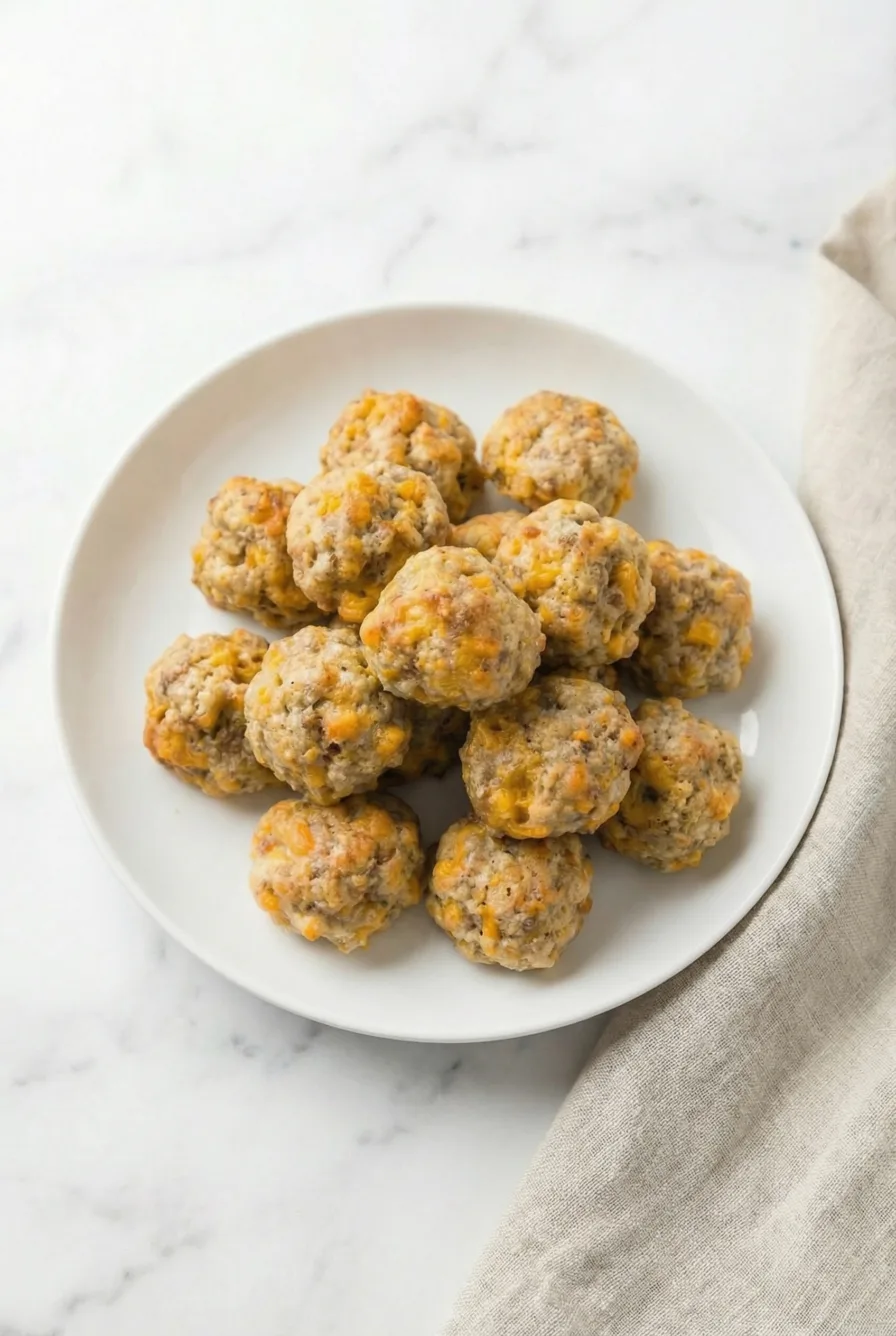

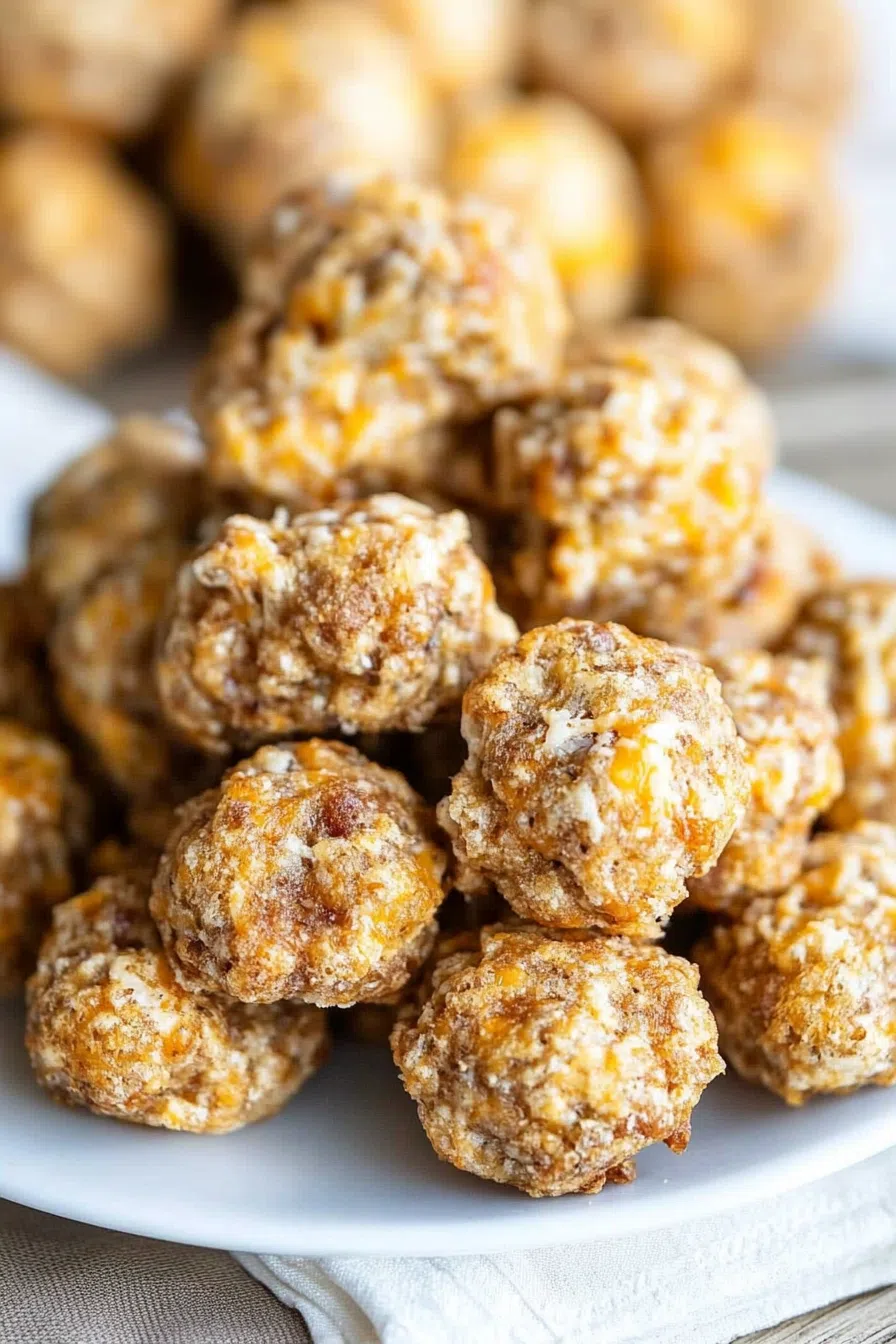
These Cheddar Bay Sausage Balls combine Red Lobster’s famous biscuit mix, creamy cheese, and savory sausage into an irresistible, easy-to-make snack!
You know that feeling when you sit down at Red Lobster, and before you even glance at the menu, the server drops a basket of warm, buttery Cheddar Bay Biscuits on the table? Yeah, that moment is pure happiness.
Now, imagine taking that cheesy, garlicky goodness and adding spicy sausage to the mix. That’s how these Cheddar Bay Sausage Balls were born.


The first time I made these, it was for a holiday party. I figured they’d be a nice little appetizer—something people could snack on before dinner. Well, let’s just say I drastically underestimated how fast they’d disappear. The entire batch was gone before I even got a second bite! Lesson learned: always make extra.
Now, these are a go-to for everything from game day snacks to brunch spreads. And honestly? Sometimes I make a batch just for myself and eat them straight from the pan. No regrets.
Why You’ll Love This Cheddar Bay Sausage Balls Recipe?
- Ridiculously Easy – Only 4 ingredients, minimal prep, and baked in under 20 minutes.
- Cheesy, Savory, and Irresistible – Think of them as biscuit-meets-breakfast-sausage-meets-cheese heaven.
- Great for Any Occasion – Party appetizer? Check. Breakfast? Yep. Late-night snack? Absolutely.
- Make-Ahead Friendly – Prep the dough, store it, and bake when ready.
Ingredient Notes:
What makes these sausage balls so good? The right mix of ingredients:
- Red Lobster Cheddar Bay Biscuit Mix – The MVP of this recipe. It adds that iconic, cheesy, buttery, garlicky flavor we all love.
If you’ve ever tried the legendary Red Lobster biscuits, you’ll know exactly the flavor I’m talking about; they’re utterly crave-worthy! Swapping out the usual Bisquick for this biscuit mix takes sausage balls to a whole new level of deliciousness. Plus, the mix comes with a convenient garlic and herb seasoning packet, so you get all that wonderful flavor in one easy step.
- Sausage – I usually go with classic pork sausage, but you can swap in turkey sausage, spicy chorizo, or even plant-based sausage.
- Cream Cheese – This keeps them soft and moist. (Ever had a dry sausage ball? Not fun.)
- Shredded Cheddar Cheese – More cheese = better. End of discussion.
Where to Find Red Lobster Cheddar Bay Biscuit Mix
Wondering where to snag that magical Cheddar Bay Biscuit Mix? You’re in luck, it’s surprisingly easy to find. Most big grocery stores carry it, including Kroger, Walmart, and Target. I’ve also spotted it at plenty of local supermarkets and even on Amazon for those late-night cravings or last-minute party plans. Just check the baking aisle, usually near other boxed mixes and cornbread.
Why Soften the Cream Cheese?
Here’s the secret to guaranteed soft, pillowy sausage balls: let your cream cheese come to room temperature before mixing. Softened cream cheese is way easier to blend with the biscuit mix, sausage, and cheddar, so you won’t end up with weird cheesy lumps or pockets. Plus, it helps everything stick together nicely, holding each ball in shape and ensuring they stay tender (not dry!) after baking.
So, don’t skip this step! Set the cream cheese out while you gather your ingredients—your future snack-loving self will thank you.

How To Make Cheddar Bay Sausage Balls?
Step 1: Preheat & Prep
Preheat your oven to 400°F (200°C). Line a baking sheet with parchment paper for easy cleanup.
What You’ll Need
Before we dive in, make sure you’ve got:
- Mixing bowls (big enough for enthusiastic stirring)
- Electric mixer or stand mixer (or just your own biceps)
- Baking sheet pan
- Parchment paper (or Silicone baking mat)
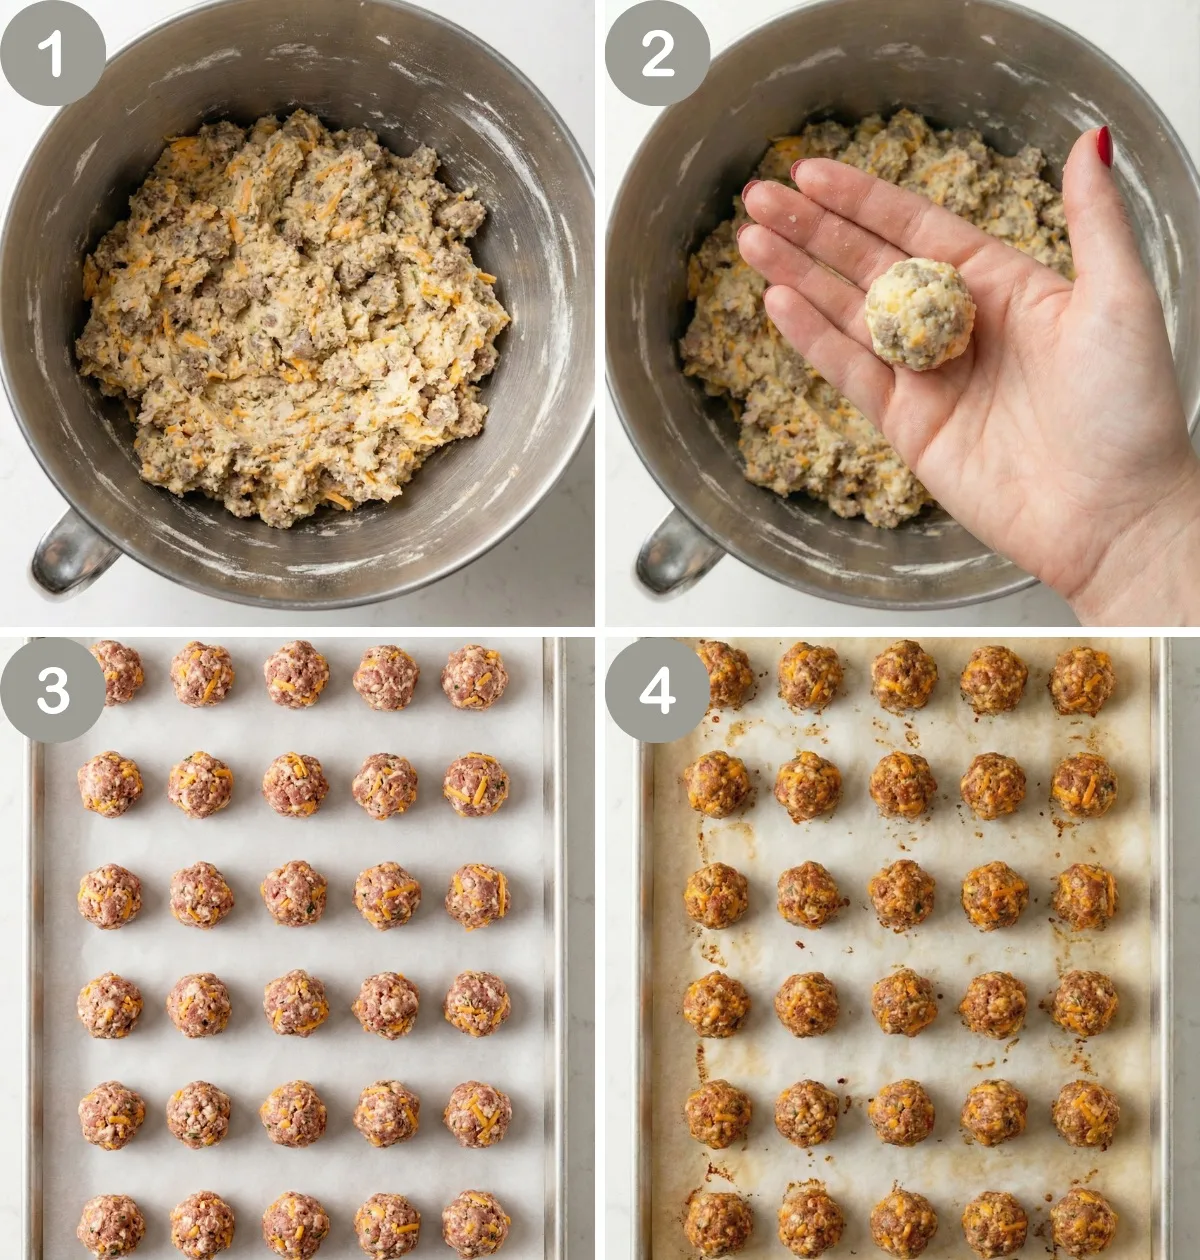
Step 2: Mix the Dough
In a stand mixer (or a big bowl with some elbow grease), combine:
- 1 package Red Lobster Cheddar Bay Biscuit Mix (including the seasoning packet!)
- 1 pound uncooked sausage
- 1 package (8 oz) softened cream cheese
- 1 ¼ cups shredded cheddar cheese
Mix everything until it forms a thick, sticky dough. It won’t look fancy, but trust me—it’s delicious.
Step 3: Roll Into Balls
Use your hands or a cookie scoop to shape the dough into 1-inch balls. Place them evenly on the prepared baking sheet. I like to keep these sausage balls on the smaller side for that perfect, poppable bite, but if you’re feeling bold and want to go bigger, just make sure to leave a little extra space between each one and add a few more minutes to the bake time; larger sausage balls may need at least 20 minutes in the oven to cook through.
Want To Save This Recipe?
Step 4: Bake to Perfection
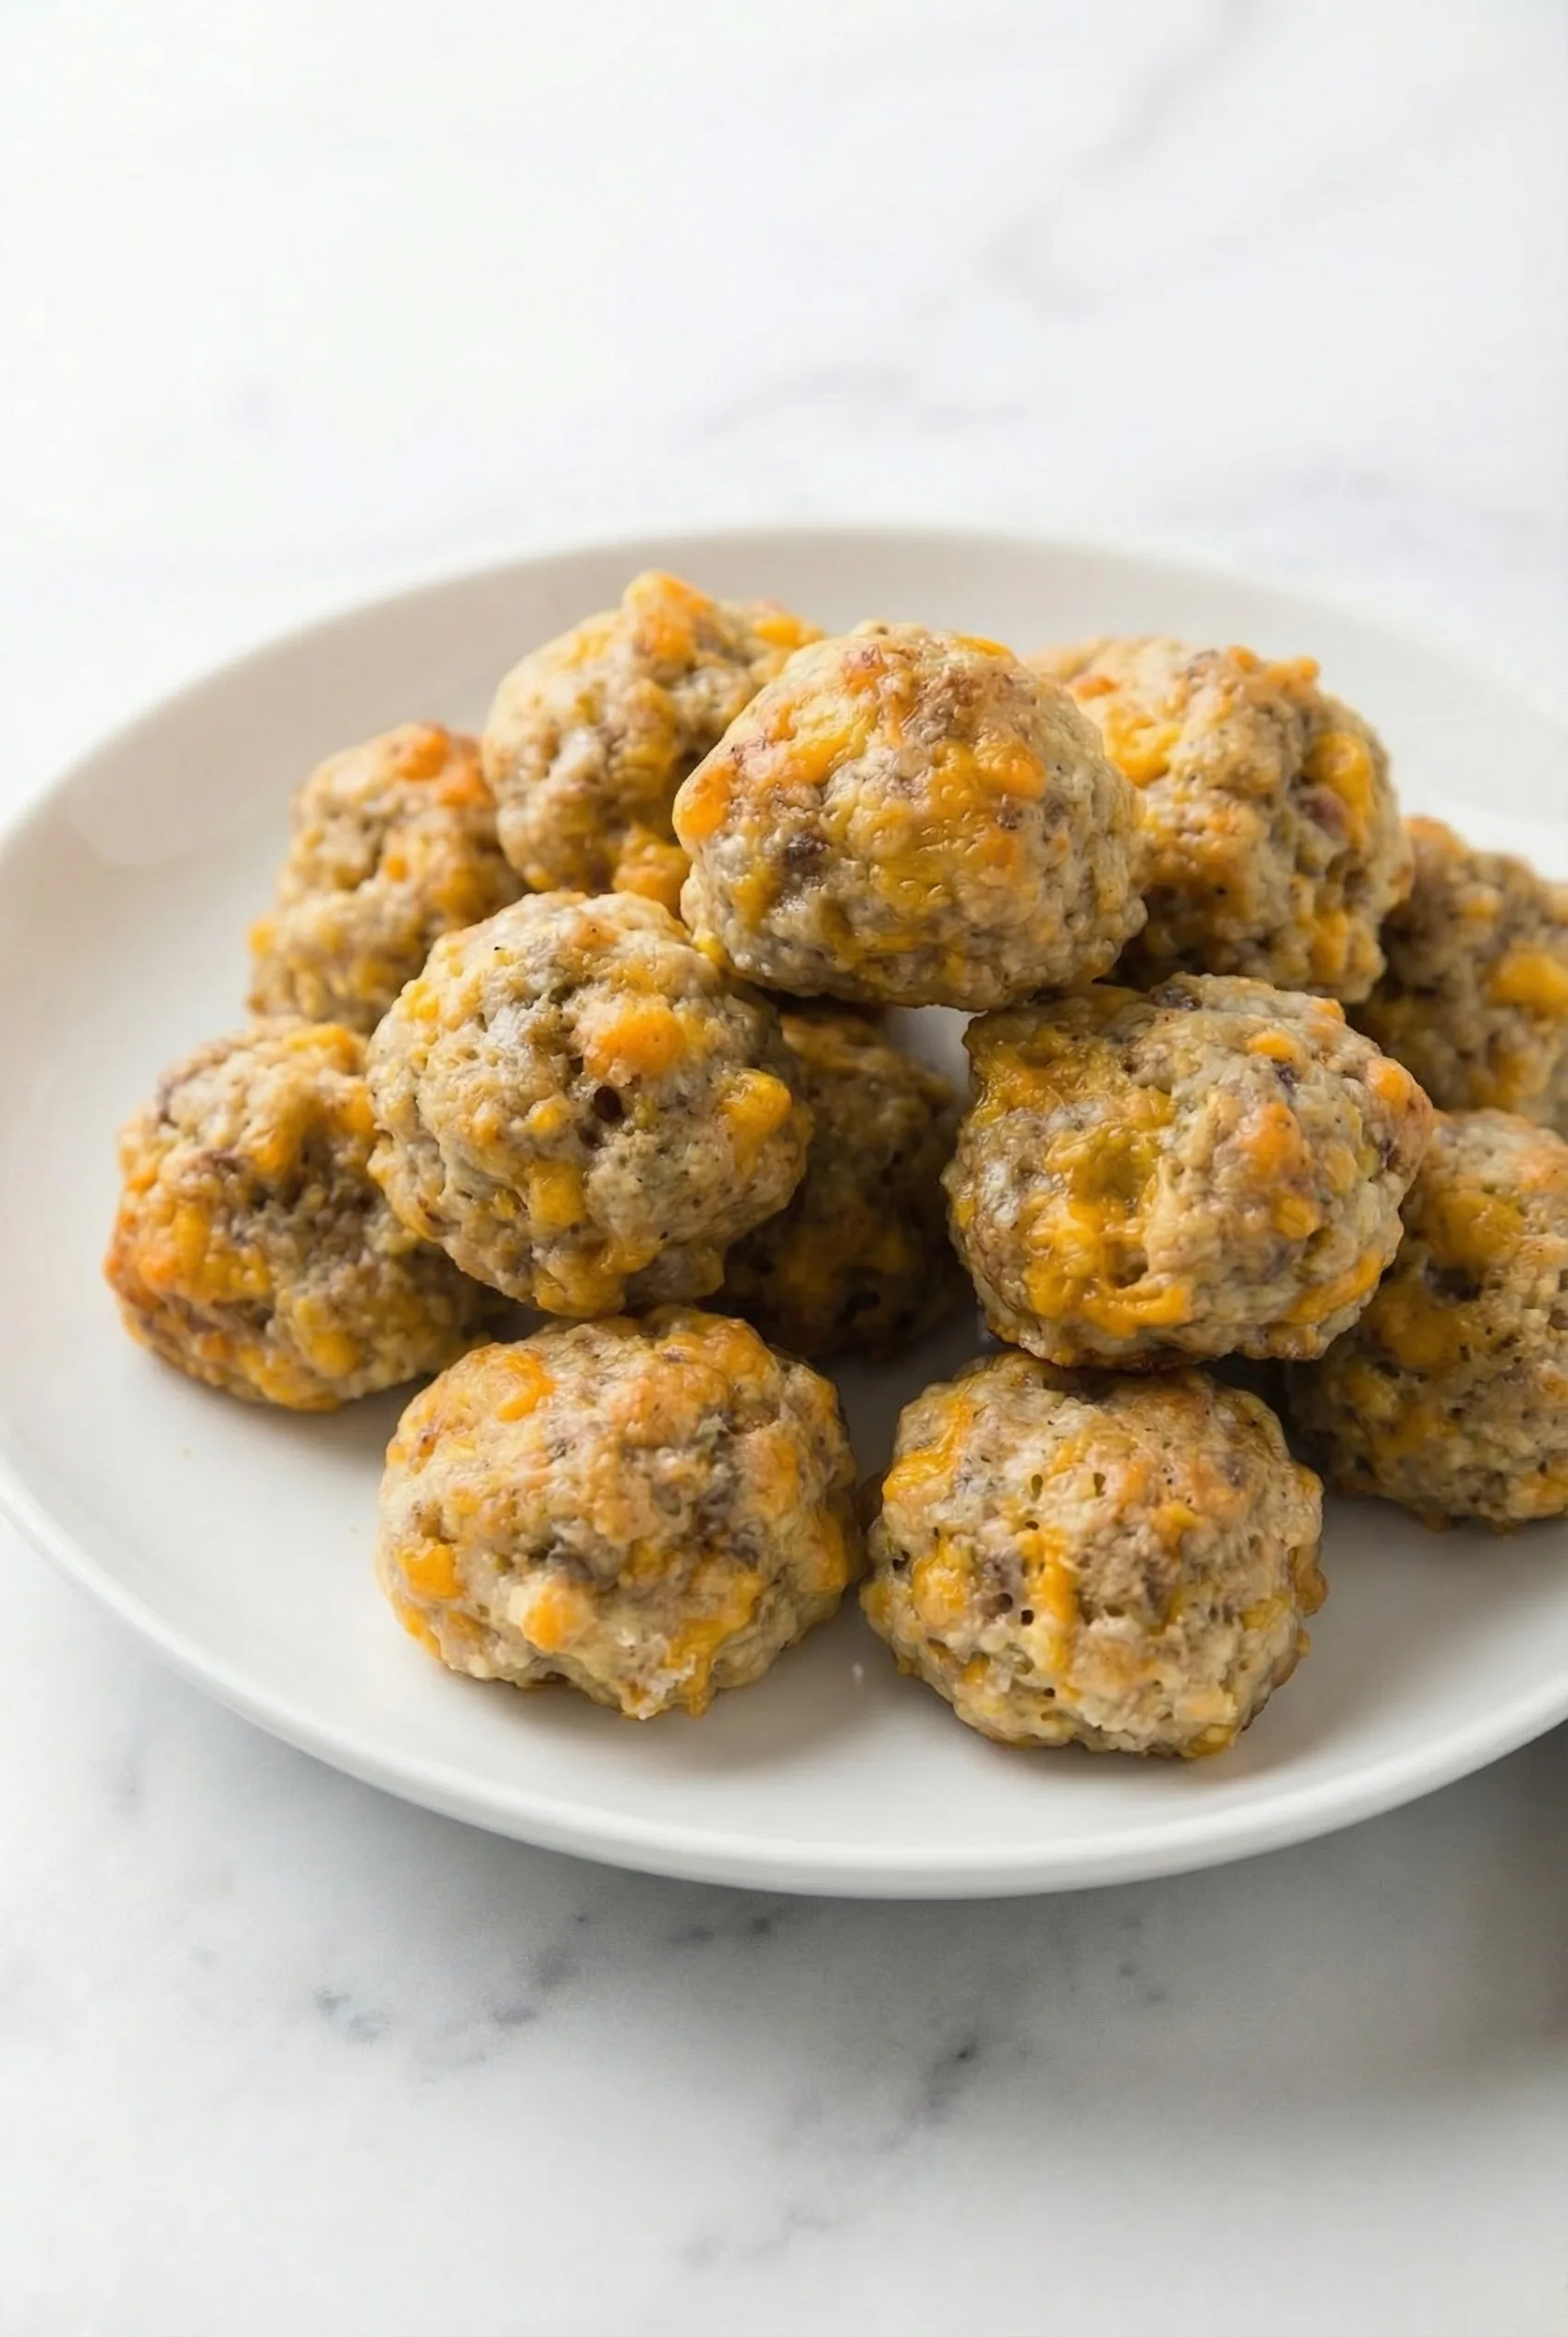
Bake for 15-20 minutes, or until they’re golden brown and your kitchen smells like absolute heaven.
Pro Tip: Dealing with Extra Grease
Sometimes, especially if your sausage is on the fattier side, you might notice a bit of grease pooling on the baking sheet once your sausage balls are done. No worries! Just transfer them right onto a plate lined with paper towels. This quick trick helps soak up any extra oil, so each bite stays perfectly tasty, never greasy.
Step 5: Serve & Devour
Let them cool for just a minute (if you can wait that long), then dig in. Best served warm, with your favorite dipping sauce!
Storage Options:
- Refrigerate: Store leftovers in an airtight container for up to 4 days.
- Freeze for Later: Freeze unbaked sausage balls on a tray, then transfer to a freezer bag. They’ll keep for up to 3 months. When ready to bake, just add a few extra minutes to the cook time.
- Reheat: Warm them up in the oven at 350°F (175°C) for about 5-10 minutes.
Variations and Substitutions:
Want to switch things up? Here are a few ways to customize your sausage balls:
- Spicy Kick – Use hot sausage and add a pinch of cayenne or crushed red pepper.
- Extra Cheesy – Toss in some Monterey Jack or Pepper Jack for more gooey goodness.
- Gluten-Free Option – Swap out the biscuit mix for a gluten-free baking mix.
- Garlic Butter Glaze – Brush them with melted butter + garlic powder right out of the oven. (This is life-changing, trust me.)
What to Serve with Cheddar Bay Sausage Balls?
These sausage balls are amazing on their own, but they’re even better with a great dipping sauce! Here are a few ideas:
- Ranch Dressing – Because ranch makes everything better.
- Honey Mustard Sauce – A little sweet, a little tangy, and totally delicious.
- Hot Sauce or Sriracha – If you like some heat, this is the way to go.
- Maple Syrup – Sounds weird, but if you love sweet & savory, try it!
Frequently Asked Questions:
Can I make these ahead of time?
Absolutely! Roll the dough into balls, store them in the fridge, and bake when you’re ready.
Can I use a different kind of sausage?
Yep! Turkey sausage, chorizo, or even plant-based sausage all work really well here.
How do I keep them from getting dry?
The cream cheese is the secret. It keeps everything soft and moist, so don’t skip it. Just make sure your cream cheese is fully softened before mixing—this helps it blend smoothly and keeps the mixture nice and cohesive.
A few more pro tips:
- Sausage Choices: Go with mild or spicy Italian sausage, whatever fits your mood. Just remember: add it raw, straight into the mix. No precooking needed—the oven will do all the work.
- Perfect Size: Roll your sausage balls on the smaller side for the ultimate bite-sized snack. If you make them bigger, just tack on a few extra minutes in the oven.
- Grease Patrol: If there’s extra grease hanging around after baking, let the sausage balls cool on a paper towel for a minute to soak it up. This keeps things tasty, not greasy.
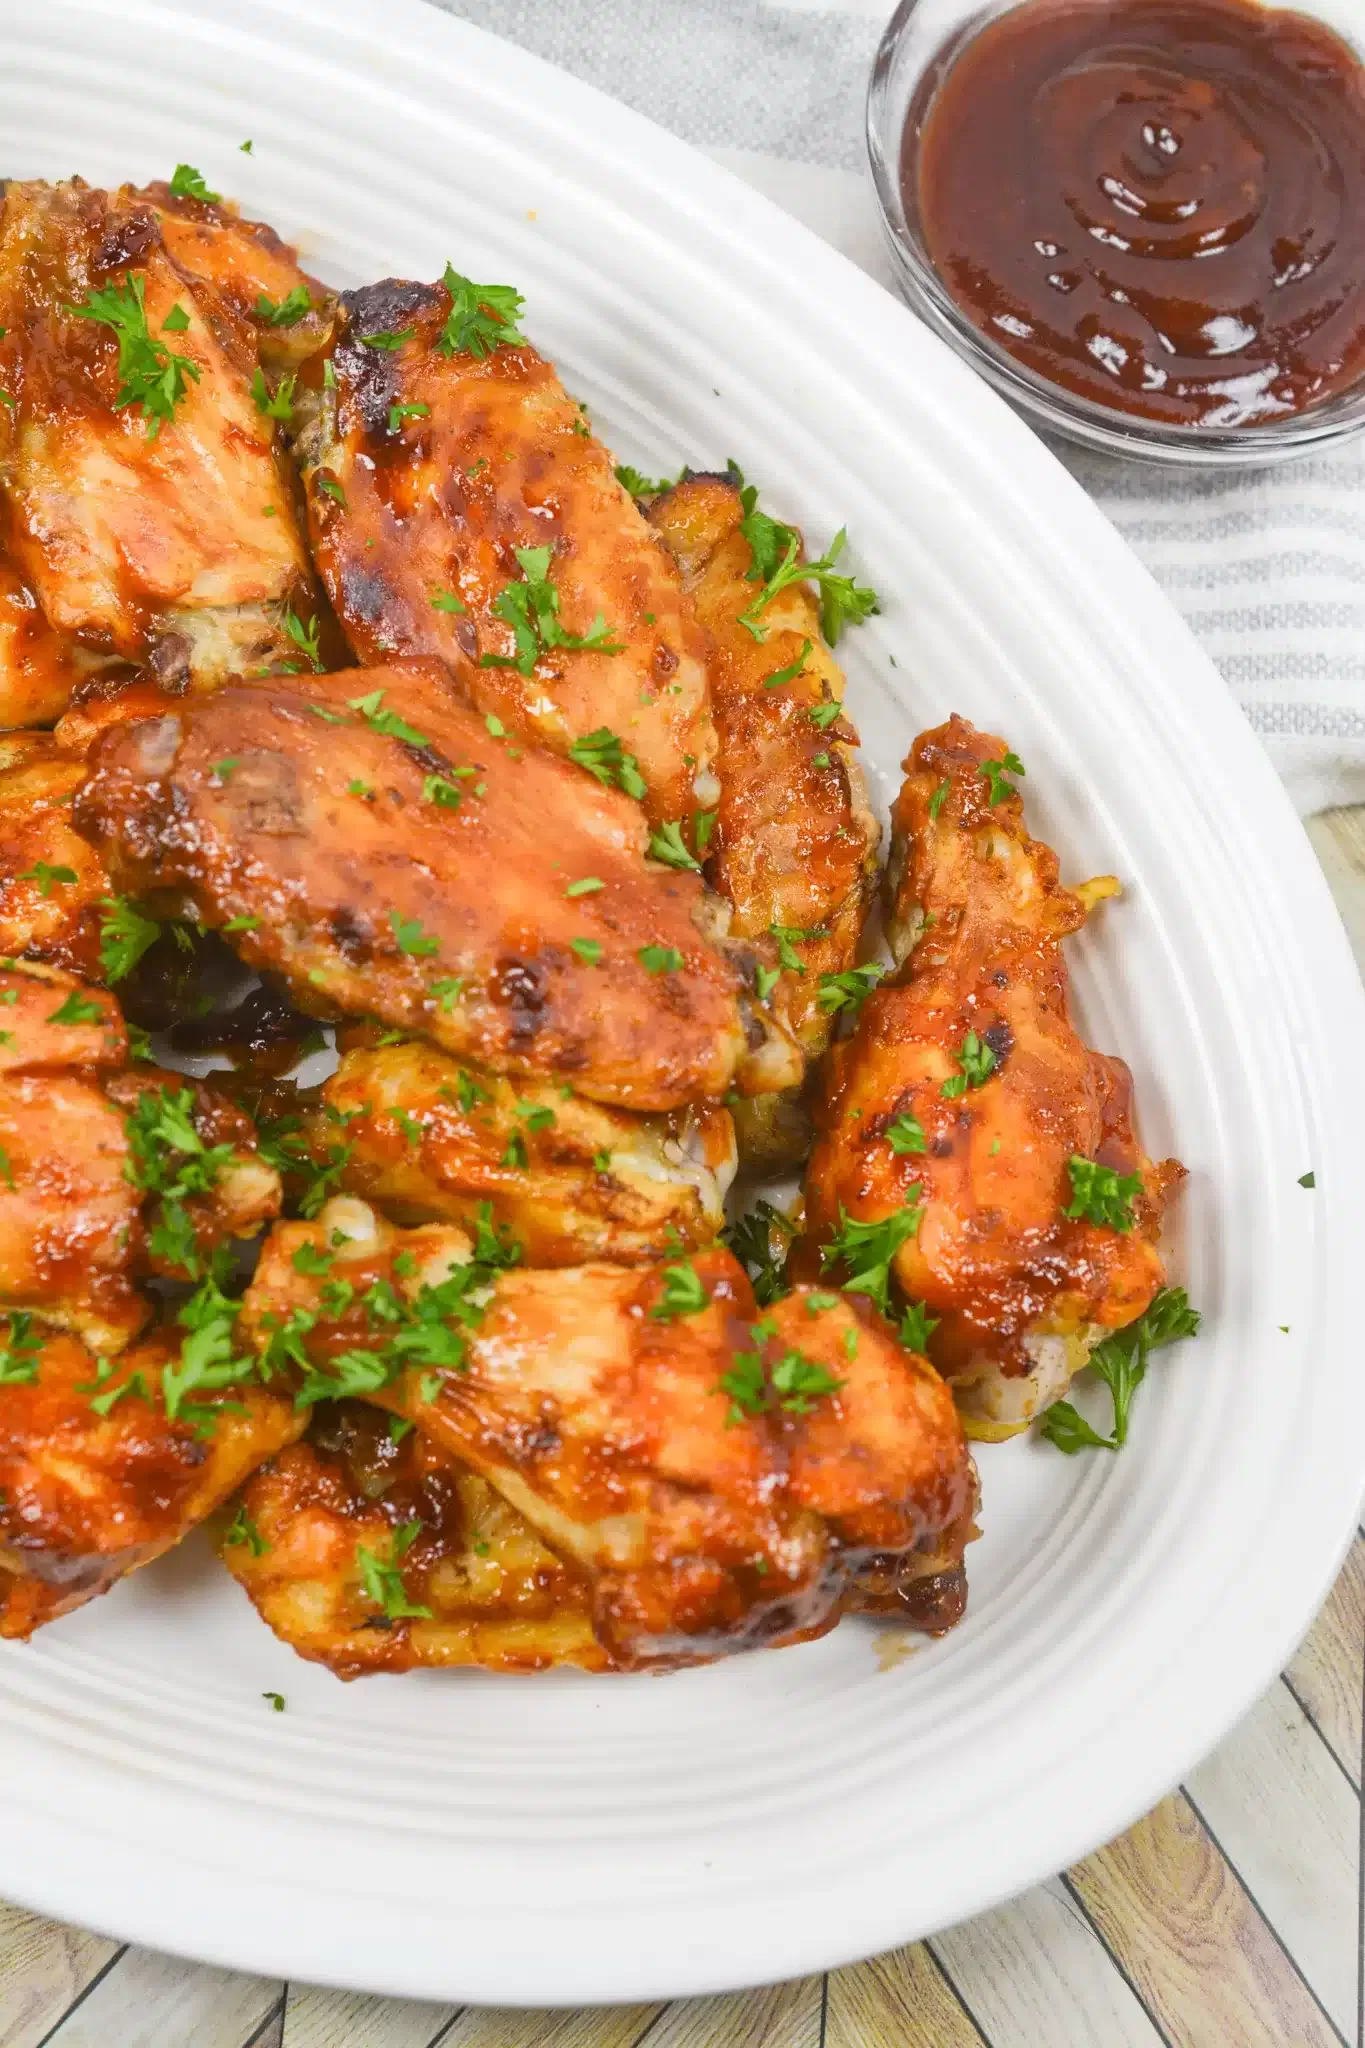
- Dipping Game: These are delicious on their own, but don’t be shy with the dips! Try ranch, spicy ketchup, BBQ sauce, or honey mustard for an extra kick.
- Leftover Love: Store any extras in an airtight container in the fridge for up to five days. Reheat them in the oven or air fryer for the best texture, or the microwave if you’re in a hurry (just know they won’t be as crisp).
Little details, big flavor, enjoy!
If you love easy, cheesy, bite-sized comfort food, these Cheddar Bay Sausage Balls are exactly what you need in your life. They’re buttery, savory, and absolutely addictive.
Have you made these before? Do you have a favorite dipping sauce? Let me know in the comments, I’d love to hear your thoughts!
Keep the Flavor Coming – Try These:
Cheddar Bay Sausage Balls
Ingredients
- 1 11.36-ounces package Red Lobster Cheddar Bay Biscuit mix
- 1 8-ounces package cream cheese, softened
- 1¼ c shredded cheddar cheese
- 1 pound sausage uncooked
Equipment
- Mixing bowls (big enough for enthusiastic stirring)
- Electric mixer or stand mixer (or just your own biceps)
- Baking sheet pan
- Parchment paper (or Silicone baking mat )
Instructions
- Preheat your oven to 400 degrees Fahrenheit.
- In a stand mixer combine biscuit mix (with seasoning), sausage, softened cream cheese and cheddar.
- Shape the mixture into 1-inch balls. Arrange them on a baking tray lined with parchment paper.
- Bake for 15 to 20 minutes until they become golden brown.
Notes
I’m Bitty, owner of nodashofgluten.com, where I share simple, delicious recipes for all tastes, including gluten-free. Check out my “About Me” page for more info!


5 Responses
Quick and easy to put together. Thanks for the suggestion to use a stand mixer. Amazing taste!
I have these mixed up and sitting in the fridge. Going to bake them tonight.
I used the hand mixer (no stand mixer don’t bake cakes very often) to blend the sausage and cream cheese together. But, when I added in the biscuit mix, I used my pastry cutting tool. It went pretty well.
That works perfectly, Sandy 😊 Using a hand mixer first and then a pastry cutter is a great way to do it, especially without a stand mixer. The fridge rest won’t hurt at all either. They should bake up just fine tonight. Hope you love them!
Can you make the ball bigger? Just double the cooking time?
Yes, you can make them bigger 😊 I wouldn’t double the time, though. Try baking them 20–25 minutes instead, checking at 20. Keep the oven at 400°F and tent loosely with foil if they brown too fast.