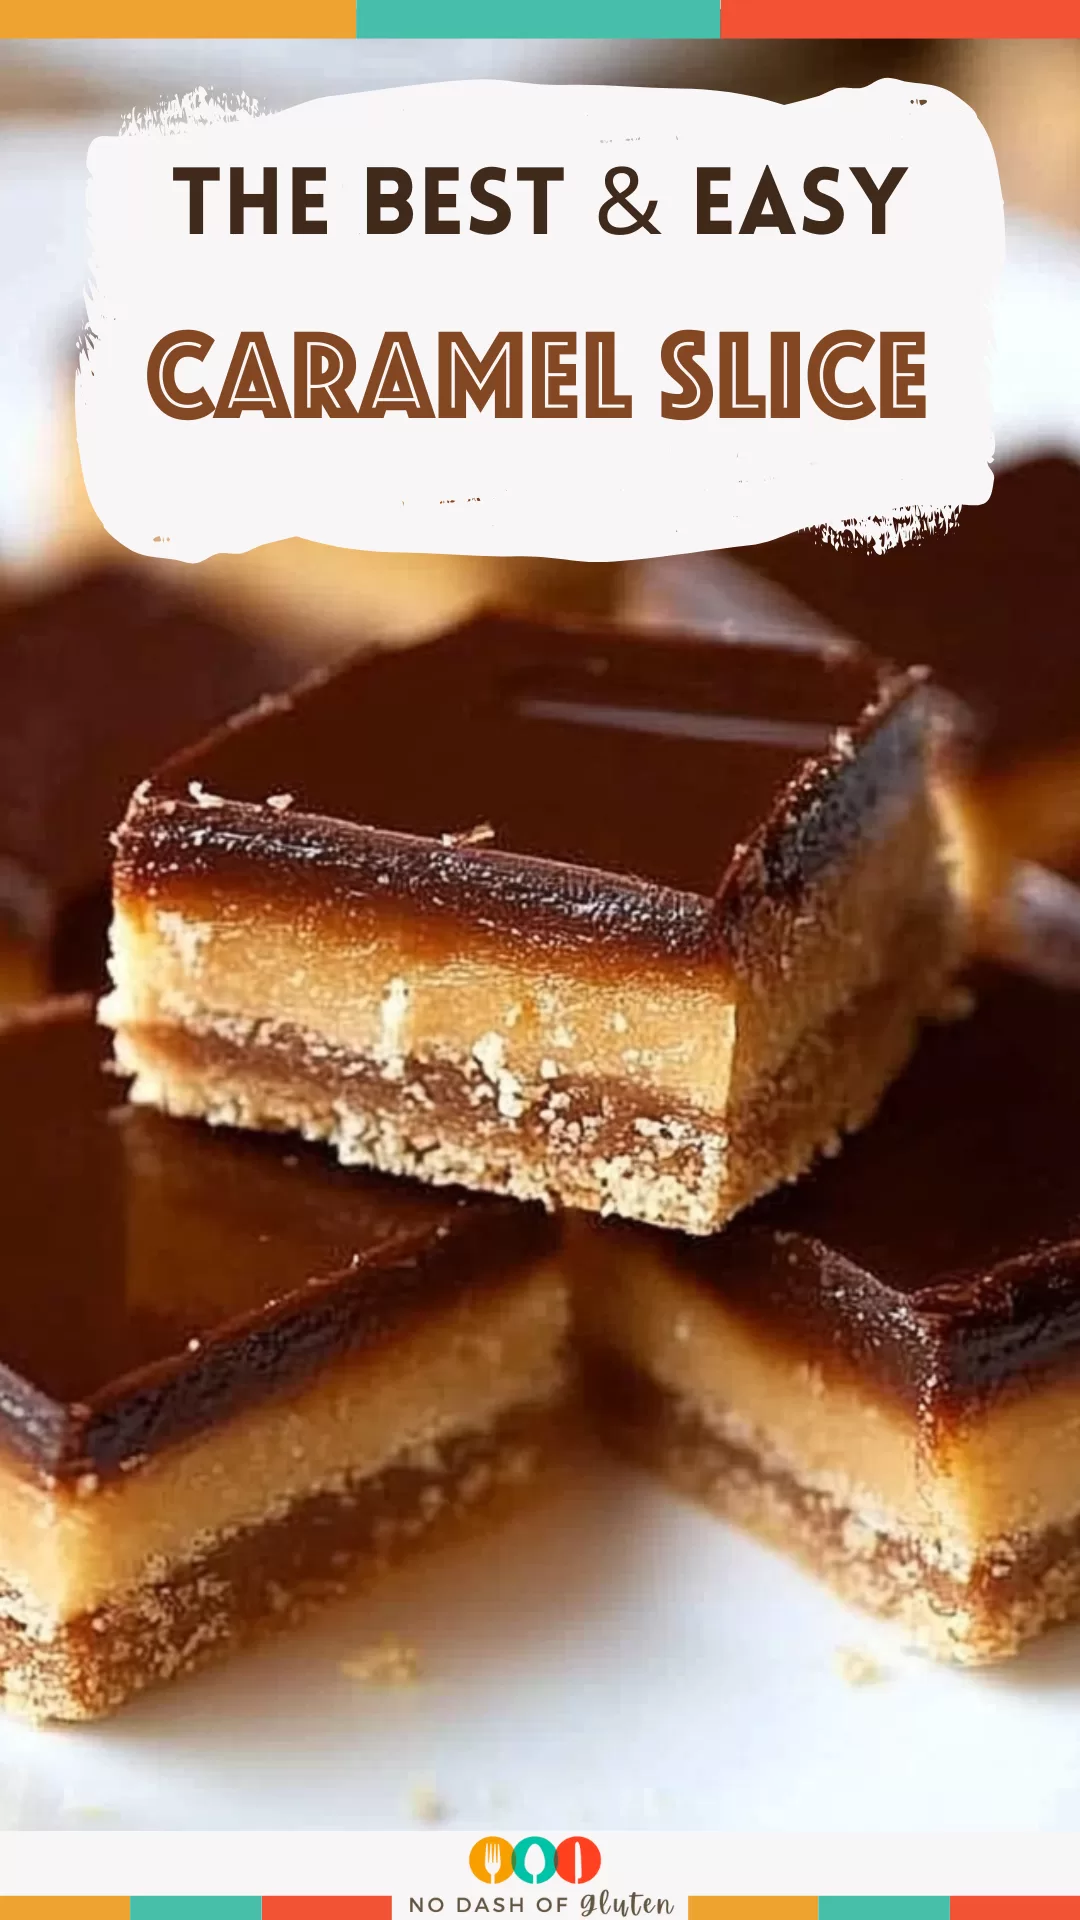
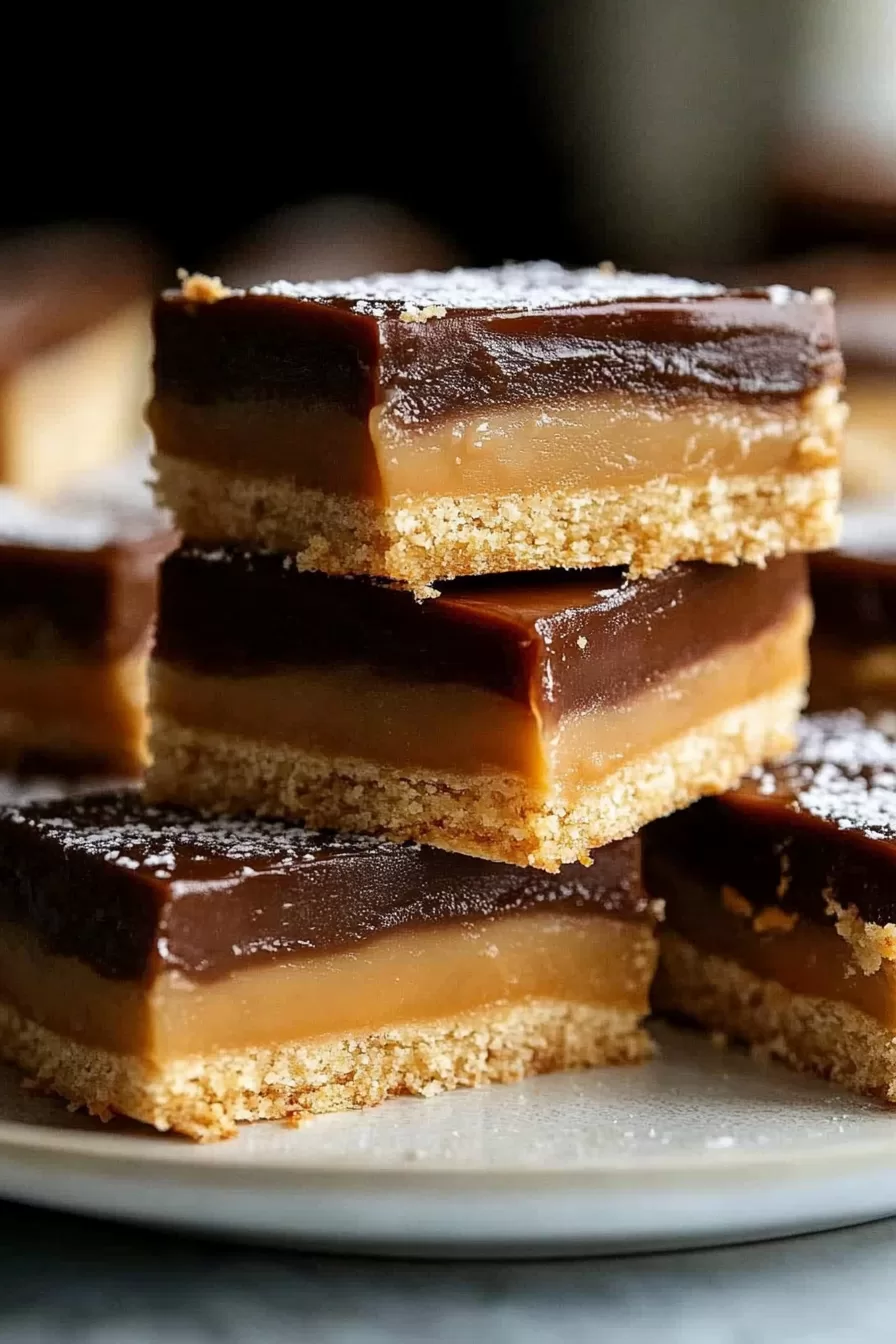
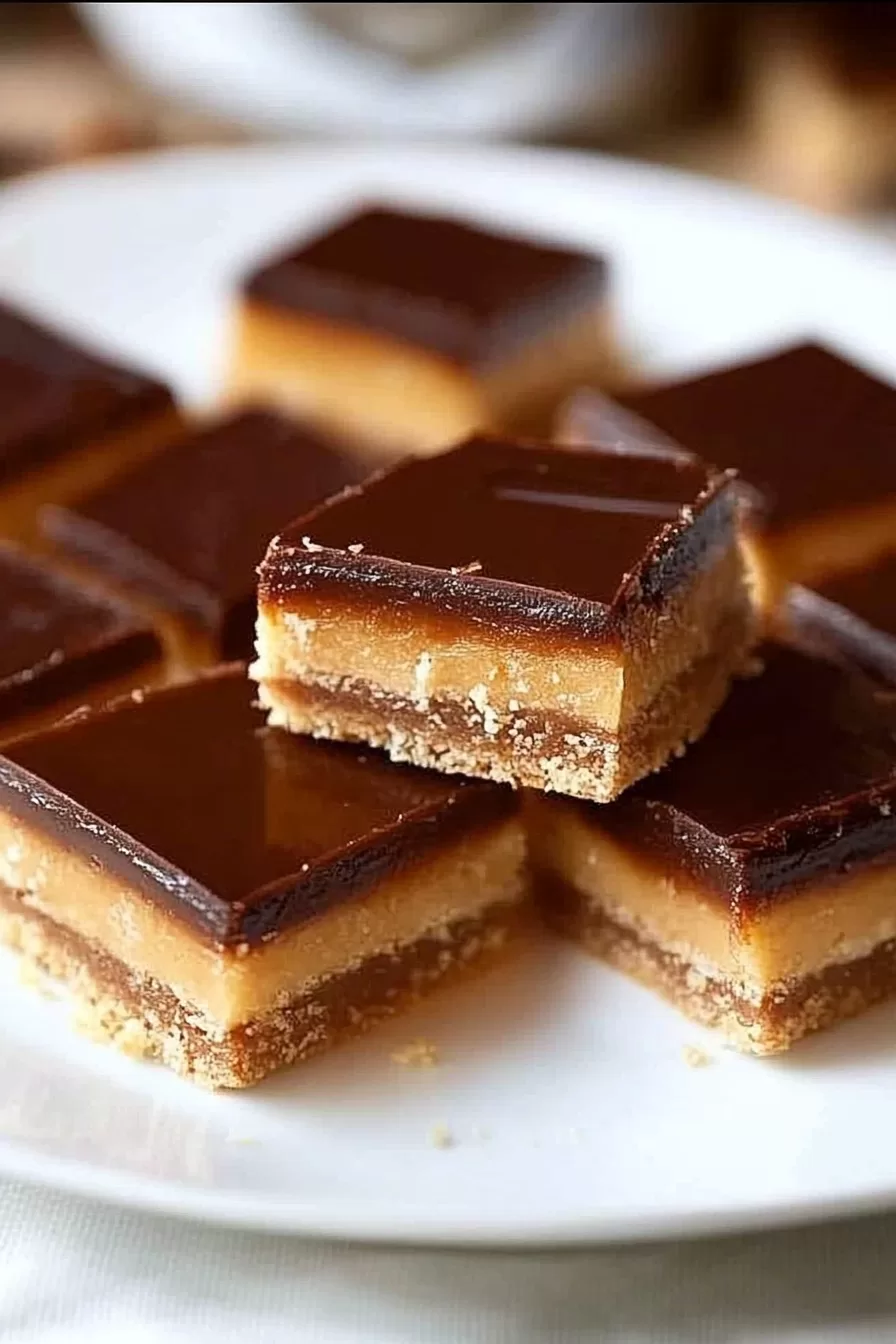
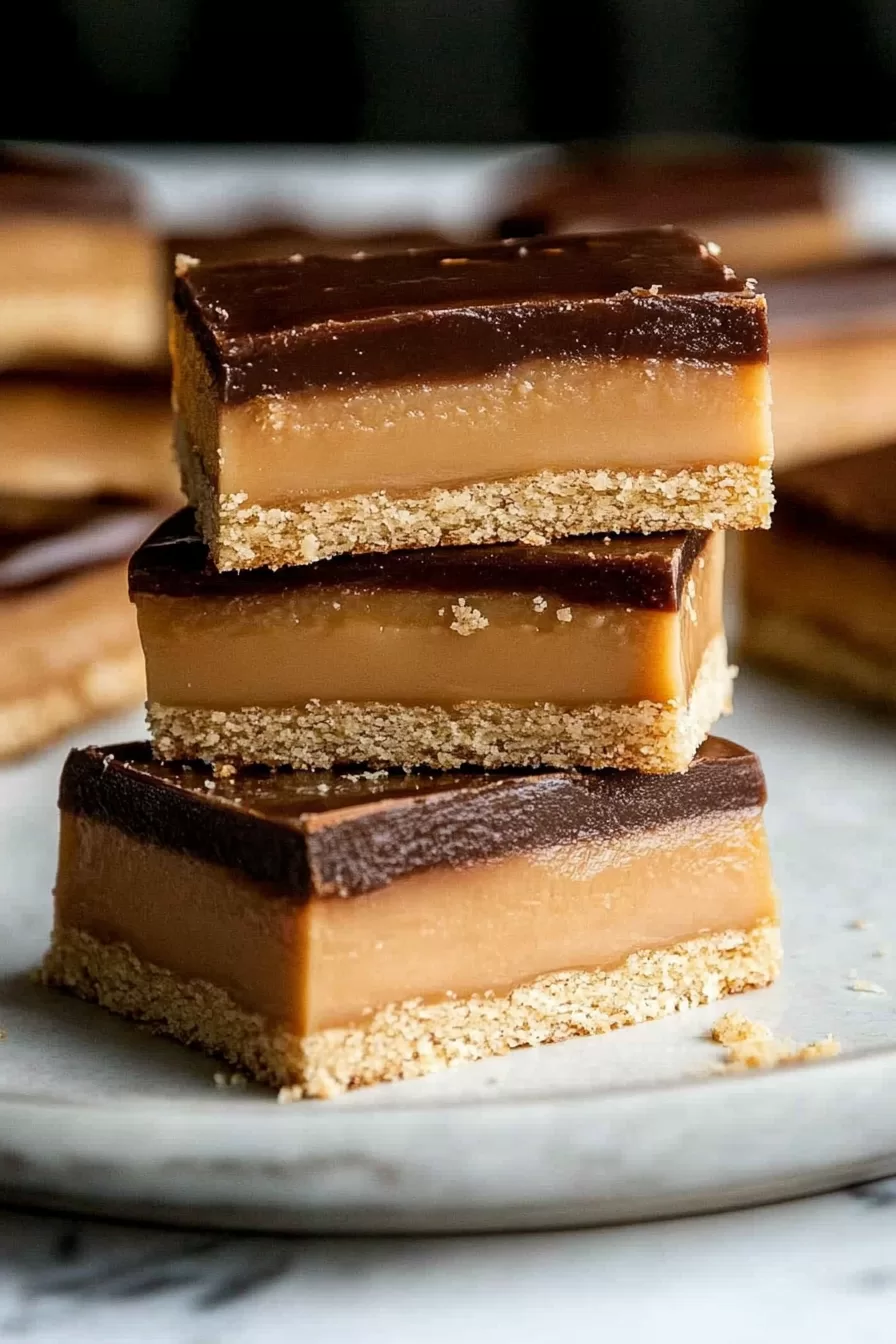
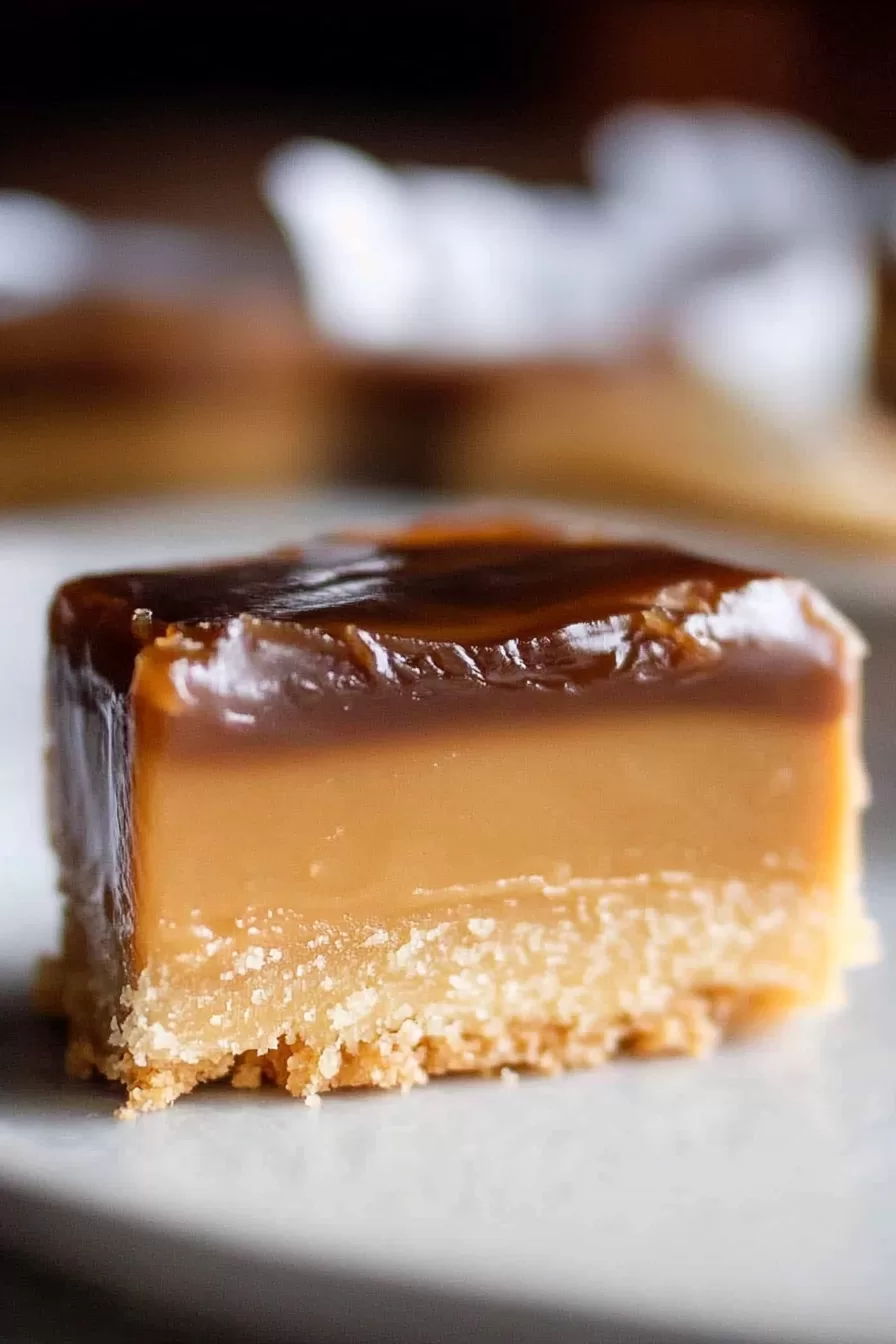
Savor this indulgent Caramel Slice with a buttery coconut crust, luscious caramel filling, and a silky chocolate topping. Simple yet decadent!


You know that moment when you bite into something and instantly feel like a kid again? That’s what this Caramel Slice does for me. The first time I made it, I was trying to recreate something I’d tasted at a cozy café during a road trip through the countryside. It was one of those perfect stops where the coffee is strong, the air smells like fresh rain, and the pastries make you forget all your worries. This slice took me back there.
I remember sitting at the kitchen counter, waiting for the layers to set, sneaking tastes of the caramel (it’s impossible not to). When it was finally ready, I sliced into it, and wow—it was like my own little slice of heaven. The crumbly base, gooey caramel, and smooth chocolate topping all came together in a way that felt nostalgic and indulgent at the same time. Even now, every time I make it, I’m transported back to that café. Funny how food can do that, right?
Why You’ll Love This Caramel Slice Recipe?
- The Perfect Trio: A buttery coconut crust, a rich caramel center, and a glossy chocolate topping—each layer brings its own magic.
- Simple but Elegant: It’s easy to make but looks like something you’d find in a fancy bakery.
- Customizable: Add a sprinkle of sea salt, switch up the chocolate, or play with flavors—it’s a dessert that loves to evolve.
- Crowd-Pleaser: Perfect for potlucks, holidays, or just because. Everyone will be asking for the recipe (trust me).
Ingredient Notes:
Let’s talk about what makes this dessert truly shine:
- All-Purpose Flour: The foundation of the crust, giving it structure without overpowering the flavor.
- Brown Sugar: Adds a molasses-like richness that complements the caramel beautifully.
- Desiccated Coconut: Brings a subtle nuttiness and texture to the base. If you’re not a fan, feel free to skip it—but it’s worth trying!
- Unsalted Butter: Used in every layer for that melt-in-your-mouth richness.
- Sweetened Condensed Milk: The heart of the caramel layer—thick, creamy, and irresistibly sweet.
- Dark or Milk Chocolate: Go dark for a sophisticated edge or milk for a sweeter finish.
- Vegetable Oil: Keeps the chocolate topping smooth and easy to slice without cracking.
How To Make Caramel Slice?
Making this caramel slice is like building a masterpiece, one delicious layer at a time.
Step 1: Prepping the Crust
Start by preheating your oven to 350°F (180°C). Line a baking pan with
Step 2: Crafting the Caramel
While the base cools, lower your oven temperature to 320°F (160°C). In a saucepan over medium heat, melt butter with brown sugar and vanilla. Stir until smooth, then add the sweetened condensed milk. Whisk continuously for about 5 minutes until it thickens into a rich, glossy caramel. Pour the caramel over the cooled base, spreading it evenly. Bake for another 12 minutes, then let it cool completely.
Step 3: Chocolate Topping
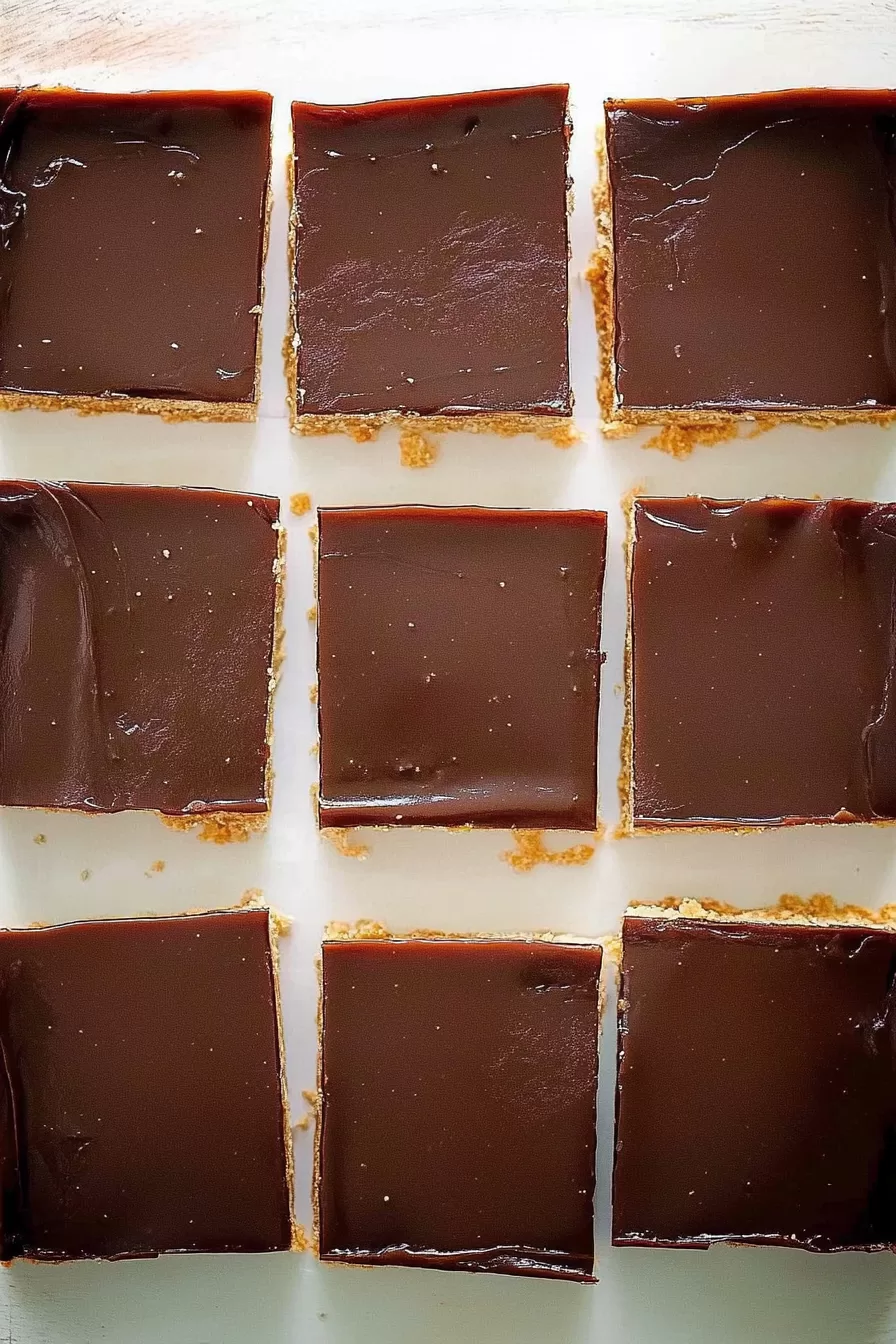
Melt chocolate with a bit of vegetable oil in the microwave, stirring every 30 seconds until smooth. Pour it over the caramel layer, spreading it evenly with a spatula. Tap the pan gently on the counter to eliminate air bubbles. Refrigerate for an hour to set, then let it sit at room temperature for 5 minutes before slicing.
Storage Options:
- Fridge: Store slices in an airtight container for up to a week.
- Freezer: Freeze individual pieces for up to 3 months. Just thaw them in the fridge before enjoying.
Variations and Substitutions:
- Salted Caramel Slice: Add a sprinkle of flaky sea salt on top of the caramel layer for a sweet-and-salty twist.
- White Chocolate Topping: Swap the dark chocolate for white chocolate for a completely different flavor profile.
- Nutty Base: Mix some chopped almonds or hazelnuts into the crust for extra crunch.
- Vegan Version: Use plant-based butter and condensed coconut milk for a dairy-free treat.
Want To Save This Recipe?
What to Serve with Caramel Slice?
- Coffee or Espresso: The bitterness balances the sweetness beautifully.
- Whipped Cream: A dollop of lightly sweetened cream adds a touch of decadence.
- Fresh Berries: Strawberries or raspberries bring a bright, tangy contrast.
Frequently Asked Questions:
Why is my caramel layer too soft?
It likely didn’t cook long enough. Make sure to whisk continuously until it thickens and forms slow, large bubbles.
Can I make this gluten-free?
Absolutely! Swap the all-purpose flour for a gluten-free baking mix.
How do I prevent the chocolate from cracking when slicing?
Let it sit at room temperature for a few minutes before cutting, and use a warm knife for cleaner slices.
That’s it, folks—your guide to mastering the Caramel Slice. Whether you’re making it for a special occasion or just because (no judgment), this recipe is bound to be a winner. So, what are you waiting for? Go ahead, give it a try, and let me know how it turns out. Did you stick to the classic or add your own twist? I’d love to hear all about it!
Keep the Flavor Coming – Try These:

Caramel Slice
Ingredients
Base:
- 1 c plain/all-purpose flour
- 1/2 c brown sugar loosely packed
- 1/2 c desiccated coconut US: sweetened finely shredded coconut
- 125 grams 4.5 ounces unsalted butter, melted
Caramel Filling:
- 125 grams 4.5 ounces unsalted butter, roughly chopped
- 1/2 c 80 grams brown sugar, loosely packed
- 1 teaspoon vanilla extract or essence
- 395 grams 14 ounces sweetened condensed milk (approximately 1 can, 300ml)
Chocolate Topping:
- 200 grams 7 ounces dark or milk melting chocolate (US: semi-sweet chocolate chips)
- 1 tablespoon vegetable oil
Instructions
- First, preheat your oven to 350°F (180°C) or 320°F (160°C) if you have a fan oven.
- Next, prepare a baking pan measuring 7" x 11" (28 x 18 cm). Grease it. Line it with parchment paper making sure there's an overhang, for easy removal later.
- In a mixing bowl combine 1 cup of flour, half a cup of sugar, half a cup of coconut and 125g of melted unsalted butter. Mix everything together until well combined.
- Evenly press this mixture into the bottom of the pan.
- Place the pan in the oven. Bake for about 15 minutes or until the surface turns a lovely golden color.
- Once done baking set it aside to cool while you work on making the caramel. If you want to speed up the cooling process you can place it in the fridge.
- Now let's move on to preparing the caramel filling. Reduce your temperature to 320°F (160°C) or 284°F (140°C) if you're using a fan oven.
- In a saucepan, over medium-low heat combine 125g of unsalted butter, half a cup of brown sugar and one teaspoon of vanilla extract.
- Stir the mixture until the butter has completely melted and all the ingredients are thoroughly combined.
- Let the mixture simmer. Then add 395g of sweetened condensed milk.
- Whisk continuously, for 5 minutes until the mixture slightly thickens and you begin to see large slow bubbles forming.
- Carefully pour the caramel over your base tilting the pan as necessary to spread it evenly.
- Place it in an oven for 12 minutes. Don't worry if there are some spots; this is normal and expected.
- Once it's done place the pan on a wire rack to cool for 20 minutes then refrigerate it for 30 minutes. The caramel should set. The pan may still feel slightly warm when touched.
- For the Chocolate Topping, combine 200g of dark or milk chocolate and 1 tablespoon of oil in a bowl that's safe to use in a microwave.
- Heat it in bursts of 30 seconds in the microwave stirring between each burst until the chocolate is completely melted and smooth.
- Pour the chocolate over the layer of caramel using a spatula to spread it evenly.
- Gently knock on the counter with the pan to remove any air bubbles and ensure that its surface is smooth.
- Refrigerate, for an hour. Until the chocolate has set. Once the chocolate is set take it out of the refrigerator. Allow it to sit for 5 minutes. This will help soften the chocolate making it easier to cut.
- Utilize the overhanging parchment paper to lift the slice out of the pan and proceed to cut it into bars or squares.
- Indulge, in your delicious homemade Caramel Slice!
Notes
I’m Bitty, owner of nodashofgluten.com, where I share simple, delicious recipes for all tastes, including gluten-free. Check out my “About Me” page for more info!