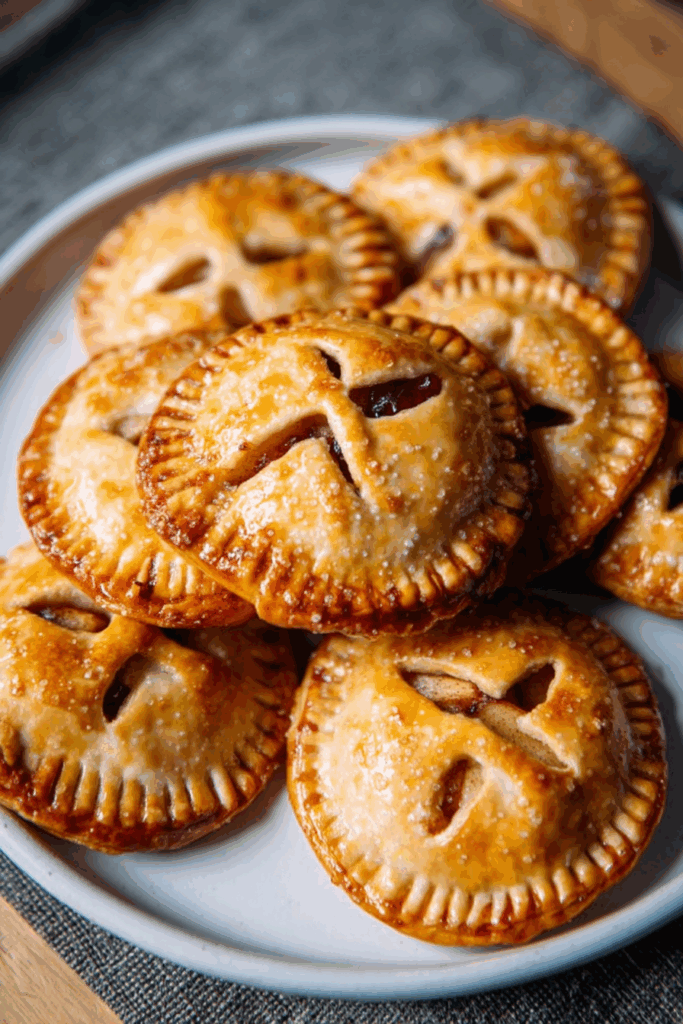
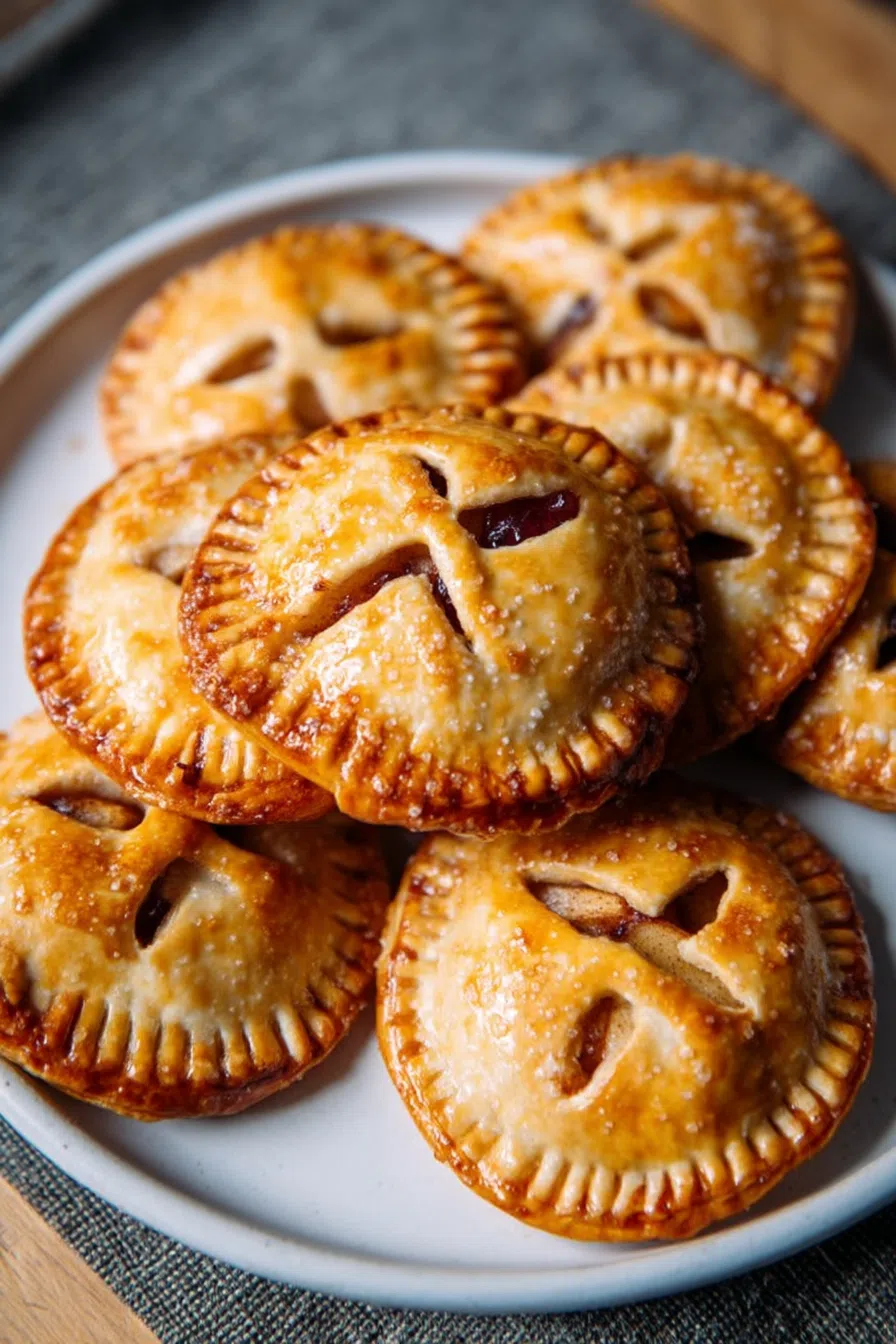
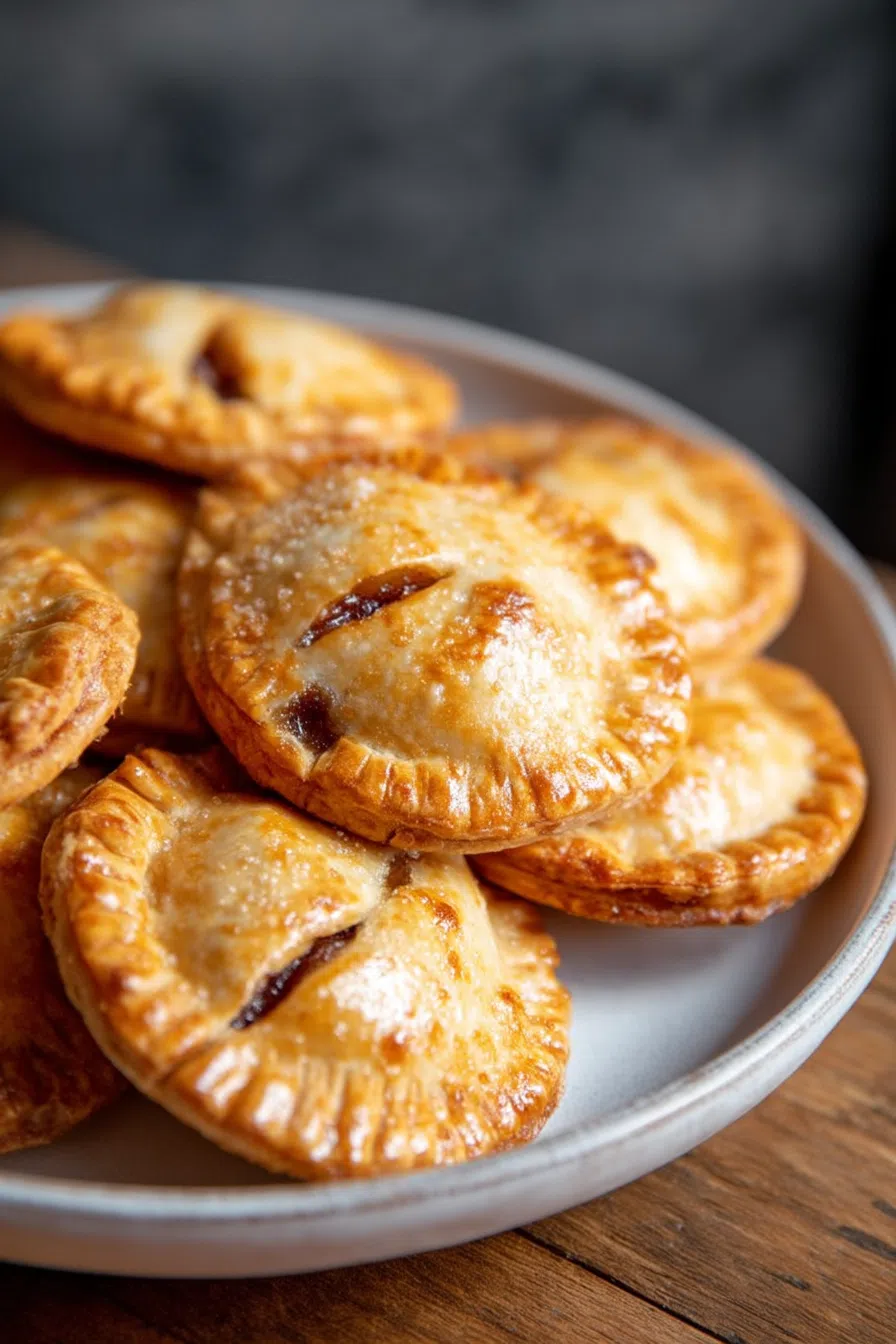
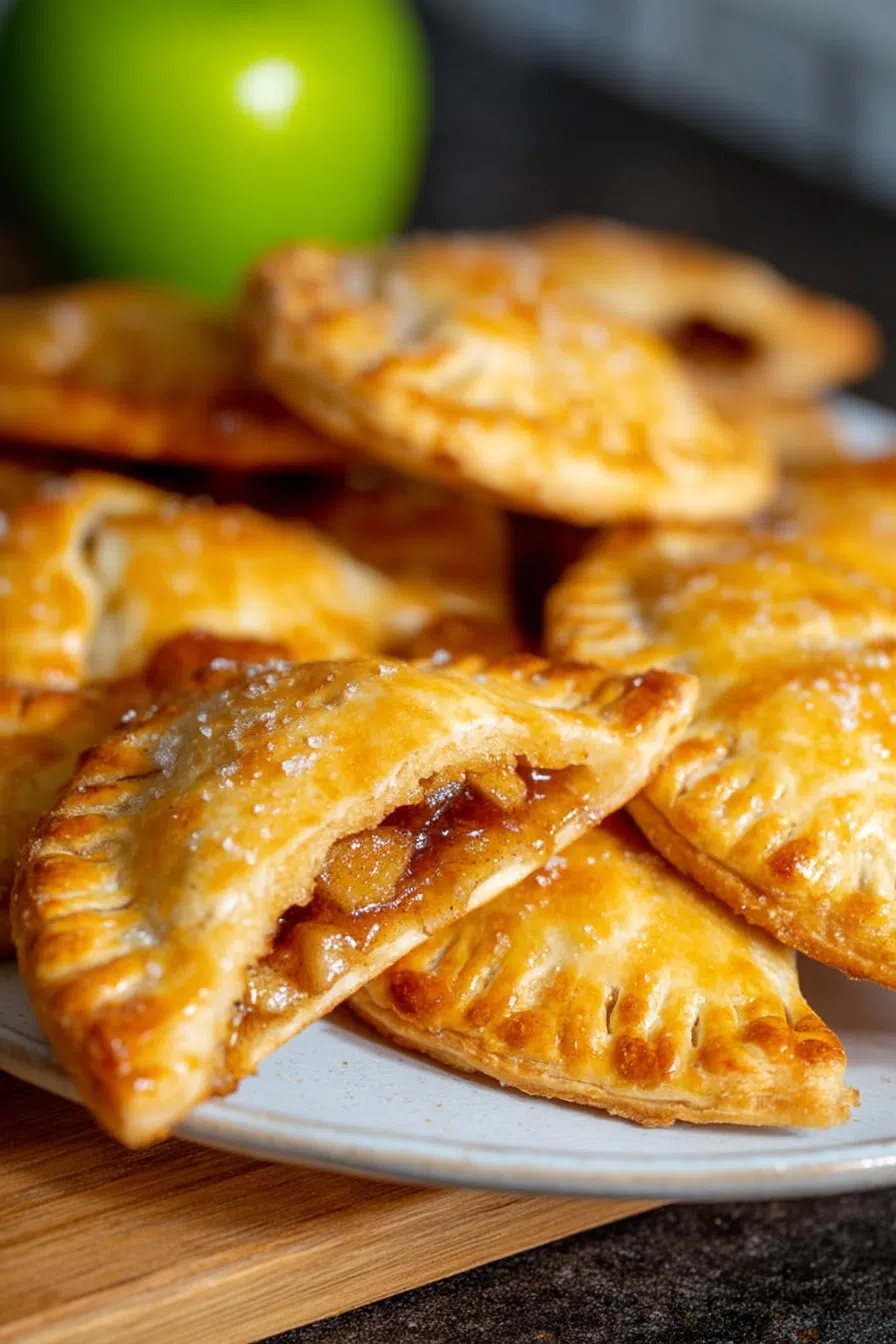
Buttery pie crust, sweet chopped apples, cinnamon, brown sugar, and a golden sugary top. These cozy apple hand pies taste like fall in your hand.
The First Time I Made These Apple Hand Pies…
…was honestly by accident. I had this dreamy Pinterest idea about making a full apple pie after a weekend apple-picking trip. You know, golden crust, lattice top, the whole Norman Rockwell moment. But by the time I got home? I was too tired, the kid was cranky, the apples were bruised, and the kitchen already looked like a tornado hit it.


So I did what any overwhelmed human would do—I pivoted. Instead of one big pie, I made little ones. Rough, imperfect, pop-them-in-your-mouth Apple Hand Pies. They didn’t look fancy, but they disappeared faster than anything I’d baked in weeks. My daughter called them “pocket pies.” My husband asked if I got them from a bakery. And I? I stood in my socks eating one over the sink like some kind of pie bandit and thought, Okay… this works.
I’ve made them a dozen times since—sometimes with pears, sometimes with a splash of bourbon (don’t tell Nana), and sometimes, just exactly like this. This version right here? It’s the one that keeps getting requested. Every time fall rolls in and the cinnamon candles come out, these pies are not far behind.
Why You’ll Love This Apple Hand Pies Recipe?
Honestly, what doesn’t? They’re flaky, sweet, warm, just messy enough to feel homemade, and small enough to justify eating two (or… let’s not put numbers on it, okay?). They’re basically little handheld hugs. Something about not needing a fork makes them feel more personal, like they’re just for you.
Also, low-key—they’re kind of a kitchen lifesaver. You don’t have to wait for the pie to set, you don’t have to slice anything perfectly, and cleanup? Basically nonexistent. You can freeze ’em. Reheat ’em. Gift ’em. Eat one standing by the fridge and call it lunch. I’ve done it. No shame.
And hey, if your edges are uneven or the filling leaks a bit? Just call them rustic. Rustic is always in.
Ingredient Notes:
Let’s talk ingredients, because I’ve got opinions. And they’re not all “by the book.” I love a good shortcut. I love a good mess-up too. That’s where the fun is, right?
-
Pie crusts – Look, if you’ve got the energy to make homemade crust, go you. But I almost always use store-bought. They’re easy, consistent, and let me focus on the filling. Life’s short. Use the crust.
-
Apples – The stars of this show. I usually go with Granny Smiths or Honeycrisps, depending on what’s on sale. Mix and match if you’ve got a bunch. Just chop ’em small enough so you’re not biting into chunks the size of ice cubes.
-
Butter – I’ve used salted, unsalted, and once… margarine (don’t ask). It all worked. Butter gives that filling richness, that melt-in-your-mouth vibe. But if you forget to soften it, I won’t judge you for microwaving it in a mug.
-
Brown sugar – It’s warm and caramel-y. White sugar is fine if it’s all you’ve got, but brown sugar just feels like fall. You know?
-
Cornstarch – Okay, technically this keeps the filling from becoming a soggy mess. But I forgot it once and honestly? It was still good. Just… eat fast.
-
Cinnamon and nutmeg – These are non-negotiable. Fall isn’t fall without cinnamon. Nutmeg is the quiet best friend who makes everything better but never takes credit.
-
Egg + milk – Egg wash makes it glossy. Makes you look like you tried harder than you did. That’s always a win.
-
Coarse sugar – Optional, but it gives that little crunch on top. Like that sprinkle of personality. It’s the glitter of the baking world.
How To Make Apple Hand Pies?
Let’s keep this real. You don’t need to be fancy. Just follow the vibe.
Step 1: Preheat the oven and pretend you’re on a baking show.
Set it to 400°F. Line two baking sheets with parchment paper if you’ve got it. Or foil. Or just… spray the heck out of it. It’ll be fine.
Step 2: Cook the filling.
Melt the butter in a skillet. Mix your brown sugar, cornstarch, cinnamon, and nutmeg in a small bowl first (so it doesn’t clump—been there). Toss it all into the skillet with your apples. Stir and let it simmer with the lid on for about 5 minutes. The goal? Softish apples. Not applesauce. Let it cool for at least 10 minutes—or longer if you get distracted by a podcast.
Step 3: Roll out the dough.
On a floured surface, roll those crusts thin. Like, 1/8-inch. Use a round cookie cutter, glass rim, jar lid, whatever. Aim for 3.5-inch circles. Reroll scraps. I do this while blasting ‘90s pop music. Highly recommend.
Step 4: Fill, seal, and crimp.
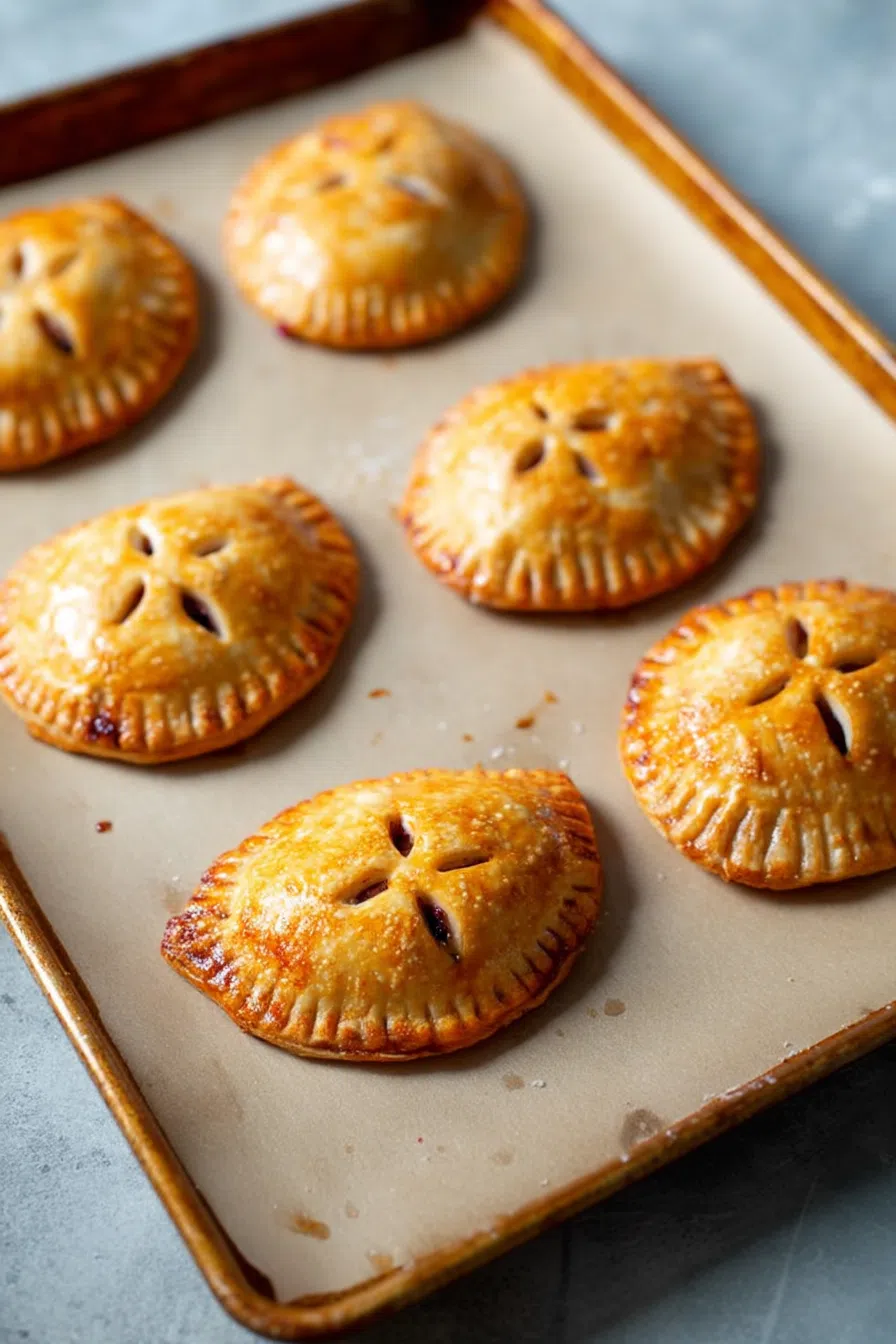
Spoon that lovely cooled apple stuff onto half the circles. Don’t overfill (I always do). Dab the edges with water. Top with another circle, press to seal, and crimp with a fork. If some filling leaks, it just means they’re enthusiastic.
Step 5: Brush and sugar it up.
Mix the egg and milk, brush it over the top like you’re painting joy onto each one. Sprinkle coarse sugar on top. It makes them sparkle. You deserve sparkle.
Step 6: Slice and bake.
Cut 2 or 3 tiny slits into the top of each. Let that steam out. Bake for about 20 minutes. They should look golden and smell like happiness.
Let them cool a bit before eating. Unless you’re into molten-apple tongue burns, in which case… no judgment.
Storage Options:
If you have any left—which, let’s be honest, you probably won’t—you’ve got options:
Want To Save This Recipe?
-
Room temp: Airtight container. 2–3 days. Perfect for sneaky midnight snacking.
-
Fridge: Up to 5 days. Reheat in the oven or toaster oven to bring back the crunch.
-
Freezer: Wrap each pie in foil, toss them in a freezer bag, and thank yourself later. Reheat at 350°F for 15-ish minutes. Easy.
Variations and Substitutions:
-
Other fruits – Pears are great. Peaches too. Or do a mix! Apple + pear? Yes please.
-
Caramel drizzle inside – Dangerously good.
-
Gluten-free crusts – Totally works. Just be gentle—they’re usually more fragile.
-
Vegan version – Use vegan butter, skip the egg wash, or use plant milk instead. Works fine.
-
Savory spin – Once, I filled them with mushrooms, herbs, and cheese. It was weirdly amazing.
Basically, this recipe’s forgiving. The only rule? Don’t be afraid to mess up.
What to Serve with Apple Hand Pies?
These pies are perfect on their own, but if you want to level up…
-
A hot cup of coffee – Morning pie? Don’t mind if I do.
-
Vanilla ice cream – Cold + warm = chef’s kiss.
-
Whipped cream – Bonus points for cinnamon on top.
-
A drizzle of caramel – It’s the extra mile that feels like a hug.
-
Sharp cheddar – Old-school combo. Salty and sweet. Trust the process.
Frequently Asked Questions:
Can I use canned pie filling?
Sure! Just chop it a little finer so it doesn’t bust out of the crust. But if you’ve got fresh apples? Use ’em. Always better.
Can I make them ahead of time?
Absolutely. Assemble and freeze before baking. Pull them out when needed and bake straight from frozen. Just add 3–5 minutes to the bake time.
My pies leaked. What now?
Same. All the time. Just clean up the mess and call them “rustic.” Honestly, they probably taste even better.

So—are you in? Because once you make these Apple Hand Pies, I’m telling you… you’ll make them again. They’re easy, cozy, and just the right mix of sweet and flaky comfort. Like a pie and a pop tart had a very delicious baby.
Try them. Share them. Hoard them. Whatever works.
And hey—if you do make them, let me know how it goes. Or don’t. But I’d love to hear what twist you try.
Keep the Flavor Coming – Try These:


Apple Hand Pies
Ingredients
- 2 9-inch pie crusts
- 2 tablespoons unsalted butter
- 2 cups apples peeled and finely chopped
- 1/3 cup packed light brown sugar
- 2 teaspoons cornstarch
- 1 teaspoon ground cinnamon
- 1/4 teaspoon ground nutmeg
- 1 large egg lightly beaten
- 1 tablespoon milk
- Coarse sugar for topping
Instructions
Preheat the Oven and Prepare Baking Sheets
- Preheat the oven to 400°F (200°C). Line two baking sheets with parchment paper and set aside.
Prepare the Apple Filling
- In a medium skillet over medium heat, melt the butter. In a separate small bowl, whisk together the brown sugar, cornstarch, cinnamon, and nutmeg. Add the dry mixture and chopped apples to the skillet. Stir to coat the apples thoroughly. Cover the skillet and allow the mixture to simmer for approximately 5 minutes, or until the apples begin to soften slightly. Remove from heat and let the filling cool for at least 10 minutes.
Roll and Cut the Pie Crusts
- On a lightly floured surface, roll out the pie crusts to approximately 1/8-inch thickness. Using a 3.5-inch round cookie cutter or similarly sized object, cut out circles from the dough. Reroll the scraps and continue cutting until all the dough is used. Place the dough rounds on the prepared baking sheets.
Fill and Seal the Hand Pies
- Spoon a small amount of the cooled apple filling onto half of the dough circles, leaving a slight border around the edges. Moisten the edges of each circle with a small amount of water, then place a second dough circle on top. Press the edges together gently and seal by crimping with the tines of a fork.
Apply Egg Wash and Sugar Topping
- In a small bowl, whisk together the beaten egg and milk. Brush the top of each assembled hand pie with the egg wash mixture. Sprinkle each with coarse sugar. Using a sharp knife, cut three small slits in the top of each pie to allow steam to escape during baking.
Bake the Hand Pies
- Place the baking sheets in the preheated oven and bake for 18 to 22 minutes, or until the hand pies are golden brown and crisp. Remove from the oven and allow to cool on a wire rack for several minutes before serving.
Notes
I’m Bitty, owner of nodashofgluten.com, where I share simple, delicious recipes for all tastes, including gluten-free. Check out my “About Me” page for more info!