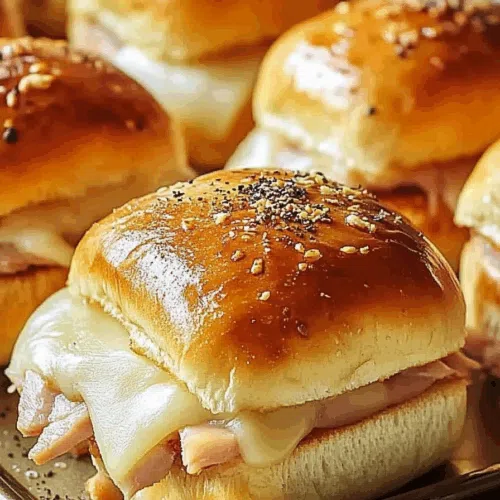
Soft slider buns, turkey, Swiss cheese, and a buttery Dijon glaze — these Turkey and Cheese Sliders are the ultimate 30-minute party snack!
So, confession time.
These Turkey and Cheese Sliders were never part of some fancy menu plan. Nope.
They were born during a total “oh-crap-people-are-coming-over-and-I-have-no-plan” panic.


It was one of those weird Sundays — too lazy to go to the store, too proud to order pizza again. (We’ve all had those weekends, right?)
I opened the fridge, hoping for inspiration, and boom — there it was: half a pound of deli turkey, a block of Swiss, and a lonely bag of Hawaiian rolls.
Cue dramatic music.
Fast forward an hour and my friends are practically fighting over these gooey little sandwiches. Someone literally said, “You HAVE to make these for every party from now on.” And honestly? I kinda have.
Why You’ll Love This Turkey and Cheese Sliders Recipe?
-
Done in 30 minutes. Seriously, I could make these half-asleep and still look like a hero.
-
Cheesy, buttery, melty perfection. They’re like the ultimate comfort food hug… but for your mouth.
-
Zero stress required. If you can layer things and stir melted butter, you can make these.
-
Customizable for whatever you’ve got lying around. Turkey? Ham? Roast beef? It’s all good, baby.
-
Always a crowd favorite. You will never have leftovers. (But if you do, midnight snacking = sorted.)
Ingredient Notes:
Before you sprint to the kitchen, here’s a quick rundown of the MVPs:
-
Slider Buns: Hawaiian rolls are my fave (that sweetness hits different), but any soft dinner rolls will work.
-
Mayonnaise: Just enough to keep things juicy. If you’re a mayo hater… try a little softened butter or leave it out. No judgment.
-
Turkey Breast: Thinly sliced deli turkey is perfect. Leftover roasted turkey? Even better.
-
Swiss Cheese: Mild, melty, and totally classic. Feel free to mix it up if you’re feeling wild.
-
Dijon Mustard + Honey: The real magic combo that gives the glaze a little tangy-sweet kick.
-
Melted Butter: Because, honestly, everything’s better when it’s dripping in butter.
-
Poppy Seeds (optional): They’re mostly for looks, but hey, who doesn’t love a little crunch?
-
Onion Powder + Worcestershire Sauce: Tiny ingredients, huge flavor.
How To Make Turkey and Cheese Sliders?
Alright, ready to create a masterpiece? Here’s how it goes:
Step 1: Prep the Oven and Pan
Crank your oven to 350°F. Lightly grease a baking dish (or just line it with parchment if you’re lazy like me and hate dishes).
Step 2: Assemble the Sliders
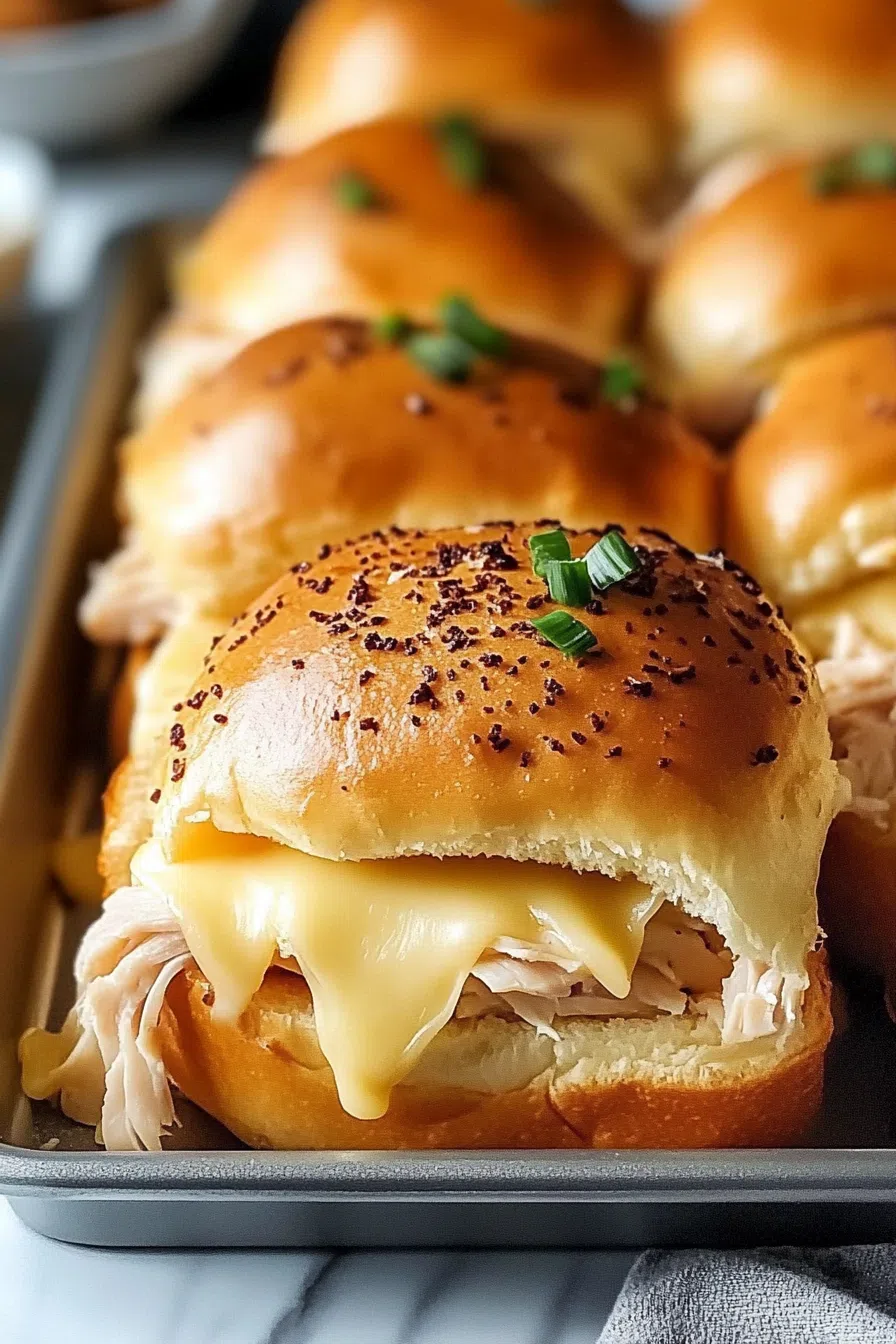
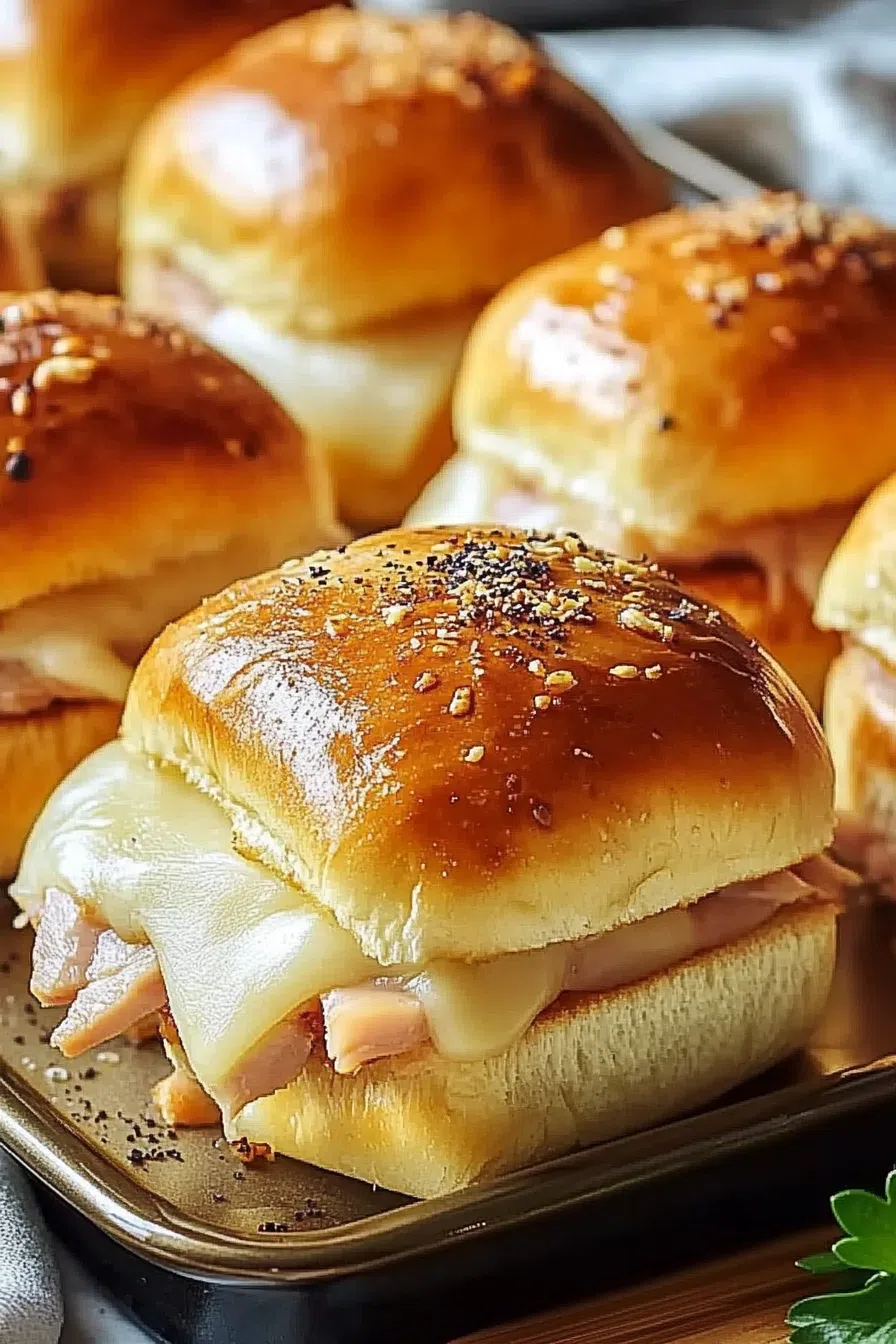
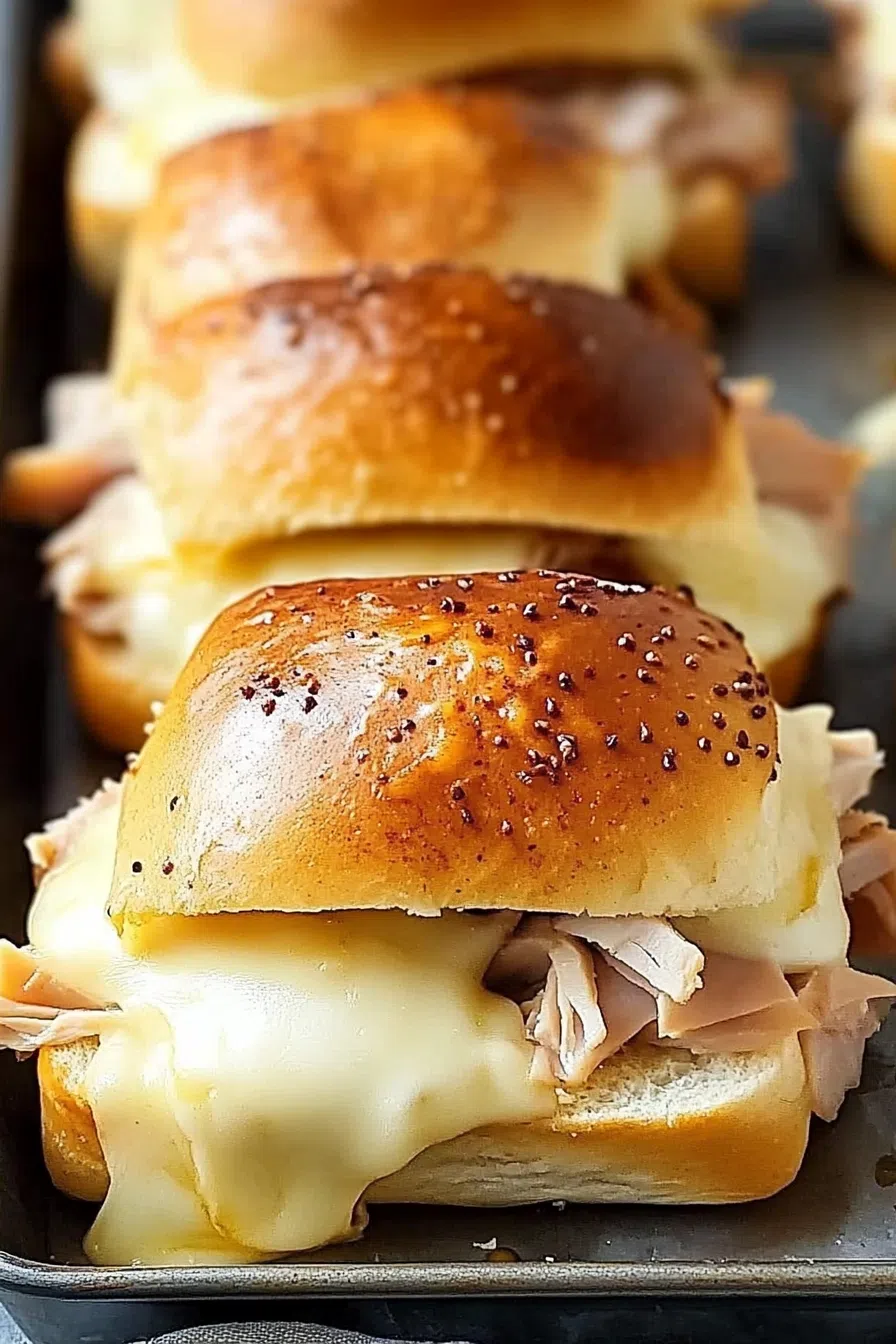
Slice your whole slab of buns horizontally — like a giant burger bun. No pulling them apart yet.
Lay the bottom half in the baking dish. Slather with a thin coat of mayo (team moist sandwiches forever).
Layer the turkey slices like you’re building the world’s greatest meat blanket. Top it off with slices of Swiss cheese.
Crown it with the top half of the buns.
Step 3: Mix Up the Sauce
In a small bowl, stir together melted butter, Dijon mustard, honey, poppy seeds (if you’re fancy), onion powder, Worcestershire sauce, and a good pinch of salt and pepper.
Brush that buttery goodness alllll over the tops of the buns.
Step 4: Bake to Golden Perfection
Cover the dish with foil and bake for 10 minutes so the cheese gets melty. Then uncover and bake another 10 minutes until the tops are golden brown and your house smells like pure happiness.
Want To Save This Recipe?
Step 5: Cool (Just a Little) and Devour
Let the sliders chill for a few minutes (hardest part, honestly) before slicing between them. Serve ’em up warm and melty!
Storage Options:
-
Fridge: Store them in an airtight container for up to 3 days.
-
Reheat: Pop them in the oven at 300°F until warmed through — about 8–10 minutes.
-
Freeze: Wrap individual sliders in foil and toss ’em in a freezer bag. They’ll keep for up to 2 months. Great for emergency cravings. (Trust me.)
Variations and Substitutions:
Because rules are made to be broken:
-
Switch up the meat: Ham, roast beef, pulled chicken — whatever you have hanging around.
-
Get wild with the cheese: Provolone, cheddar, pepper jack for a spicy twist.
-
Add extras: Sliced tomatoes, caramelized onions, even a few spinach leaves if you’re feeling healthy-ish.
-
Make it gluten-free: Use gluten-free buns and double-check your mustard and Worcestershire labels.

What to Serve with Turkey and Cheese Sliders?
These sliders are a full vibe on their own, but if you want to build a full feast:
-
Potato chips or fries: Classic, can’t go wrong.
-
Pickles: Always pickles. It’s the law.
-
Coleslaw: A little crunchy, a little tangy — perfect sidekick.
-
Tomato soup: Ideal for dunking if you wanna get cozy.
Frequently Asked Questions:
Can I assemble these ahead of time?
Absolutely! Just hold off on the butter sauce until right before baking so things don’t get soggy.
How do I make these spicier?
Add a little sriracha to the butter glaze or swap Swiss cheese for pepper jack. Game-changer.
What if I don’t have Swiss cheese?
No big deal — cheddar, mozzarella, or even American cheese will still make your tastebuds happy.
These Turkey and Cheese Sliders are proof that simple ingredients, a little butter, and a lotta love can create something truly magical.
Have you ever made sliders before? Got a go-to flavor combo? Let’s swap ideas in the comments — I’m always down to try something new!
Keep the Flavor Coming – Try These:
Turkey and Cheese Sliders
Ingredients
- 12 slider buns
- ½ cup mayonnaise
- 1 pound thinly sliced turkey breast
- 12 slices Swiss cheese
- 2 tablespoons Dijon mustard
- 2 tablespoons honey
- 1 tablespoon poppy seeds optional
- ¼ cup unsalted butter melted
- 1 teaspoon onion powder
- 1 teaspoon Worcestershire sauce
- Salt and freshly ground black pepper to taste
Instructions
Preheat the Oven:
- Preheat the oven to 350°F (175°C). Lightly grease a baking dish large enough to hold all twelve sliders or line it with parchment paper.
Prepare the Buns:
- Slice the entire slab of slider buns horizontally, creating a top and bottom half. Keep the buns connected; do not separate them into individual rolls. Place the bottom half into the prepared baking dish.
Assemble the Sliders:
- Spread a thin layer of mayonnaise evenly over the bottom buns. Arrange the turkey slices over the mayonnaise, followed by a layer of Swiss cheese slices. Place the top half of the buns over the cheese layer.
Prepare the Glaze:
- In a small mixing bowl, combine the melted butter, Dijon mustard, honey, poppy seeds (if using), onion powder, Worcestershire sauce, salt, and pepper. Stir until well blended.
Glaze the Sliders:
- Using a pastry brush, generously coat the tops of the buns with the prepared butter mixture.
Bake:
- Cover the baking dish with aluminum foil and bake for 10 minutes. Remove the foil and continue baking for an additional 10 minutes, or until the tops are golden brown and the cheese has fully melted.
Cool and Serve:
- Allow the sliders to cool for a few minutes before slicing and serving. Serve warm.
Notes
I’m Bitty, owner of nodashofgluten.com, where I share simple, delicious recipes for all tastes, including gluten-free. Check out my “About Me” page for more info!