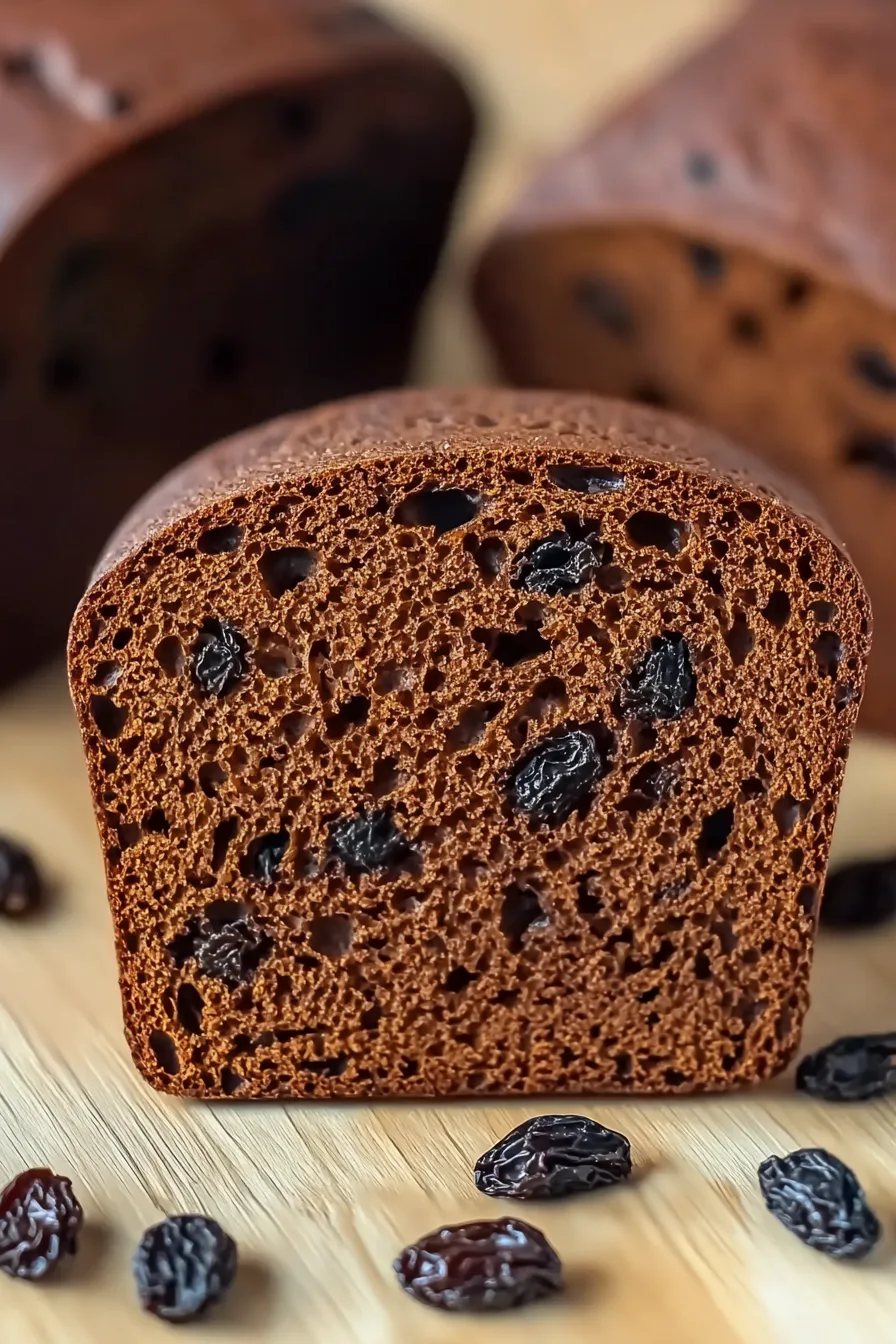
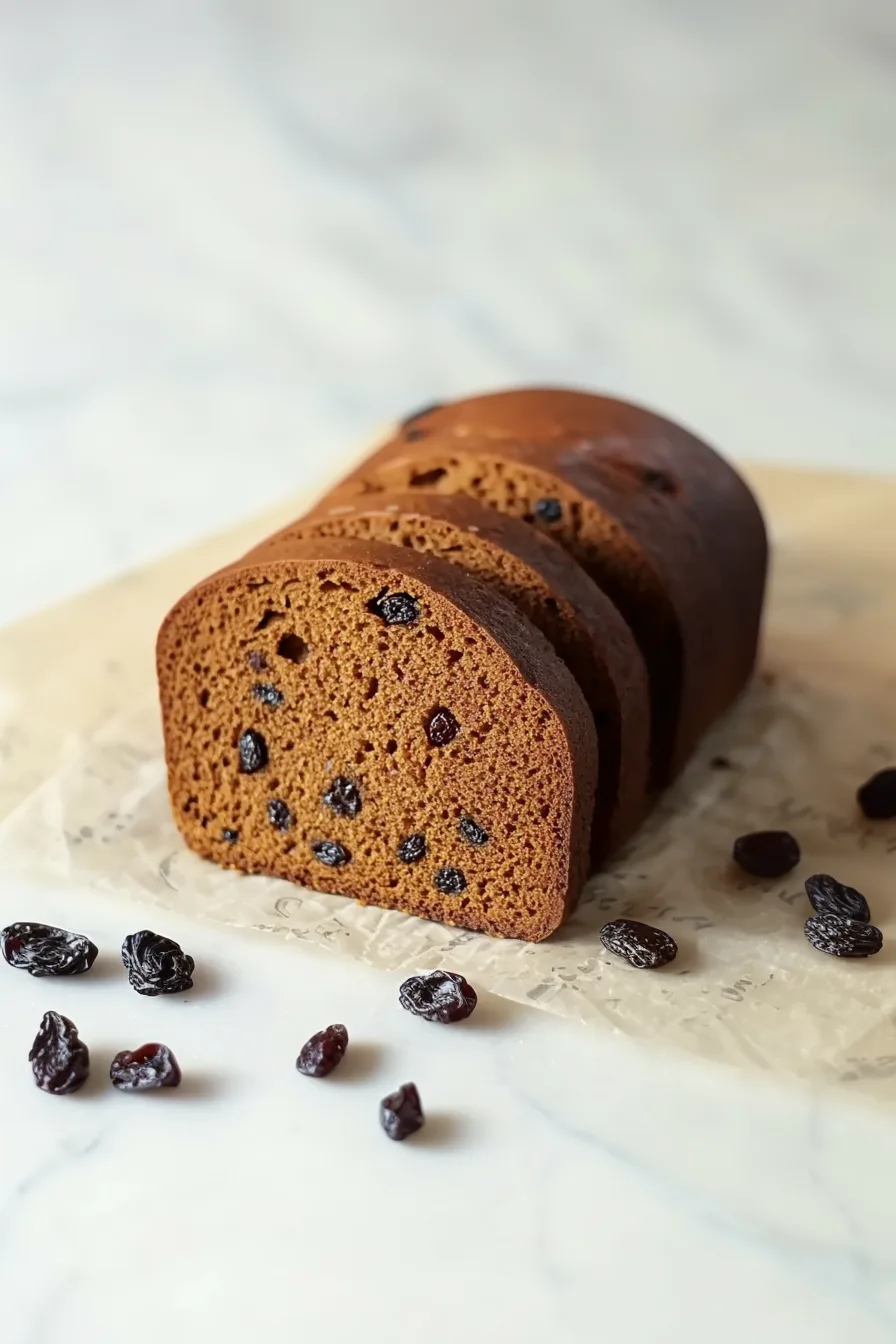
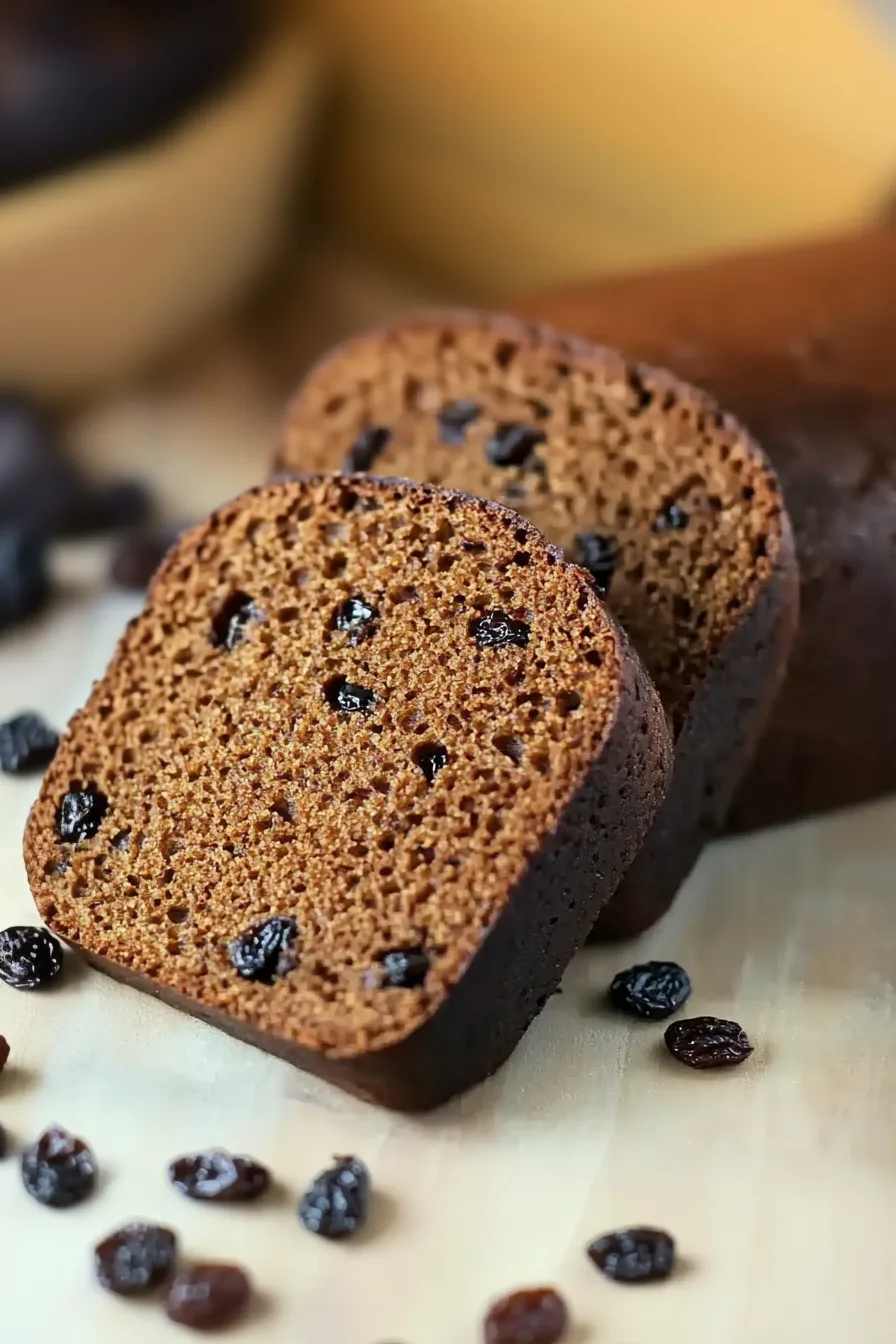
Old-school Traditional Boston Brown Bread made with cornmeal, rye, molasses, buttermilk, and optional raisins—steamed low and slow the classic New England way.
So, here’s the funny thing about Traditional Boston Brown Bread—I didn’t grow up with it. Not even close. My family was more the “buy whatever’s on sale at the grocery store and call it bread” type, which meant this old-fashioned, molasses-dark loaf was one of those foods that felt almost mythical to me. But a couple years ago, during a weirdly nostalgic phase (I blame a rainy week and too many old cooking shows), I stumbled on a coffee can at a thrift store in Maine. Like, the really old kind—the kind that made me wonder who drank that much coffee back then.


And for some reason, that silly can reminded me of a bus trip my family took up the East Coast when I was a kid. I barely remember anything about it except a moment where we stopped at this tiny general store in Massachusetts, and there was this loaf wrapped in wax paper sitting next to the register. My mom said, “That’s Boston brown bread. Old-school stuff.” She didn’t buy it (budget was tight), but the way she said it stuck with me. Warm. A little nostalgic. Like she’d had it once and loved the memory more than the bread itself. Isn’t it strange what the brain holds onto?
Anyway, when I saw that coffee can in Maine, I got this impulse—one of those random ones that makes no sense at the time—and suddenly I needed to try making my own Traditional Boston Brown Bread. I didn’t expect the molasses smell to hit me so hard. It was almost emotional… that deep, smoky sweetness that feels like stories and winters and old wooden kitchens. I stood there stirring and thinking, “Why does this feel familiar even though it isn’t?” Sound familiar? That weird déjà vu food moment when your heart knows something before your mouth does? Yeah. That.
Why You’ll Love This Traditional Boston Brown Bread Recipe?
There’s something so unapologetically unfancy about Traditional Boston Brown Bread, and honestly, that’s kind of its charm. It’s dense, but not in a sad way. More like… purposeful? Like it knows exactly what it’s supposed to be and doesn’t waste time trying to be a brioche or whatever the trendy bread of the moment is. And the steaming method—yes, steaming in a can like some adorable 1890s field guide—is weirdly calming.
The molasses makes it taste deep and cozy, almost like a winter sweater in bread form. The rye and cornmeal give it texture, like something hearty a fisherman’s wife would pack in his lunch (okay, that might be dramatic, but you get it). And the optional raisins? People fight about them. I’m somewhere in the middle; some days I want that sweet chewiness, other days I’m like, “Nope, not today.” See? No absolutes here. Just vibes.

Ingredient Notes:
Let’s take a little stroll through what actually makes a loaf of Traditional Boston Brown Bread do its thing. And like any old recipe, the ingredients aren’t fancy. They’re like your friends who show up in sweatpants and don’t apologize for it.
- All-purpose flour: The baseline. The reliable sibling. Keeps the loaf from collapsing into a molasses swamp.
- Rye flour: This is where the traditional New England flavor lives. Kind of earthy, a touch serious.
- Finely ground cornmeal: And yes, finely. Learned the hard way once—coarse cornmeal makes it crunchy in a way that feels like a mistake.
- Baking powder & baking soda: The very small lift team. Not glamorous, but helpful.
- Salt: Brings clarity to the party.
- Allspice: Just a tiny sprinkle of warmth. If spices were people, this would be the introvert.
- Raisins: Optional but emotionally charged. People really have opinions.
- Buttermilk: Tangy and tenderizing. Like a quiet miracle worker.
- Vanilla extract: Totally optional, but honestly? A little splash just feels right to me.
- Molasses: The soul. The star. The moody, dark, sticky base note that makes you feel like you’re cooking in 1903.
How To Make Traditional Boston Brown Bread?
Making Traditional Boston Brown Bread feels kind of like stepping outside time for a second. It’s slow but in a good way—almost meditative. And yes, there’s something satisfying about using a coffee can for something other than holding pens.
Step 1. Set up your steaming situation.
Stovetop or oven, doesn’t matter. The stovetop feels more rustic—like something you’d see in an old documentary. The oven is less fussy if you’re prone to forgetting water levels (hi, it’s me).
Step 2. Grease your coffee can or loaf pan.
Butter it like you mean it. Trust me, anything with molasses wants to stick like a toddler who won’t let go of your leg.
Step 3. Mix your dry ingredients.
This part always smells cozy. Rye, cornmeal, flour, spices—it’s like autumn whispering “Hey.” Add your raisins here if you’re using them. Or don’t. No pressure.
Step 4. Mix your wet ingredients.
Molasses is dramatic. It pours like you’re summoning a spell. Buttermilk calms it down.
Step 5. Combine the two.
This batter will be thick, stubborn, and not particularly graceful. Honestly love that about it.
Step 6. Fill the can only 2/3 full.
You want a gentle rise, not a mushroom cloud situation.
Step 7. Cover it tightly with foil.
Pretend you’re tucking it into bed.
Step 8. Steam away.
Two hours and fifteen minutes at least. Check the water a few times—pots get dramatic and boil dry when you’re not looking.
Want To Save This Recipe?
Step 9. Toothpick test.
Clean? Great. Not clean? Give it a bit more time. No guilt.
Step 10. Cool down.
Don’t rush this. Hot brown bread is crumb-prone and emotional.
Storage Options:
This bread gets better the next day—one of those rare foods that ages like a good memory. Leave it wrapped on the counter for 2–3 days, refrigerate for longer, or freeze slices for quick toaster moments. I weirdly think it tastes even better toasted with butter after being frozen. Not sure why. Maybe absence makes the heart grow fonder.
Variations and Substitutions:
Sometimes you don’t have exactly what you need. Or sometimes you’re just in a mood. Either way, Traditional Boston Brown Bread is more flexible than you think.
- Swap raisins for cranberries if you want tart little pops.
- Add nuts when you want crunch.
- Use blackstrap molasses for a deep, almost smoky bitterness—though honestly, I hesitate some days.
- DIY your buttermilk with milk + lemon juice.
- Add orange zest if you want holiday vibes.
- Replace rye with whole wheat—it won’t taste exactly “traditional,” but it’ll still be good.
See? No strict rules. We’re cooking, not taking a test.
What to Serve with Traditional Boston Brown Bread?
This is where it gets fun. Traditional Boston Brown Bread is like that one friend who somehow fits in with every group.
- Baked beans — the classic New England duo.
- Smoked or roasted meats — sweet meets savory in the best way.
- Butter, just butter — seriously, sometimes that’s all you need.
- Cream cheese — trust me; I doubted it too until I tried it.
- Jam or marmalade — breakfast feels fancy even when it isn’t.
Frequently Asked Questions:
Why steam instead of bake?
Tradition, mostly. And the moisture gives it that dense, comforting texture. It’s very “old barn kitchen in November.”
Do I need a coffee can?
Nope. A loaf pan works. But the can gives you that fun round loaf that looks like something out of a vintage cookbook.
Raisins or no raisins?
It depends on the day. And your mood. And maybe the weather. Truly no wrong answer.

If you end up making this Traditional Boston Brown Bread, I’d honestly love to know what memories—or random feelings—it pulls out of you. Recipes do that. They connect the weirdest dots in our lives. So go make it, enjoy the slow rhythm of it, and message me after… don’t leave me hanging.
Keep the Flavor Coming – Try These:


Traditional Boston Brown Bread
Ingredients
- Butter for greasing the coffee can or loaf pan
- 1/2 cup heaping all-purpose flour
- 1/2 cup heaping rye flour
- 1/2 cup heaping finely ground cornmeal
- 1/2 teaspoon baking powder
- 1/2 teaspoon baking soda
- 1/2 teaspoon kosher salt
- 1/2 teaspoon allspice
- 1/2 cup raisins optional
- 1 cup buttermilk
- 1 teaspoon vanilla extract optional
- 1/2 cup molasses
Instructions
Prepare the steaming environment
- For the stovetop method, place a steamer rack inside a tall stockpot and add enough water to reach one-third of the height of the coffee can. Set the pot over medium heat while preparing the batter.
- For the oven method, preheat the oven to 325°F (163°C). Bring a large pot of water to a boil.
Grease the container
- Thoroughly grease a clean coffee can or a small loaf pan with butter, ensuring all inner surfaces are coated.
Combine the dry ingredients
- In a large bowl, whisk together the all-purpose flour, rye flour, finely ground cornmeal, baking powder, baking soda, kosher salt, and allspice. Add the raisins, if using, and mix to distribute evenly.
Combine the wet ingredients
- In a separate bowl, whisk together the buttermilk and vanilla extract, if using. Add the molasses and whisk until the mixture is smooth and fully incorporated.
Incorporate the wet mixture into the dry ingredients
- Pour the wet mixture into the dry mixture and stir until a thick, cohesive batter forms. Do not overmix.
Fill the container and cover
- Transfer the batter into the prepared coffee can or loaf pan, ensuring the batter does not exceed two-thirds of the container’s height. Cover the top securely with foil to seal in moisture.
Steam the bread
- For the stovetop method, place the container onto the steamer rack. Add additional water if necessary so it remains one-third up the sides. Cover the pot and reduce the heat to the lowest setting that still maintains a gentle simmer. Steam for 2 hours and 15 minutes, checking the water level periodically to prevent boiling dry.
- For the oven method, place the filled container inside a high-sided roasting pan. Pour boiling water into the roasting pan until the water reaches one-third up the sides of the container. Carefully transfer the pan to the oven and steam for 2 hours and 15 minutes.
Test for doneness
- Insert a toothpick into the center of the bread. If it emerges clean, the bread is done. If not, re-cover the container and continue steaming for an additional 30–45 minutes.
Cool the bread
- Remove the container from the heat. Allow the bread to cool for 10 minutes before transferring it to a cooling rack. Let it cool for at least 1 hour before unmolding.
Notes
I’m Bitty, owner of nodashofgluten.com, where I share simple, delicious recipes for all tastes, including gluten-free. Check out my “About Me” page for more info!