

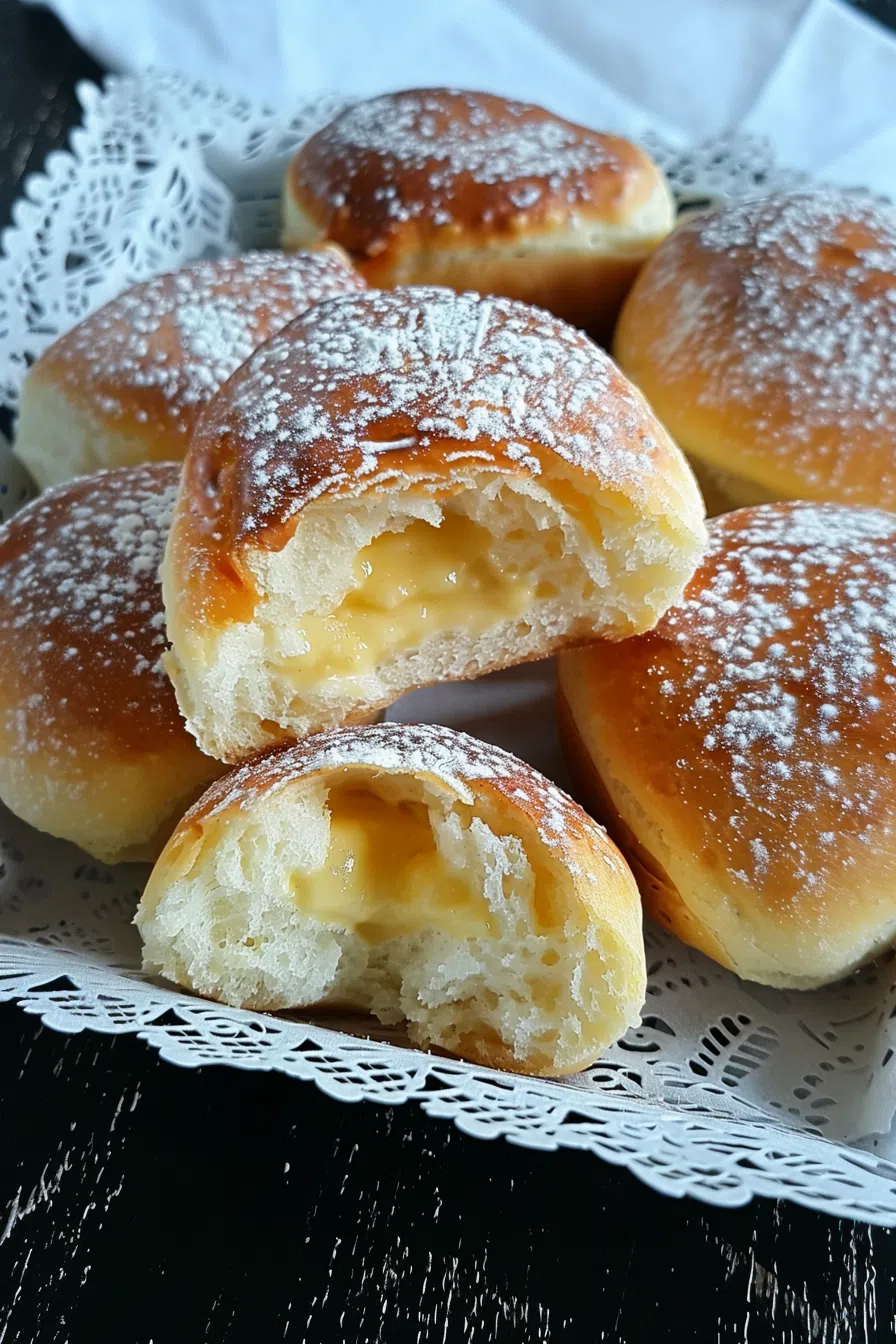
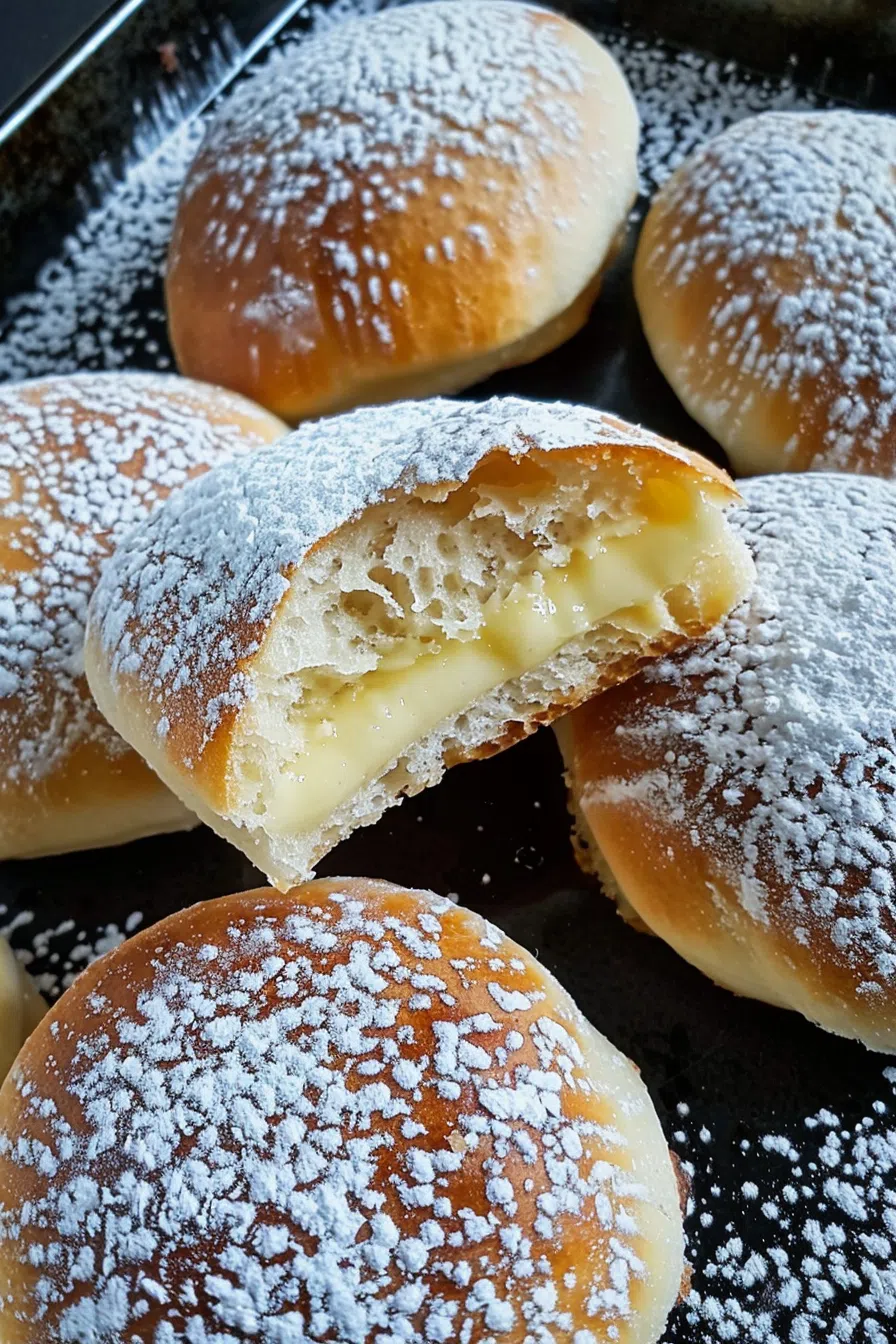
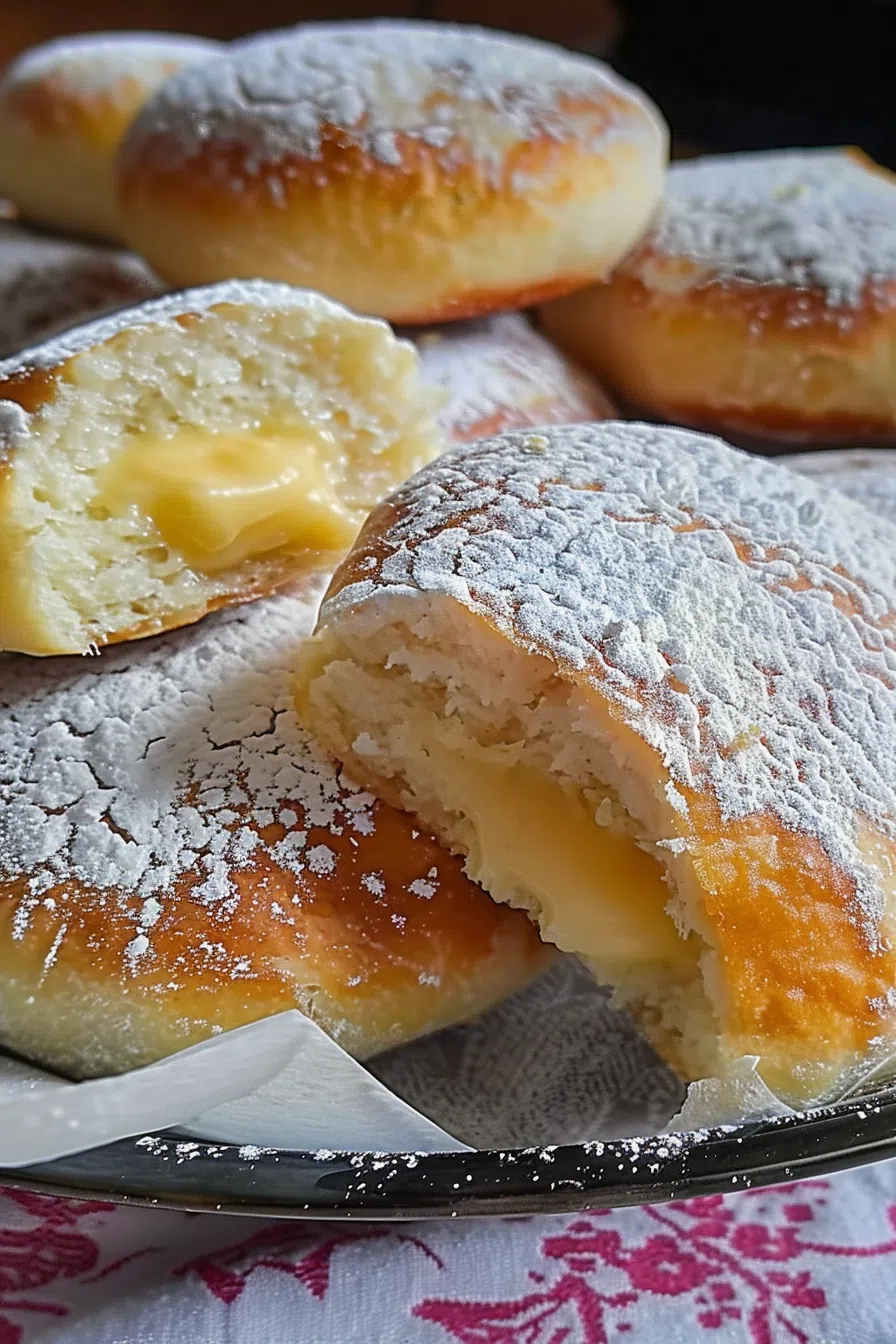
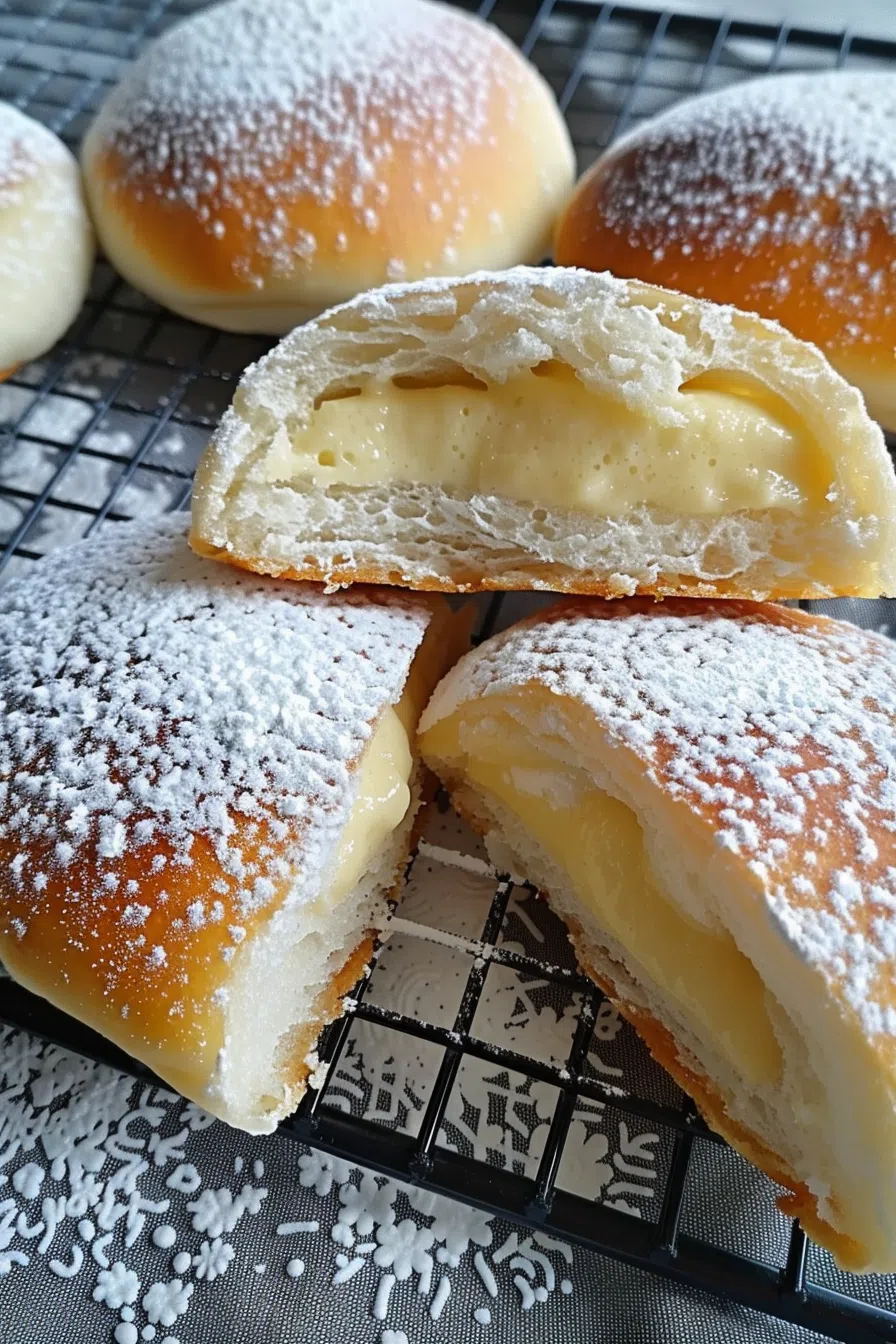
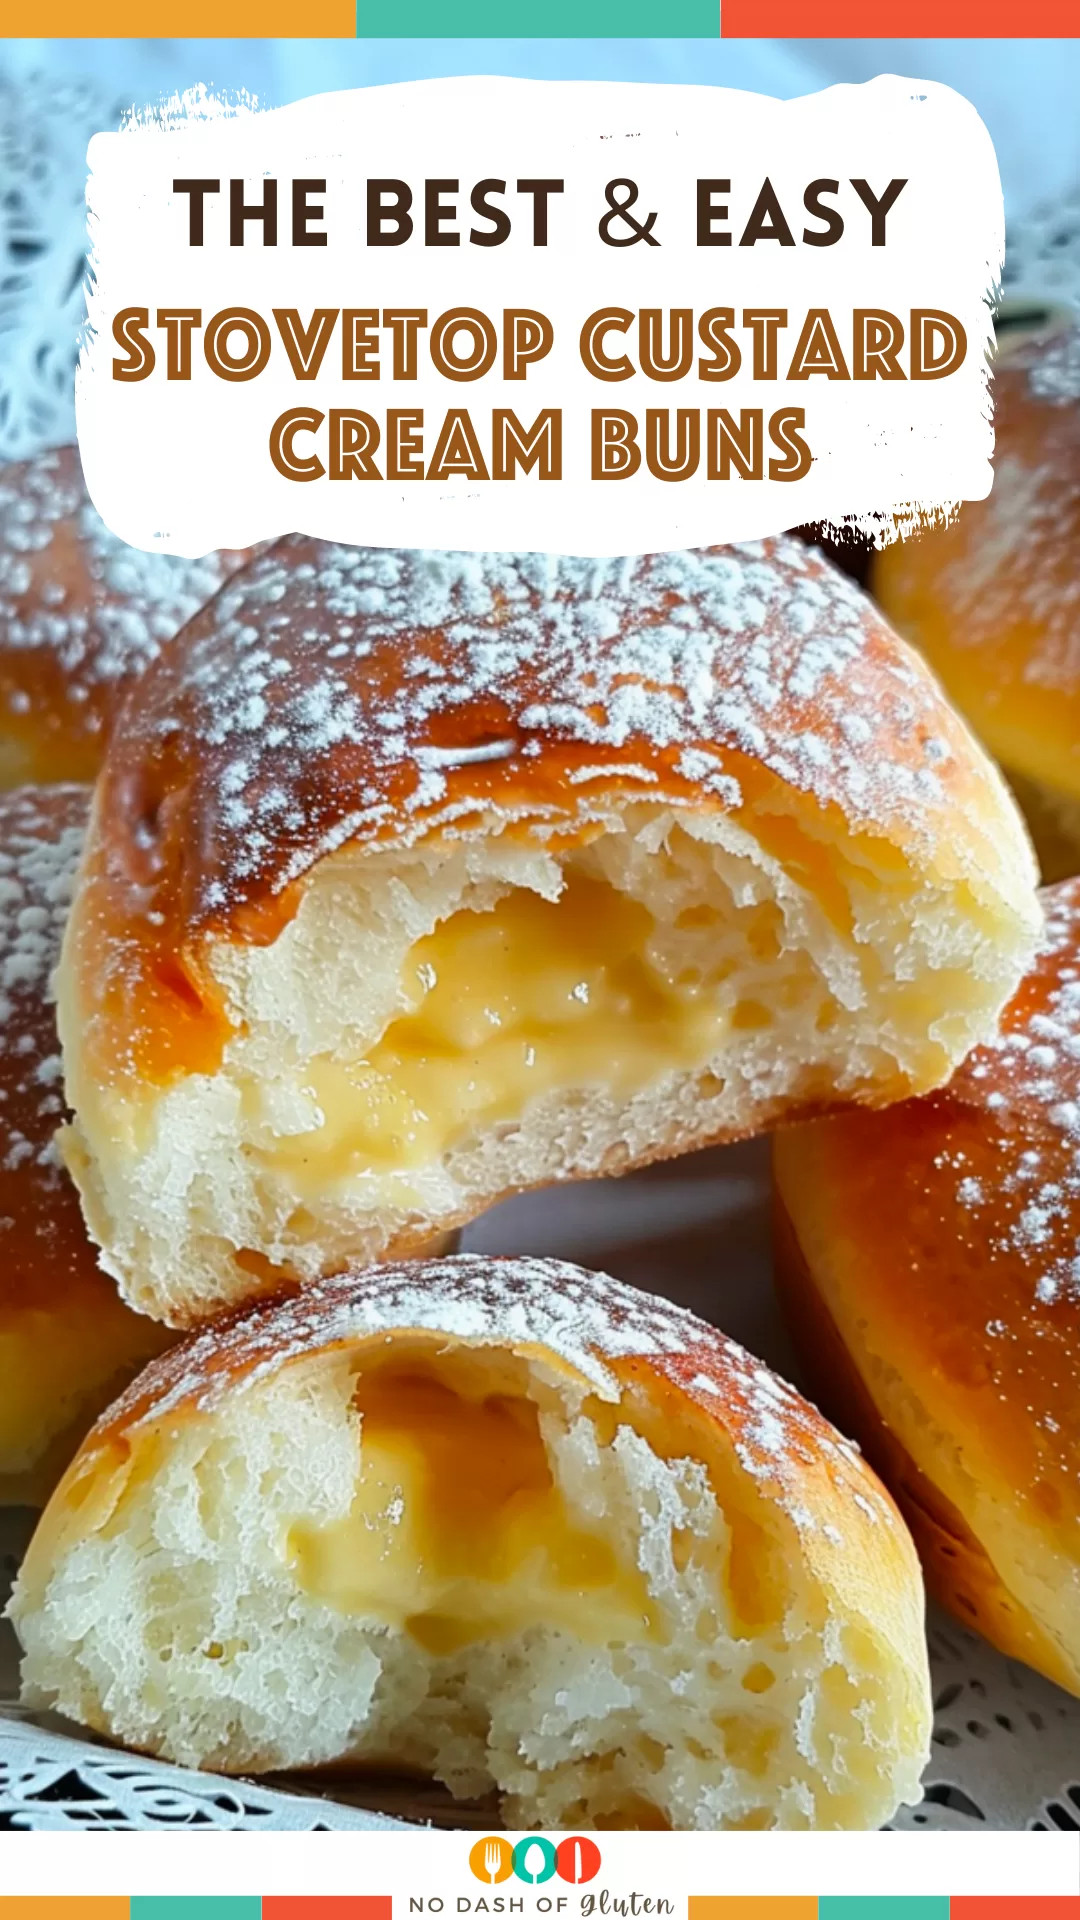
These stovetop custard cream buns are made with flour, yeast, water, sugar, and a creamy custard filling—all without turning on the oven.
It was one of those days. You know, when everything feels slightly off and your to-do list is longer than your patience. My oven had just decided to take an unscheduled break (again), but I had this intense craving for something warm and soft and kind of nostalgic. Not a cookie. Not a cake. Something bready… but sweet. Comforting.


I remembered these old-school stovetop buns my mom once made when our electricity went out during a storm. We sat on the kitchen floor, ate them right off the cooling rack, custard dripping down our chins, and for that moment, the world outside didn’t matter.
So I tried to recreate that memory. I had custard from another recipe sitting in the fridge (let’s be honest—I almost just ate it with a spoon and called it dinner), and enough flour to make something happen. What came out of that pan? Pure joy. A little uneven, a little messy, and completely perfect. These buns made me feel like I was back in that kitchen, storm outside, warm inside.
Why You’ll Love This Stovetop Custard Cream Buns Recipe?
There’s a kind of quiet magic in stovetop baking. No timers. No fans whirring. Just the sound of dough gently puffing and sizzling in a warm pan. These Stovetop Custard Cream Buns aren’t trying to impress with glossy finishes or precision. They’re soft, slightly rustic, and filled with warm, velvety custard that oozes out when you tear into them.
And did I mention no oven? You could make these in a tiny kitchen, in a camper, in your friend’s rental while their oven is “being replaced next week” (a lie, obviously). The dough is simple. The process is forgiving. The result feels like something out of a Sunday morning you didn’t know you needed.
Ingredient Notes:
You don’t need a mile-long shopping list or a bakery kitchen. Here’s what you’ll need:
-
Flour (1¾ cups): I’ve used both all-purpose and cake flour. One gives you structure, the other gives you tenderness. Flip a coin or use what’s in your cabinet.
-
Instant dry yeast (1 tsp): The no-fuss kind. No blooming required.
-
Sugar (1 tbsp): Just enough to sweeten the dough and feed the yeast.
-
Salt (⅓ tsp): A little salt balances the sweetness. Always, always include it.
-
Warm water (½ cup): Think “pleasantly warm bath,” not “boiling kettle.”
-
Milk (1 tbsp): Adds a bit of richness. Could you skip it? Sure. Should you? Nah.
-
Oil (1 tbsp): I used canola, but sunflower or even light olive oil works.
-
Custard: Store-bought is fine. Homemade? Even better. You do you.
How To Make Stovetop Custard Cream Buns?
Step 1: Make the dough
In a mixing bowl, whisk together the flour, yeast, sugar, and salt. In a separate cup, combine the warm water, milk, and oil. Pour the wet into the dry and mix until you have a slightly shaggy ball of dough. Knead it for about 5 minutes—it should feel soft but not sticky. Like a chubby baby’s cheek. You’ll know.
Step 2: Let it rise
Cover the dough with a towel or plastic wrap. Let it rest somewhere warm-ish (I sometimes stick it near my toaster oven, don’t judge) until doubled in size. About an hour. Use that time to blast music, clean the kitchen, or scroll way too far into TikTok.
Step 3: Shape & fill
Punch the dough down (gently—it’s done nothing wrong) and divide it into 12 pieces. Flatten each into a little round, add a generous spoonful of custard to six of them, then top with the remaining six rounds. Pinch the edges together like you’re sealing a ravioli. Will they all be perfect? Nope. Will they be delicious anyway? Yup.
Step 4: Proof again
Let those sweet little filled buns rest for about 15 minutes. They’ll puff slightly. This part’s important—even dough needs a nap.
Step 5: Cook on the stovetop
Heat a non-stick pan over low heat. No oil needed. Place a few buns in at a time, cover with a lid, and cook for about 10 minutes on one side. Flip and cook another 5 minutes on the other. You want golden brown bottoms and tops, and a warm, almost fluffy center. Some custard might escape. It’s fine. It’s part of the charm.
Step 6: Cool slightly (if you can wait)
Let them sit for a few minutes before biting in unless you like lava-mouth. Then, eat them warm. With tea. Or coffee. Or while standing barefoot in your kitchen, like I did.
Want To Save This Recipe?
Storage Options:
These are chef’s kiss the day they’re made. But if you manage to not devour them all, store in an airtight container at room temp for up to two days. Reheat gently in the microwave or pan to bring them back to life.
You can freeze them too—just wrap individually and thaw on the counter. Reheat and enjoy all over again.
Variations and Substitutions:
-
No custard? Try jam, Nutella, lemon curd, or sweetened cream cheese.
-
Savory twist: Go rogue with garlic butter and mozzarella. It works.
-
Make it vegan: Use plant-based milk and custard. It’s totally doable.
-
Add spice: Cinnamon, cardamom, nutmeg—sprinkle into the dough for warm fall vibes.
-
Top with glaze: A quick powdered sugar and milk drizzle? Yes please.
What to Serve with Stovetop Custard Cream Buns?
You really don’t need much. But if you’re turning this into a moment:
-
Tea or coffee: Obviously. Warm buns + hot drink = bliss.
-
Yogurt and fruit: For a “look, I’m balanced” breakfast.
-
Whipped cream: Why not?
Frequently Asked Questions:
Can I use active dry yeast instead of instant?
Totally. Just dissolve it in the warm water with a pinch of sugar first. Let it sit until foamy, then proceed.
Do I have to let them proof twice?
Technically? Yes. That second rise helps the texture. But if you’re in a rush, shorten it—just know they might be a little more dense. Still tasty.
Can I bake them instead?
Sure. 350°F (175°C) for 15–18 minutes should do it. But stovetop gives them that slightly chewy, crisp edge that’s just different (and amazing).

These Stovetop Custard Cream Buns aren’t just a recipe. They’re a little throwback. A little comfort. A reminder that good food doesn’t need bells and whistles. Just your hands, your stove, and maybe a dollop of custard from the fridge that was begging to be turned into something better than leftovers.
If you make them, please tell me how it went. Did your custard leak everywhere? Did they come out misshapen but still get devoured in five minutes? Did you make them with jam and eat three before anyone else saw? I want to hear it all.
Keep the Flavor Coming – Try These:

Stovetop Custard Cream Buns
Ingredients
- 1 ¾ c all purpose / cake flour
- 1 tsp instant dry yeast
- 1 tbsp white granulated or castor sugar
- ⅓ tsp salt
- ½ c warm water
- 1 tbsp milk
- 1 tbsp oil canola or sunflower oil
Instructions
- In a bowl whisk together the flour, yeast, sugar and salt.
- In a pot or pitcher combine the water, milk and oil.
- Add the wet mixture to the dry ingredients and mix until a dough forms. Knead it for 5 minutes until it becomes smooth.
- First Proofing: Cover the dough. Allow it to rest in a warm area for an hour until it doubles in size.
- Once the dough has proofed. Deflate it by pressing down and kneading briefly. Divide it into 12 portions. Shape each piece into a circle. Fill half with custard. Fold over and seal the edges.
- Second Proofing: Let the shaped buns sit for 15 minutes.
- Heat a stick pan over low heat. Cook the buns for 10 minutes on one side. Then flip them over. And cook for a 5 minutes until they turn brown.
- Allow the buns to cool slightly before serving. Enjoy your Stovetop Custard Cream Buns!
Notes
I’m Bitty, owner of nodashofgluten.com, where I share simple, delicious recipes for all tastes, including gluten-free. Check out my “About Me” page for more info!

2 Responses
These turned out SO GOOD! I ended up baking ours because they were a late night impulse bake and our big stovetop pan was in the running dishwasher. They turned out perfect in the oven at 350 for 18 minutes. You’ve officially broken my recent streak of bad luck with bread recipes! Puffy, delightful, just sweet enough.
Mara, I’m so glad they turned out beautifully for you! I love that you adapted them to the oven—350 for 18 minutes sounds perfect, and honestly, I think they’d be just as wonderful baked that way. There’s something about finally nailing a bread recipe that feels like breaking a spell, right? Thank you for sharing that win with me!