

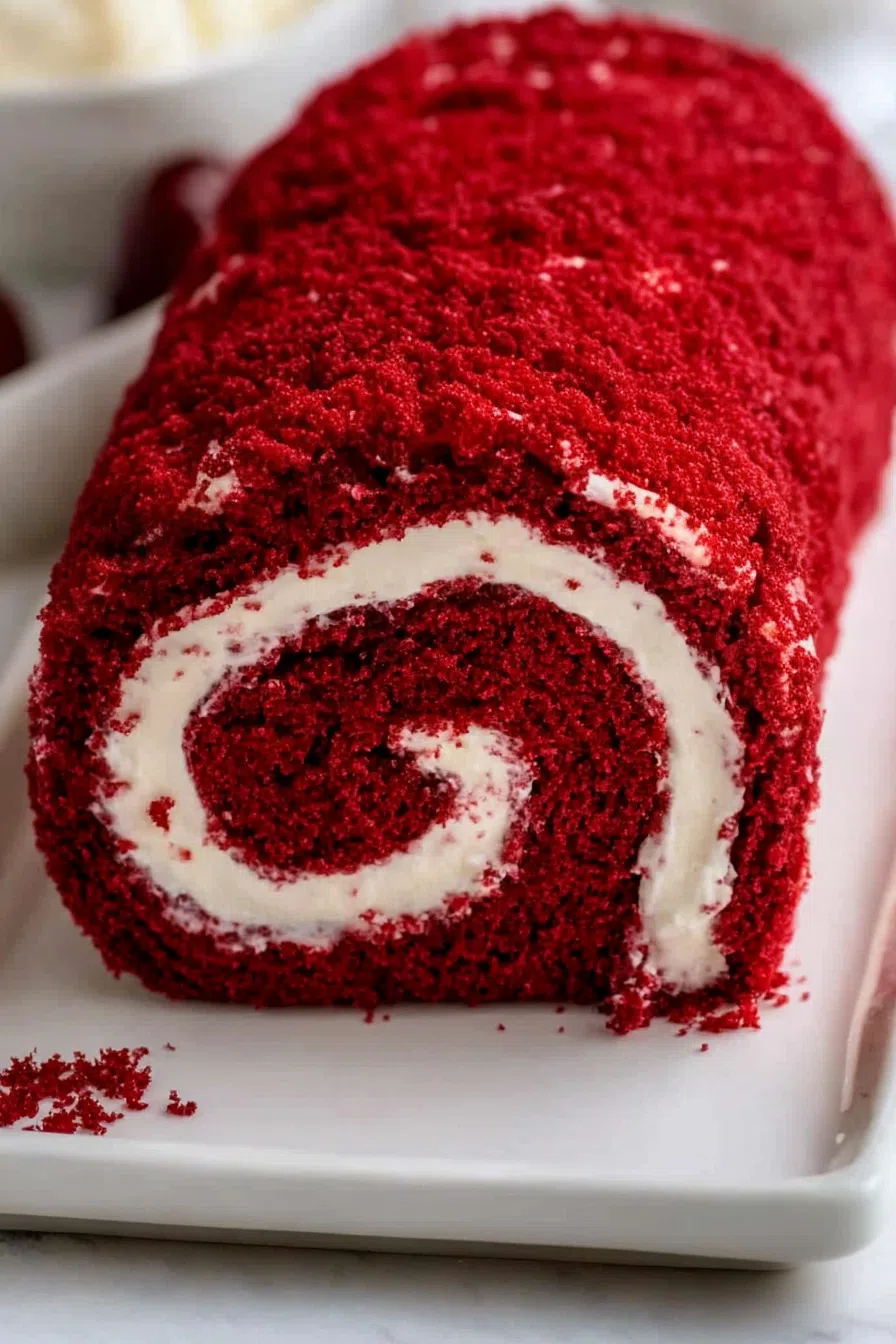
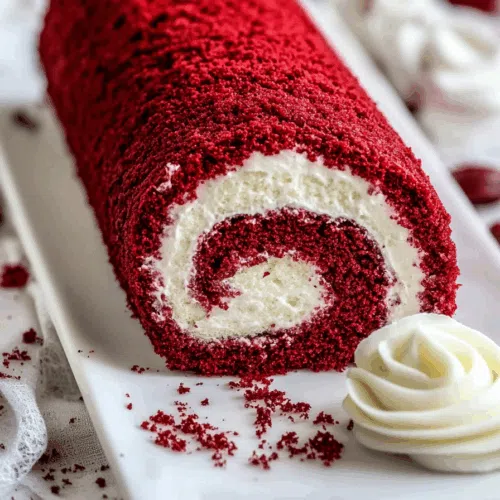
This Red Velvet Cake Roll is made with cocoa powder, cake flour, buttermilk, and cream cheese—moist, festive, and ridiculously good.
Okay, full honesty? I wasn’t planning to bake this. It wasn’t on a menu or part of a plan. I didn’t even have anyone coming over. I was just stuck inside on one of those weird icy weekends where time feels fake and the idea of leaving the house is… nope.
There I was, staring into the pantry at some cake flour, cocoa, and eggs that were getting dangerously close to their “uh-oh” date. I had cream cheese in the fridge (because doesn’t everyone?), and I remembered seeing a recipe for a Red Velvet Cake Roll once. I never tried making one before because, honestly, I assumed it would crack or fall apart or look like a crime scene.


But I figured, whatever. If it works, great. If not, I’ll eat it with a spoon. Alone. Possibly in the dark.
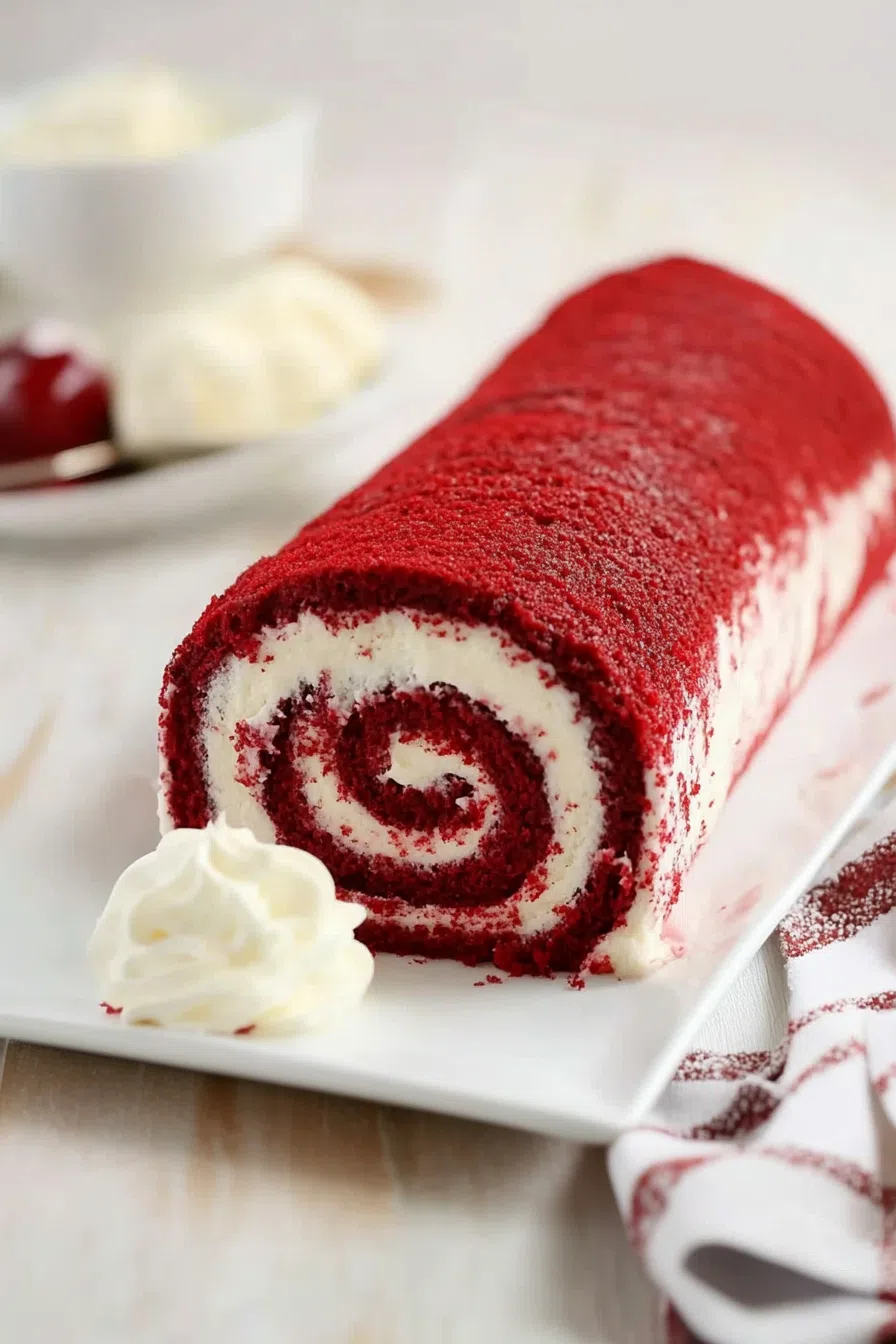
It didn’t fall apart. It rolled. It swirled. It made my entire kitchen smell like a warm hug. And when I sliced into it and saw that perfect little cream cheese spiral? I actually whispered “well look at you” out loud like I was talking to a puppy. Yep, it was that kind of day.
Why You’ll Love This Red Velvet Cake Roll Recipe?
Where do I start? First off, the cake part—super soft, with just the right touch of cocoa and that tangy little zip from the buttermilk and vinegar (I know, sounds weird, but trust me). It’s bright red, because… well, it’s red velvet. That’s the whole thing. Go big or go beige, right?
But the real star here? That cream cheese filling. It’s thick and sweet, but not too sweet, and it spreads like a dream. Honestly, if this cake were a person, it’d be the friend who shows up late but brings snacks and always makes you feel better about life.
And when you slice into that swirl? Yeah. Instant mood lift.
Ingredient Notes:
You’re not building a spaceship here. Most of this stuff is easy to find, and if you’re like me, it’s probably already hiding in the back of your pantry or fridge.
-
Cake flour – This is what makes the cake soft and light. You can use all-purpose, but it won’t be quite as delicate.
-
Cocoa powder – Red velvet’s secret weapon. A little chocolatey, a little earthy. Just enough.
-
Buttermilk – Adds moisture and that slightly tangy bite. If you don’t have any, stir a little vinegar into milk and let it sit for 5 minutes.
-
Vinegar – It sounds odd, but it brings the batter together and helps with the color. It’s kind of like the weird ingredient that actually matters.
-
Red food coloring – Two tablespoons. Yes, it’s a lot. Yes, it’s worth it. Red velvet should be red, not “did-I-forget-to-color-this?”
-
Eggs – Four. I know. But they make the cake rollable. Without them, you’re just making… flat sadness.
-
Cream cheese – The frosting, the swirl, the soul of the whole situation.
-
Powdered sugar – In the filling and on the towel. Because cake roll rules are real and powdered sugar makes it official.
How To Make Red Velvet Cake Roll?
Look, it sounds intimidating. I get it. Rolling a cake?? What is this—The Great British Bake Off? But I promise, it’s not that deep. Just follow along. There’s room for mistakes.
Step 1: Prep everything
Grease a 15×10-inch jelly-roll pan, line it with wax paper, and then grease and flour that, too. Yep, double prep. Trust me. Then take a clean kitchen towel (not the one you wipe down the counters with), sprinkle it generously with powdered sugar, and set it aside.
Step 2: Batter time
Sift together your dry ingredients—cake flour, cocoa, salt, baking powder. In your mixer, beat the eggs for five whole minutes. It feels excessive, but this is what gives the cake that light, spongy texture. Add sugar and oil. Mix again. Then add in the buttermilk, vinegar, vanilla, and food coloring. Stir in the dry stuff until it’s all together. Not too much. Don’t overthink it.
Step 3: Bake it
Pour the batter into your pan and spread it evenly. Bake at 350°F for about 13–15 minutes. Keep an eye on it. If you poke it and it springs back, it’s done.
Step 4: The roll (deep breath)
Take the hot cake out of the oven and IMMEDIATELY flip it onto your prepared towel. Carefully peel off the wax paper (don’t panic if it tears a little). Roll it up in the towel, starting at the short end, and let it cool like that. It feels wrong. But it’s right.
Step 5: The filling
Beat the cream cheese, butter, powdered sugar, and vanilla until smooth and irresistible. Don’t sample too much or you’ll end up with a very thin layer of frosting. (I’ve learned this the hard way.)
Step 6: Fill and reroll
Once the cake is cool, unroll it gently. Spread the filling all over. Roll it back up—without the towel this time. Wrap it tightly in plastic wrap and chill it for at least an hour. Overnight’s even better.
Want To Save This Recipe?
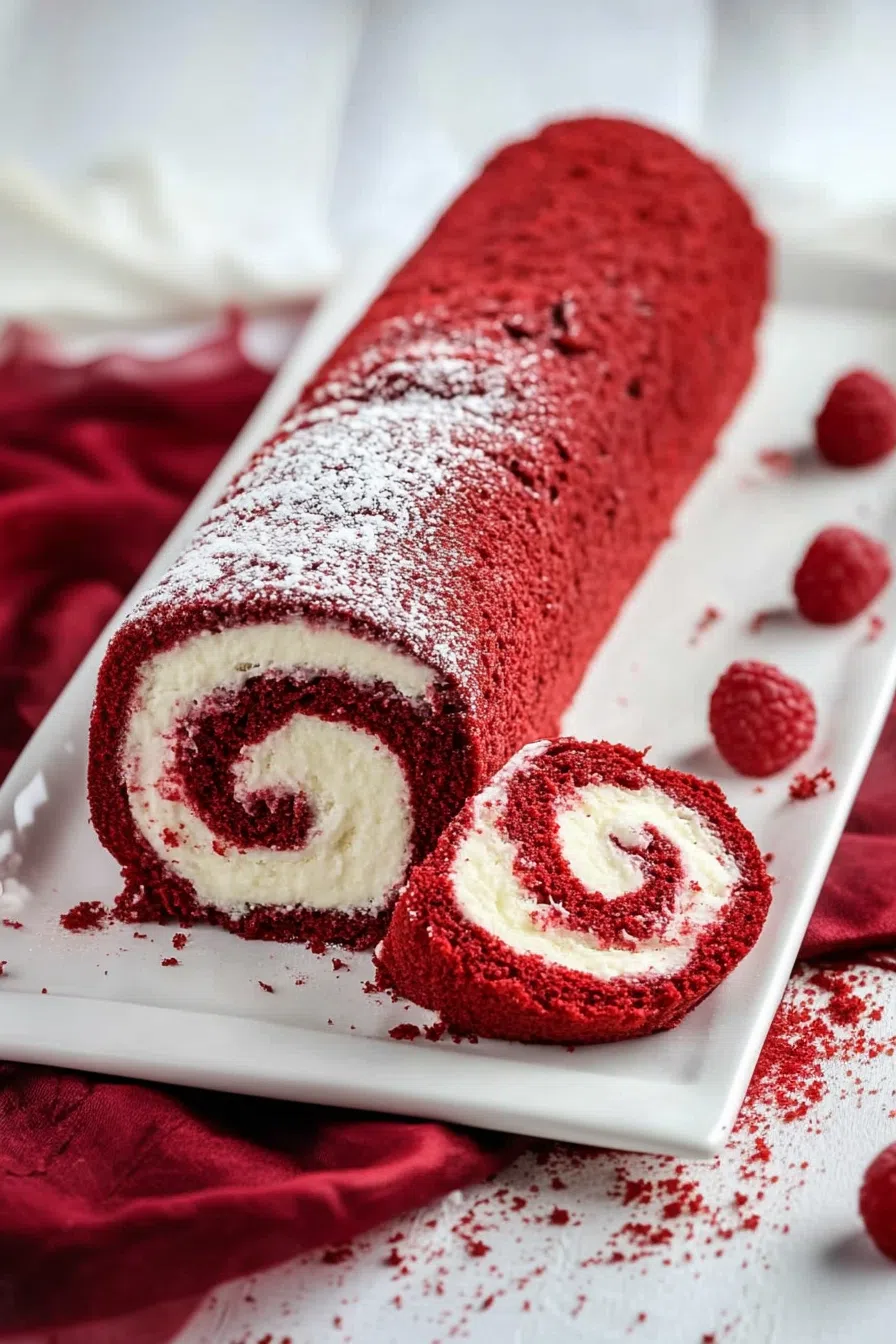
Step 7: Slice, dust, serve
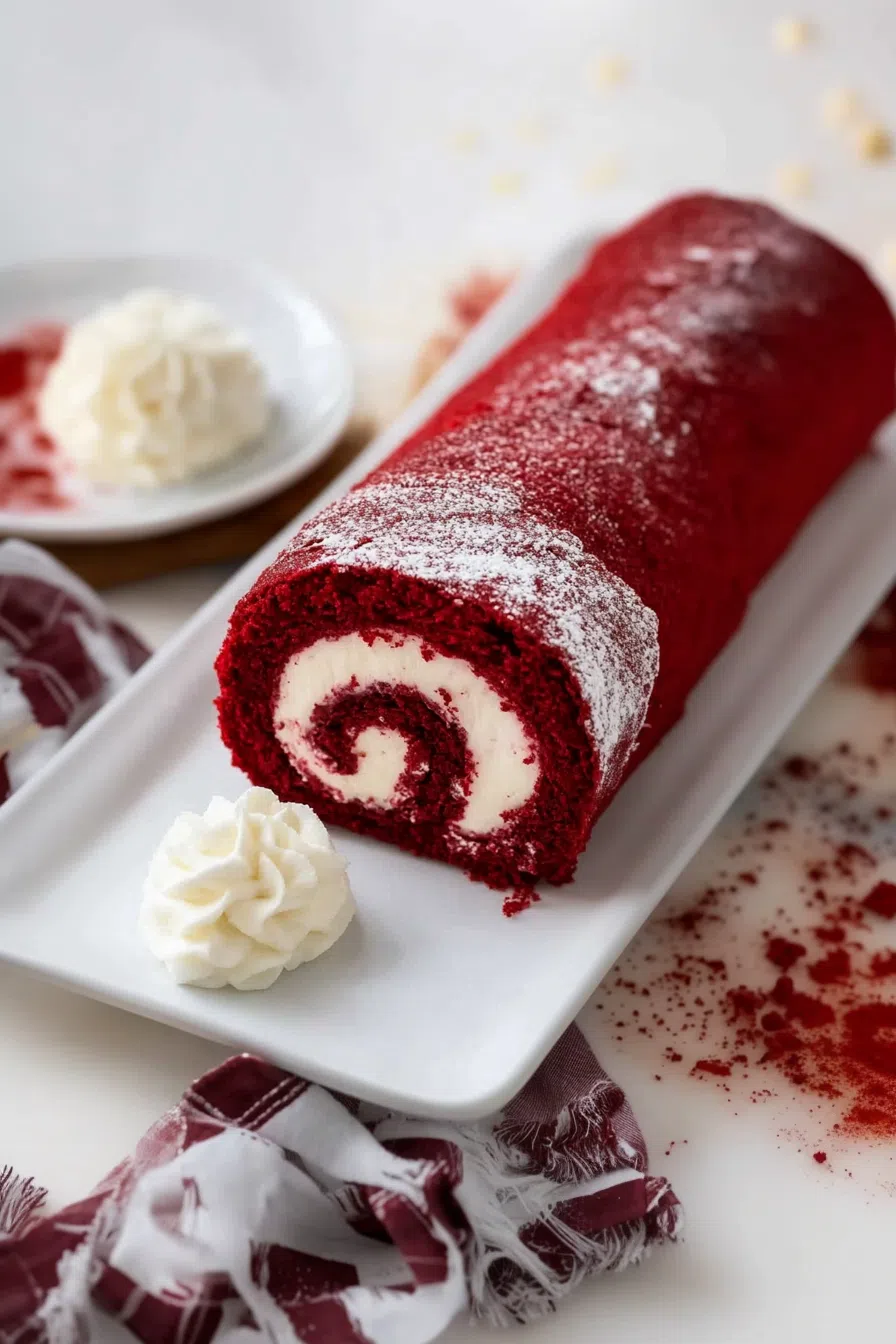
Sprinkle with a little more powdered sugar. Slice it into spirals. Bask in the compliments.
Storage Options:
Wrap it up and keep it in the fridge for up to 4 days. It holds together really well and actually tastes even better the next day. You can also freeze it (frosting and all)—just wrap it tight in plastic and foil. Thaw overnight in the fridge. Then slice like nothing happened.
Variations and Substitutions:
Because let’s be honest—sometimes we don’t have the right flour or we just feel like winging it.
-
No buttermilk? Use milk + a bit of vinegar or lemon juice. Let it sit, boom—DIY magic.
-
No cake flour? Use all-purpose, but subtract 2 tablespoons and replace with cornstarch.
-
Want it less red? Use less food coloring. It won’t mess up the flavor.
-
Add-ins? Mini chocolate chips in the filling. Or chopped pecans. Live your truth.
-
Gluten-free? Use a 1:1 gluten-free blend. Just be extra gentle when you roll it.
What to Serve with Red Velvet Cake Roll?
This cake deserves a moment. Make it one.
-
Coffee – Not just any coffee. A good, hot, sip-while-you-sigh kind of coffee.
-
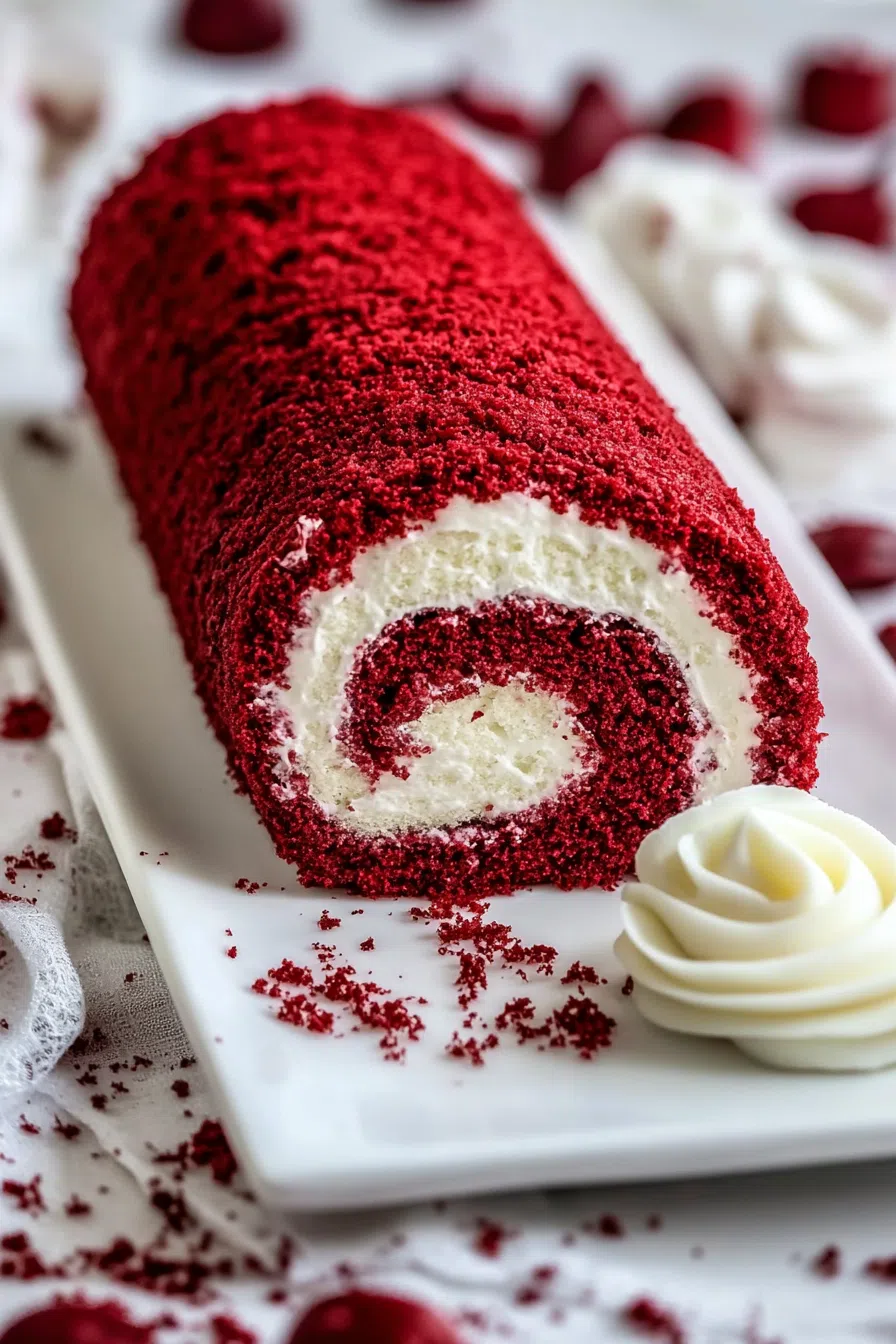
Berries – Fresh raspberries or strawberries on the side? Game changer.
-
Whipped cream – If you’re going for over-the-top, go all the way.
-
A glass of champagne – Because why the heck not?
Frequently Asked Questions:
Can I make this ahead of time?
Yes, and honestly? You should. It slices better cold, and the flavors have time to settle into each other.
What if my cake cracks?
It happens. Roll cakes are like people—they have flaws. Just dust it with sugar and move on. It still tastes amazing.
Can I freeze it after frosting?
You sure can. Wrap it tightly in plastic wrap and foil. Freeze it whole or slice it first and just pull out a piece when the craving hits.
So, that’s the story. Me, a snowstorm, and this Red Velvet Cake Roll that ended up making me feel like a pro baker on a day when I barely got out of my pajamas. If you try it, I wanna hear how it goes—especially if it cracks or you forget to sift the powdered sugar. You’re not alone. This one’s about taste, not perfection.
Now go roll something up that’s actually worth unrolling later.
Keep the Flavor Coming – Try These:


Red Velvet Cake Roll
Ingredients
For the Cake:
- ½ teaspoon salt
- 1 teaspoon baking powder
- ¼ cup unsweetened cocoa powder
- ¾ cup cake flour sifted
- 4 large eggs
- ¾ cup granulated sugar
- 1 tablespoon vegetable oil
- 2 tablespoons buttermilk
- 1 teaspoon distilled white vinegar
- 1 teaspoon vanilla extract
- 2 tablespoons red food coloring
For the Cream Cheese Filling:
- 8 ounces cream cheese softened to room temperature
- 1 cup powdered sugar sifted
- 6 tablespoons unsalted butter or margarine softened
- 1 teaspoon vanilla extract
- Additional powdered sugar for dusting
Instructions
Prepare the baking pan and towel:
- Preheat the oven to 350°F (175°C). Grease a 15 x 10-inch jelly-roll pan, then line it with wax paper. Grease and lightly flour the wax paper. On a clean cotton kitchen towel, sprinkle an even layer of powdered sugar and set aside.
Sift the dry ingredients:
- In a large bowl, sift together the salt, baking powder, cocoa powder, and cake flour. Set aside.
Beat the eggs and mix the wet ingredients:
- In the bowl of a stand mixer fitted with the paddle attachment, beat the eggs for 5 minutes on medium speed, or until light and frothy. Gradually add the sugar and vegetable oil, beating until fully combined. Add the buttermilk, vinegar, vanilla extract, and red food coloring. Mix briefly until incorporated.
Combine the batter:
- Gradually add the sifted dry ingredients to the wet mixture, stirring just until smooth and no dry streaks remain. Do not overmix.
Bake the cake:
- Pour the batter into the prepared jelly-roll pan and spread it evenly using an offset spatula. Bake in the preheated oven for 13–15 minutes, or until the cake springs back when gently touched in the center.
Roll the cake while warm:
- Immediately loosen the edges of the cake and turn it out onto the prepared towel, powdered sugar side down. Carefully peel off the wax paper. Starting from one of the narrow ends, roll the cake and towel together into a spiral. Place the rolled cake seam side down on a wire rack and allow it to cool completely.
Prepare the cream cheese filling:
- In a clean mixing bowl, beat the softened cream cheese, butter, powdered sugar, and vanilla extract on medium speed until smooth, light, and creamy.
Fill and reroll the cake:
- Once the cake is fully cooled, gently unroll it. Spread the cream cheese filling evenly over the surface, leaving a small border around the edges. Carefully roll the cake up again—this time without the towel—into a tight log.
Chill and serve:
- Wrap the cake roll in plastic wrap and refrigerate for at least 1 hour before serving. Just before serving, dust the top lightly with powdered sugar. Slice into even portions and serve chilled or at room temperature.
Notes
I’m Bitty, owner of nodashofgluten.com, where I share simple, delicious recipes for all tastes, including gluten-free. Check out my “About Me” page for more info!

