
Creamy, buttery, and kissed with peppermint — this Peppermint Caramels Recipe brings old-fashioned holiday sweetness home.
Every December, my kitchen turns into a bit of a candy factory — minus the elves and plus a little chaos. You know how some people light candles or bake cookies to get into the Christmas spirit? For me, it’s peppermint. That scent — sharp and sweet, like winter itself — just hits me right in the nostalgia.
I first tried making peppermint caramels one snowy Saturday a few years ago. I’d just come back from a local holiday market — you know, the kind with homemade jams, hand-knit scarves, and way too many samples of fudge. One booth was selling these shiny little caramels wrapped in red and white paper, and the woman behind the table said, “They’re peppermint butter caramels, dear — we’ve been making them since the ‘70s.” Something about that line — the old-school confidence — made me think, “Okay, challenge accepted.”


So I went home, lit up Bing Crosby on the speaker, and decided I was going to make my own Peppermint Caramels Recipe. The first batch was… well, not great. I misread the thermometer and ended up with a pan of hard candy that could chip teeth. The second try, though? Buttery perfection with that cool little burst of mint. I wrapped each piece like tiny gifts, and I swear, even my grumpy neighbor smiled when I dropped a few at his door.
Now it’s tradition. Every year I make them, every year I eat too many before wrapping them. It’s kind of like therapy — slow, warm, sticky therapy.
Why You’ll Love This Peppermint Caramels Recipe?
These caramels are what happens when cozy nostalgia meets a little peppermint sparkle. They’re buttery, chewy, and just the right amount of festive — the kind of candy that feels like it came from your grandmother’s recipe box (even if she never made them).
What I love most is how old-fashioned they feel. You’ve got your saucepan bubbling away, your thermometer clipped on like you actually know what you’re doing — and that smell. Butter, sugar, peppermint, vanilla… it’s like wrapping paper, cocoa, and Christmas morning all at once.
And the best part? They make amazing gifts. I tuck them into mason jars, tie them up with twine, and boom — instant “I made this” energy. Though, if we’re being honest, I always keep a secret stash in the pantry. Quality control, you know?

Ingredient Notes:
Let’s talk ingredients — because good candy starts with good stuff. Nothing fancy, just the basics done right.
-
Heavy Cream: It’s what makes these caramels rich and smooth. Don’t skimp.
-
Unsalted Butter: Go for the real thing — none of that margarine business. This recipe deserves butter that means it.
-
Peppermint Extract: Be gentle with this one. Too much and suddenly you’re eating a candy cane’s evil twin.
-
Vanilla Extract: It softens the peppermint so it’s more “holiday hug” and less “mouthwash.”
-
Kosher Salt: Because even candy needs balance.
-
Sugar, Corn Syrup, Water: The holy trinity of caramel-making. Trust them, but don’t turn your back for a second.
-
Mini Candy Canes (optional): Crush ’em and roll your caramels in the dust — it’s festive, sparkly, and just fun.

How To Make Peppermint Caramels?
You don’t have to be Willy Wonka to pull this off, I promise. Just a little patience — and maybe a candy thermometer that doesn’t lie to you like mine once did.
Step 1. Prep Your Pan
Line an 8×8-inch dish with parchment paper, making sure it comes up the sides. Give it a quick spritz of cooking spray. It’s not glamorous, but future you will thank you when the caramels slide right out.
Step 2. Warm the Cream and Butter
In a small pot, heat your cream and butter until the butter melts and the mixture’s steaming. Stir in the peppermint, vanilla, and salt. Set it aside — like a cozy little bath waiting for its turn.
Step 3. Make the Caramel Base
Combine sugar, corn syrup, and water in a big pot. Stir gently until it’s all mixed, then stop. (Resist the urge!) Bring it to a boil and let it bubble until it hits 270°F. Use a wet pastry brush to wipe any sneaky sugar crystals off the sides.
Step 4. Add the Cream Mixture
Now for the fun part — carefully pour that warm cream into the pot a little at a time. It’ll hiss and bubble dramatically, like it’s auditioning for a Christmas movie. Just stir gently and keep calm.
Step 5. Cook Until Golden
Let the caramel cook until it reaches 245–250°F, swirling the pot every now and then. The color should be that perfect golden-brown that makes you think of toffee and cozy fireplaces.
Step 6. Pour and Cool
Pour the caramel into your pan (don’t scrape the pot — nobody wants burnt bits). Let it cool for about 10 minutes, then pop it in the fridge for an hour.
Step 7. Cut and Wrap
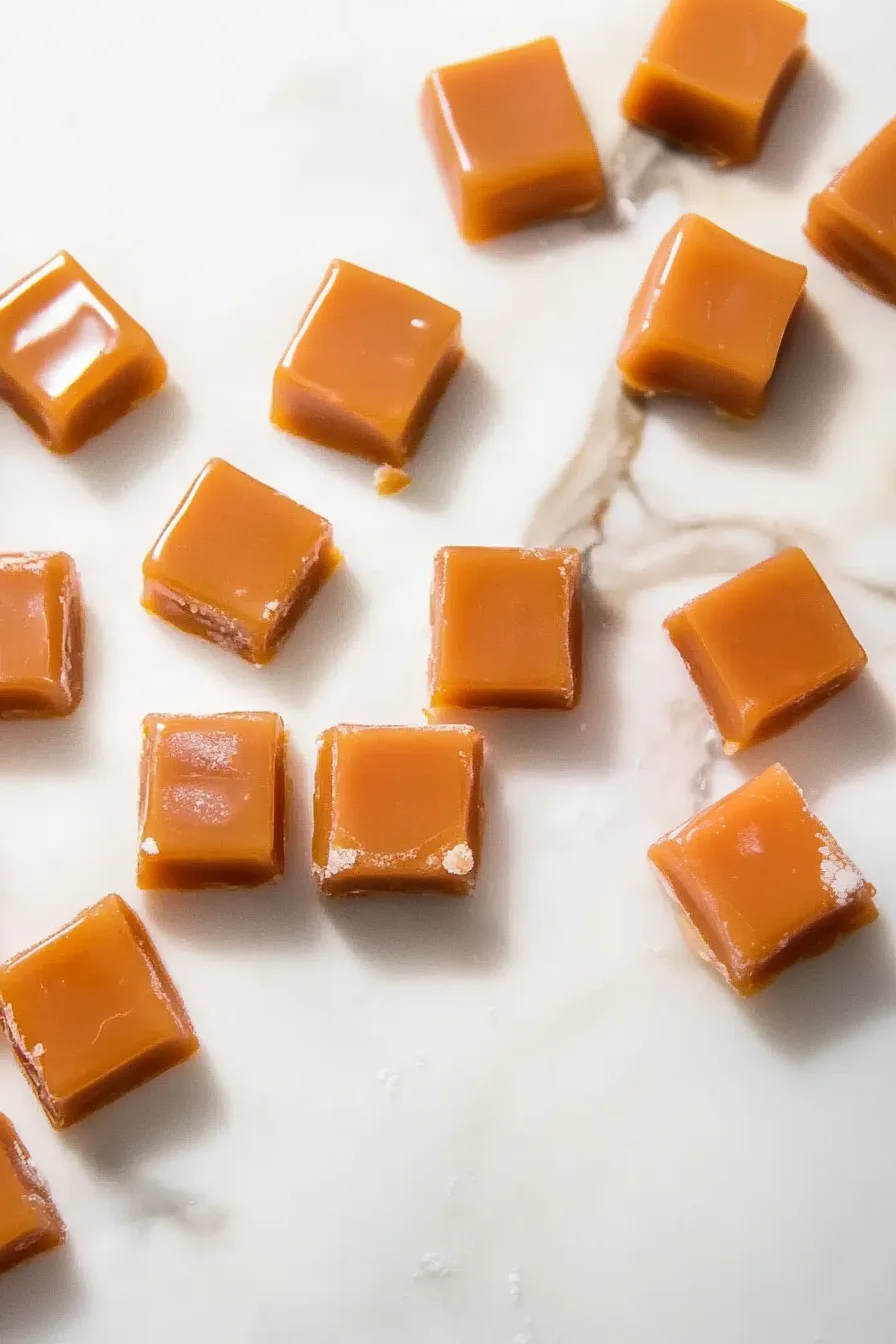
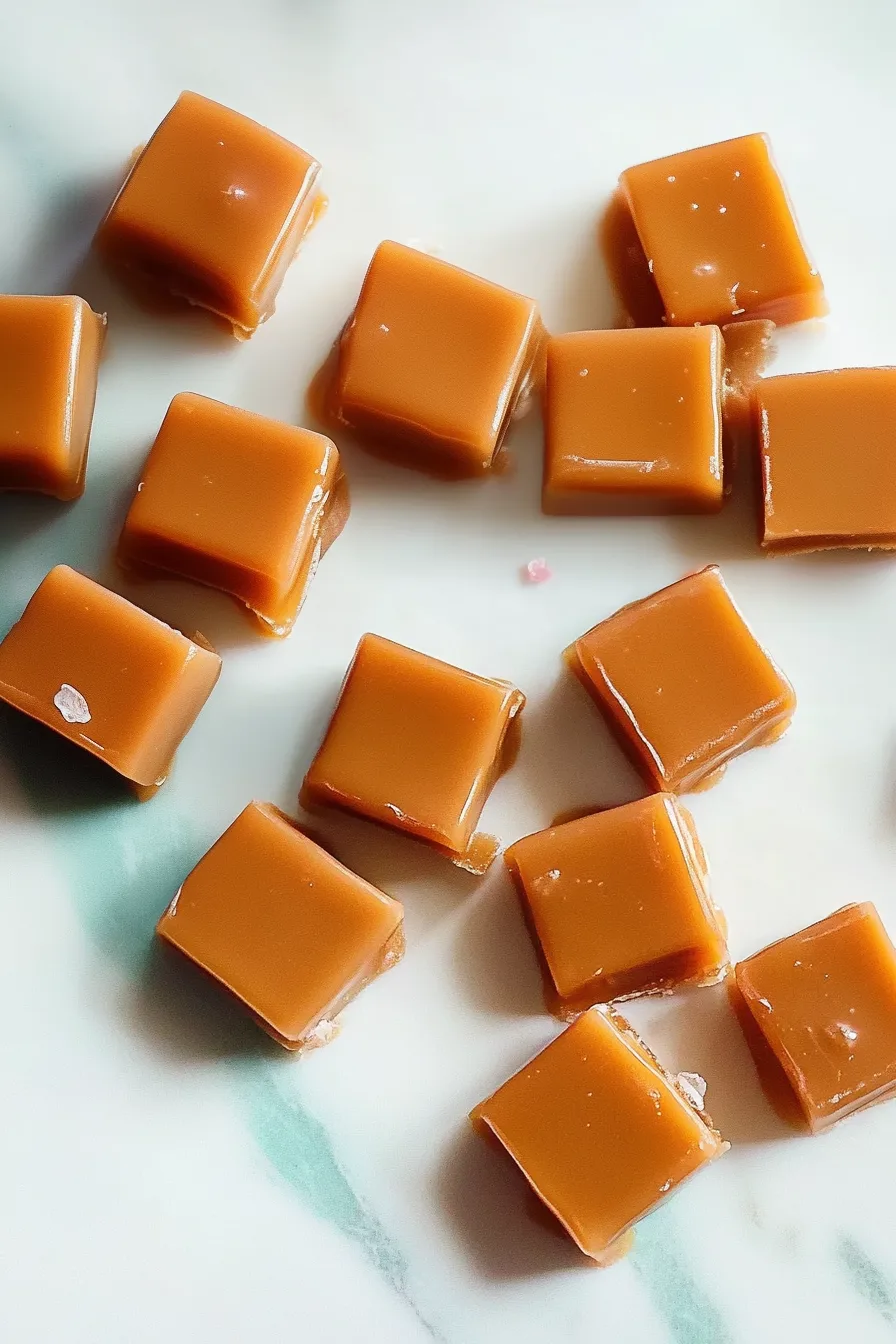
Cut into small squares, roll them in crushed candy canes if you’re feeling fancy, and wrap them up in parchment paper. They’ll look so cute you might almost not want to eat them. Almost.
Want To Save This Recipe?
Storage Options:
Store these little treasures in an airtight container at room temp and they’ll last for about three weeks — theoretically. Realistically, they’ll be gone in days. If you want to save some for later (or just look like a responsible adult), you can freeze them for up to three months.
Pro tip? Label the container something boring like “leftover soup.” Works every time.
Variations and Substitutions:
Candy-making is a playground, and you can definitely bend the rules a bit here.
-
Chocolate Peppermint Caramels: Stir in a spoonful of cocoa powder for a rich twist.
-
Sea Salt Finish: Sprinkle a little flaky salt on top before they set. It’s fancy and delicious.
-
Butter Rum Caramels: Skip the peppermint and add rum extract — it’s like grown-up candy.
-
Maple Caramels: Replace the peppermint with maple extract for cozy autumn vibes.
-
Nutty Version: Fold in finely chopped pecans or almonds for a bit of crunch.
Play around — half the fun is finding your own favorite version.
What to Serve with Peppermint Caramels?
These caramels don’t need a partner, but they definitely shine brighter with one.
-
Hot Chocolate: Drop one in your mug and let it melt. Trust me.
-
Coffee: That bitter-sweet combo is chef’s kiss.
-
Brownies: Press a square into warm brownies and let it melt into gooey perfection.
-
Holiday Dessert Boards: Mix these with cookies, truffles, and fudge for that “Pinterest-perfect” look (even if it’s just you and your cat eating it).
Frequently Asked Questions:
Can I use peppermint oil instead of extract?
You can, but start tiny — like two drops tiny. That stuff’s powerful.
My caramel turned grainy — why?
Sugar crystals probably sneaked back in. Next time, brush down the sides of the pot with a wet brush, and don’t stir too much.
How do I wrap them without sticking?
Wax paper, parchment, or those cute candy wrappers you can buy online. Anything else, and you’ll be peeling caramels off your hands till New Year’s.

Every time I make this Peppermint Caramels Recipe, I end up smiling — partly because they taste amazing, and partly because it just feels like Christmas. There’s something about watching that sugar swirl and bubble that feels old-fashioned in the best way. Like slowing down for a moment in a season that moves way too fast.
So, if your kitchen smells like peppermint and butter by the end of the night — congratulations, my friend. You’ve just made holiday magic.
Now go on, sneak one while they’re still warm. You deserve it.
Keep the Flavor Coming – Try These:
Peppermint Caramels Recipe
Ingredients
For the Caramels:
- Cooking spray
- 1 ¼ cups heavy cream
- 3 tablespoons unsalted butter
- 1 teaspoon peppermint extract
- ½ teaspoon vanilla extract
- ¼ teaspoon kosher salt
- 1 ¼ cups granulated sugar
- ½ cup light corn syrup
- ¼ cup water
For Garnish (Optional):
- 20 mini candy canes crushed, for dusting
Instructions
Prepare the Pan
- Line an 8 × 8-inch metal or ceramic baking dish with parchment paper, allowing the paper to overhang the sides for easy removal. Fold the corners to fit snugly against the pan and spray the parchment lightly with cooking spray.
Heat the Cream and Butter
- In a small saucepan, combine the heavy cream and butter. Warm over medium heat until the mixture is steaming. Remove from the heat, then stir in the peppermint extract, vanilla extract, and salt. Cover and set aside to keep warm.
Cook the Sugar Mixture
- In a large, high-sided saucepan, combine the granulated sugar, corn syrup, and water. Stir gently until blended. Using a clean pastry brush dipped in water, wash down any sugar crystals clinging to the inside of the pan. Attach a candy thermometer to the side of the saucepan, ensuring the tip is submerged in the syrup but not touching the bottom.
Bring to Temperature
- Cook the mixture over high heat without stirring until it reaches 270 °F (132 °C), about 15 minutes. If sugar crystals form along the sides, brush them away carefully with the wet pastry brush, avoiding excess water.
Add the Cream Mixture
- When the sugar mixture reaches 270 °F, carefully add the warm cream and butter mixture a little at a time, stirring gently after each addition. Stand back from the pot to avoid steam burns. Continue cooking over medium-high heat, without stirring, until the caramel reaches 245 °F to 250 °F (118 °C to 121 °C) and turns a deep golden color. Tilt and swirl the pan occasionally to ensure even cooking.
Pour and Cool
- Remove the saucepan from heat and immediately pour the hot caramel into the prepared pan. Do not scrape the bottom of the pot, as any crystallized sugar may alter the texture. Let the caramel cool for 10 minutes, then cover the pan loosely with plastic wrap and refrigerate until firm, about 1 hour.
Cut and Wrap
- Once chilled, lift the caramel slab from the pan using the parchment overhang. Transfer to a cutting board and cut into 1-inch strips, then into 1-inch squares. If desired, lightly roll each piece in finely crushed candy cane powder. Wrap each caramel individually in 1 ½ × 3-inch pieces of parchment or wax paper, twisting the ends to seal.
Storage
- Store wrapped caramels at room temperature in an airtight container for up to 3 weeks. For longer storage, refrigerate or freeze in layers separated by wax paper.
Notes
I’m Bitty, owner of nodashofgluten.com, where I share simple, delicious recipes for all tastes, including gluten-free. Check out my “About Me” page for more info!

