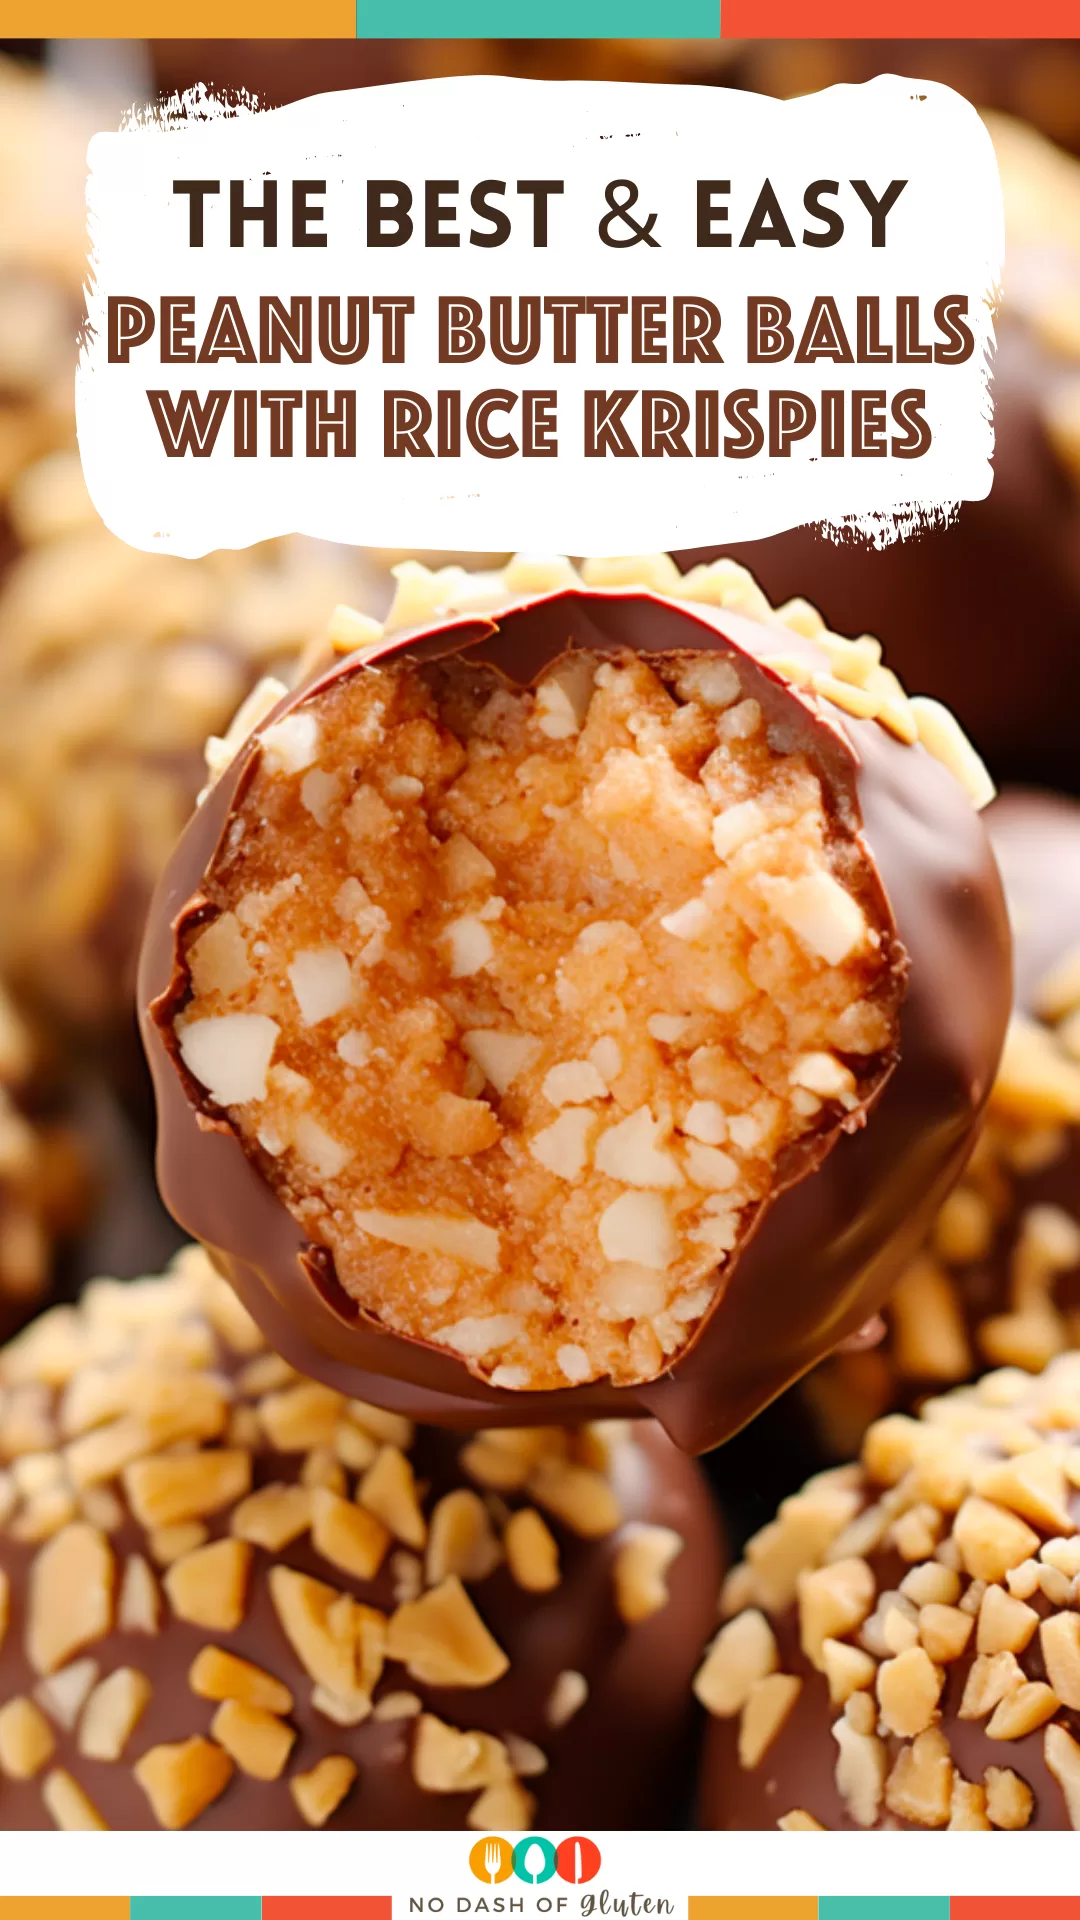
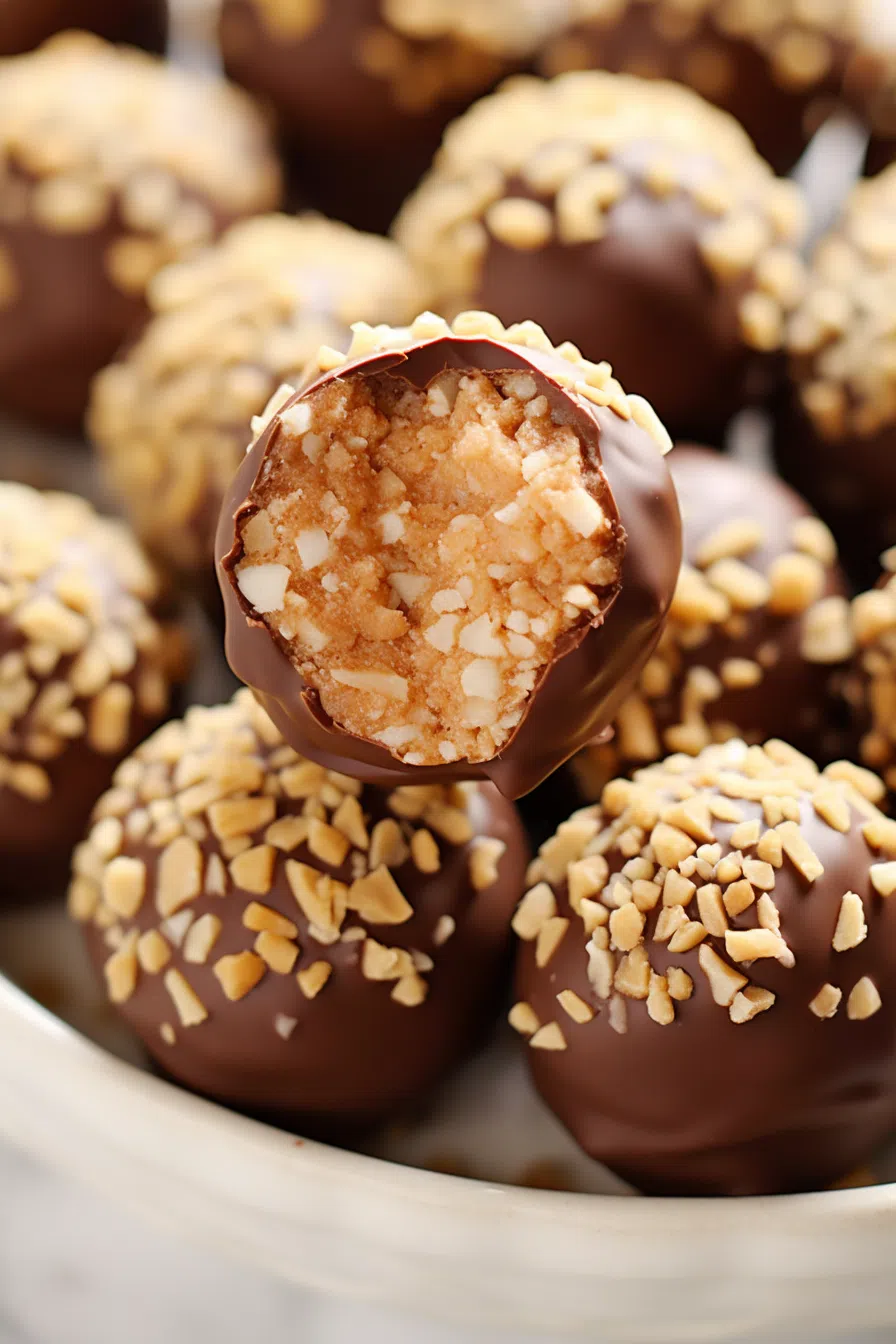
Crunchy, chocolate-dipped Peanut Butter Balls with Rice Krispies, powdered sugar, and creamy peanut butter. The easiest no-bake treat you’ll love!
(And That One Time I Ate Half a Batch Before the Party Even Started)
So here’s the thing. Every family has “that recipe,” right? The one everyone fights over, sneaks extras of, and—let’s be honest—stashes a few in a napkin for later. For my family? It’s these Peanut Butter Balls with Rice Krispies. No contest.
I first made them with my mom when I was about eight. She was in charge of desserts for the church bake sale (because obviously, she always was), and I was just there to “help.” Translation: sneak tastes of the peanut butter mix when she wasn’t looking. The first batch? Gone before we even dipped them in chocolate. Oops. The second batch barely made it to the tray.


These days, whenever I make them—usually around the holidays or when I’m feeling nostalgic—I still have to remind myself to chill the filling before dipping. Because yes, I still get impatient and try to dip them while they’re soft. And yes, it’s still a mess. But you know what? They still taste amazing.
If you’ve never tried these, you’re in for a treat. And if you have? Well, you know why I’m obsessed.
Why You’ll Love This Peanut Butter Balls with Rice Krispies Recipe?
(And Why They Never Last Longer Than a Day at My House)
I’ll shoot straight with you—these Peanut Butter Balls with Rice Krispies are not fancy. But man, are they good. They’re the kind of treat that makes you stop mid-bite and say, “Wait… whoa.”
First off, they’re no-bake. Which, if you’re like me and already juggling twelve other things, is a lifesaver. Second, they’re crunchy and creamy at the same time. That crispy Rice Krispies crunch? Totally addictive. And the chocolate coating? Just rich enough without overpowering the peanut butter goodness.
And here’s a confession: I keep a secret stash in the freezer. Hidden behind the peas. Because otherwise, they’d be gone by the end of the day. Not kidding.
Ingredient Notes:
(With a Few of My Personal Tips Thrown In)
-
2 cups peanut butter
I usually go crunchy for texture, but creamy works if you want something smoother. And if you’re wondering—yes, I’ve used the bottom-of-the-jar stuff. It works fine. No shame. -
½ cup (1 stick) unsalted butter, softened
If you forgot to leave it out (same), just zap it in the microwave for like 8-10 seconds. Not melted. Just soft. -
3-4 cups powdered sugar
Start with 3 cups. If your dough feels too sticky, add more. Some days it’s 3 cups, some days it’s 4. Baking is like that, right? -
1 teaspoon vanilla extract
Don’t skip this. It makes a difference. Even the store-brand stuff works. -
2 cups Rice Krispies cereal
Not the off-brand kind. Okay, maybe the off-brand. But they’ve gotta be fresh. Nobody likes soggy cereal in their peanut butter balls. -
16 oz chocolate candy coating
I love Ghirardelli melting wafers. They melt like a dream. But I’ve used chocolate chips in a pinch—just add a little coconut oil so they’re smooth enough for dipping. -
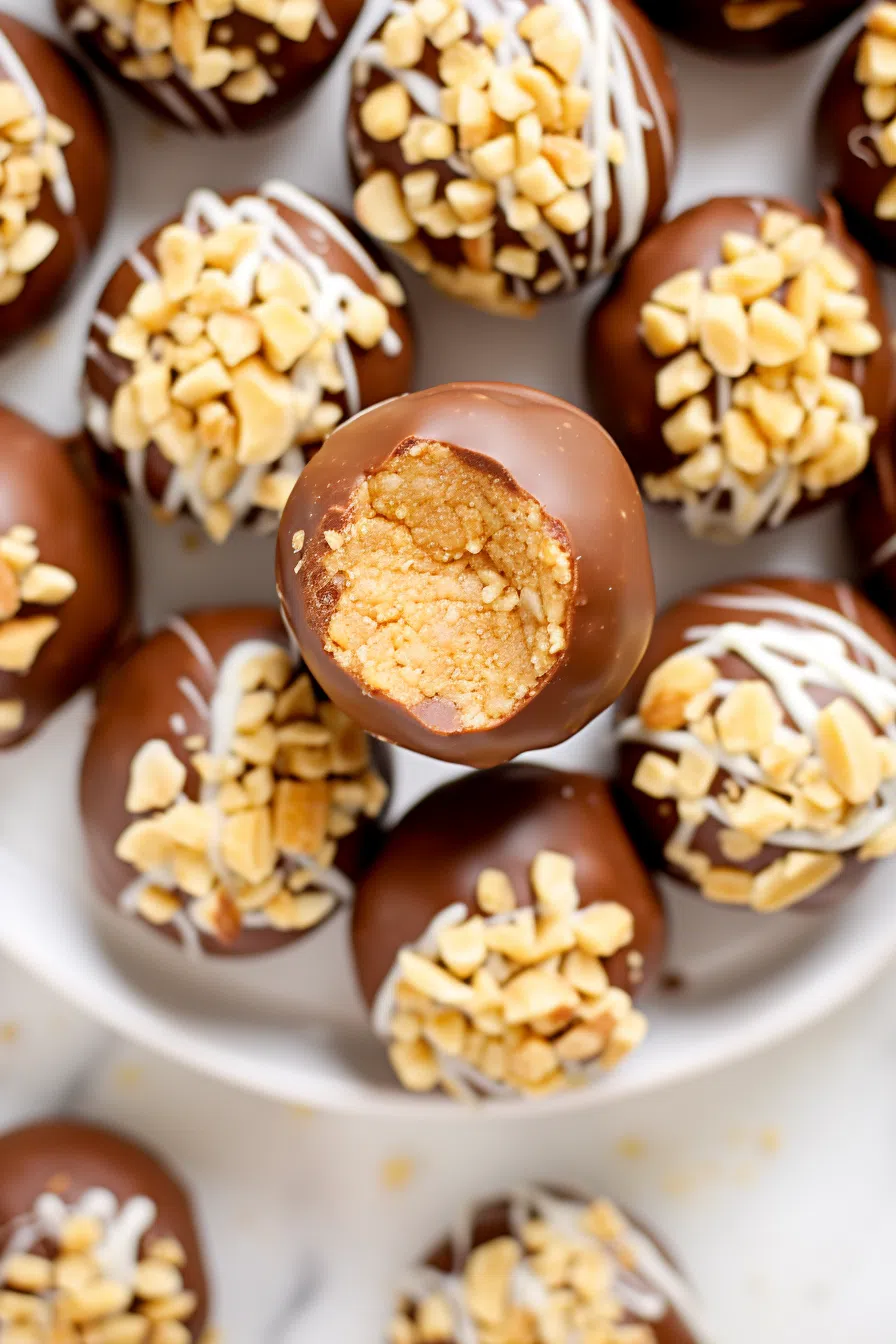
Optional toppings: chocolate jimmies or chopped peanuts
Optional… but come on, sprinkles make everything more fun. And salty peanuts? Heaven.
How To Make Peanut Butter Balls with Rice Krispies?
(And Why You Shouldn’t Skip the Chill Time, Even If You’re Impatient Like Me)
Step 1: Prep Time
Line a baking sheet with
Step 2: Mix the Good Stuff
In a big bowl, mix the peanut butter and softened butter until smooth. Add the vanilla. Smells amazing already, right?
Step 3: Sweeten Things Up
Gradually add the powdered sugar. I do a cup at a time. You want a thick dough that holds together but doesn’t stick to your hands like glue. If you mess up the ratio, no big deal. Add more sugar or peanut butter until it feels right.
Want To Save This Recipe?
Step 4: Add the Crunch
Fold in the Rice Krispies gently. You don’t wanna crush them into dust (learned that the hard way).
Step 5: Roll ‘Em
Scoop about a tablespoon of the mixture and roll it into balls. I like to keep them bite-sized, but if you’re feeling bold… go big! Put them on your lined tray.
Step 6: Chill Out
Pop them in the fridge for at least 30 minutes. This step’s a pain if you’re impatient (me), but it makes dipping soooo much easier.
Step 7: Melt the Chocolate
Melt the chocolate candy coating according to the package. I use the microwave because I’m lazy. Stir it every 30 seconds until smooth.
Step 8: Dunk and Decorate
Dip each peanut butter ball into the chocolate. Let the excess drip off, then plop it back on the tray. Add sprinkles or chopped nuts while they’re still wet. If you wait too long… well, you’ll have naked balls. And nobody wants that.
Step 9: Let Them Set
Let the chocolate harden. If you’re in a rush (guilty), stick them in the fridge for a bit. Then—finally—snack away!
Storage Options:
(If You Can Somehow Stop Yourself From Eating Them All)
- Room temp: Airtight container, 3-5 days.
- Fridge: Keeps them firm and fresh for up to 2 weeks.
- Freezer: Oh yeah. Layer them with parchment and freeze for up to 3 months. I eat them straight from the freezer. You?
Variations and Substitutions:
(For When You Wanna Mix Things Up or Forgot an Ingredient… Been There)
- Nut Butter Swaps: Try almond butter, cashew butter, or sunflower seed butter if you need nut-free.
- Different Cereals: Cornflakes, crushed pretzels, even Cheerios in a pinch.
- Chocolate Choices: White chocolate, dark chocolate, or drizzle with caramel. Go nuts.
- Add-Ins: Mini chocolate chips, chopped dried fruit, or toffee bits.
- Flavor Boosts: A little cinnamon or espresso powder in the filling is a game-changer.
What to Serve with Peanut Butter Balls with Rice Krispies?
(Because They’re Great Solo, But Sometimes You Want a Sidekick)
- Cold Milk: Classic. Don’t mess with perfection.
- Coffee: Perfect for an afternoon snack. Or breakfast. No judgment.
- Vanilla Ice Cream: Chop them up and throw them on top. You’re welcome.
- Hot Chocolate: Dip one halfway. Trust me. That melty chocolate moment? Perfection.
Frequently Asked Questions:
(Because You’re Probably Wondering…)
Can I use natural peanut butter?
You can… but it’s tricky. Natural PB is oilier, so your mixture might not hold together as well. Add more powdered sugar if you go this route.
Why are my balls crumbling?
Probably too much cereal or not enough sticky stuff. Add a spoonful of peanut butter or butter and mix it back in.
Do I have to refrigerate them?
Nope! But I like them cold. The chocolate stays firm, and they’re super refreshing that way.
And there you have it—my forever favorite Peanut Butter Balls with Rice Krispies recipe. They’re fun, easy, and way too addictive. If you make them, tell me how it went! Did you go wild with toppings? Did you eat half the batch before dipping (been there)? I wanna hear all about it.
Keep the Flavor Coming – Try These:


Peanut Butter Balls with Rice Krispies
Ingredients
- 2 c crunchy or creamy peanut butter
- ½ c 1 stick unsalted butter, softened
- 3-4 c powdered sugar
- 1 tsp vanilla extract
- 2 c crispy rice cereal
- 16 oz chocolate candy coating e.g., Ghirardelli melting wafers
- Optional decorations: ¼ c chocolate jimmies ¼ c roughly chopped salted peanuts
Instructions
- Start by lining a baking sheet, with parchment paper.
- In a bowl combine peanut butter. Softened butter. Stir in some vanilla extract.
- Gradually incorporate sugar into the mixture until it becomes smooth.
- Gently fold in crispy rice cereal.
- Form the mixture into 1-inch balls and place them on the baking sheet. Let them chill in the refrigerator for 30 minutes.
- Follow the instructions on the chocolate candy coating package to melt it properly.
- Using a dipping tool dip each ball into the melted chocolate. Then place it back on the parchment paper to set.
- While the chocolate is still wet sprinkle some chocolate jimmies. Chopped peanuts on top of each ball.
- Let the chocolate coating firm up, before serving these treats.
Notes
I’m Bitty, owner of nodashofgluten.com, where I share simple, delicious recipes for all tastes, including gluten-free. Check out my “About Me” page for more info!