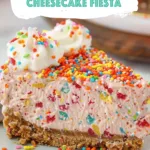
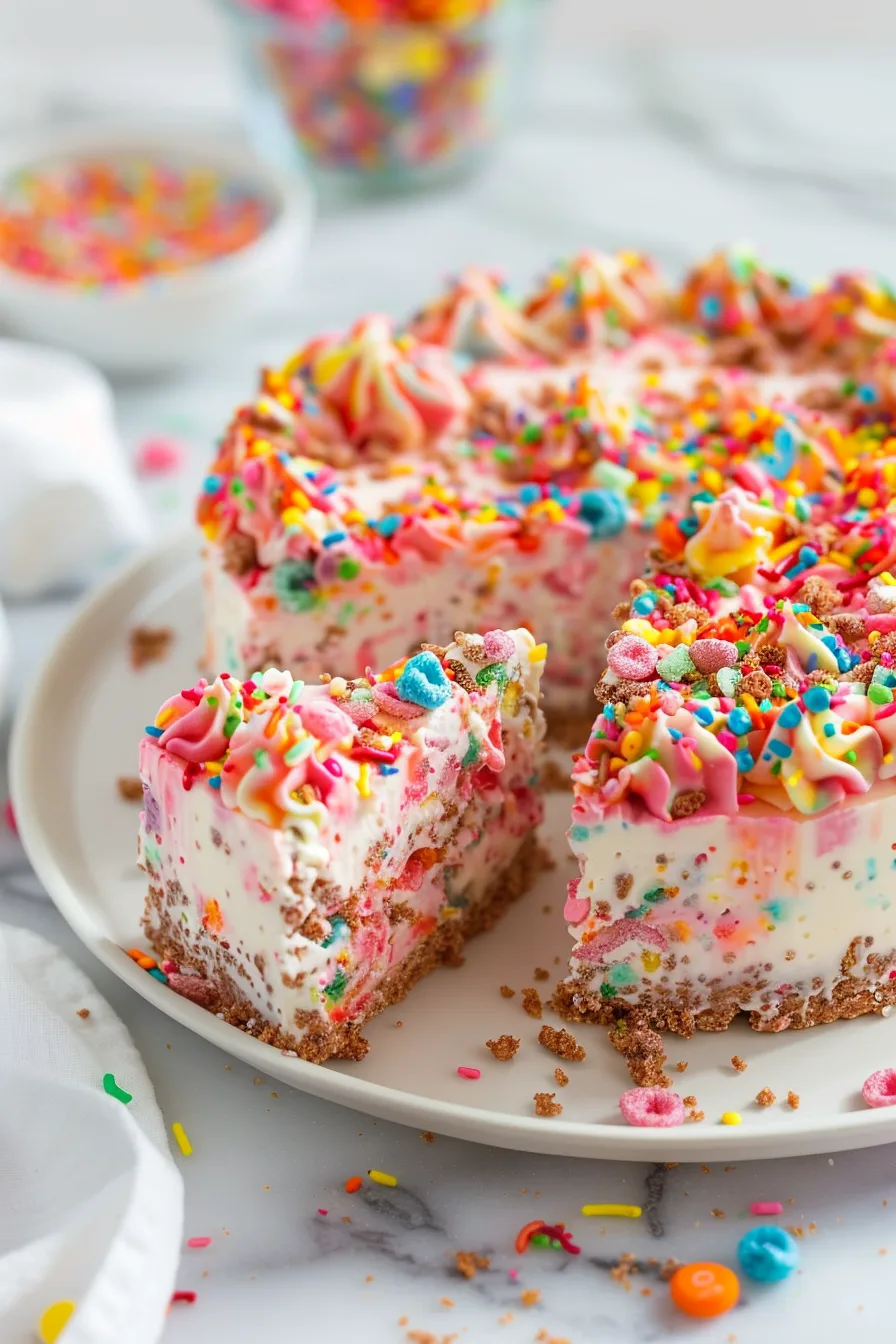
No-Bake Fruity Pebble Cheesecake Fiesta – Dive into a colorful and delightful dessert experience. With our No-Bake Fruity Pebble Cheesecake Fiesta! Perfect for those who adore a vibrant twist. To their sweets. Without the hassle of an oven. This recipe. Brimming with the crunchy goodness of Fruity Pebbles. And the creamy texture of cheesecake. Is a guaranteed crowd-pleaser. At any gathering. The combination of Nilla Wafer crumbs, buttery crust, and a luscious filling. Topped with a whimsical Fruity Pebble whipped cream. Makes every bite an adventure.

Remember it later!
Planning to try this recipe soon? Pin it for a quick find later!
Remember it later!
Planning to try this recipe soon? Pin it for a quick find later!
The first time I decided to whip up this cheerful concoction. It was for a summer backyard party. Skeptical yet excited. My husband and child. Watched as I mixed. And folded. The anticipation grew as it chilled. And the result? Absolute delight. Their eyes lit up. At the first bite. And the cheesecake was declared. The star of the day. It’s become our go-to celebration cake. Bringing smiles. And a burst of color to our table.
Here’s a quick peek at what’s inside:
Table of content
What makes this No-Bake Fruity Pebble Cheesecake Fiesta truly stands out?
This No-Bake Fruity Pebble Cheesecake Fiesta stands out. With its oven-free preparation. Making it an ideal treat. For warm weather. Or when you want to keep things simple. Yet spectacular. Its eye-catching colors. And textures. Promise to be the centerpiece of any event. Combining the crunchy joy of Fruity Pebbles. With a creamy, decadent cheesecake base. Whether it’s for a special celebration. Or a delightful family dessert. Its vibrant presentation. And exquisite taste. Ensure it’s not just a dessert. But an unforgettable experience.
What You Need To Make This No-Bake Fruity Pebble Cheesecake Fiesta Recipe?
The Crust: Combines the comforting crunch of Nilla Wafers with the playful colors and flavors of Fruity Pebbles. Together with melted butter, they form a crust that’s both nostalgic and fun, laying down the perfect base.
The Filling: Rich and creamy, this layer is all about indulgence. Full-fat cream cheese for that unmistakable smoothness, whipped cream for a fluffy texture, and Fruity Pebbles for a surprise burst of color and flavor in every bite. It’s creamy, it’s crunchy, it’s everything a cheesecake should be.
The Topping: A simple yet elegant whipped cream topping, sweetened just right and sprinkled with more Fruity Pebbles. It adds a final touch of whimsy, making each slice as pretty as it is delicious.
Steps To Make No-Bake Fruity Pebble Cheesecake Fiesta:
Step 1: Crust Creation: Transform your Nilla Wafers and Fruity Pebbles. Into fine crumbs. As if they’re fairy dust. Let them mingle in a bowl. Then introduce them to the melted butter. Until they’re all cozily mixed. Press this mixture into your springform pan. Creating a snug bed for the filling.
Step 2: Filling Fantasy: Whip the heavy cream into fluffy clouds. Sweeten with powdered sugar. Then set aside. Beat the cream cheese into silky smoothness. Blend in the sugar. And a splash of cream. Now, gently fold in the whipped cream. Turning it tenderly. Until fully combined. And sprinkle in the crushed cereal. Pour this dreamy mixture. Over your crust. And let it chill. Transforming into cheesecake magic.
Step 3: Topping Triumph: Whip up another batch of cream. This time mixing in the powdered sugar. And cereal. For a final flourish. Pipe it over your chilled cheesecake in swirls. And peaks that beckon.
Want To Save This Recipe?
Enter your email below and we'll send the recipe straight to your inbox.
Tip:
For an extra smooth. And creamy filling. That perfectly balances the crunchy crust. And toppings. Ensure your cream cheese is thoroughly softened. To room temperature before mixing. This simple step. Prevents lumps. And guarantees a filling. That’s velvety and lush. Marrying beautifully with the playful crunch. Of the Fruity Pebbles. Taking the time. To beat the cream cheese. Until it’s perfectly smooth. Before adding other ingredients. Makes all the difference. In achieving that dreamy, creamy texture. That makes this cheesecake. Truthfully unforgettable.
Frequently Asked Questions:
Can I use low-fat cream cheese?
Though full-fat ensures the creamiest texture. A lower fat option can work. If you’re looking to lighten it up.
How long can I store the cheesecake?
It stays fresh. For up to 3 days in the fridge. Cover it well. To keep it from absorbing other flavors.
Can I freeze the cheesecake?
Yes. For up to a month. Wrap it tightly. And thaw overnight in the refrigerator. Before serving.
Remember it later!
Planning to try this recipe soon? Pin it for a quick find later!
Remember it later!
Planning to try this recipe soon? Pin it for a quick find later!
Keep the Flavor Coming – Try These:
No-Bake Fruity Pebble Cheesecake Fiesta
Ingredients
For the Crust:
- 1 c 104 grams Nilla Wafer crumbs
- 2 c 72 grams Fruity Pebble Cereal
- ½ c 113 grams unsalted butter, melted
For the Filling:
- 1 ½ c plus 2 tbsp 384 grams heavy whipping cream, divided
- ¾ c 98 grams powdered sugar
- 2 c 72 grams Fruity Pebbles cereal
- 16 oz 452 grams full-fat cream cheese, at room temperature
- ½ c 95 grams granulated sugar
For the Topping:
- ¾ c 117 ml heavy whipping cream
- ½ c 18 grams Fruity Pebbles cereal
- 2 tbsp 16 grams powdered sugar
Instructions
Crust:
- Blend Nilla Wafers and Fruity Pebbles into fine crumbs.
- Mix crumbs with melted butter until well coated.
- Press into the bottom and up the sides of a 9-inch springform pan. Chill.
Filling:
- Crush Fruity Pebbles into fine crumbs.
- Whip 1 ½ cups heavy cream until soft peaks form, then add powdered sugar and whip until stiff.
- Beat cream cheese with granulated sugar and 2 tbsp heavy cream until smooth.
- Fold whipped cream into cream cheese mixture, then stir in crushed Fruity Pebbles.
- Pour filling over crust and refrigerate for at least 4 hours.
Topping:
- Crush Fruity Pebbles into fine crumbs.
- Whip heavy cream until soft peaks form, add powdered sugar and Fruity Pebbles, and whip until stiff.
- Decorate the cheesecake with whipped cream topping.
- Enjoy your vibrant, no-bake creation!
Notes

I’m Bitty, owner of nodashofgluten.com, where I share simple, delicious recipes for all tastes, including gluten-free. Check out my “About Me” page for more info!


