No-Bake Chocolate Peanut Butter Fudge Pinwheel made with sweetened condensed milk, chocolate chips, and peanut butter chips.
You ever have one of those days where nothing feels organized—not your plans, not your house, not even your hair—but somehow you’re expected to show up with a dessert that looks like you tried? That was exactly the kind of day I was having when this No-Bake Chocolate Peanut Butter Fudge Pinwheel was born. It still makes me laugh thinking about it. I’d just come back from one of those rushed grocery trips where you swear you bought important things but somehow walk out with only coffee creamer, bagels, and a candle that smells like “Nordic Winter Forest.” Don’t ask.


Anyway, I opened my pantry hoping a dessert would magically appear (sadly, it did not), but I found chocolate chips, peanut butter chips, and that one can of sweetened condensed milk that seems to survive every pantry clean-out like it’s clinging to life. And something about that moment reminded me of being a teenager at my grandma’s house, rummaging through her pantry, trying to make “fudge” out of whatever we could find—usually chocolate chips and… sometimes not even that. So maybe it was nostalgia, or maybe I was just tired, but I melted everything together the same way I used to, except this time I spread it out, rolled it up, and prayed it wouldn’t fall apart.
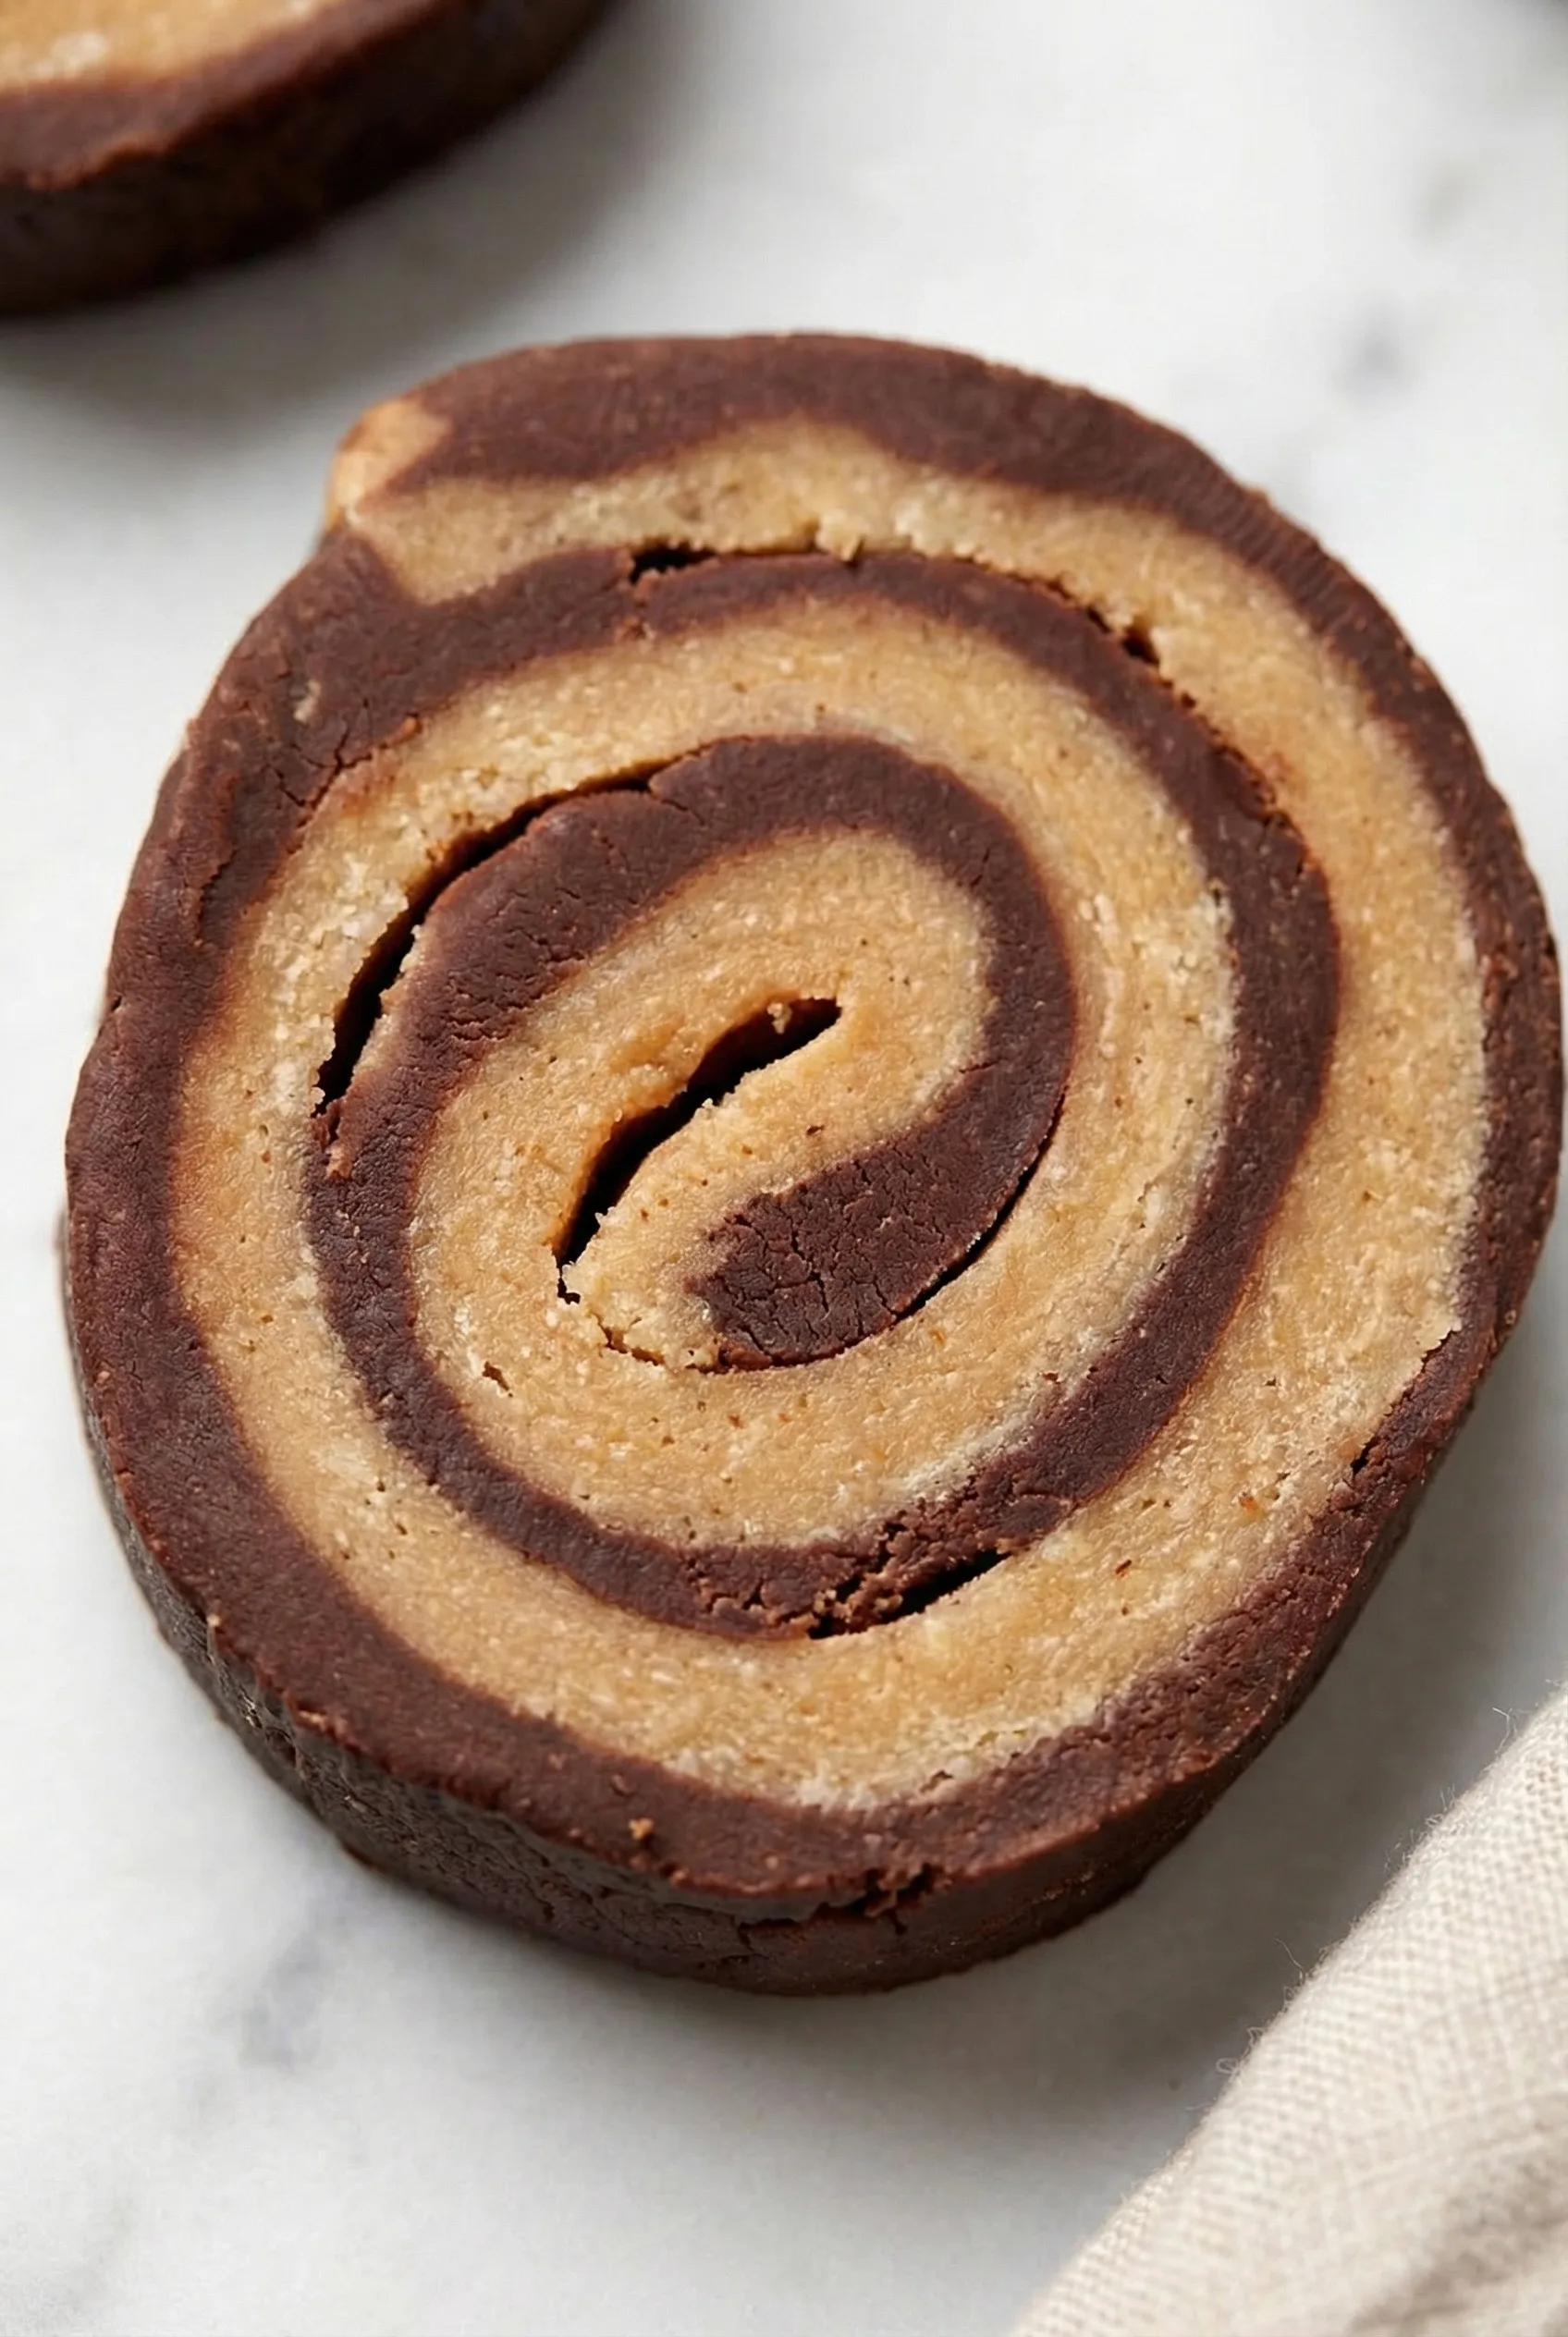
When I sliced into the No-Bake Chocolate Peanut Butter Fudge Pinwheel for the first time, those spirals looked… honestly magical? Like something you’d see at a holiday market or one of those cute boutique bakeries where everything costs $8 a square. And I remember thinking, Wait, did I just accidentally make something impressive? My husband walked by, saw the slices, and asked, “Where’d you buy these?” which was maybe slightly insulting but also kind of flattering. If you’ve ever surprised yourself in the kitchen—like really surprised yourself—you know that weird, warm feeling I’m talking about. This recipe carries a little bit of that for me every time.
Why You’ll Love This No-Bake Chocolate Peanut Butter Fudge Pinwheel Recipe?
If I had to describe what makes this No-Bake Chocolate Peanut Butter Fudge Pinwheel so special, I’d probably start with the fact that it pretends to be complicated. It looks fancy, like the kind of dessert you’d bring to a cookie exchange to impress someone who’s notoriously hard to impress. But behind the scenes? It’s three ingredients and a microwave. There’s something almost rebellious about that—like when your outfit looks amazing but you actually got dressed in the dark.
The flavors hit that nostalgic chocolate–peanut butter combo that honestly feels like childhood lunchroom treats had a glow-up. And the swirl? The swirl is the drama. The reveal. The thing that makes people go, “Oh wow, how’d you do that?” even though internally you’re thinking, “Uh… I rolled it like a yoga mat?” Plus it’s a no-bake dessert, which, let’s be honest, feels extra appealing during those months when it’s way too hot to turn on the oven or when life already feels busy enough without adding baking sheets and oven timers into the chaos.
And maybe this is just me oversharing, but there’s something comforting about a dessert that doesn’t ask for perfection. This recipe just… works. Even when you feel like you don’t have everything together.
Ingredient Notes:
Before you jump in, let’s talk ingredients the way friends talk in the kitchen—honestly, casually, with a little side commentary.
-
Sweetened Condensed Milk: This stuff is like the duct tape of fudge recipes. Sticky, sweet, capable of holding everything together even when you’re not completely sure what you’re doing.
-
Semi-Sweet Chocolate Chips: The base flavor of the No-Bake Chocolate Peanut Butter Fudge Pinwheel. Semi-sweet keeps it from being “wow that’s sweet,” but feel free to use darker chocolate if you’re feeling fancy or if your taste buds have matured faster than mine.
-
Peanut Butter Chips: They melt into the most ridiculously creamy peanut butter layer ever. They’re sweeter than real peanut butter but in that nostalgic way that reminds you of convenience store candy aisle finds after school.
And, honestly, the fact that this entire No-Bake Chocolate Peanut Butter Fudge Pinwheel uses only three ingredients feels almost suspicious. But hey—we’re embracing the simplicity.

How To Make No-Bake Chocolate Peanut Butter Fudge Pinwheel?
Think of me standing beside you in your kitchen, probably with an iced coffee in hand, cheering you on through the messy bits.
Step 1: Melt the Chocolate Mixture
Dump the chocolate chips into a heat-proof bowl, pour half the condensed milk over them, and microwave for about 30 seconds. Stir like you mean it. If it still looks clumpy, microwave another 10–15 seconds. Just don’t overheat it—chocolate has a dramatic personality and will seize if you push too far, kind of like me when someone changes the TV volume too quickly.
Spread the chocolate mixture out onto a baking sheet lined with parchment or wax paper. It doesn’t need to be perfect. We’re rolling it later, so the edges are basically irrelevant. Cover with another piece of paper and gently roll it out. Chill for a few minutes until slightly firm.
Step 2: Melt the Peanut Butter Mixture
Same deal, different chips. Melt the peanut butter chips with the rest of the condensed milk and stir until creamy. Pour the mixture over the chilled chocolate layer and spread it evenly—again, not obsessively. Imperfections give character. And dessert should always have character.
Step 3: Chill Again
Pop the whole thing back into the fridge for 15–30 minutes. You want it set, but still flexible enough to roll. It’s a balancing act, kind of like trying to fold fitted sheets. (If you’ve mastered that skill, please share your ways.)
Step 4: Roll the Pinwheel
Start at the long edge and roll slowly. The wax paper helps you guide the layers like a soft dessert yoga mat. If a crack forms? Pretend it didn’t. Keep rolling. Wrap the whole log and refrigerate 1–2 hours.
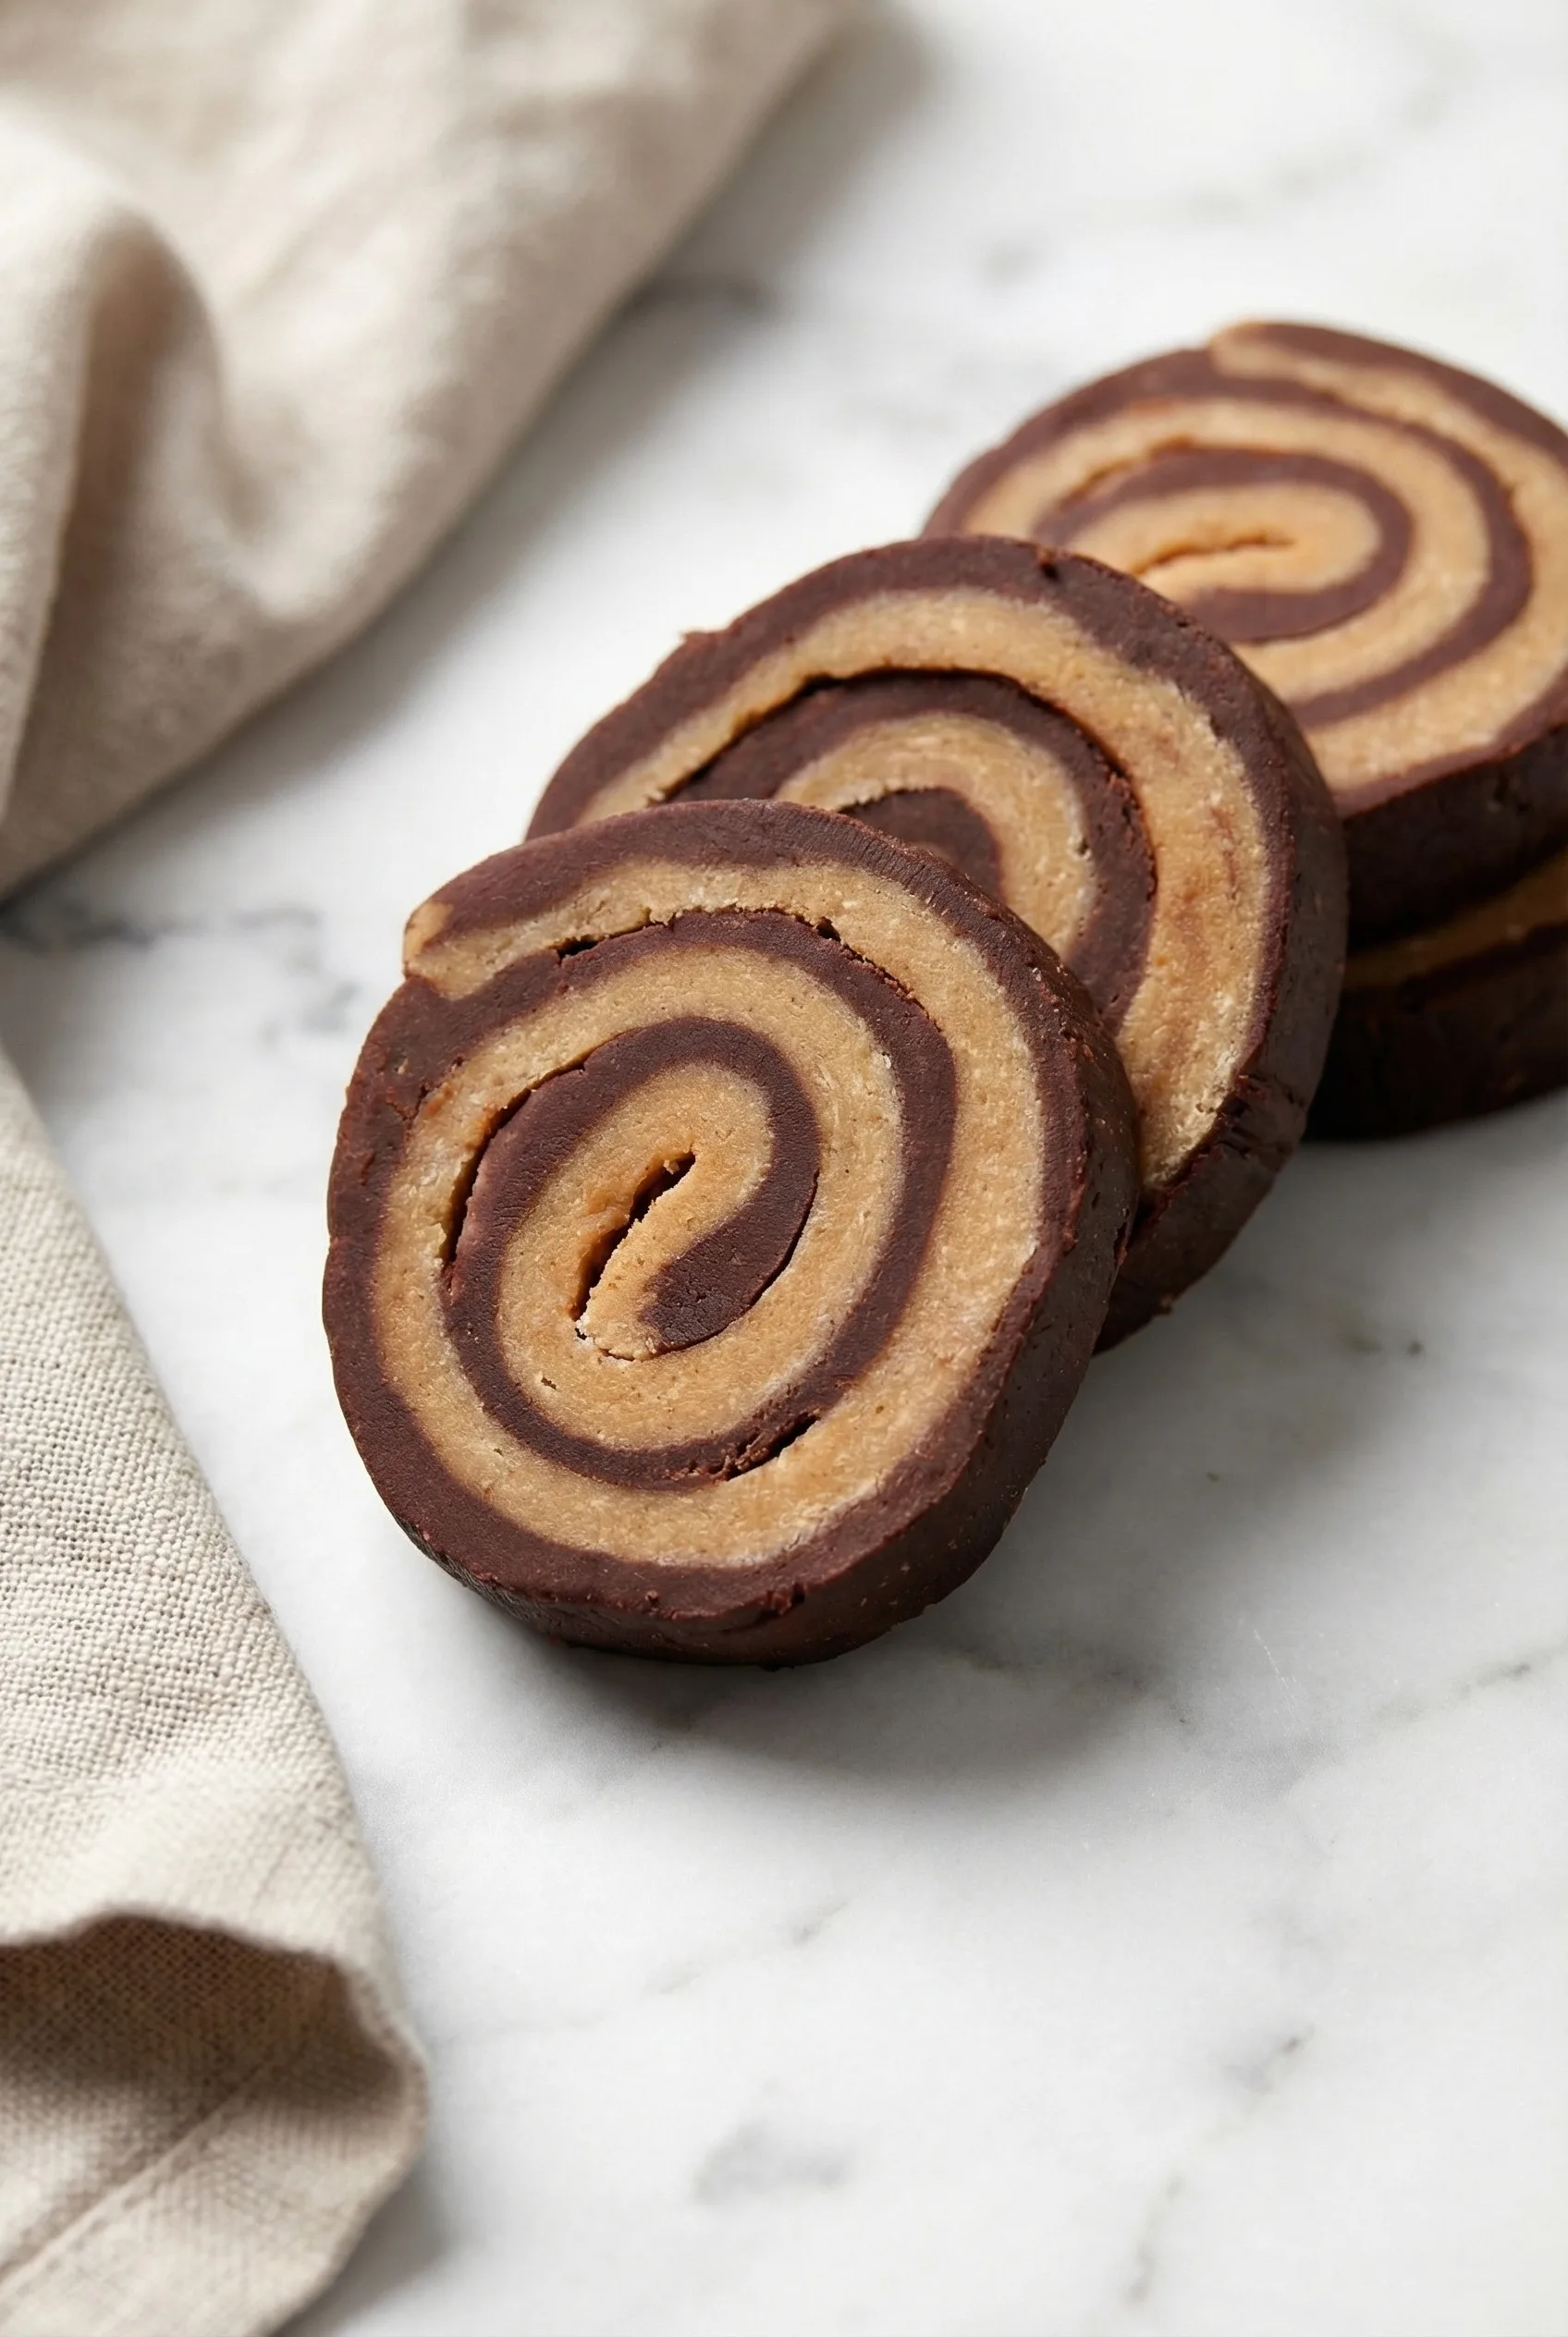
Step 5: Slice & Admire
Once firm, slice into little spirals. This is the moment where the No-Bake Chocolate Peanut Butter Fudge Pinwheel feels like it reveals its personality. It’s honestly a little magical.
Want To Save This Recipe?
Storage Options:
You can store the No-Bake Chocolate Peanut Butter Fudge Pinwheel in an airtight container at room temp for a few days. If your kitchen runs warm, the fridge is a better option—plus it gives the pinwheels that extra-firm bite that reminds me of sneaking candy from the fridge as a kid.
And yes, they freeze beautifully. I’ve absolutely eaten them straight from the freezer at midnight. No regrets.
Variations and Substitutions:
Because the No-Bake Chocolate Peanut Butter Fudge Pinwheel is basically a blank canvas wearing chocolate, you can twist it in so many ways:
-
Dark Chocolate Version: Use dark chocolate chips if you want something moodier and less sweet.
-
Crunchy Add-Ins: Crushed pretzels, nuts, or mini chips add texture and personality.
-
Holiday Edition: Add peppermint bits, colored sprinkles, or cinnamon sugar depending on the season.
-
White Chocolate Swirl: Swap peanut butter chips for white chocolate for a lighter flavor that looks elegant.
-
Nut-Free Option: Use sunflower butter chips or similar swaps if allergies are a concern.
Ever tried tweaking a recipe “just a little” and then realized you created something completely new? This one totally encourages that kind of chaos.

What to Serve with No-Bake Chocolate Peanut Butter Fudge Pinwheel?
Whenever I make this No-Bake Chocolate Peanut Butter Fudge Pinwheel, I like pairing it with things that balance the sweetness or make the plate look extra intentional—even if it wasn’t.
-
Iced coffee or espresso: The bitterness is perfect.
-
Fresh berries: Especially raspberries—like they were made for this.
-
Cold milk: Because some pairings are classics for a reason.
-
Vanilla ice cream: Slice + scoop = instant dessert magic.
Frequently Asked Questions:
Why did mine crack when rolling?
Probably chilled too long. Let it warm up a minute. Happens to all of us.
Can I make it ahead?
Yes, and honestly it tastes even better the next day.
Can I freeze it whole?
Definitely. Freeze the whole roll and slice when slightly chilled—you’ll get the cleanest cuts.
If you make this No-Bake Chocolate Peanut Butter Fudge Pinwheel, I genuinely hope it brings you that same mix of nostalgia, chaos, and surprise delight it brought me. And seriously—tell me how yours turns out. I love hearing these stories.
Keep the Flavor Coming – Try These:


No-Bake Chocolate Peanut Butter Fudge Pinwheel
Ingredients
For the Fudge Pinwheel
- 1 14-ounce can sweetened condensed milk
- 1½ cups semi-sweet chocolate chips
- 1½ cups peanut butter chips
Instructions
Prepare the Chocolate Layer
- Place the semi-sweet chocolate chips in a heat-proof bowl. Add half of the sweetened condensed milk.
- Microwave for approximately 30 seconds, then stir until smooth. If additional melting is required, heat in 10–15 second intervals, mixing well between each session to prevent overheating.
- Transfer the chocolate mixture onto a 10×15-inch baking sheet lined with parchment or wax paper. Spread the mixture evenly.
- Place another sheet of wax paper over the surface and use a rolling pin or glass to flatten and smooth the layer. Refrigerate for a minimum of 5 minutes to allow it to firm.
Prepare the Peanut Butter Layer
- In a separate heat-proof bowl, combine the peanut butter chips with the remaining sweetened condensed milk.
- Microwave using the same method as the chocolate mixture. Stir until fully melted and creamy.
- Remove the chilled chocolate layer from the refrigerator and spread the peanut butter mixture evenly on top.
Chill the Combined Layers
- If desired, add toppings at this stage.
- Place wax paper over the layered mixture and gently smooth it. Refrigerate for 15–30 minutes, or until firm enough to roll without cracking.
Roll the Fudge Pinwheel
- Beginning at the long edge of the baking sheet, carefully roll the layered fudge into a tight log, using the wax paper to guide the process.
- Wrap the completed roll in the wax paper and refrigerate for 1–2 hours, or until sufficiently firm.
Slice and Serve
- Once fully chilled, remove the wax paper and slice the roll into pinwheel rounds using a sharp knife. Serve immediately or store as desired.
Notes
I’m Bitty, owner of nodashofgluten.com, where I share simple, delicious recipes for all tastes, including gluten-free. Check out my “About Me” page for more info!