

Soft peanut butter cookies sandwiched with milk chocolate and cream filling—made with butter, sugar, eggs, and a nostalgic craving or two.
So this story begins with me, a pair of fuzzy socks, and a snowstorm that basically canceled everything. I was home, under-caffeinated, and poking around my pantry in that “maybe something will inspire me” kind of way. You know what I mean, right?


I wasn’t looking to bake anything elaborate. Honestly, I wasn’t looking to bake anything at all. But then I saw a bag of milk chocolate chunks wedged between an old pack of ramen and an unopened jar of peanut butter I forgot I bought. And something about that combo just lit a spark. I mean… milk chocolate and peanut butter? That’s the food equivalent of a power couple.
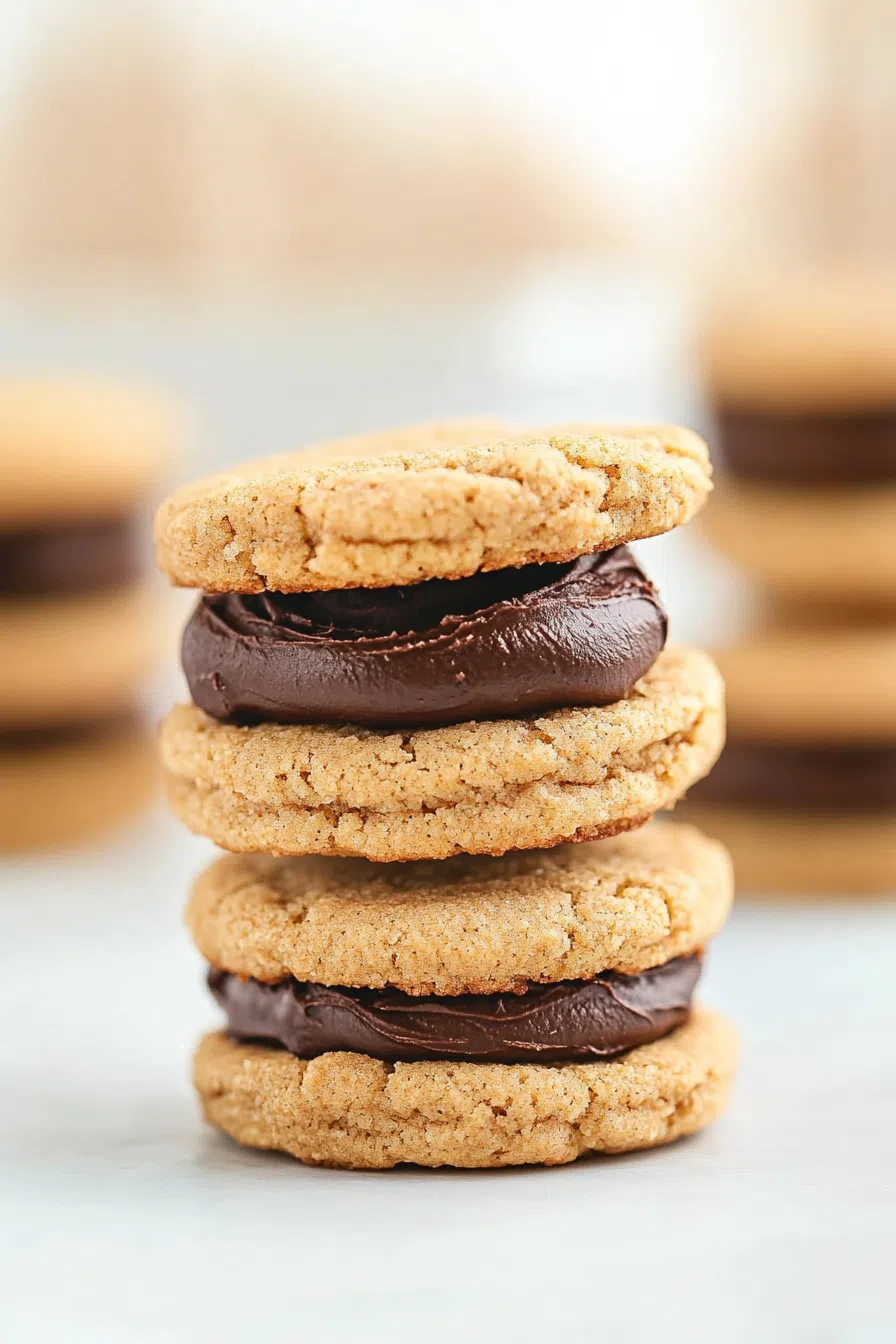
Fast-forward three chaotic batches, one scorched pan (RIP), and a kitchen that looked like it had been through something—I had them. These Milk Chocolate Peanut Butter Sandwich Cookies. Soft, sweet, just a little messy, and wildly addictive. The kind of cookie that makes you text your sister, “You need to make these right now,” followed by way too many fire emojis.
Why You’ll Love This Milk Chocolate Peanut Butter Sandwich Cookies Recipe?
Let’s be real: there are cookies you bring to a PTA meeting, and then there are cookies that get whispered about like a secret family recipe. These are the second kind.
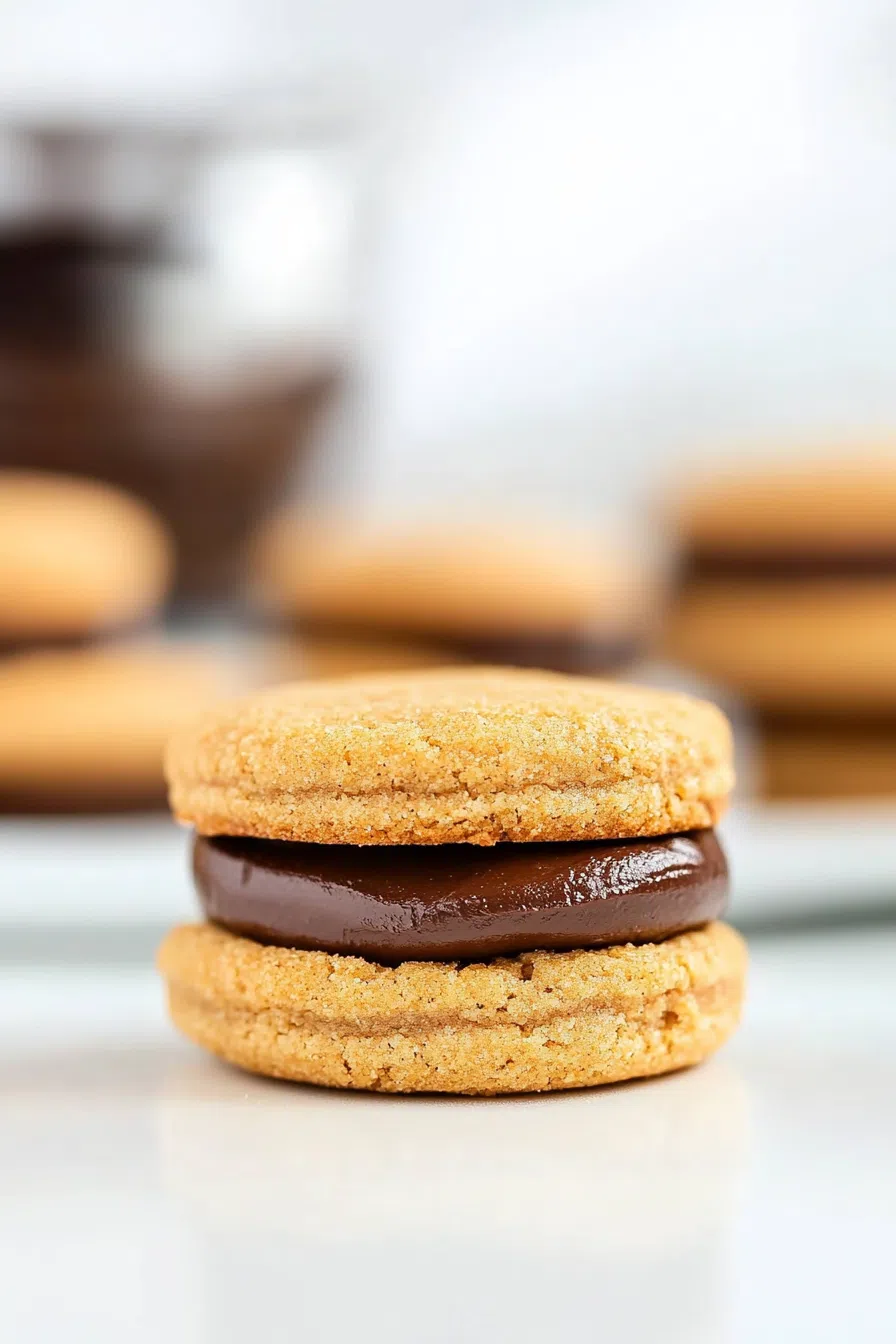
These sandwich cookies start with peanut butter cookies that are soft in the center, with just the slightest crisp on the edges. They’re not too sweet, not too salty—just… right. Then comes the creamy milk chocolate-peanut butter filling. It’s like a ganache met a peanut butter cup and decided to settle down inside a cookie.
And if I’m being honest, there’s something about sandwich cookies that just feels extra. Like you’re putting in a little more effort—even if you’re not. Which is nice when you’re trying to impress people (or just trick your brain into thinking you’re fancy when you’re actually in pajama pants with a coffee stain down the front).

Ingredient Notes:
I used what I had, and maybe you will too. Here’s what went into these cookies—and why it works.
-
All-purpose flour – Just standard flour. I didn’t sift it, and they turned out great, so…
-
Baking soda & salt – The soda gives them that little puff; salt keeps things balanced.
-
Milk chocolate – I used a chopped-up bar, not chips. It melts smoother and tastes better. But if you’ve only got chips? Go for it.
-
Unsalted butter – Two sticks. Yes, the full deal. It’s not diet food.
-
Granulated sugar + dark brown sugar – Both bring something. White sugar gives structure, and the brown sugar makes it soft and rich.
-
Eggs – Two large ones. I forgot to bring them to room temp and nothing exploded, so no stress.
-
Vanilla extract – The cheap kind, if we’re being honest. It still worked.
-
Creamy peanut butter – Not natural, not crunchy. Just good ol’ reliable creamy.
-
Powdered sugar, whipping cream, and more peanut butter & chocolate – That filling? It’s a little indulgent and completely worth it.
How To Make Milk Chocolate Peanut Butter Sandwich Cookies?
I’m not gonna pretend this went smoothly the first time. There were weird shapes, a pan that almost slid off the counter, and at least one cookie that mysteriously disappeared while cooling (weird, right?). But the final result? Glorious. Here’s what I did:
Step 1: Mix your dry stuff.
I dumped the flour, baking soda, salt, and chopped chocolate in a bowl and gave it a good stir. No measuring stress—just aim for even distribution.
Step 2: Beat the butter and sugars.
I used a stand mixer, but a hand mixer works too. Beat until it looked fluffy and pale. It took longer than I thought, and I may have zoned out a bit. Happens.
Step 3: Eggs, vanilla, peanut butter—go.
I added the eggs one at a time. (Okay, maybe I cracked them both at once. Still worked.) Then the vanilla and peanut butter. It all came together in a beautiful, slightly sticky mess.
Step 4: Dry meets wet.
I added the flour mix in two parts. The dough got thick and I had to scrape the sides a few times, but it wasn’t fussy. Pro tip: don’t overmix. When it’s just combined, stop. Trust yourself.
Step 5: Chill time.
Covered the bowl with cling wrap and chilled it for three hours. Yes, three. I tried skipping this once. The cookies came out flat and… sad. Don’t skip it.
Step 6: Shape and bake.
Want To Save This Recipe?
I scooped the dough into teaspoon-sized balls and pressed them just a little to flatten. Baked them at 375°F for 8-ish minutes. They looked underdone, which freaked me out a bit—but they firmed up as they cooled. Like magic.
Step 7: That dreamy filling.
While the cookies cooled, I made the filling. Poured hot cream over a mix of chopped milk chocolate, peanut butter, powdered sugar, and salt. Stirred until smooth. Chilled it for an hour until it was thick enough to spread. I may have licked the spoon. Okay, I definitely did.
Step 8: Sandwich time.
Spread the filling on one cookie, topped it with another. Gave it a little press. Admired it for a second before shoving it into my mouth. Then did it again. And again.

Storage Options:
These cookies hold up like champs. I stored mine in an airtight container on the counter and they lasted three days. After that, they got a little soft—but still delicious. You can refrigerate them if you want a firmer texture.
Freezer tip: wrap each sandwich cookie in plastic wrap and freeze in a zip bag. Thaw one at a time when life gets overwhelming. They taste even better cold, honestly.
Variations and Substitutions:
Honestly, I’ll probably tweak these every time I make them. That’s the fun, right?
-
Use dark chocolate instead of milk for more intensity.
-
Try crunchy peanut butter for some extra texture.
-
Add a little cinnamon to the dough—just a pinch.
-
Use almond butter instead, though I haven’t tested this. Might be amazing. Might be weird.
-
Make mini sandwich cookies, because small things are cute and also you can eat more.

What to Serve with Milk Chocolate Peanut Butter Sandwich Cookies?
These go with almost anything. But if you want the full experience:
-
A glass of cold milk. Obvious, but it just works.
-
A strong iced coffee with oat milk and a sprinkle of cinnamon.
-
Vanilla ice cream—especially if you make cookie ice cream sandwiches.
-
A slow Saturday afternoon and your favorite playlist. Pure bliss.
Frequently Asked Questions:
Can I skip the filling and just make the cookies?
Of course. But then they’re just peanut butter cookies. Still good, just… less wow.
What if I only have semi-sweet chocolate?
Use it. You might miss a bit of the creamy vibe milk chocolate gives, but it’ll still be awesome.
Do I really need to chill the dough?
I’m begging you. Yes. Otherwise, you’ll end up with cookies that are flat and crunchy in a sad way. Trust me.
These Milk Chocolate Peanut Butter Sandwich Cookies started as a snow day project and turned into a full-blown obsession. They’re a little fancy, a little nostalgic, and completely worth the effort.
If you make them, please let me know how they turned out. Even if they’re messy. Especially if they’re messy. That’s where the magic usually is.
Keep the Flavor Coming – Try These:


Milk Chocolate Peanut Butter Sandwich Cookies
Ingredients
For the Cookies:
- 1 3/4 cups all-purpose flour
- 2 teaspoons baking soda
- 1 teaspoon salt
- 6 ounces milk chocolate coarsely chopped
- 1 cup 2 sticks unsalted butter, softened and cut into 1-inch pieces
- 1 cup granulated sugar
- 1 cup firmly packed dark brown sugar
- 2 large eggs
- 1 teaspoon pure vanilla extract
- 1 cup creamy peanut butter
For the Filling:
- 3 ounces milk chocolate chopped
- 1/4 cup creamy peanut butter
- 2 tablespoons powdered sugar
- 1/4 teaspoon coarse kosher salt
- 6 tablespoons heavy whipping cream
Instructions
To Prepare the Cookies:
Combine dry ingredients:
- In a medium bowl, sift together the flour, baking soda, and salt. Stir in the chopped milk chocolate; set aside.
Cream the butter and sugars:
- In the bowl of a stand mixer fitted with the paddle attachment, beat the butter, granulated sugar, and brown sugar until light and fluffy, scraping down the sides of the bowl as needed.
Add eggs, vanilla, and peanut butter:
- Add the eggs one at a time, ensuring each is fully incorporated before adding the next. Stir in the vanilla extract and peanut butter, mixing just until blended.
Incorporate the dry mixture:
- Add half of the flour mixture and mix for approximately 15 seconds. Add the remaining flour mixture and continue mixing until just combined. Do not overmix.
Chill the dough:
- Cover the bowl with plastic wrap and refrigerate the dough for a minimum of 3 hours to ensure proper texture and prevent spreading during baking.
Preheat the oven:
- Set the oven to 375°F (190°C) and line baking sheets with parchment paper.
Shape and bake:
- Drop the chilled dough by rounded teaspoons onto the prepared baking sheets, spacing each approximately 2 inches apart. Gently press each ball to form a thick disc, being careful not to flatten completely. Sprinkle lightly with granulated sugar.
Bake the cookies:
- Bake for 8 minutes, or until the tops of the cookies begin to brown slightly. Remove the baking sheet from the oven and allow cookies to rest for 2 minutes. Transfer cookies to a wire rack to cool completely.
To Prepare the Filling:
Create the ganache:
- Place the chopped milk chocolate, peanut butter, powdered sugar, and salt in a medium heat-safe bowl.
Heat the cream:
- In a small saucepan over medium heat, bring the whipping cream just to a boil. Immediately pour the hot cream over the chocolate mixture.
Stir until smooth:
- Allow the mixture to sit for a minute, then stir until the chocolate is fully melted and the filling is smooth and glossy. Transfer to the refrigerator and chill until thick and spreadable, approximately 1 hour.
To Assemble the Sandwich Cookies:
- Once the cookies are fully cooled and the filling has set, spread approximately 1 rounded teaspoon of filling onto the flat side of one cookie.
- Top with a second cookie, pressing gently to form a sandwich.
- Repeat the process with the remaining cookies and filling.
- Store the assembled cookies in an airtight container at room temperature.
Notes
I’m Bitty, owner of nodashofgluten.com, where I share simple, delicious recipes for all tastes, including gluten-free. Check out my “About Me” page for more info!

