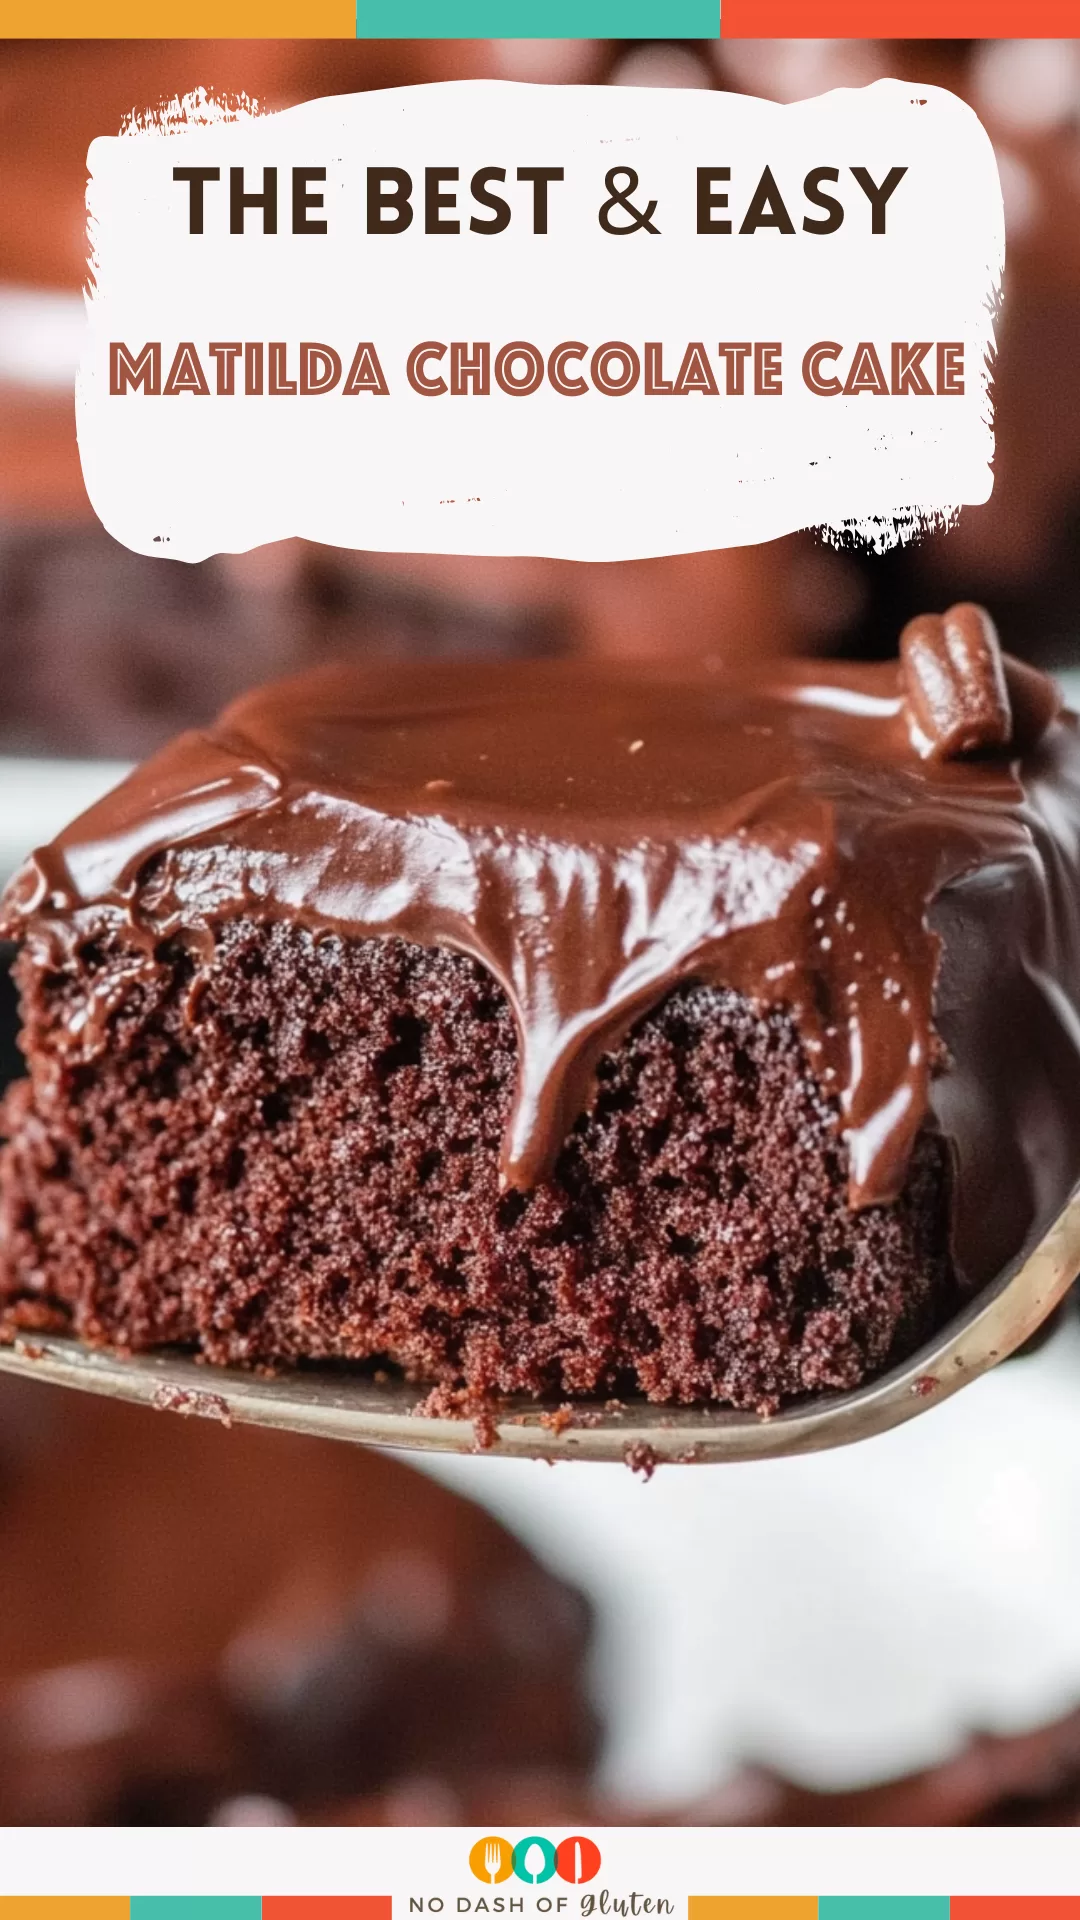
Flour, cocoa powder, sour cream, dark chocolate, and cream cheese come together in this Matilda Chocolate Cake with rich fudge frosting.
Let me start with a confession: I’ve been chasing the perfect chocolate cake since I was a kid. And if you’ve ever watched Matilda, you probably understand why. Bruce Bogtrotter’s epic showdown with that towering chocolate cake is still one of the most relatable food moments ever. Watching him take bite after gooey bite, I couldn’t help but think, That cake must be life-changing.


Fast forward to today—after years of testing and tweaking recipes—I think I’ve finally nailed it. This Matilda chocolate cake is rich, indulgent, and everything a chocolate cake should be. It’s the kind of dessert that makes you pause after the first bite, close your eyes, and just enjoy. My family doesn’t even wait for it to cool before diving in. And honestly? I don’t blame them.
This cake is perfect for birthdays, dinner parties, or just because you want to treat yourself. It’s the cake you make when you want to wow a crowd—or keep all to yourself. No judgment here.
Why You’ll Love This Matilda Chocolate Cake Recipe?
Why is this Matilda Chocolate Cake so special? I mean, it’s chocolate cake, so it’s already a winner, but this one takes things to the next level:
- Moist Beyond Belief: Thanks to sour cream and buttermilk, the texture is unbelievably soft and tender.
- Deep Chocolate Flavor: A mix of Dutch-processed cocoa and a little instant coffee gives it that “wow” factor.
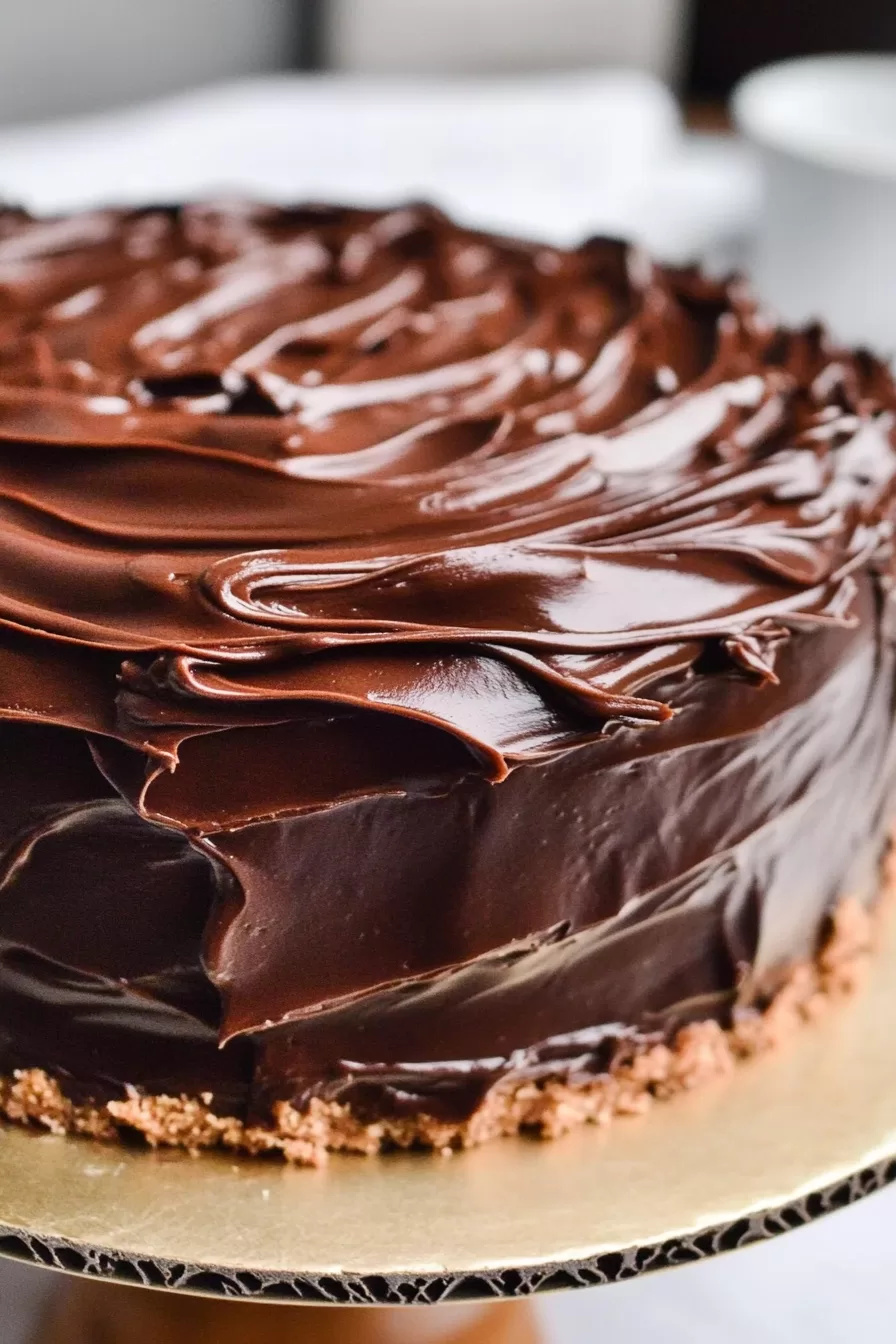
- Silky Fudge Frosting: The frosting is a creamy, chocolaty dream. Honestly, you could eat it with a spoon (and I won’t tell).
- Crowd-Pleaser: Whether it’s a birthday or just a random Thursday, this cake never disappoints.
Ingredient Notes:
Let’s break down the magic:
- Flour: Regular all-purpose flour gives the cake its structure while keeping it soft and light.
- Sour Cream: This is the secret to making a cake so moist that people will ask for your recipe. Every. Single. Time.
- Dutch-Processed Cocoa: It’s smoother and richer than regular cocoa powder. If you have it, use it!
- Instant Coffee: Don’t worry—it doesn’t make the cake taste like coffee. It just enhances the chocolate flavor.
- Dark Chocolate: For the frosting, because regular chocolate just won’t cut it.
- Cream Cheese: Adds a little tang to the frosting that balances all the sweetness beautifully.

How To Make Matilda Chocolate Cake?
This cake might look fancy, but trust me, it’s easier than you think. Here’s how to make it happen:
Step 1. Prep Like a Pro
Start by preheating your oven to 350°F. Line three 8-inch cake pans with parchment paper and butter them generously. Seriously, don’t skimp on this step—no one likes a stuck cake.
Step 2. Whisk the Dry Ingredients
In a big bowl, whisk together the flour, baking powder, baking soda, sugars, and salt. Make sure everything’s well combined and lump-free.
Step 3. Mix the Wet Ingredients
In another bowl, whisk the eggs, oil, buttermilk, and sour cream until smooth. It should look creamy and slightly thick.
Step 4. The Cocoa Magic
In a small bowl, stir the cocoa powder and instant coffee into the boiling water. It’ll turn into this glossy, chocolatey mixture that smells amazing.
Step 5. Combine and Fold
Add the dry ingredients to the wet in two additions, folding gently. Then pour in the cocoa mixture and fold again until the batter is smooth. Don’t overmix—lumps are fine!
Step 6. Bake
Divide the batter evenly among the pans and bake for 22–24 minutes. When a toothpick comes out with moist crumbs, they’re done. Let the cakes cool for 20 minutes in their pans, then transfer them to a wire rack.
Step 7. Make the Frosting
Melt the dark chocolate and corn syrup in a saucepan over low heat. In a stand mixer, beat cream cheese, cocoa powder, powdered sugar, and salt until creamy. Add the heavy cream and whip until fluffy. Finally, drizzle in the melted chocolate and mix until it’s smooth and luscious.
Step 8. Assemble Like a Boss
Trim the domes off the cooled cakes so they stack evenly. Spread frosting generously between the layers, then cover the entire cake with a thin crumb coat. Chill for 20 minutes before slathering on the rest of the frosting.
Want To Save This Recipe?
Storage Options:
This cake stores beautifully, so you can enjoy it for days (if it lasts that long).
- Room Temperature: Store in an airtight container for up to 2 days if your kitchen is cool.
- Refrigerator: Keeps well for up to 5 days. Let it come to room temp before serving for the best texture.
- Freezer: Wrap the layers or slices tightly in plastic wrap, then foil, and freeze for up to 3 months.
Variations and Substitutions:
Want to switch things up? Here are some ideas:
- Filling: Add a layer of raspberry jam, salted caramel, or peanut butter between the layers.
- Different Frosting: Try whipped ganache or even a simple vanilla buttercream.
- Gluten-Free: Substitute a 1:1 gluten-free flour blend, and you’re good to go.
- Toppings: Sprinkle with chocolate shavings, toasted nuts, or a dusting of cocoa powder.

What to Serve with Matilda Chocolate Cake?
This cake is a showstopper on its own, but why not go all out?
- Vanilla Ice Cream: Because warm cake and cold ice cream are a match made in dessert heaven.
- Fresh Berries: Strawberries or raspberries add a bright, tangy contrast.
- Whipped Cream: A light, airy topping to balance the richness.
- Espresso: Coffee and chocolate? Yes, please.
Frequently Asked Questions:
Can I make this cake ahead of time?
Absolutely! Bake the layers a day ahead and store them in the fridge. Frosting can also be prepped and chilled.
Can I use milk chocolate instead of dark?
Sure, but the frosting will be sweeter and less intense. Still delicious, though!
How do I get that smooth frosting look?
Use a warm offset spatula or a blow dryer on low to gently warm the frosting—it works like magic.
There you have it—the ultimate Matilda Chocolate Cake. It’s rich, indulgent, and guaranteed to make any day feel special. Give it a try and let me know—did it live up to your chocolate dreams? I can’t wait to hear!

Keep the Flavor Coming – Try These:


Matilda Chocolate Cake
Ingredients
For the Chocolate Cake:
- 2 cups all-purpose flour sifted (260g)
- 1 ½ tsp baking powder
- 1 ½ tsp baking soda
- 1 cup granulated sugar 200g
- ⅔ cup light brown sugar packed (135g)
- 1 tsp salt
- 3 large eggs room temperature
- ⅔ cup vegetable oil 133g
- ⅓ cup buttermilk 80g (mix ⅓ cup whole milk with 1 tsp vinegar)
- 1 cup sour cream room temperature (240g)
- ¾ cup cocoa powder Dutch-processed preferred (75g)
- 2 tsp instant coffee
- ¾ cup boiling water 180g
For the Chocolate Fudge Frosting:
- 300 g dark chocolate melted
- 3 tbsp corn syrup
- 8 oz cream cheese room temperature (226g)
- ⅓ cup cocoa powder 33g
- 1 cup powdered sugar 100g
- ¼ tsp salt
- 1 ¼ cup heavy cream chilled
Instructions
Prepare the Cake Pans and Preheat the Oven
- Preheat your oven to 350°F (175°C). Line three 8-inch round cake pans with parchment paper and generously butter the pans to prevent sticking.
Combine the Dry Ingredients
- In a large mixing bowl, whisk together the flour, baking powder, baking soda, granulated sugar, light brown sugar, and salt until evenly distributed.
Mix the Wet Ingredients
- In a separate bowl, whisk the eggs, vegetable oil, buttermilk, and sour cream until the mixture is smooth and cohesive.
Prepare the Cocoa Mixture
- In a small bowl, combine the cocoa powder and instant coffee. Pour the boiling water over the mixture and whisk until it forms a smooth, shiny liquid.
Create the Batter
- Gradually add the dry ingredients to the wet ingredients in two additions, folding gently with a spatula until just combined. Then, incorporate the cocoa mixture, folding carefully to avoid overmixing.
Divide and Bake the Cake Layers
- Evenly divide the batter among the prepared cake pans. Bake for 22–24 minutes, or until a toothpick inserted in the center comes out with moist crumbs. Allow the cakes to cool in their pans for 20 minutes before transferring them to a wire rack. Chill the cooled layers in the refrigerator for at least 1 hour.
Prepare the Fudge Frosting
- In a saucepan, melt the dark chocolate with the corn syrup over low heat, stirring constantly. Set aside to cool slightly. In the bowl of a stand mixer fitted with the paddle attachment, beat the cream cheese, cocoa powder, powdered sugar, and salt on medium speed until creamy and smooth. Add the heavy cream and mix on low speed until fluffy. Slowly pour in the melted chocolate and mix until fully combined. Allow the frosting to cool to a spreadable consistency at room temperature for approximately 30 minutes.
Assemble the Cake
- Use a serrated knife to trim the domed tops of the cake layers, ensuring they are flat. Place one cake layer on a serving plate and spread a generous amount of frosting over the top. Repeat with the second and third layers, then cover the entire cake with a thin crumb coat of frosting. Refrigerate for 20 minutes to set the crumb coat. Finish by spreading the remaining frosting over the cake, smoothing with an offset spatula.
Notes
I’m Bitty, owner of nodashofgluten.com, where I share simple, delicious recipes for all tastes, including gluten-free. Check out my “About Me” page for more info!