

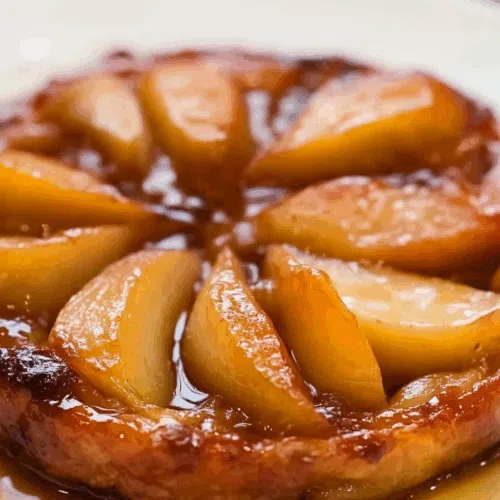
Pears, maple syrup, puff pastry, and brown sugar come together in this easy, rustic Maple-Pear Tarte Tatin that flips into golden caramel magic.
You know that moment when you accidentally feel fancy? Like, you’re still in sweatpants, there’s flour in your hair (how?), but you pull something golden and gorgeous out of the oven and suddenly feel like you could host a dinner party in Paris? Yeah. That’s what this Maple-Pear Tarte Tatin is. It’s magic in a skillet—and the best part is, it doesn’t care if you forgot to chill the wine or if your pastry edges are a little crooked. It still shows up and shows off.
I didn’t grow up eating tarte Tatin. We were more of a “dump cake” family. (Respect, dump cake—you taught me you don’t need to be complicated to be amazing.) But the first time I tried a pear tarte Tatin at a little neighborhood café on a rainy afternoon, something clicked. The buttery crust, the soft caramelized fruit, that whisper of maple… I was hooked. I made it my mission to recreate it at home. Spoiler: this version might not win any Michelin stars, but it will make you do a little happy dance in the kitchen.


Okay, so my first tarte Tatin didn’t go exactly to plan. I remember flipping it too fast and sending two pear halves flying across the counter like caramelized comets. One stuck to the stove. One hit the cat’s tail. But here’s the thing: it still tasted incredible. That messy, slightly lopsided tart was polished off in ten minutes.
That was the day I learned that the real joy of a recipe isn’t in how perfect it looks—it’s in how it feels. And this one? It feels warm, buttery, nostalgic. Like something you should be eating while wrapped in a blanket, listening to soft jazz, and pretending you don’t have three loads of laundry waiting.
Why You’ll Love This Maple-Pear Tarte Tatin Recipe?
Let me put it this way: if apple pie is your dependable bestie, Maple-Pear Tarte Tatin is the charming friend who always brings a bottle of wine and has great stories.
Here’s what makes it special:
-
It looks way harder than it is. Great for impressing people with minimal stress.
-
The maple syrup gives it depth. Not overly sweet—just… cozy.
-
Puff pastry saves the day. Store-bought, no shame. It gets golden and flaky with zero effort.
-
Caramelized edges. Need I say more?
-
It’s meant to be rustic. Translation: messy is welcome.
And maybe my favorite part? You only need a handful of ingredients. No mixer, no dough chilling, no fancy techniques. Just a skillet, some pears, and the willingness to flip something upside down and hope for the best.
Ingredient Notes:
-
Puff pastry (½ package): Buy the good stuff if you can. But even the cheap brand will puff up like a champ when paired with butter and heat.
-
Butter (¼ cup): Unsalted, because you’re already throwing in syrup and sugar. But hey—if all you’ve got is salted, roll with it. I have.
-
Brown sugar (⅓ cup): Adds that molasses warmth that just feels right with pears.
-
Maple syrup (¼ cup): Real maple if you can swing it. But yes, I’ve used the pancake stuff before. It still slaps.
-
Cinnamon & nutmeg: Just enough to whisper “fall” without yelling about it.
-
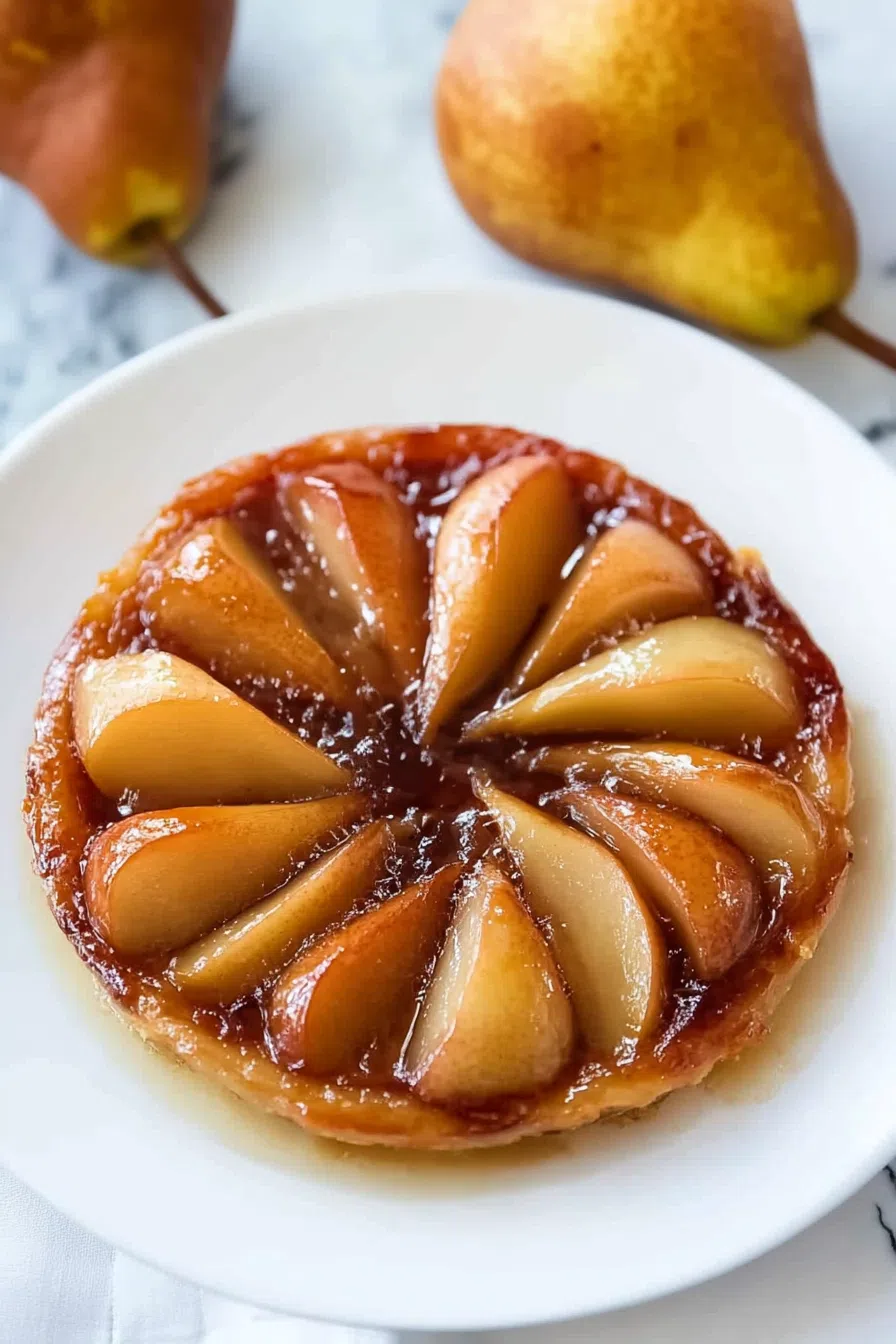
Pears (4, maybe 5): Bosc or Anjou work well. You want them to keep some shape. Mushy pears? Sadness.
PS: I once used apples and pears together because I ran out. And it might’ve been better than the original. Just saying.

How To Make Maple-Pear Tarte Tatin?
Step 1: Preheat to 375°F.
Start by rolling out your puff pastry to about ¼ inch thick. If you’re using a wine bottle instead of a rolling pin, I’ve been there. Chill the pastry while you prep the rest.
Step 2: Make that maple-butter magic.
Melt the butter in a cast iron skillet. Stir in the brown sugar, cinnamon, nutmeg, and maple syrup. Let it bubble. It should smell like the inside of a cozy cabin.
Step 3: Arrange the pears.
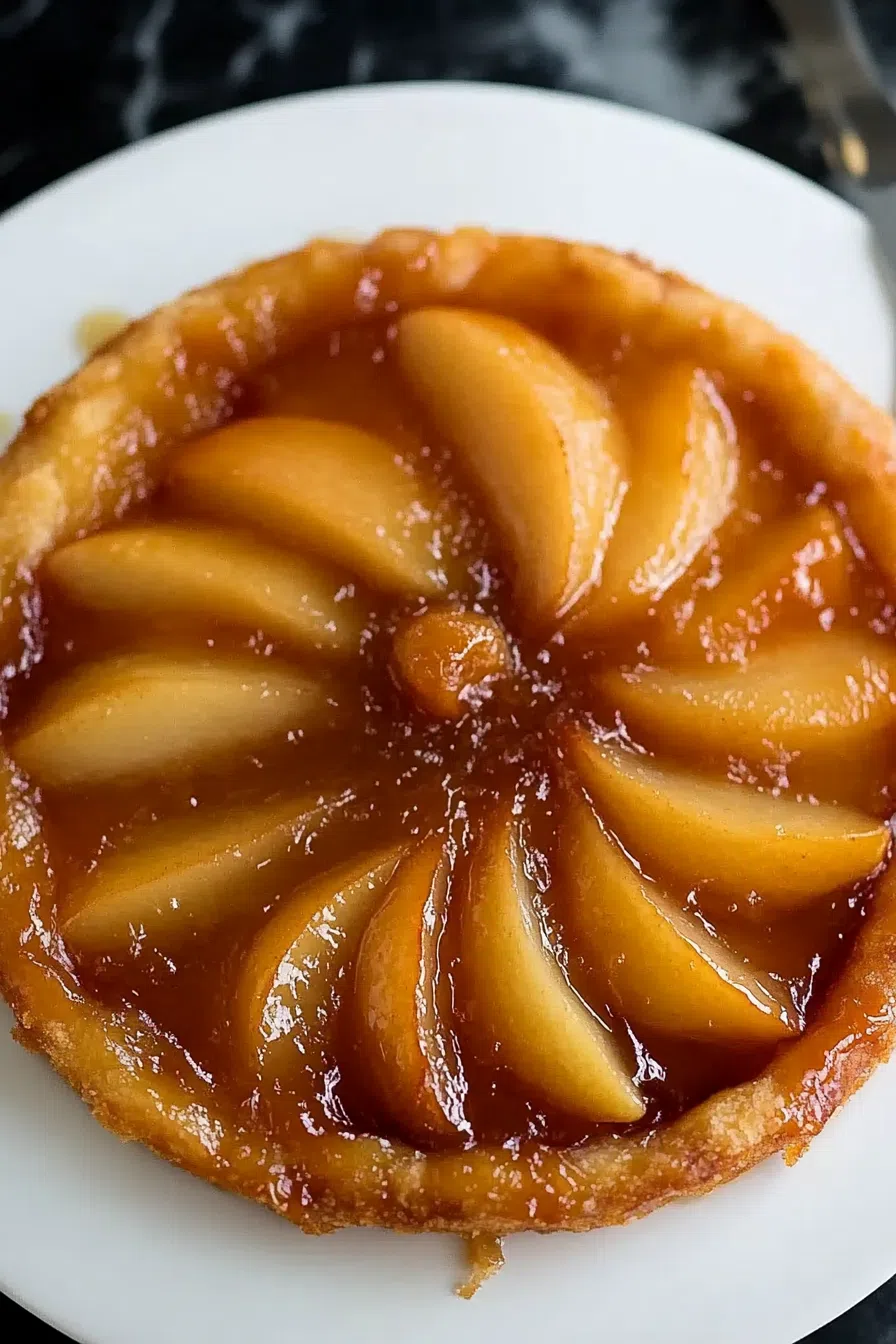
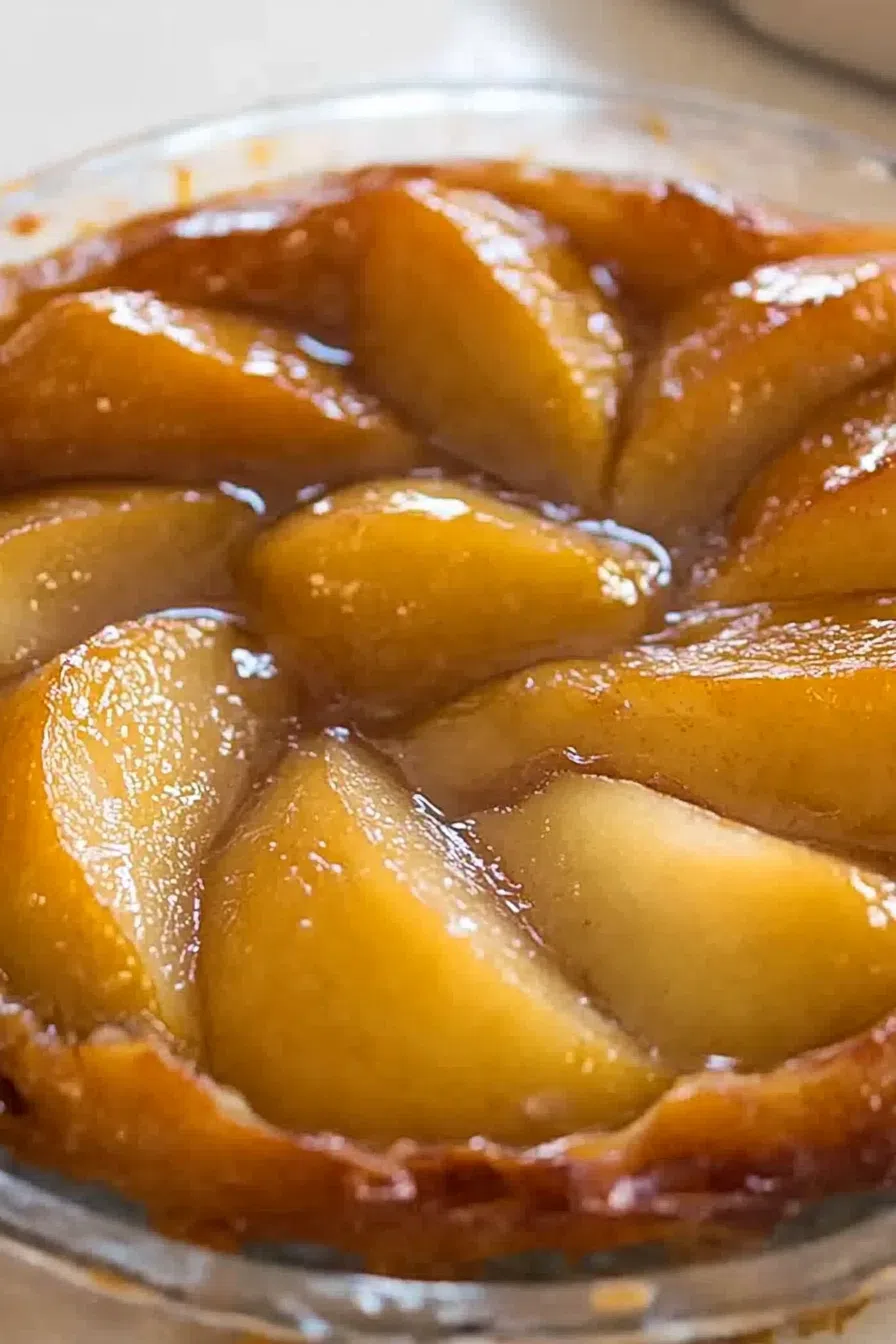
One half in the center, cut side up. The rest around it, also cut side up, in your best attempt at a circle. If they overlap or don’t fit perfectly? That’s your tart’s personality.
Step 4: Simmer & spoon.
Let the pears simmer in the syrup for about 5 minutes. Spoon the mixture over them a few times. Feel free to sneak a bite. No one’s watching.
Want To Save This Recipe?
Step 5: Lay on the puff pastry.
Take the chilled pastry and lay it over the pears. Tuck the edges in gently like you’re swaddling a baby… made of fruit.
Step 6: Bake.
Into the oven it goes for 20–25 minutes. You want it golden and puffed like a pastry pillow.
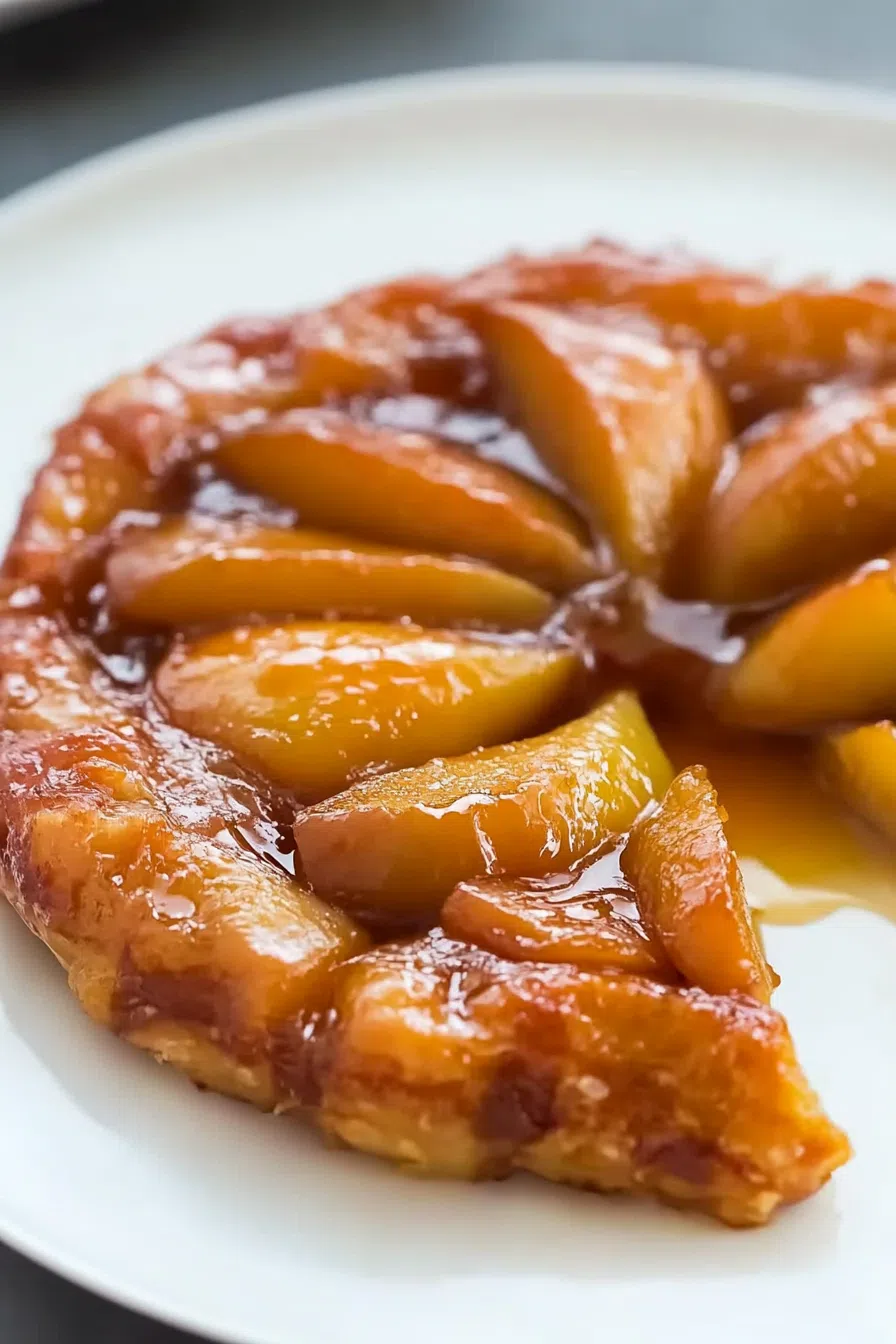
Step 7: The Big Flip.
This is the moment of truth. Let the tart rest for 5-ish minutes, then put a plate over the skillet and flip with courage. If some pears stick, just plop them back on and call it abstract. No regrets.
Storage Options:
Honestly, I rarely have leftovers. But if you do? Wrap them up and keep them in the fridge for up to three days. Reheat in the oven for a little crispness, or sneak a cold slice straight from the fridge at midnight like a rebel.
Variations and Substitutions:
-
Apples, peaches, or plums: Go seasonal!
-
Spice it up: Add cardamom, ginger, or even black pepper for a surprise.
-
Boozy twist: A splash of brandy or bourbon in the caramel = grown-up dessert moment.
-
Nuts: A sprinkle of chopped pecans or walnuts adds great crunch.
What to Serve with Maple-Pear Tarte Tatin?
-
Vanilla ice cream – classic, melty, dreamy.
-
Lightly sweetened whipped cream – cloud-like.
-
Crème fraîche – tangy sophistication.
-
A strong cup of coffee – pairs perfectly with that maple warmth.
Frequently Asked Questions:
Can I make this ahead of time?
Yes. But it’s best warm. If you do make it ahead, reheat in the oven to bring back the flake.
What if my flip goes wrong?
Honestly? Still delicious. Stack it, drizzle extra syrup on top, and call it rustic chic.
Do I need a cast iron skillet?
Nope! Any oven-safe skillet or deep baking dish will work. Just don’t use anything that can’t handle heat or syrup.
This Maple-Pear Tarte Tatin is for anyone who’s ever wanted to feel a little French without leaving their kitchen. It’s cozy and caramelized, it makes the house smell amazing, and it comes with just enough drama (that flip!) to keep things interesting.
Try it. Get sticky. Laugh when it doesn’t turn out perfectly. Eat the too-dark edge. Share a slice. Or don’t.
And if you do make it? I’d love to hear about your version. Did it flip clean? Did it flip at all? Did you eat it straight out of the pan with a fork? You’re in good company.
Keep the Flavor Coming – Try These:
Maple-Pear Tarte Tatin
Ingredients
- ½ 17.3 oz package frozen puff pastry, thawed
- ¼ c butter
- ⅓ c brown sugar
- ¼ tsp ground cinnamon
- 1 pinch ground nutmeg
- ¼ c maple syrup
- 4 firm pears - peeled cored, and halved, or more as needed
Instructions
- Set your temperature to 375°F (190°C).
- Roll out the puff pastry on a floured surface until it reaches a thickness of 1/4 inch. Place it in the refrigerator to chill.
- In a 9-inch cast iron skillet melt butter over medium heat. Add sugar, cinnamon and nutmeg cooking until the sugar dissolves completely. Stir in maple syrup. Continue cooking until it starts bubbling. Remove from heat.
- Take one half of a pear. Place it with its side facing up in the center of the skillet. Surround it with the remaining pear quarters with their cut sides facing up.
- Return the skillet to medium-low heat. Cook the pears while gently basting them with the syrup for 5 minutes.
- Retrieve the chilled puff pastry, from the fridge. Carefully lay it over the pears ensuring that its edges are tucked inside of the skillet.
- Place your skillet, in your preheated oven. Let it bake until you notice that your pastry has turned beautifully golden and puffed up – this should take 20 minutes.
- Allow your tart to cool down for 5 minutes. Then take a serving plate. Place it over your skillet before flipping everything upside down to release your tart onto that plate. Serve while still warm.
Notes
I’m Bitty, owner of nodashofgluten.com, where I share simple, delicious recipes for all tastes, including gluten-free. Check out my “About Me” page for more info!

One Response
I made this and put more pears than it said since I had a million pears to use lol, and it was so good and yummy. I also made my own puff pastry beforehand. Everyone in my family including my step dad who is a professional chef said this was super delicious and tender.