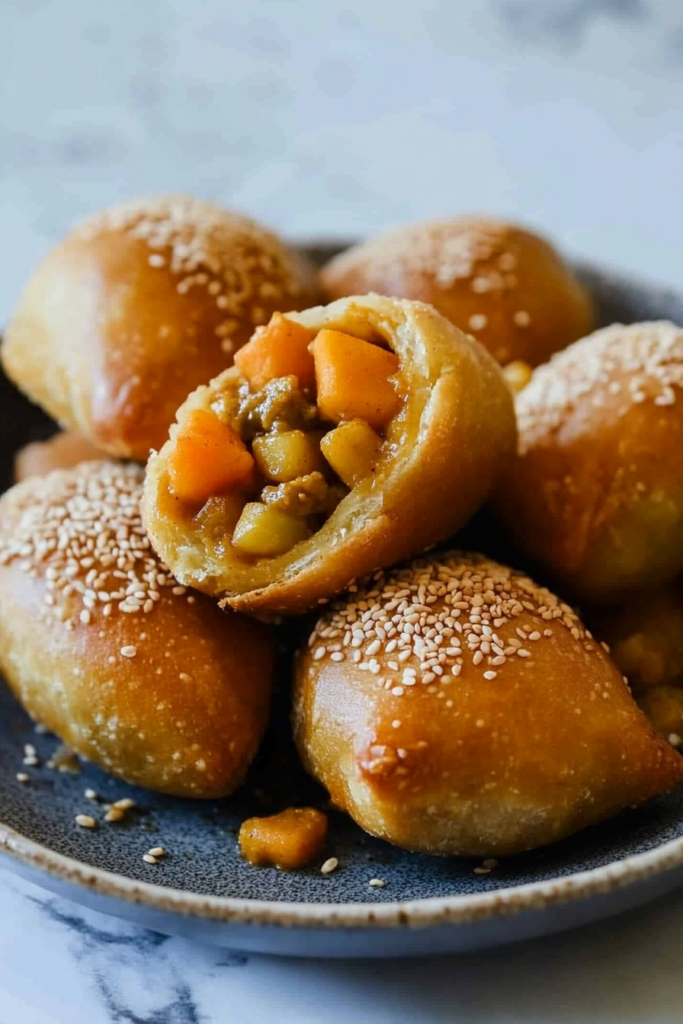
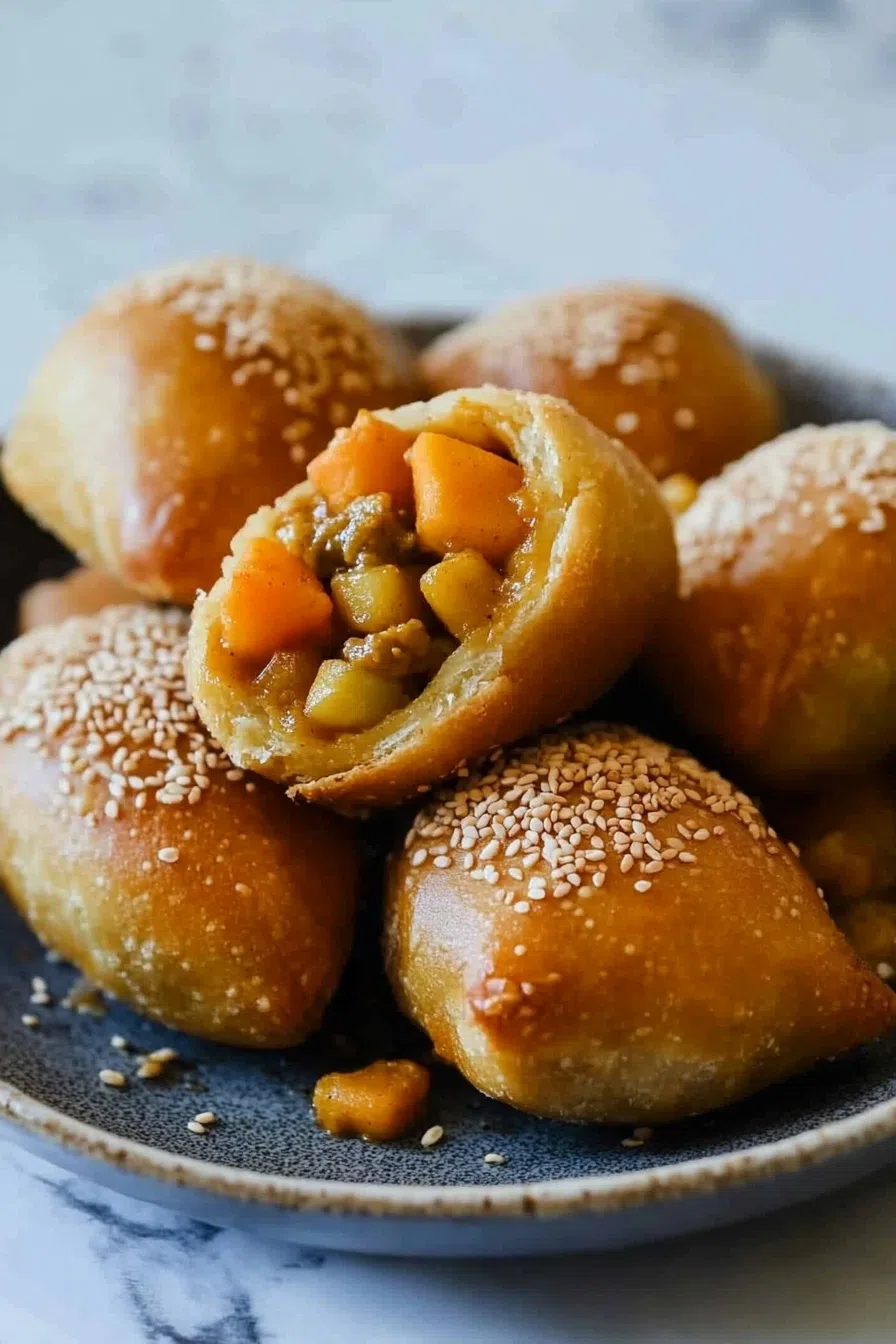
Crispy Japanese curry buns stuffed with savory potatoes, carrots, and onions in a rich curry sauce. A street-food classic made easy at home!


So, picture this. It was 3 p.m. in Tokyo. I was jet-lagged, borderline hangry (you know that stage when you start seeing stars?), and wandering the streets with no clue what I was doing. Then—like some mystical breadcrumb trail—I caught a whiff of something magical. You ever have that moment where a smell practically grabs you by the shirt and pulls you in? That was me, following my nose to a tiny corner bakery.
And there they were: golden, crispy Japanese curry buns, glistening under the glass like little nuggets of joy. One bite and I swear I heard angels singing. That combo of crunchy panko crust and rich, savory curry filling? Unreal. I promised myself I’d figure out how to make them back home. And after a lot of trial and error (and burnt buns I’m not proud of), here we are.
Why You’ll Love This Japanese Curry Bun Recipe?
I could go on for days, but here’s the short version:
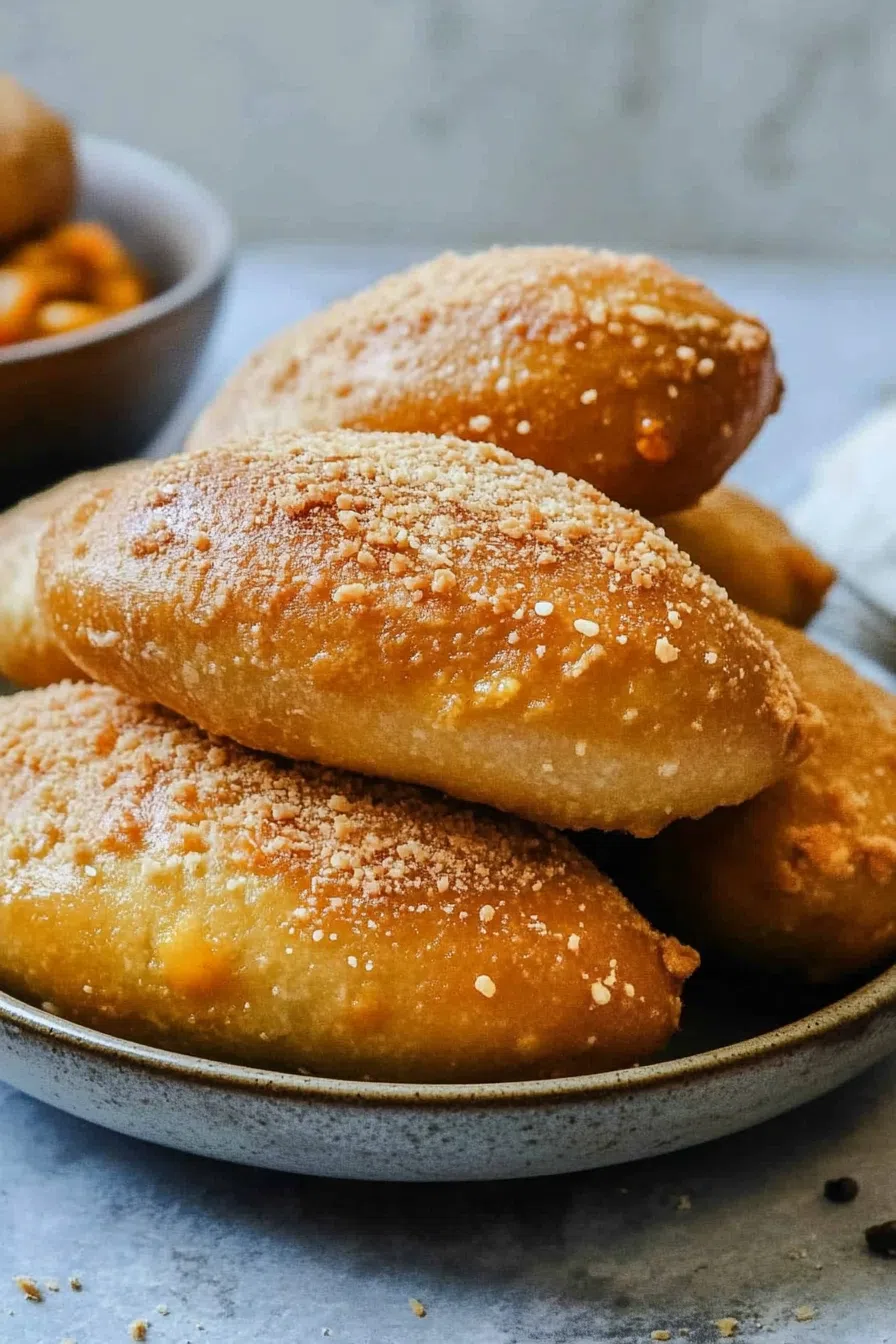
- Crispy outside, soft and chewy inside. That golden crust gives way to the fluffiest bread you’ve ever had.
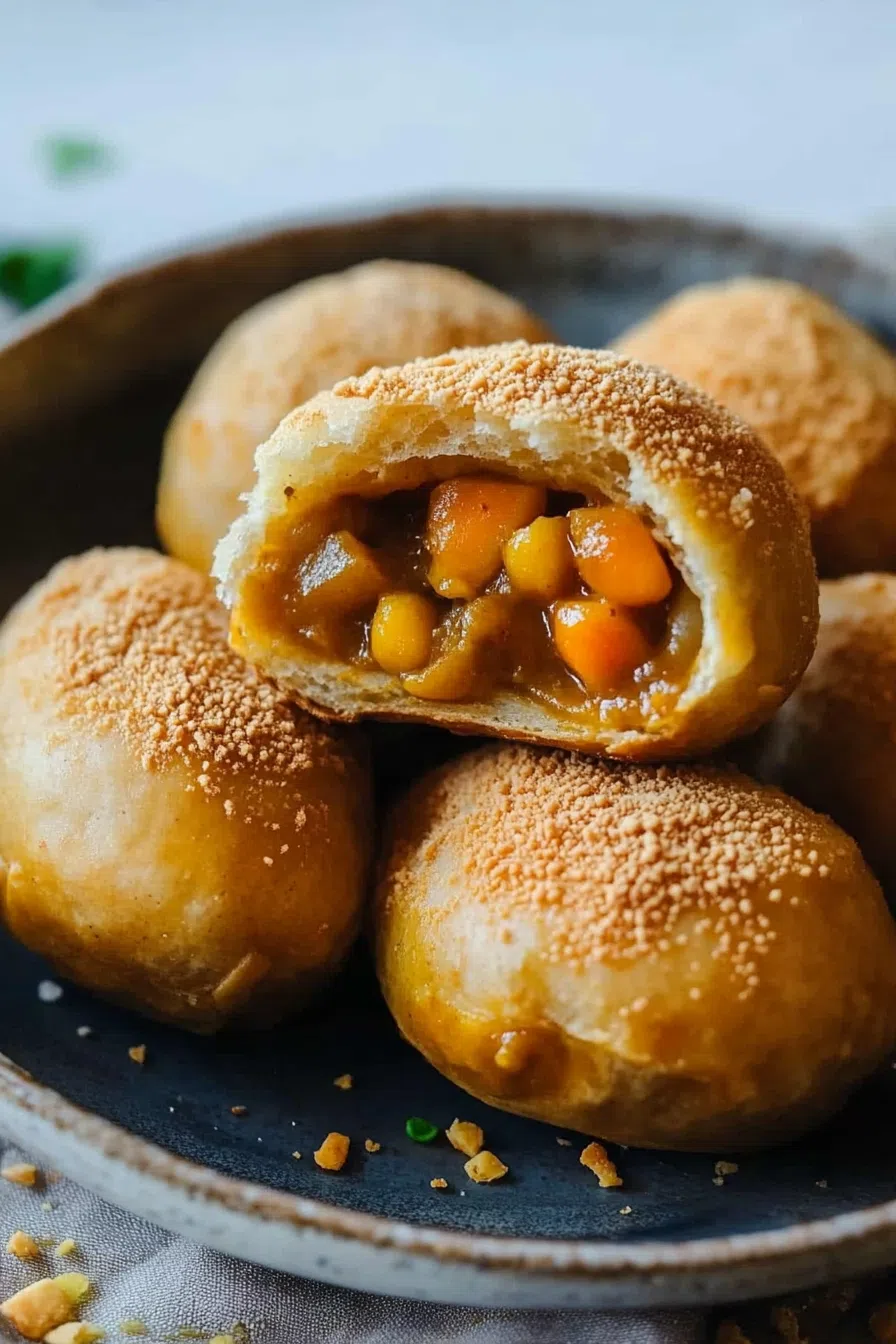
- Hearty curry filling. It’s loaded with potatoes, carrots, onions, and bell peppers. Basically, it’s like a warm hug in food form.
- Baked OR fried. You pick your adventure! Want indulgent and crispy? Fry ’em. Feeling lighter? Bake them—still crazy good.
- Freezer-friendly. Yep. Make a batch, freeze ‘em, and pop one out when the curry bun cravings strike. Trust me. They will strike.
Ingredient Notes:
I’m not gonna leave you scratching your head in the baking aisle. Let’s break it down.
- Bread Flour + All-Purpose Flour: Bread flour gives that chewy bite; all-purpose softens it up so it’s not like chewing a flip-flop.
- Cornstarch: Helps crisp things up—think of it as the secret weapon of crunch.
- Instant Yeast: The lazy baker’s BFF. Toss it in and go.
- Soy Milk: Or whatever milk you like. I used soy because it’s what I had on hand. Don’t overthink it.
- Japanese Curry Cubes: S&B Golden Curry is a winner. Go mild, medium, or wild—dealer’s choice.
- Panko Bread Crumbs: If you skip these, we can’t be friends. They’re the reason these buns get that signature crunch.
How To Make Japanese Curry Bun?
Step 1: Make the Curry Filling
Grab a big ol’ pan, heat it up, and add some oil. Toss in onions and sauté till they’re nice and soft (you want them almost melting). Bell peppers go in next—give ‘em a minute or two to get cozy. Then add potatoes and carrots. Now pour in water and toss in your curry cubes. Stir until the cubes melt and things thicken up like a good stew. Let it cool. Overnight in the fridge works great because it firms up, and nobody likes leaky buns.
Step 2: Make the Dough
Mix your dry stuff in a bowl. While mixing, pour in warm milk. It’ll look rough—just trust the process. Once it’s shaggy, get in there with your hands. Knead, knead, knead (about 10 minutes), until smooth. If it’s too sticky, add a bit of flour. Too dry? More milk. This isn’t an exact science.
Cover it and let it rise somewhere warm. I use my oven on “proof” mode. After an hour, poke it. If it doesn’t spring back, you’re golden.
Step 3: Shape the Buns
Punch the dough (yes, it’s as fun as it sounds). Divide it into 8 equal pieces. Roll one out to about 4 inches wide. Add 1-1.5 tbsp of curry filling in the center. Don’t overfill unless you enjoy cleaning up exploded buns (ask me how I know). Pinch the edges closed like your life depends on it. Seal it tight.
Brush with soy milk + cornstarch slurry (think of it as the vegan egg wash), then coat in panko.
Want To Save This Recipe?
Step 4: Bake or Fry
Bake: Pop them on an oiled baking tray at 350°F. Spray or brush them with a little oil. Bake for 35-40 mins until golden.
Fry: Heat oil in a pot. When a breadcrumb sizzles on contact, it’s ready. Fry the buns in batches until they’re golden brown and glorious.
Storage Options:
- Fridge: Airtight container for 3 days. Reheat in the oven or
air fryer to bring back that crunch. - Freezer: Freeze before baking/frying. Thaw and cook when the craving hits.
- Room Temp: Not recommended beyond day 1 unless you like soggy buns (no judgment).
Variations and Substitutions:
- Spicy Version: Add chili flakes to the filling.
- Protein Packed: Toss in tofu, tempeh, or shredded chicken.
- Gluten-Free: Sub GF flour and GF panko. Make sure your curry cubes are GF too.
- Veggies: Swap in peas, mushrooms, sweet potato—whatever’s rolling around in your crisper drawer.

What to Serve with Japanese Curry Bun?
- Miso Soup: Light and perfect.
- Pickled Veggies: Cuts through the richness like a boss.
- Iced Green Tea: Balances the flavors.
- Dipping Sauce: Kewpie mayo mixed with sriracha is a vibe.
Frequently Asked Questions:
Can I make these ahead of time?
Heck yeah. Prep the filling and dough ahead. Assemble and cook later.
Can I bake instead of fry?
Absolutely. They’re a little less crispy but still amazing.
How do I keep them crispy?
Reheat in an oven or

And there you have it. My Japanese Curry Bun Recipe that’ll make you feel like you’re strolling through a Tokyo bakery, no passport needed. If you make these, I need to hear about it. Comment below or tag me on social—I’m dying to see your curry bun masterpieces!
Keep the Flavor Coming – Try These:

Japanese Curry Bun Recipe
Ingredients
For the Dough
- 1 cup 155g bread flour
- 1/4 cup 40g all-purpose flour
- 1 tablespoon 9g corn starch
- 1 teaspoon salt
- 1 tablespoon sugar
- 1 teaspoon instant dry yeast
- 1/2 cup warm soy milk or other non-dairy milk
- 1 tablespoon neutral oil such as vegetable or canola oil
For the Filling
- 2 cups diced potatoes
- 1 cup diced carrots
- 1 medium onion finely diced
- 1 bell pepper diced
- 2 cups water more if required for consistency
- 70-80 grams vegan Japanese curry cubes
For the Coating
- 2 tablespoons room temperature soy milk mixed with 1/2 tablespoon corn starch
- 1/2 to 3/4 cup Japanese or panko bread crumbs
Instructions
Prepare the Filling
- In a large pan or pot, heat a small quantity of neutral oil over medium-high heat.
- Add the diced onion and sauté until translucent and tender. Incorporate the diced bell peppers and continue to cook for an additional 2 to 3 minutes.
- Add the diced carrots and potatoes, followed by 2 cups of water. Once the mixture comes to a boil, stir in the vegan Japanese curry cubes.
- Stir regularly until the cubes are fully dissolved and the curry thickens, approximately 10 to 15 minutes. For optimal filling consistency, refrigerate overnight or until the mixture becomes firm.
Prepare the Dough
- In a large mixing bowl, combine the bread flour, all-purpose flour, corn starch, salt, sugar, and instant yeast.
- Gradually add warm soy milk while mixing until a rough dough forms. Incorporate the neutral oil and knead by hand for approximately 8 to 10 minutes, or until a smooth, elastic dough is achieved.
- Shape the dough into a ball and return it to the bowl. Cover with a damp cloth and allow it to proof in a warm environment for at least one hour or until doubled in size.
Assemble the Buns
- After the dough has doubled, divide it into eight equal portions (approximately 40-45 grams each). Keep the dough covered to prevent drying.
- On a floured surface, flatten each portion and roll into a round disc, approximately 3.5 to 4 inches in diameter. Pinch the edges of each disc to create a thinner rim.
- Place 1 to 1.5 tablespoons of the cooled curry filling in the center of each disc. Carefully bring the edges together and seal by pinching firmly, ensuring no filling escapes.
- Mix the soy milk and corn starch until smooth. Brush each sealed bun with the mixture. Coat evenly with panko bread crumbs.
Cooking Methods
Baking Method:
- Preheat the oven to 350°F (175°C).
- Place the buns on a lined baking sheet, brush lightly with oil, and bake for 35 to 40 minutes or until golden brown, flipping once halfway through if necessary.
Frying Method:
- Heat sufficient neutral oil in a deep pan over medium-high heat (approximately 350°F or 175°C).
- Fry the buns in batches for approximately 5 minutes on each side, or until golden brown and crisp. Ensure the oil remains at a consistent temperature.
Notes
- Substitute bread flour and all-purpose flour with a gluten-free bread flour blend. Ensure the blend contains xanthan gum or another binding agent.
- Use gluten-free panko bread crumbs.
- Confirm that the vegan Japanese curry cubes are certified gluten-free.
- Double-check all other packaged ingredients, including soy sauce (if used), for gluten-containing additives.
I’m Bitty, owner of nodashofgluten.com, where I share simple, delicious recipes for all tastes, including gluten-free. Check out my “About Me” page for more info!