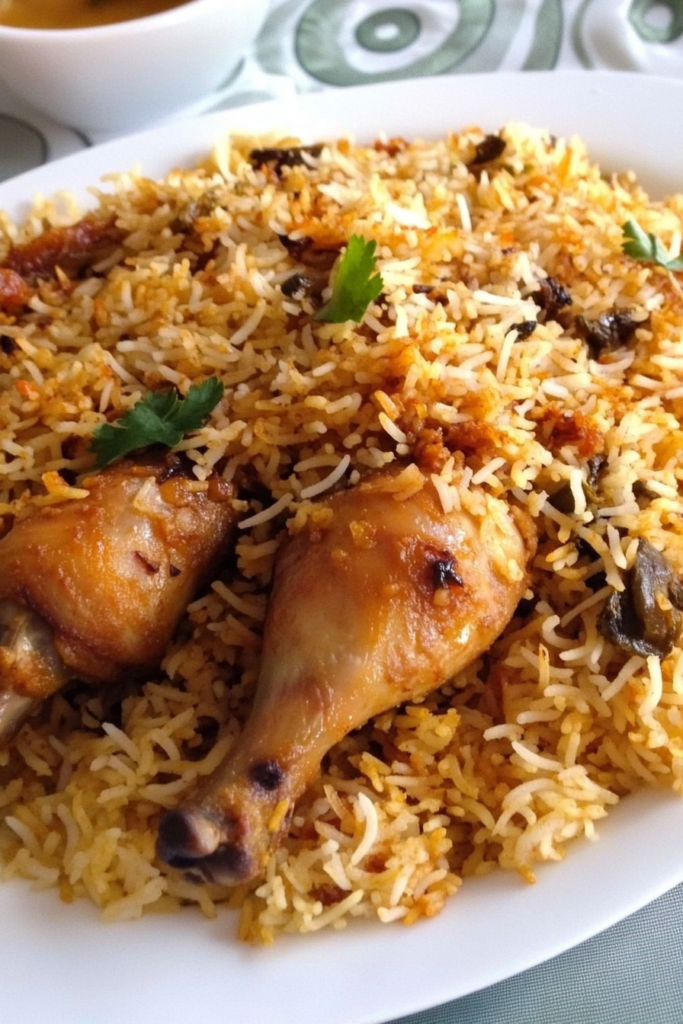
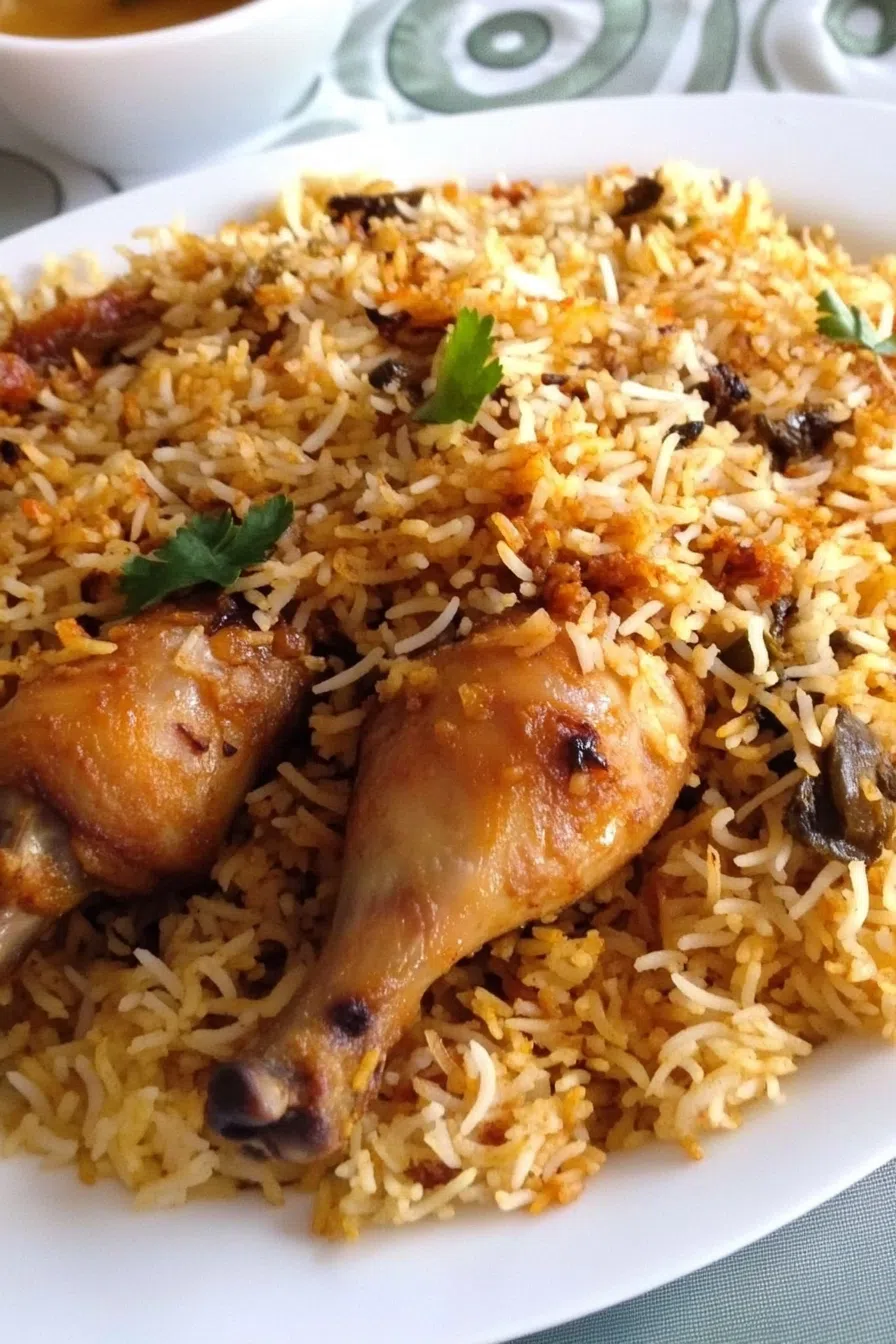
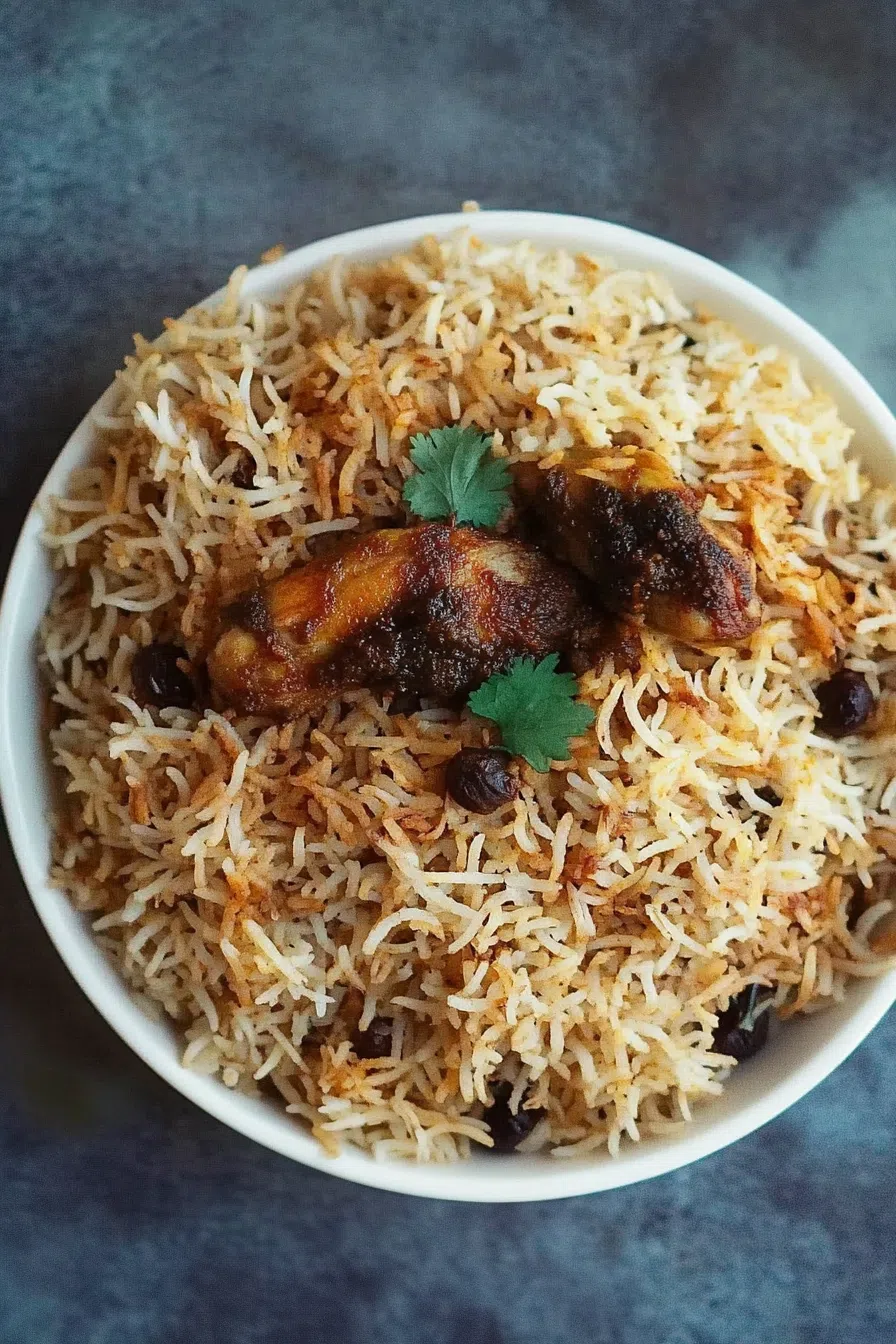
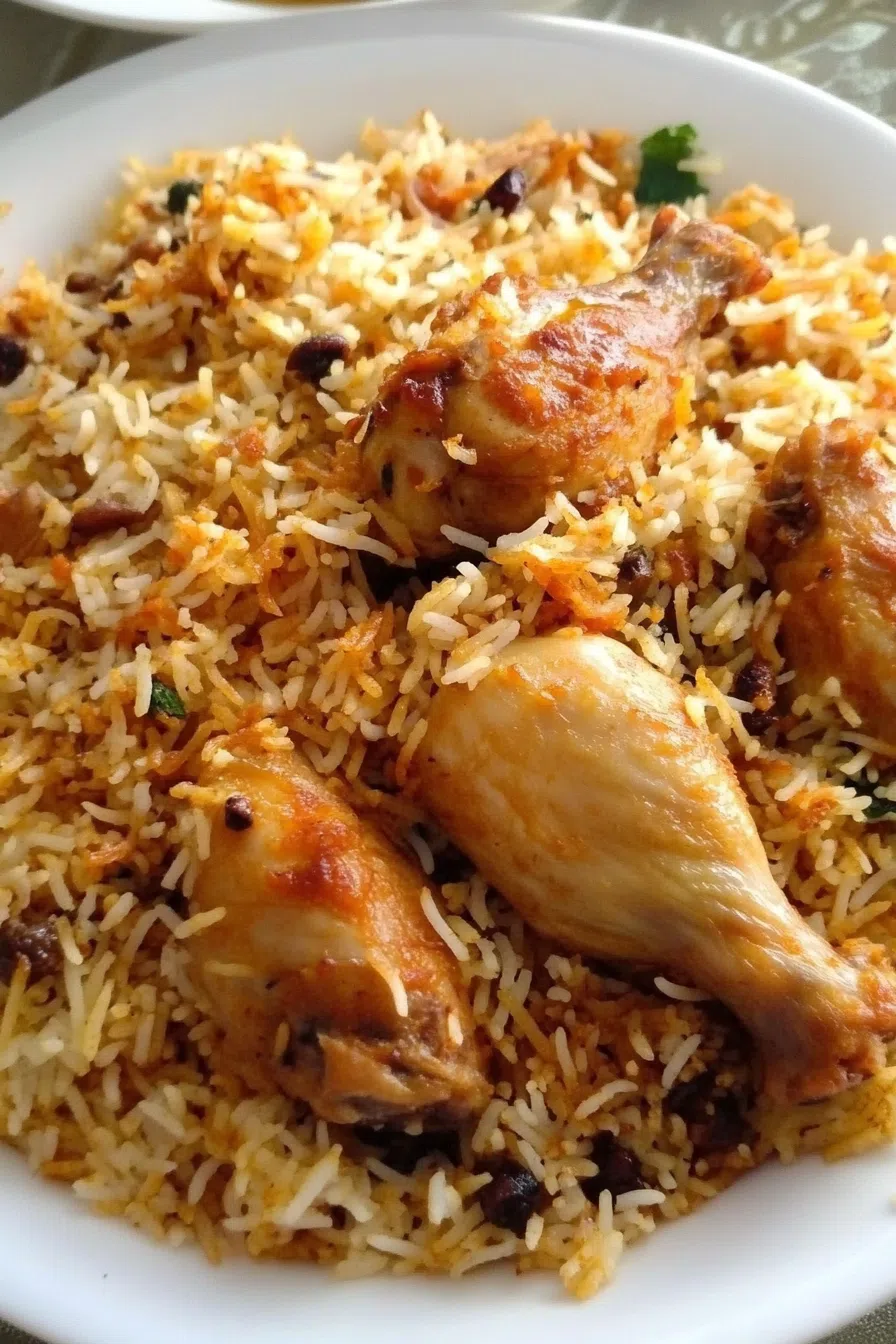
Juicy marinated chicken, fragrant basmati rice, crispy fried onions, saffron milk, and warm spices all layered into this Hyderabadi Chicken Biryani Recipe. A feast for the senses!
I’ll never forget the first time I tasted Hyderabadi Chicken Biryani—it was one of those “where has this been all my life?” moments. It was at a family friend’s house during a Diwali celebration. I remember walking into the kitchen, and BAM—the smell hit me. Warm spices, caramelized onions, and that unmistakable floral note of saffron. My curiosity (and my stomach) were immediately piqued.
Now, here’s where it gets funny. I decided, in all my overconfidence, to try making it at home the very next weekend. And let me tell you—my kitchen? Looked like a war zone. Rice stuck to the bottom of the pot, onions burnt to a crisp (because apparently, golden brown is a delicate line I bulldozed right over), and the chicken? Dry. Like, desert dry.


But here’s the thing—I couldn’t let it go. Biryani’s not just a dish; it’s an event. It’s comfort food with history, culture, and so much love layered into every bite. So, I went back to the drawing board, did my research, tweaked the process, and round two? Perfection. Well, almost. My onions were still a little too dark, but I called it “extra caramelized” and served it with confidence.
Now, this Hyderabadi Chicken Biryani Recipe has become my go-to for special occasions—or anytime I need a kitchen project that ends with a seriously satisfying meal. And if you’ve ever thought, “Biryani’s too complicated,” I’m here to say: nah, you’ve got this. Let’s dive in.
Why You’ll Love This Hyderabadi Chicken Biryani Recipe?
Okay, I get it—making biryani feels intimidating. All those steps. All those spices. But hear me out—this recipe hits that sweet spot between “authentic flavor” and “doable at home.” Here’s why you’ll love it:
- It’s all about the layers. Juicy marinated chicken, fluffy saffron-kissed rice, crispy fried onions—every bite is a little bit different and so good.
- The flavors? Insane. We’re talking smoky, spicy, floral, and buttery all in one. Trust me, your kitchen will smell like an Indian restaurant in the best way.
- It’s a crowd-pleaser. Whether it’s Sunday dinner or a festive feast, this biryani always steals the show.
- The leftovers? Even better. It’s one of those magical dishes that somehow tastes even better the next day after the flavors have all cozied up together.
- It’s a whole experience. Making biryani is like a little culinary adventure. You’ll curse the onions halfway through but be singing their praises by the end.
Ingredient Notes:
Look, I know the ingredient list is long—but each one’s pulling its weight. Here’s what you need (and why):
Saffron Milk:
- Saffron Strands (¼ tsp): Yep, it’s fancy. But it adds that floral aroma and iconic golden hue. Toasting the saffron before soaking brings out even more flavor.
- Milk (60 ml): Slightly warmed to help pull out the saffron’s color and aroma.
Chicken Marinade:
- Onions (4 large): Fried until golden and crispy. Half go in the marinade, the rest get layered on top for that signature crunch.
- Chicken (1 kg): Skinless, bone-in pieces are best—they soak up the marinade and stay juicy during cooking.
- Yogurt (150 g): Helps tenderize the chicken and creates a creamy marinade.
- Ginger & Garlic Paste (1 tbsp each): The flavor heavyweights—earthy, pungent, and absolutely essential.
- Green Chili Paste (1 tsp, optional): For those who like a little heat.
- Red Chili Powder (1 tbsp): Adds warmth and a gorgeous deep color.
- Turmeric Powder (½ tsp): Gives that classic yellow hue and an earthy kick.
- Coriander & Cumin Powder (1 tsp each): Grounding flavors that make the whole dish feel balanced.
- Garam Masala (1 tbsp): The ultimate biryani spice blend.
- Salt & Pepper (to taste): Because no one likes bland biryani.
- Lemon Juice (1 tbsp): Brightens up the marinade and balances the richness.
Rice:
- Basmati Rice (3 cups): The longer the grain, the better. You want rice that fluffs up, not clumps together.
- Whole Spices (Black & Green Cardamom, Cloves, Bay Leaves, Cinnamon Stick): They infuse the water, so even the rice has layers of flavor.
- Salt (1½ tsp) & Oil (2 tbsp): Keeps the rice seasoned and prevents sticking.
Assembly:
- Fresh Coriander & Mint: Adds brightness and a pop of freshness to the rich layers.
- Ghee (3-5 tbsp): Because biryani without ghee is just… sad.
- Biryani Coloring (optional): For that classic orange streak (totally aesthetic, but it’s pretty).
- Fried Onions: I repeat—more onions. Always.
Pro Tip: If you’re short on time, you can use store-bought fried onions—but nothing beats homemade.
How To Make Hyderabadi Chicken Biryani?
Yes, it’s a process—but once you get the rhythm, it’s honestly kind of fun. Plus, the end result? So. Worth. It.
Step 1: Make the Saffron Milk
Warm the milk, toss in the saffron strands, and let them steep. It’ll turn golden and smell amazing. This is your secret weapon for that signature biryani aroma.
Step 2: Fry the Onions
Heat oil in a deep pan and fry the sliced onions until golden and crispy. Don’t rush this—slow and steady wins the race. Drain on paper towels. Half go in the marinade, half for layering.
And yes, you’ll be tempted to snack on these onions before they hit the biryani. I get it.
Step 3: Marinate the Chicken
In a big bowl, mix yogurt, ginger, garlic, green chili paste, red chili, turmeric, coriander, cumin, garam masala, salt, pepper, lemon juice, and a third of the fried onions. Coat the chicken well and marinate for at least 30 minutes. (Longer = more flavor. If you can, leave it for 3 hours.)
Step 4: Par-Cook the Chicken
Transfer the marinated chicken to a pot, cover it, and cook over medium-low heat for about 15 minutes. The goal is to get it almost done—it’ll finish cooking during the final bake.
Step 5: Cook the Rice
Bring a big pot of water to a boil with salt, oil, and the whole spices. Add the basmati rice and boil until it’s about 50% cooked—soft edges but still firm inside. Drain and spread it out to cool slightly. This prevents it from going mushy later.
Want To Save This Recipe?
Step 6: Assemble the Biryani
Here’s where it all comes together:
- Start with a layer of chicken at the bottom of a large, heavy-bottomed pot.
- Add a layer of rice.
- Sprinkle on fried onions, coriander, mint, saffron milk, and ghee.
- Repeat until everything’s used up, finishing with a final layer of rice.
If you’re using food coloring, drop a few spoonfuls here and there for that classic look.
Step 7: Dum Cooking (The Secret to Biryani Perfection)
Cover the pot tightly with foil and a lid. Bake at 200°C (390°F) for 20 minutes, then lower to 180°C (350°F) for another 45 minutes. The trapped steam (aka “dum”) helps the flavors meld and the rice cook through.
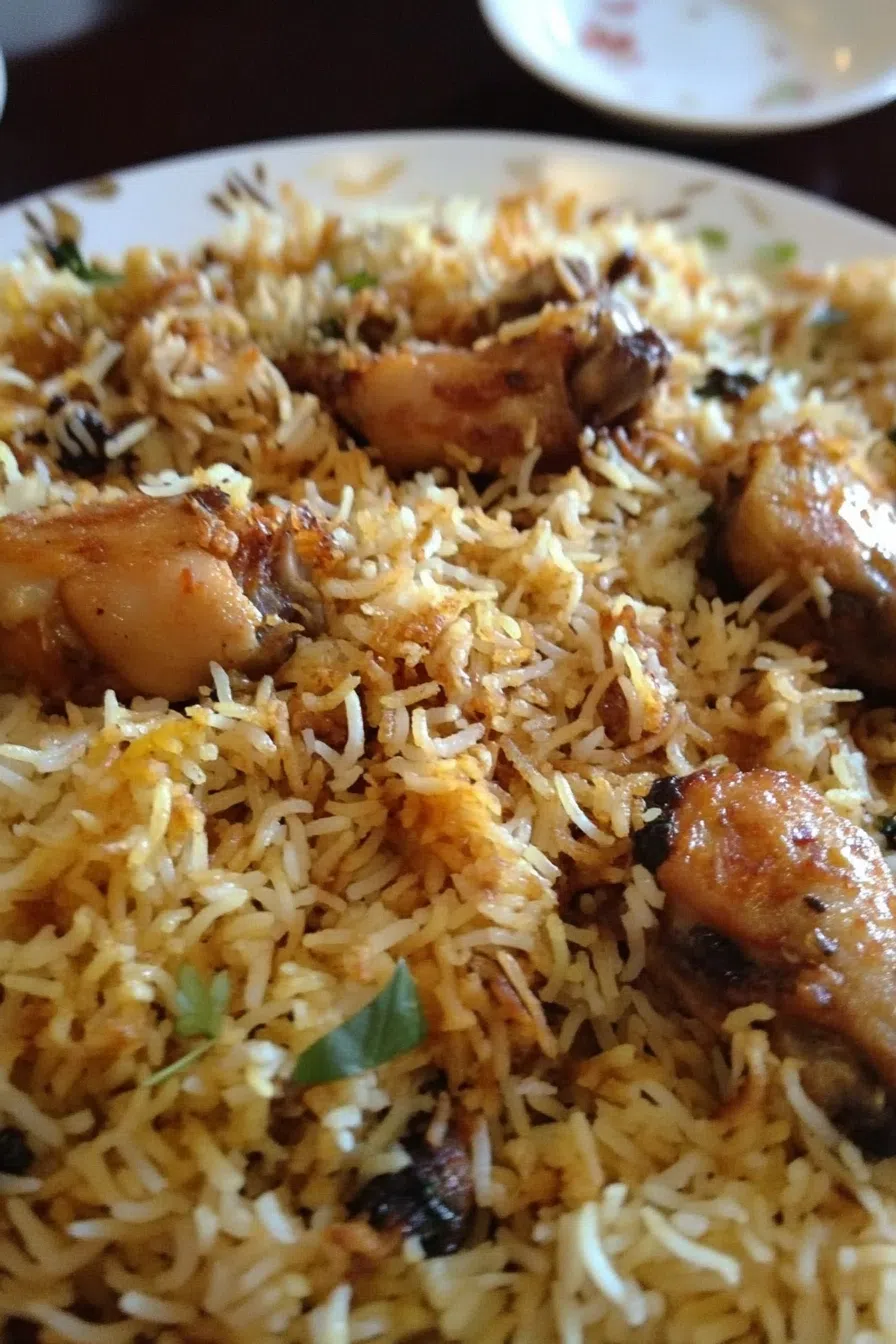
Step 8: Rest, Fluff, and Serve
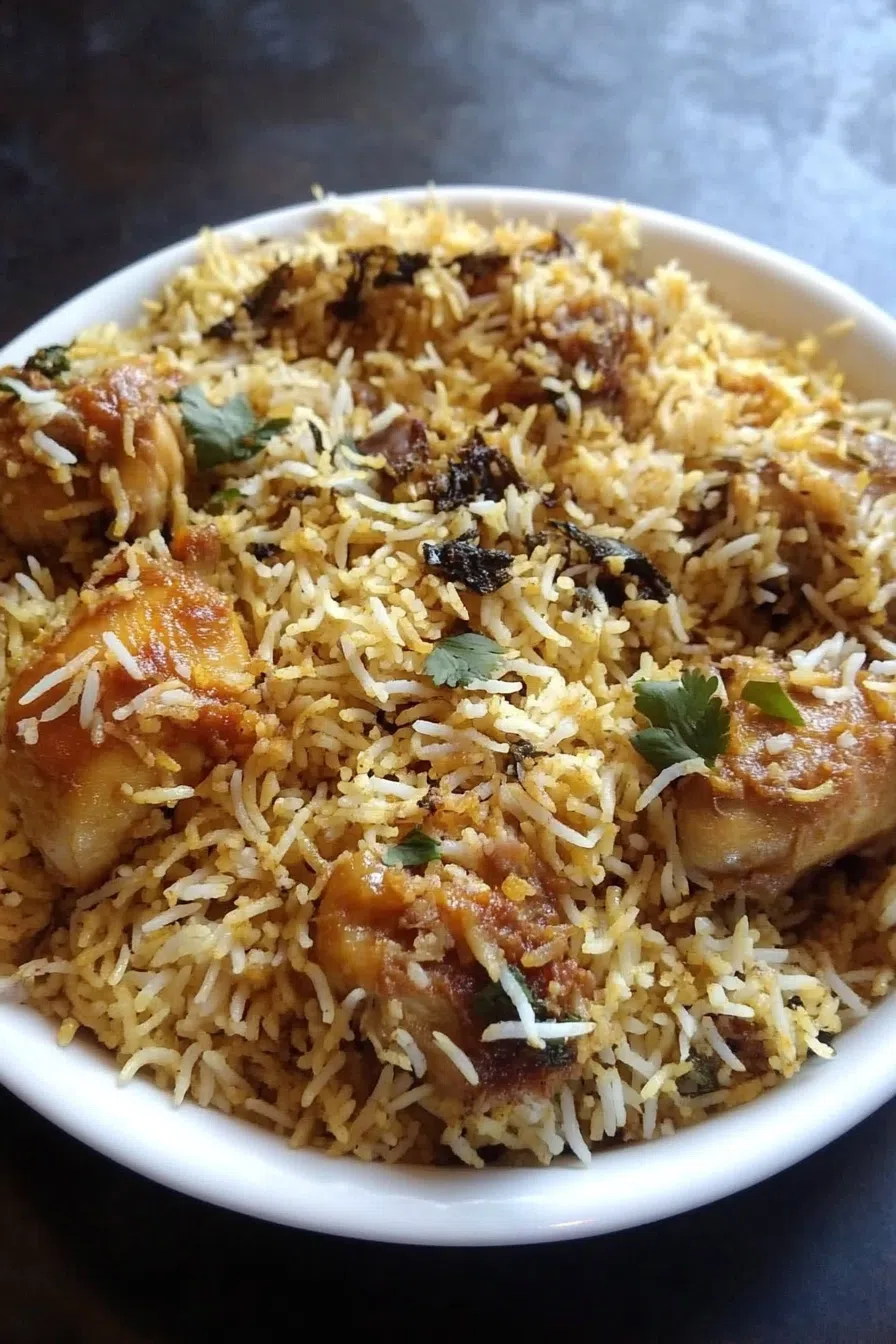
Let it sit for 10 minutes after baking. Then, when you finally lift that lid? That smell—pure heaven. Use a spatula to scoop from the bottom so you get a bit of everything in each bite.
Storage Options:
The best part about biryani? It’s even better the next day. Here’s how to keep it fresh:
- Fridge: Store in an airtight container for up to 4 days.
- Freezer: Portion it out, wrap it tight, and freeze for up to 3 months.
- Reheat: Microwave works, but if you want to revive that fluffy rice, sprinkle a little water on top and reheat on the stove.
Variations and Substitutions:
Feeling creative? Here’s how you can tweak this recipe:
- Switch the Protein: Lamb, beef, shrimp, or even tofu if you’re going vegetarian.
- Add Veggies: Potatoes, peas, or carrots are classic additions.
- Turn Up the Heat: Add more green chili paste or a sprinkle of Kashmiri chili powder.
- Short on Time? Use pre-fried onions and store-bought biryani spice mix to cut corners.
What to Serve with Hyderabadi Chicken Biryani?
Biryani’s pretty much a complete meal, but these sides take it over the top:
- Raita: Cool, creamy yogurt with cucumber and mint to balance the spices.
- Kachumber Salad: A fresh, crunchy cucumber-tomato-onion salad for contrast.
- Papadum or Naan: Because more carbs = more joy.
- Lemon Wedges: A little squeeze of acidity brightens every bite.
Frequently Asked Questions:
Is saffron really necessary?
Technically, no. But for that authentic flavor and color? Totally worth it.
Why did my rice turn mushy?
Most likely, it was overcooked during the boiling stage. Remember—50% cooked before layering is key.
Can I freeze it?
Yep! Just portion it out, freeze, and reheat when the craving hits. Sprinkle a bit of water on top when reheating to keep the rice fluffy.
So, what do you think? Ready to give this Hyderabadi Chicken Biryani Recipe a shot? It’s a little bit of work, yeah—but the end result? Absolute flavor heaven. And when you take that first bite of perfectly spiced chicken, fluffy rice, and crispy onions, you’ll know every single step was worth it. Let me know how it goes—can’t wait to hear your biryani success stories!
Keep the Flavor Coming – Try These:


Hyderabadi Chicken Biryani Recipe
Ingredients
For Saffron Milk:
- ¼ teaspoon saffron strands lightly toasted
- 60 ml warm milk
For Chicken Marinade:
- 125 ml oil for deep frying onions
- 4 large onions thinly sliced into half rounds
- 1 kg skinless bone-in chicken, cut into 10 pieces
- 150 g plain yogurt
- 1 tablespoon ginger paste
- 1 tablespoon garlic paste
- 1 teaspoon green chili paste optional
- 1 tablespoon red chili powder
- ½ teaspoon turmeric powder
- 1 teaspoon coriander powder
- 1 teaspoon cumin powder
- 1 tablespoon garam masala or biryani masala
- 1 teaspoon salt
- ½ teaspoon ground black pepper
- 1 tablespoon lemon juice
For Rice:
- 2-3 liters water
- 1½ teaspoons salt
- 2 tablespoons oil
- 3 black cardamom pods
- 3 green cardamom pods slightly crushed
- 4 cloves
- 2 bay leaves
- 1 cinnamon stick
- 3 cups basmati rice
For Assembly:
- A large handful fresh coriander leaves finely chopped
- 1-2 tablespoons mint leaves finely chopped (optional)
- 3-5 tablespoons ghee
- ½ teaspoon red or orange biryani coloring optional, mixed with water
- Remaining fried onions from the marinade
Instructions
Prepare the Saffron Milk:
- Lightly toast the saffron strands in a dry pan until fragrant. Soak the saffron in the warmed milk and set aside to infuse. This step enhances the aroma and adds a subtle golden hue to the rice.
Fry the Onions:
- Heat the oil in a deep frying pan. Add the sliced onions and fry until they turn dark golden brown and crispy. Stir frequently to avoid burning. Once fried, remove the onions and drain on a paper towel. Set aside one-third of the onions for the chicken marinade and reserve the remaining for assembly.
Marinate the Chicken:
- In a large mixing bowl, combine the yogurt, ginger paste, garlic paste, green chili paste (if using), red chili powder, turmeric, coriander powder, cumin powder, garam masala, salt, pepper, lemon juice, and one-third of the fried onions. Add the chicken pieces and coat thoroughly. Cover and marinate for at least 30 minutes, preferably up to 3 hours for deeper flavor.
Cook the Chicken:
- Transfer the marinated chicken to a heavy-bottomed pot. Cover and cook over medium-low heat for approximately 15 minutes, or until the chicken is mostly cooked through. Add ½ cup of water to loosen the sauce if necessary.
Prepare the Rice:
- In a large pot, bring 2-3 liters of water to a boil. Add salt, oil, black and green cardamom pods, cloves, bay leaves, and the cinnamon stick. Add the basmati rice and boil until it is about 50% cooked (grains should be soft on the outside but firm inside), roughly 10 minutes. Drain the rice and spread it out on a flat surface or tray to cool slightly.
Assemble the Biryani:
- In a large, heavy-bottomed pot, begin by layering half of the cooked chicken at the bottom. Spread a layer of partially cooked rice over the chicken. Sprinkle with fresh coriander, mint leaves, fried onions, a drizzle of saffron milk, and ghee. Repeat the layers with the remaining chicken and rice, finishing with rice on top. Optionally, sprinkle the biryani coloring over the top for visual appeal.
Cook the Biryani (Dum Method):
- Cover the pot tightly with two layers of aluminum foil and place a lid over it to seal. Bake in a preheated oven at 200°C (390°F) for 20 minutes. Lower the temperature to 180°C (350°F) and continue baking for an additional 45 minutes. This slow-cooking process allows the flavors to meld together.
Rest and Serve:
- Once cooked, remove the biryani from the oven and let it rest, covered, for 10 minutes before serving. Using a flat spatula, gently scoop from the bottom to ensure all layers are served. Garnish with remaining fried onions and fresh coriander.
Notes
- Replace plain yogurt with a certified gluten-free yogurt if necessary.
- Ensure that the garam masala or biryani masala used is gluten-free, as some commercial blends may contain fillers.
- All other ingredients, including rice, spices, and saffron, are naturally gluten-free. Always check packaged products to confirm.
I’m Bitty, owner of nodashofgluten.com, where I share simple, delicious recipes for all tastes, including gluten-free. Check out my “About Me” page for more info!