
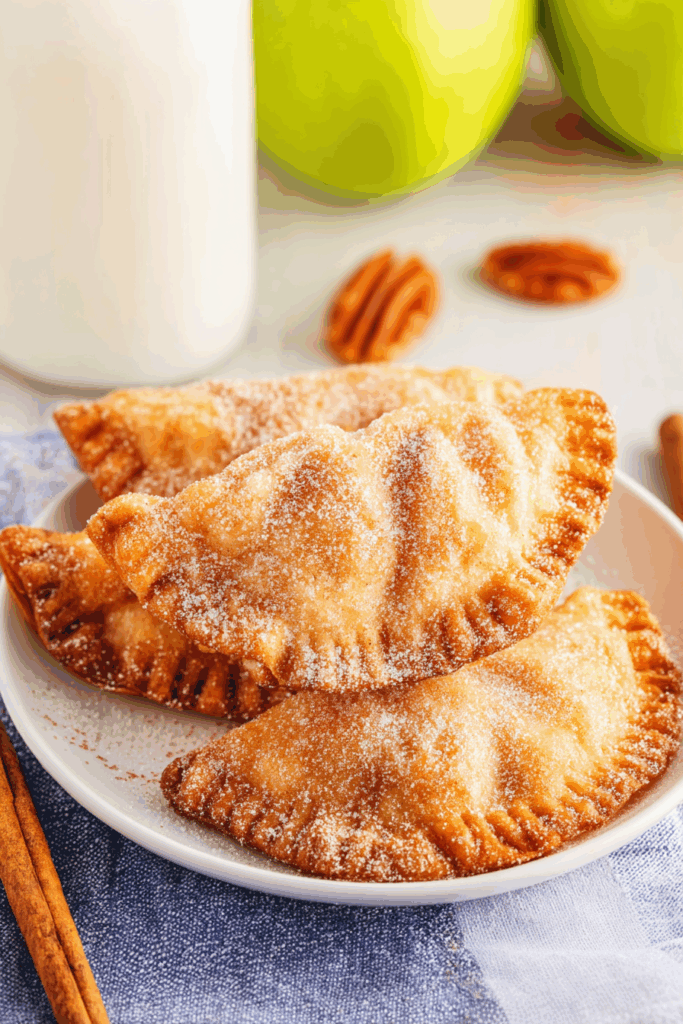
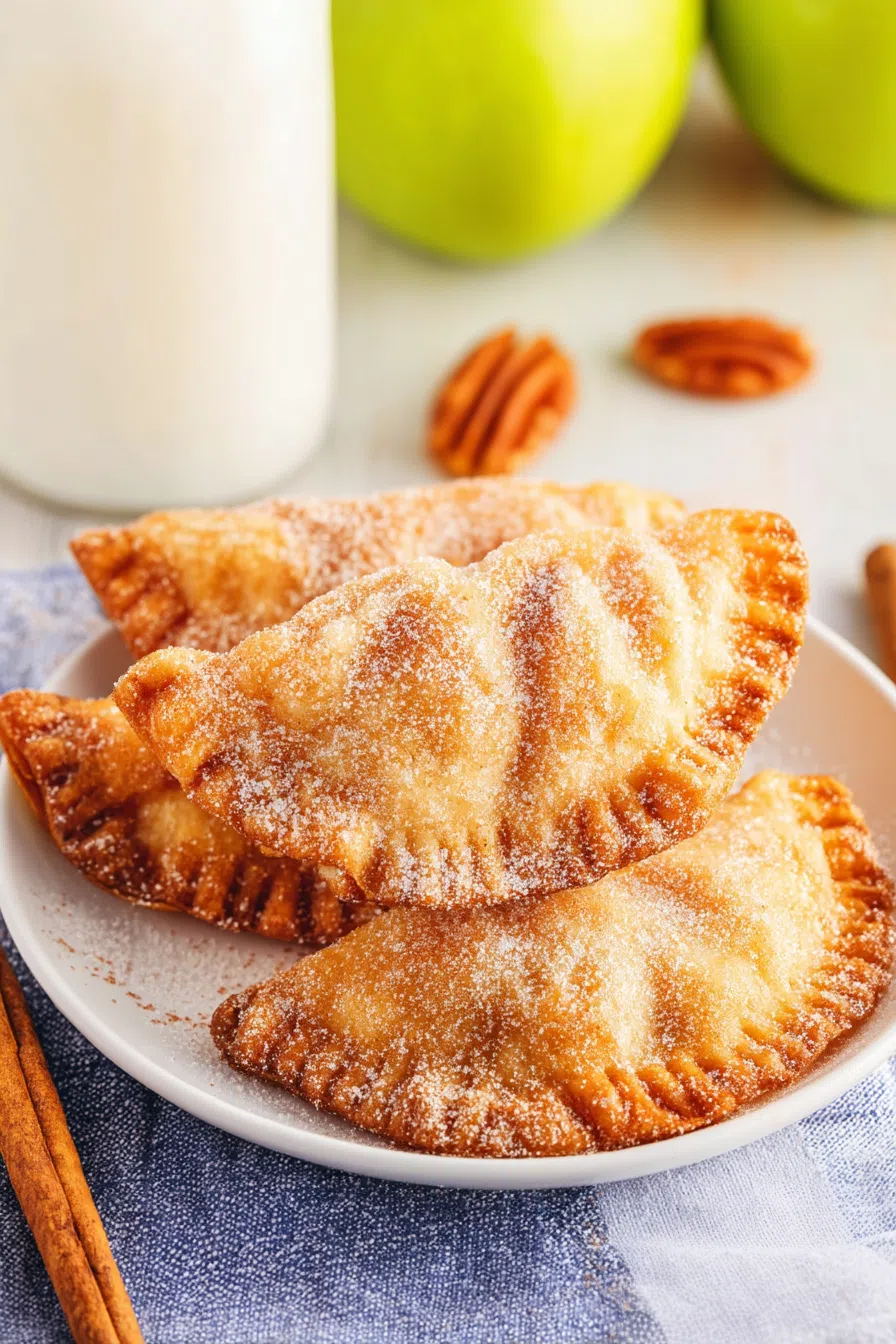
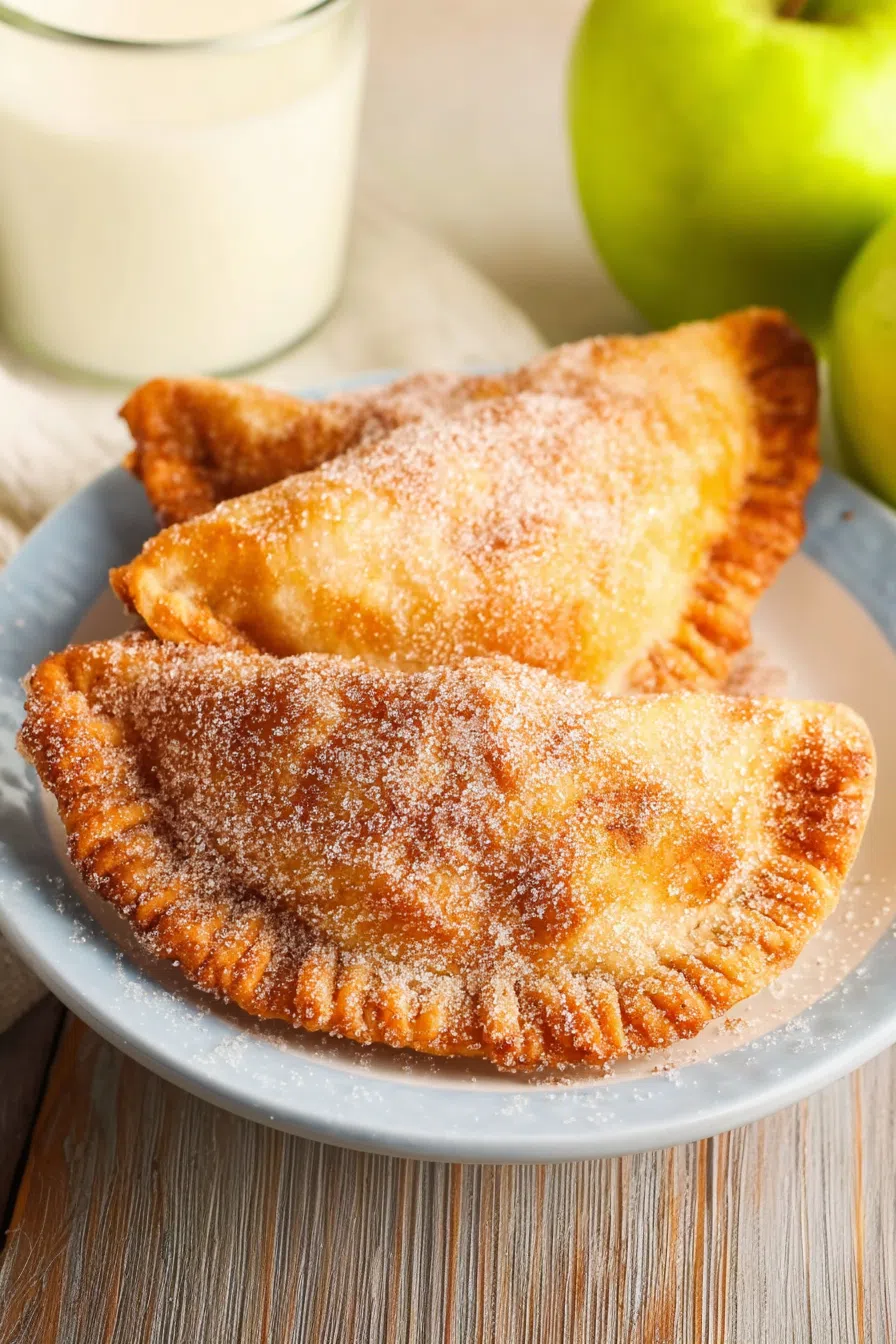
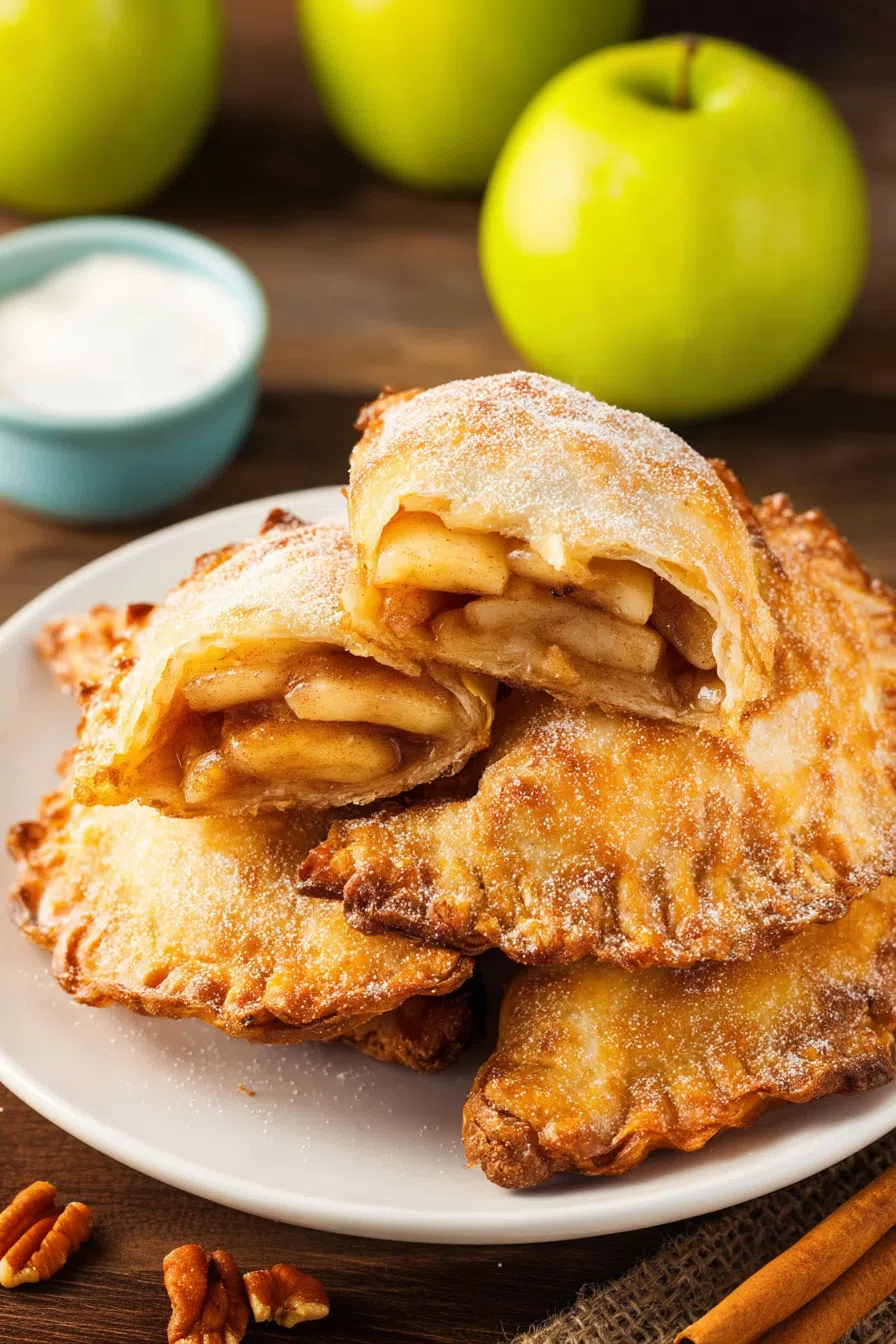
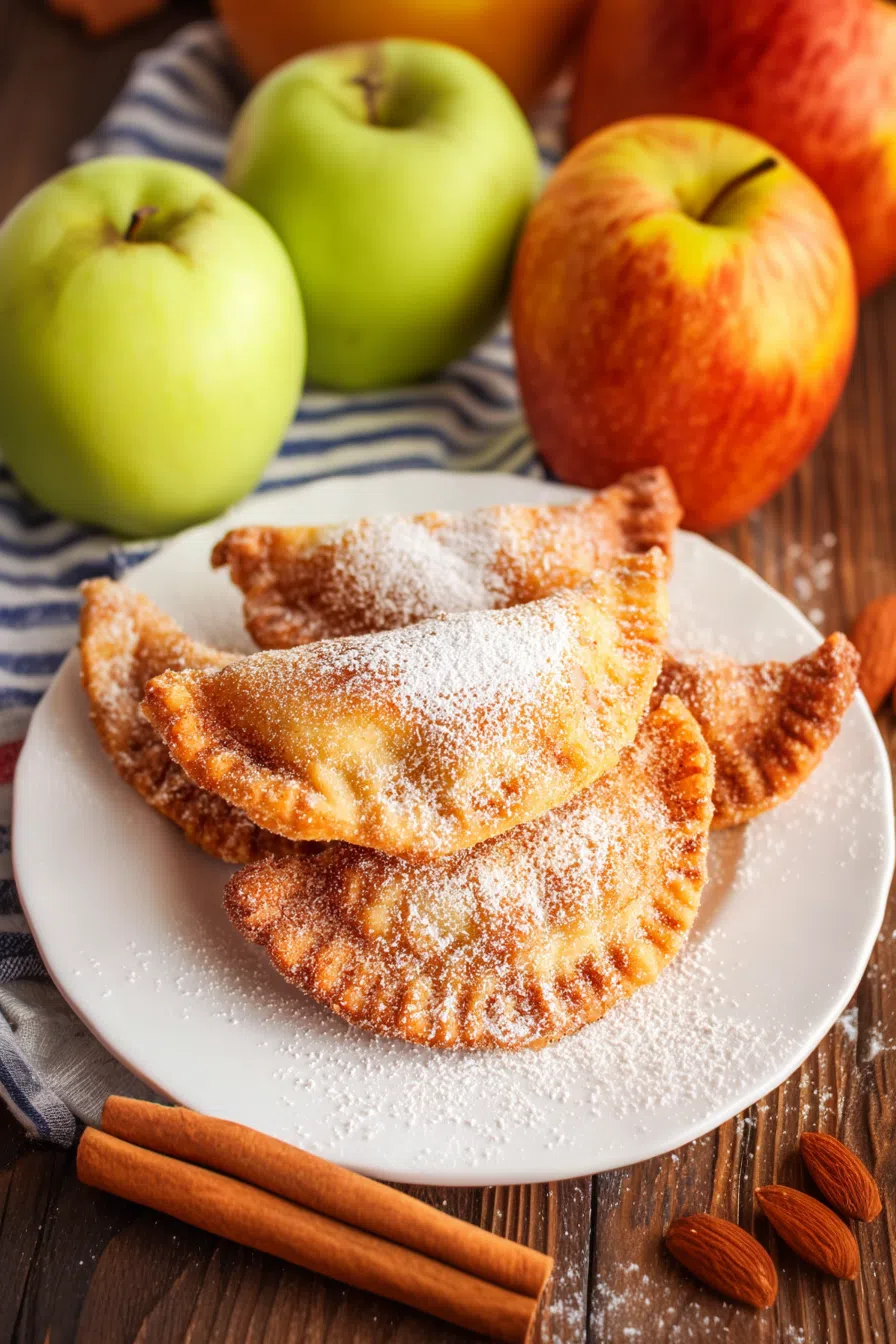
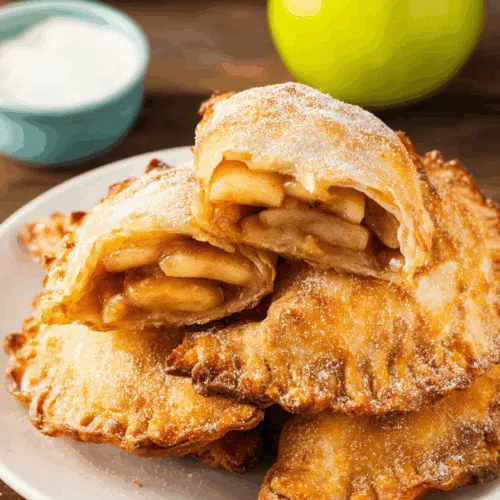
Granny Smith and Honeycrisp apples, flaky homemade crust, warm cinnamon and vanilla, fried ‘til golden and drizzled with glaze — the ultimate comfort treat.
Alright… let me be completely honest here. Every time I make these Homemade Fried Apple Pies, I’m instantly transported back to my childhood. You know that memory that feels extra warm? For me, it’s my grandmother, standing by the stove, apron dusted in flour, humming away while frying up a batch of these beauties.


And yes, I was the kid who couldn’t wait. I’d hover. Impatiently. Always asking, “Are they done yet?” and sneaking a taste before they even cooled properly (burnt tongue… worth it).
So now, making them in my own kitchen feels kinda special. These aren’t just pies. They’re a hug from the past. And guess what? You can create that same little bit of magic right at home — no culinary degree required.
Why You’ll Love This Homemade Fried Apple Pies Recipe?
Let’s be real — apple pies are everywhere. But these? These are something else. Here’s why:
-
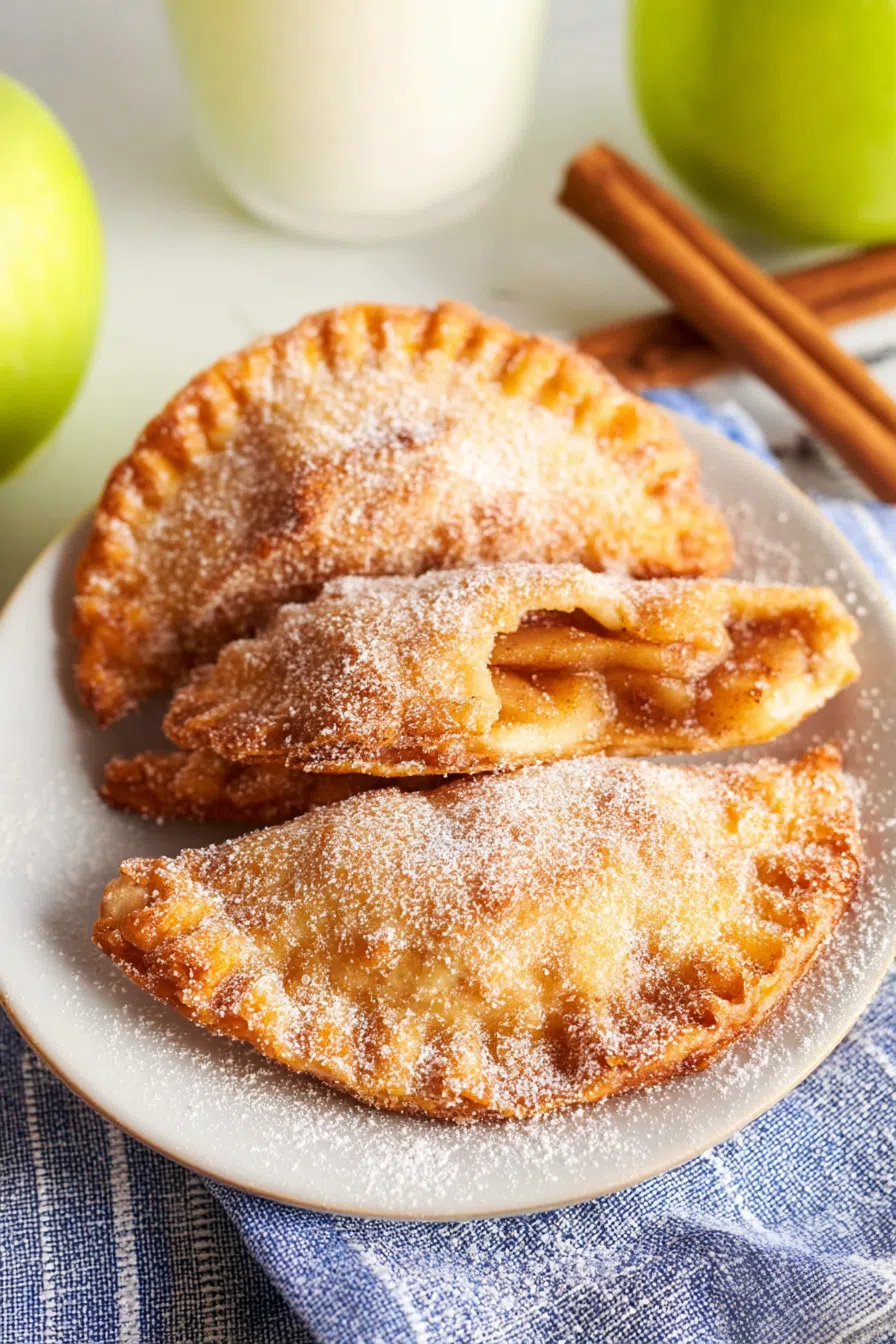
Crispy outside, gooey inside. You bite in, and bam — flaky crust + warm cinnamon apple filling = heaven.
-
Sweet AND tart. Granny Smith + Honeycrisp? Oh, they know how to dance together.
-
That homemade touch. Store-bought could never.
-
Versatile. Make ’em fancy or super rustic. Either way, they’ll disappear fast.
-
Glaze? Absolutely necessary. Like icing on a cake… or better.
Trust me, once you try them, you’ll realize why I never make just six. Somebody always wants seconds.
Ingredient Notes:
Before you dive in, here’s a little cheat sheet to help you get to know your ingredients like old friends.
For the Filling
-
Apples (Granny Smith + Honeycrisp): The tart/sweet duo. Always go with this combo — or mix up what you’ve got.
-
Brown sugar + cinnamon: Cozy vibes incoming.
-
Vanilla: Adds that subtle “Oh wow, what is that?” flavor.
-
Apple cider + cornstarch: Helps make the filling thick, not soupy. You don’t want soggy pies.
For the Dough
-
Self-rising flour: Makes life easier. One less step.
-
Butter (unsalted, cubed): The secret to flaky layers.
-
Egg yolks + hot milk: Helps pull it all together.
-
Salt: Don’t skip. Sweet stuff always needs a pinch of salt.
For Frying + Glaze
-
Vegetable oil: Nothing fancy. Keep it neutral.
-
Powdered sugar, milk, vanilla: The trio that makes the glaze sing.
How To Make Homemade Fried Apple Pies?
Step 1: Make That Filling
Toss those diced apples in a saucepan with brown sugar, cinnamon, and vanilla. Stir ‘em up and let them cook a few minutes until they get juicy and soft. Mix apple cider with cornstarch and pour that in. This is your thickener — makes the filling perfectly sticky. Let it cool while you tackle the dough.
Step 2: Whip Up the Dough
Sift your flour (no need to be crazy precise, just get rid of lumps). Cut in the butter until you see little crumbs. In a separate bowl, stir the egg yolks and hot milk together (yes, hot — it helps everything bind). Mix this liquid into the flour mixture until it forms a dough. Soft, a little tacky, but not sticky. Think… playdough vibes.
Want To Save This Recipe?
Step 3: Shape and Fill
Divide the dough into six balls. Roll each out into circles. Spoon some filling in the middle (don’t overdo it). Fold them over and press the edges to seal. Got extra dough hanging off? Trim it. No big deal.
Step 4: Fry ‘Em Up
Heat oil to 350°F. Drop the pies in, carefully. Fry about 2 minutes on each side — or until golden brown and irresistible-looking. Pull them out and let them drain on paper towels. Yes, they’ll test your patience here. They smell that good.
Step 5: Glaze for Glory
Mix powdered sugar, milk, and vanilla. Once the pies have cooled just a little, drizzle or brush that glaze all over them. They’ll look shiny and fancy and ready to devour.
Storage Options:
-
Countertop: They’re best fresh but fine for about a day.
-
Fridge: Up to 3 days. Zap ‘em in the microwave before eating.
-
Freezer: Yep, freeze before glazing. Just thaw and reheat, then glaze after.
Variations and Substitutions:
-
Other fruits: Pears, peaches — go wild.
-
Add-ins: Chopped nuts, raisins, or even caramel bits.
-
Dough swap: No time? Store-bought pie dough works. Not as good, but still delicious.
-
Skip the glaze: Dust with powdered sugar if you’re going for simple.
What to Serve with Homemade Fried Apple Pies?
-
Ice cream. Vanilla, of course. The warm/cold combo is elite.
-
Whipped cream. For a lighter, fluffier finish.
-
Coffee or tea. Perfect afternoon snack pairing.
-
Caramel drizzle. If you’re feeling extra.
Frequently Asked Questions:
Can I bake instead of fry?
Sure, but let’s be honest — fried is better. Baking works if you want less mess though. Just bake at 375°F until golden.
Do they have to be glazed?
Nope. But why would you skip it? That glaze is everything.
Can I make the filling ahead?
Absolutely. Make it the day before and keep it chilled.
These Homemade Fried Apple Pies aren’t just pies. They’re stories. They’re memories. They’re the thing everyone grabs first at the table.
So… are you ready to make some magic? I say go for it. And hey — if you make them, let me know how they turned out. Did they disappear faster than you expected? (Spoiler: they will.)
I seriously can’t wait to hear about your version of this cozy classic!
Keep the Flavor Coming – Try These:
Homemade Fried Apple Pies
Ingredients
APPLE PIE FILLING:
- 2 large apples peeled, cored, and diced (I recommend 1 granny smith and 1 honeycrisp for balance)
- 1/4 c brown sugar
- 1/2 tsp cinnamon
- 1 tsp vanilla
- 2 tsp apple cider or apple juice
- 1 tsp cornstarch
PIE DOUGH:
- 2 c self-rising flour sifted
- 4 tbsp unsalted butter cubed
- 2 egg yolks
- 1/3 c HOT milk
- 1/4 tsp salt
PIE GLAZE:
- 1/2 tsp vanilla extract
- 1 tbsp milk
- 1/2 c powdered sugar
- Vegetable or canola oil for frying
Instructions
- To make the filling, for the apple pie start by combining apples, brown sugar, cinnamon and vanilla in a saucepan. Cook this mixture until the juices begin to form around 3 minutes. In a bowl mix together apple cider (or apple juice) and cornstarch. Add this mixture to the saucepan. Continue cooking for 3 minutes until the filling thickens. Set it aside.
- Moving on to preparing the pie dough: Begin by sifting flour into a mixing bowl. Adding cubed butter. Use a pastry cutter to blend these ingredients until you achieve lumps of butter throughout. In a bowl combine egg yolks and salt. Heat up some milk in the microwave until hot. Gradually add it to the egg mixture while stirring continuously. Pour this milk and egg mixture into the flour mixture. Stir everything together until it forms a dough.
- Now it's time to shape our pies: Divide the dough into six pieces. Roll each piece into a ball shape. Roll out each ball into shapes then place two tablespoons of apple pie filling in the center of each circle. Fold them in carefully ensuring that you seal all edges tightly and trim any dough.
- For frying our pies: Heat oil in a pan or deep fryer to 350°F (You can check if it's ready by observing bubbles forming around a wooden spoon when inserted). Fry each pie for two minutes, per side. Until they turn golden brown in color. Once cooked transfer them onto a paper towel to drain any oil.
- Prepare the glaze: Combine sugar, vanilla and milk together until you achieve a smooth consistency. Apply the glaze to the pies while they are still warm, by either brushing it on or drizzling it over them.
- Allow the glaze to set for a few minutes and then relish in the pleasure of Homemade Fried Apple Pies—warm delicious treats that will surely satisfy your taste buds.
Notes
I’m Bitty, owner of nodashofgluten.com, where I share simple, delicious recipes for all tastes, including gluten-free. Check out my “About Me” page for more info!

