


Have you been looking for an easy homemade gluten free bread recipe that is perfect for sandwiches, budget-friendly, and easy to make? You are in the right place! Learn how to make this delicious gluten free yeast bread with this detailed guide below!
This post may contain affiliate links. As an Amazon Services LLC Associates and RewardStyle affiliate, we may earn a small commission for any purchases made through affiliate links. Please read our disclaimer and disclosure statement for full details.
What Is the Trick to Making Gluten Free Bread?
There are a few things to keep in mind when baking gluten free:
First, you will need to increase the hydration level of your bread as gluten free flour absorbs more liquid.
Second, you want to use a kitchen scale as gluten free flours are different in weight and volume than regular flour.
Third, you need to mix your dough really well (no fear of overworking your gluten here!) as it helps form the structure of the bread.
Finally, choose your flour well. You can buy a pre-made flour blend or you can make your own!
Bread + Sandwich Must Haves

What is Best Gluten Free Sandwich Bread Flour Mix?
Since I bake gluten free bread every other day, I prefer to go with budget-friendly flour blends. In all of my gluten free baking I use a mix of corn, white rice, whole grain brown rice flours, and corn or potato starch.
They work great for me and my family, however, there are ways you can level up your bread baking with whey protein isolate, tapioca starch, and other add-ins that are less affordable, but bring great results! (Keep in mind that whey is a derivative of milk).
If you don’t want to bother with mixing your own gluten free bread mix, then try already premade blends you can find in your local grocery store or order online! There are plenty of them out there.
Gluten Free Bread Ingredients
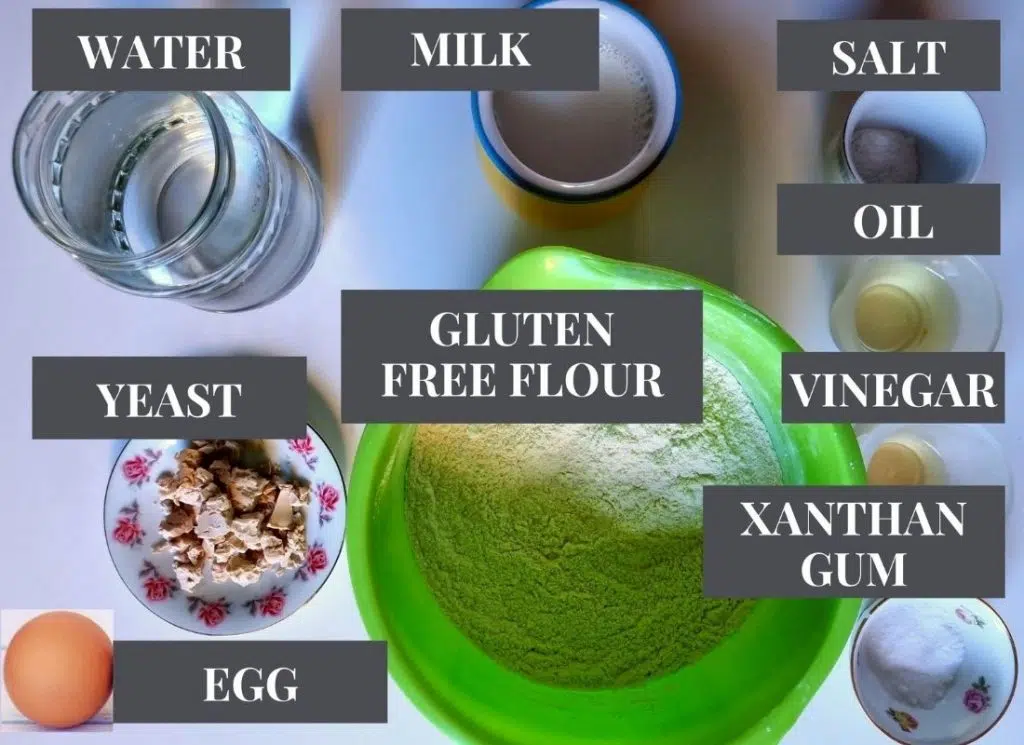
- 375 grams (2 1/3 cups) gluten free flour. For this recipe I use 90 grams of whole grain brown rice flour, 100 grams of white rice flour, 105 grams of corn flour, and 80 grams of corn or potato starch. In cups it would be 2/3 cups of each type of flour & starch!
- 1 ½ tsp Xanthan gum (if your blend doesn’t already contain it)
- 25 grams of fresh yeast
- 170 ml (2/3 cup) of water
- 3 tbsp oil (I use olive or sunflower oil, feel free to use any other type!)
- 1 tbsp apple cider vinegar
- 100 ml (½ cup) of milk (or dairy free alternative)
- 1 tsp sugar
- 1 egg
- ½ tbsp salt
Watch How to Make Homemade Gluten Free Bread
How is Gluten Free Bread Made? Step by Step Recipe
STEP 1 – Activate the Yeast
Pour the milk into a cup and heat it up in the microwave until warm (but not hot!). Add sugar and yeast, stir, and place into a warm spot (I use turned off microwave for this) for 5-10 minutes until you see some foam forming on the top.
STEP 2 – Combine all Ingredients
In a large mixing bowl combine all the dry ingredients and mix well. Then add all the rest of the ingredients (other than milk). When you see that yeast has activated, you can add milk to the bowl as well. Mix well, use a hand or a stand mixer to break up all the lumps. Gluten free dough likes extra mixing, so keep going for a few extra minutes until your dough is nice and smooth.
STEP 3 – Proofing
Grease a loaf pan with some margarine, butter, or oil for a dairy free option, and pour the batter into the pan. Smooth it out with a spatula and place into a warm spot for rising. It is not the best to use a warm oven as it is easy to kill the bacteria by raising the temperature too much. This step will take about an hour. My loaf rises within 45 minutes, but it does depend on the temperature of your house!
STEP 4 – Baking
While your bread is rising, preheat the oven to 350F/175C. When the batter doubled in size (or almost doubled in size) place it to the middle rack of the oven and leave for 45 minutes. 45 minutes into baking wrap a piece of foil over the loaf pan to prevent the top from burning and put back to the oven to bake for another 25 minutes.
STEP 5 – Cooling
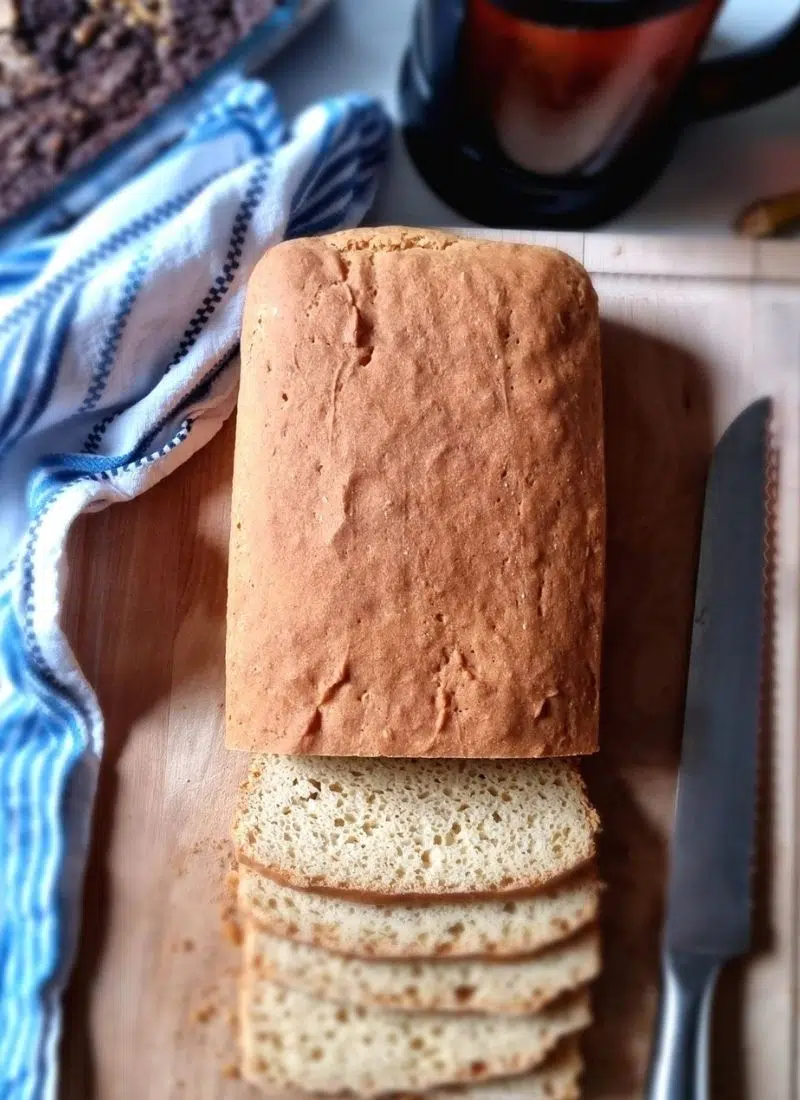
When done baking, take the bread out of the loaf pan and place on a cooling rack or sideways into the pan (as you see on the picture). It is important to let the air escape so that the bottom of your bread doesn’t become soaked! Cool for about 30-60 minutes.
STEP 6 – Enjoy!
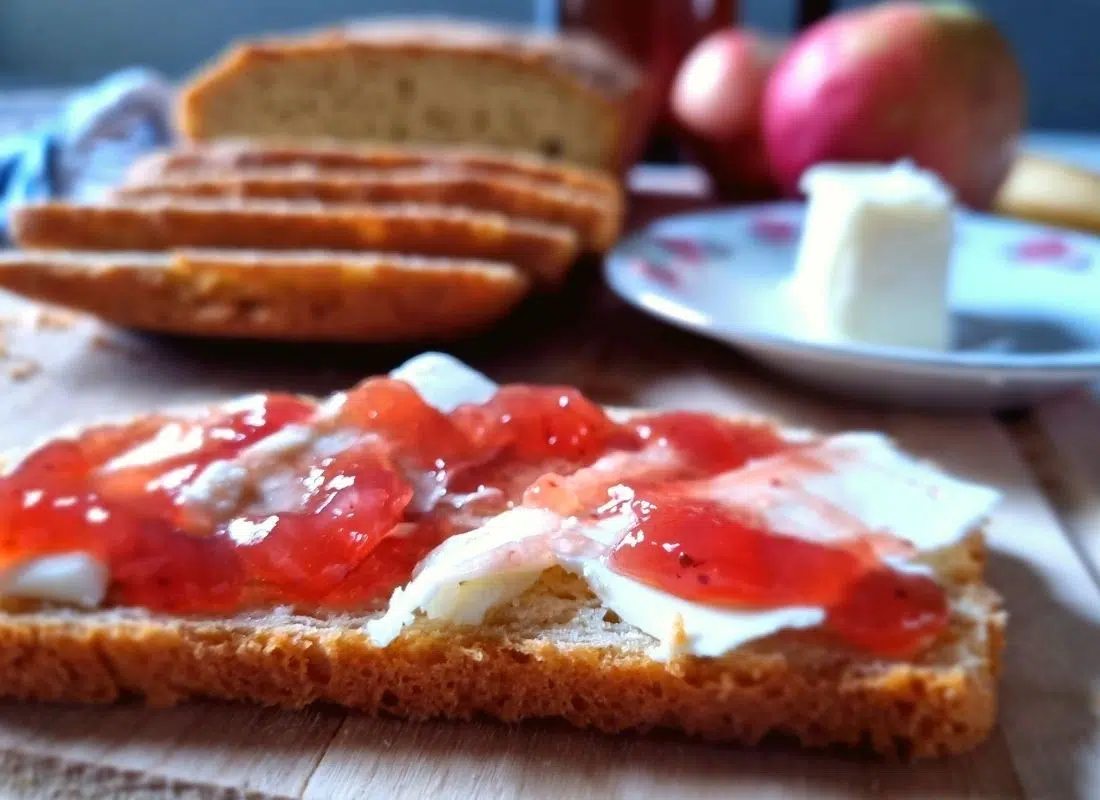
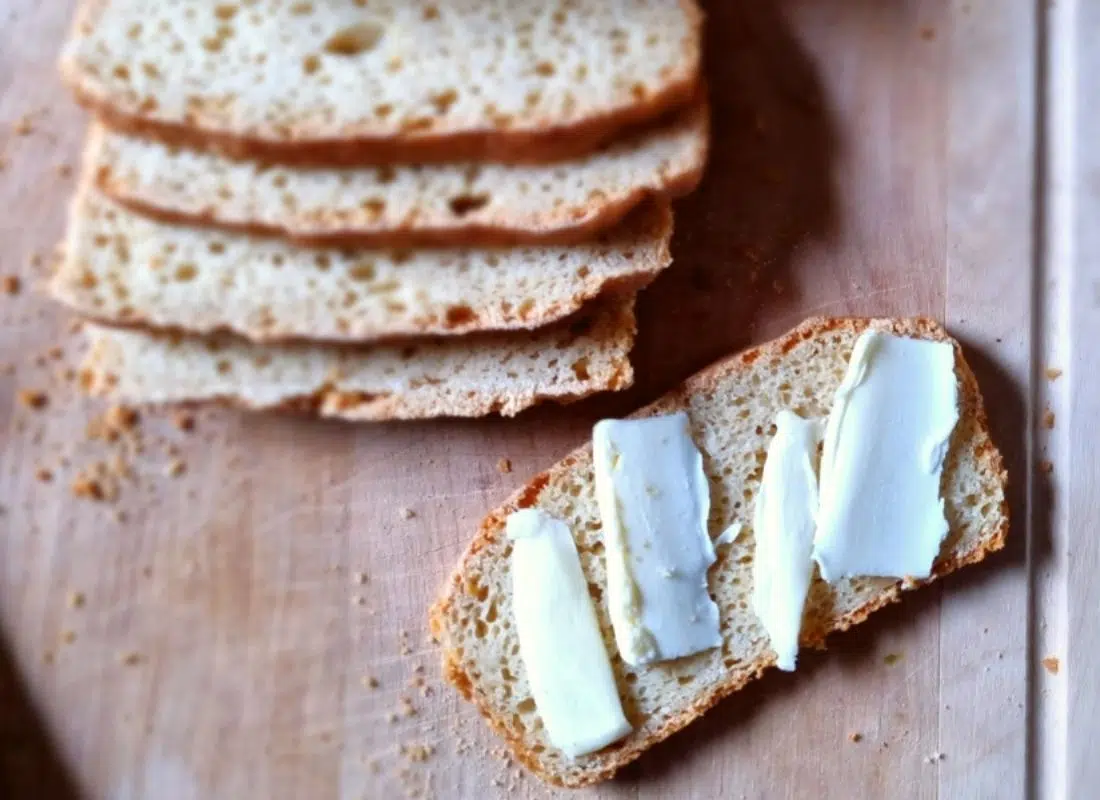
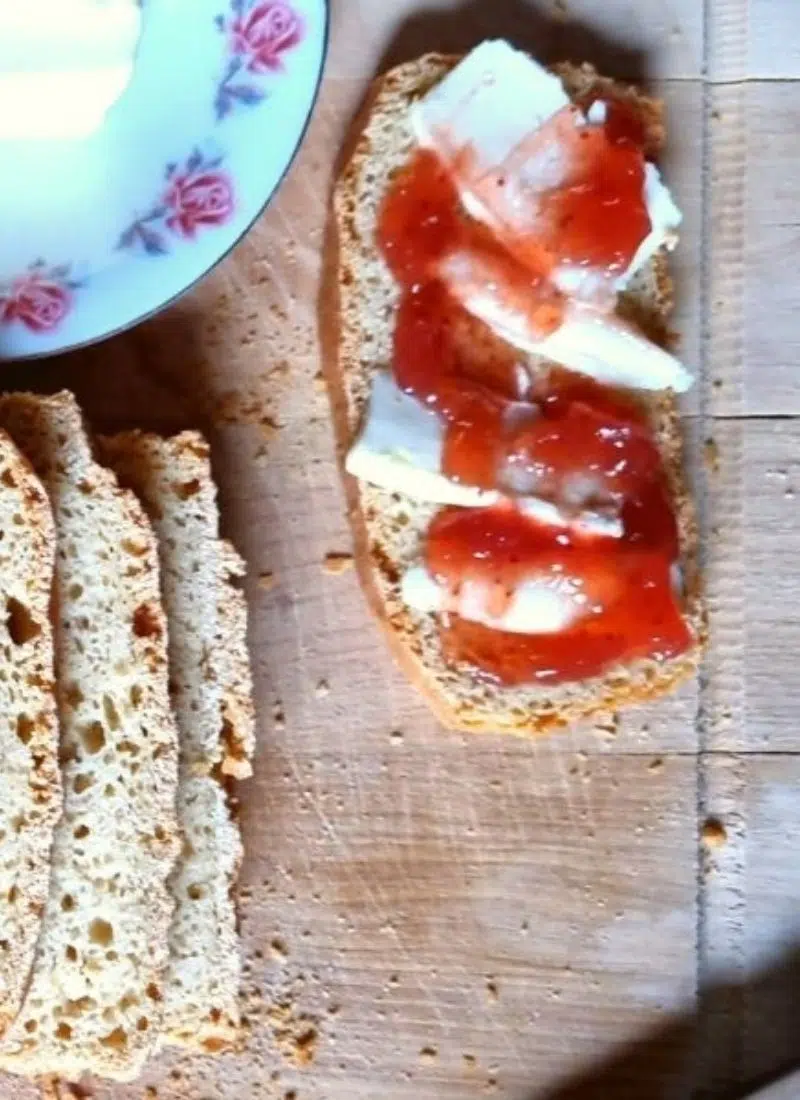
After the bread has cooled completely feel free to cut into it and enjoy your gluten free creation! Make a breakfast toast, a delicious sandwich, or try my avocado grilled cheese!
Want To Save This Recipe?
Gluten Free Sandwich Bread: Tips and Tricks
If you want your bread to rise more during baking, just place a sheet pan with some ice or water to the bottom of your oven and the steam will help your bread spring! Remove half way through baking to allow for crust to form on the loaf.
Make sure your batter has xanthan gum to prevent the bread from falling apart after cooling!
Use a kitchen scale to ensure best results. There are some really cheap and easy to use kitchen scales that are definitely worth the investment! (Like this one from Amazon!)
If your bread feels too dry, increase the amount of water in the batter next time you bake.
Let the bread cool completely before slicing as it will continue baking for up to an hour after you take it out of the oven.
Add sesame seeds or nuts to the bread if you’d like right before putting it into the oven!
To make this recipe dairy free substitute milk for a plant based one or just use water. Omit the egg if making vegan gluten free bread!
Store your bread on the counter the first day and put it away into the fridge from the second day on. Make sure to cover your bread with a towel or place into a plastic wrap!
Frequently Asked Questions
Is It Cheaper to Make Your Own Gluten Free Bread?
Oh, it definitely is! The whole reason we started baking our own bread is because it is so much cheaper to do it yourself, especially if you eat gluten free on a regular basis. Generally, a gluten free loaf costs about $5-7 while making it yourself is less than $3 if you use simpler flours. The price can be higher if you decide to go with more pricey ingredients, but overall you will save money baking your gluten free bread yourself!
What Does Apple Cider Vinegar Do For Gluten Free Bread?
Apple cider vinegar allows for a quicker rise of the dough. It might add an extra flavor to the loaf as well as support the texture, but the main purpose of adding apple cider vinegar is to create a friendlier environment for yeast to work!
Is This Gluten Free Sandwich Bread Recipe Suitable for Bread Machines?
I never tried this recipe in a bread machine, but I know other people who did and it worked for them. Give it a try and let us know how it turned out for you!
(Amazon has a great deal on Bread Machines right now – check out their top picks here)
How do I Toast Gluten Free Breads?
The same as the regular ones! You can use a toaster or brown your bread in a frying pan. However, remember to handle gluten free sandwich bread with care as it falls apart easier than the regular type. To ensure better browning, spread a bit of mayo on both sides of the slice and fry in a cast iron pan for a minute or two on each side!
Is Yeast Gluten-Free?
Fresh yeast is gluten free, however, sometimes manufacturers will add extra ingredients to dry yeast that can contain gluten. Check the contents on the back of the package to make sure your yeast is suitable for this gluten free sandwich bread recipe!
Can I Just Replace Regular Flour with Gluten Free Flour for GF Bread Recipes?
Short answer: no, you can’t. Gluten free flours behave differently from regular wheat flour, so you will need to make appropriate adjustments if converting a regular recipe to gluten free!
What’s Next?
Have you made this gluten free sandwich bread at home? Please share your results with us! You can share pictures on Instagram and tag them #natashashome or #nodashofgluten. If you have any questions that were not covered in this post, feel free to ask in the comments below and I would love to help you become a better home cook!
I’m Bitty, owner of nodashofgluten.com, where I share simple, delicious recipes for all tastes, including gluten-free. Check out my “About Me” page for more info!
