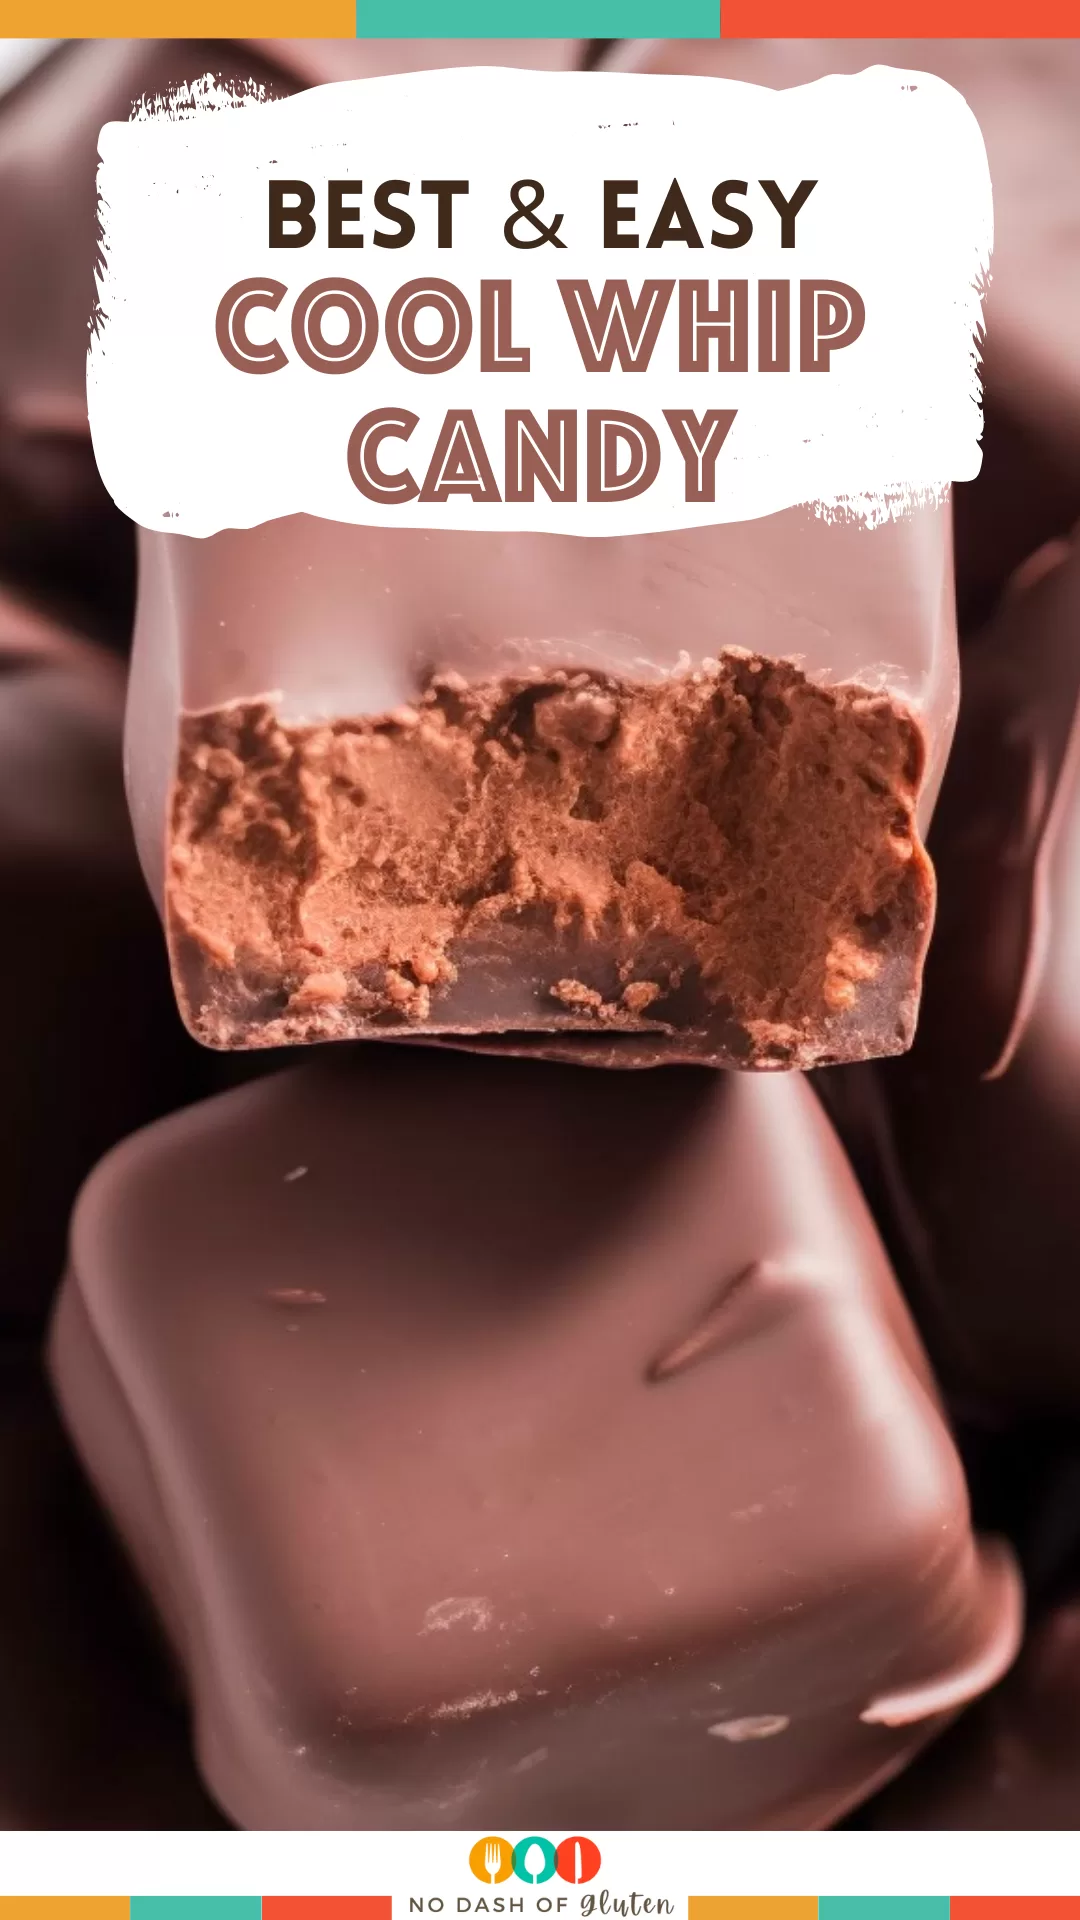
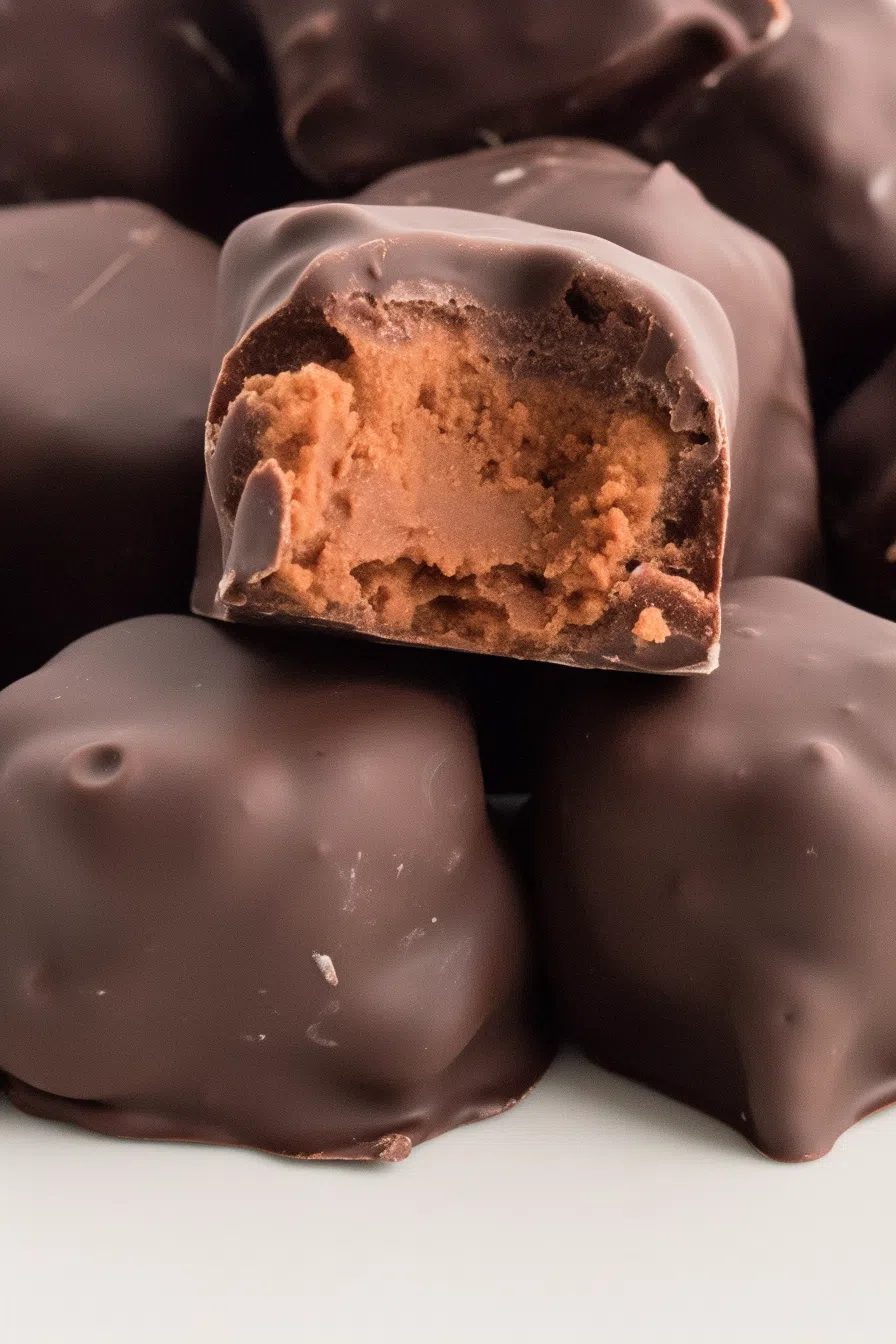
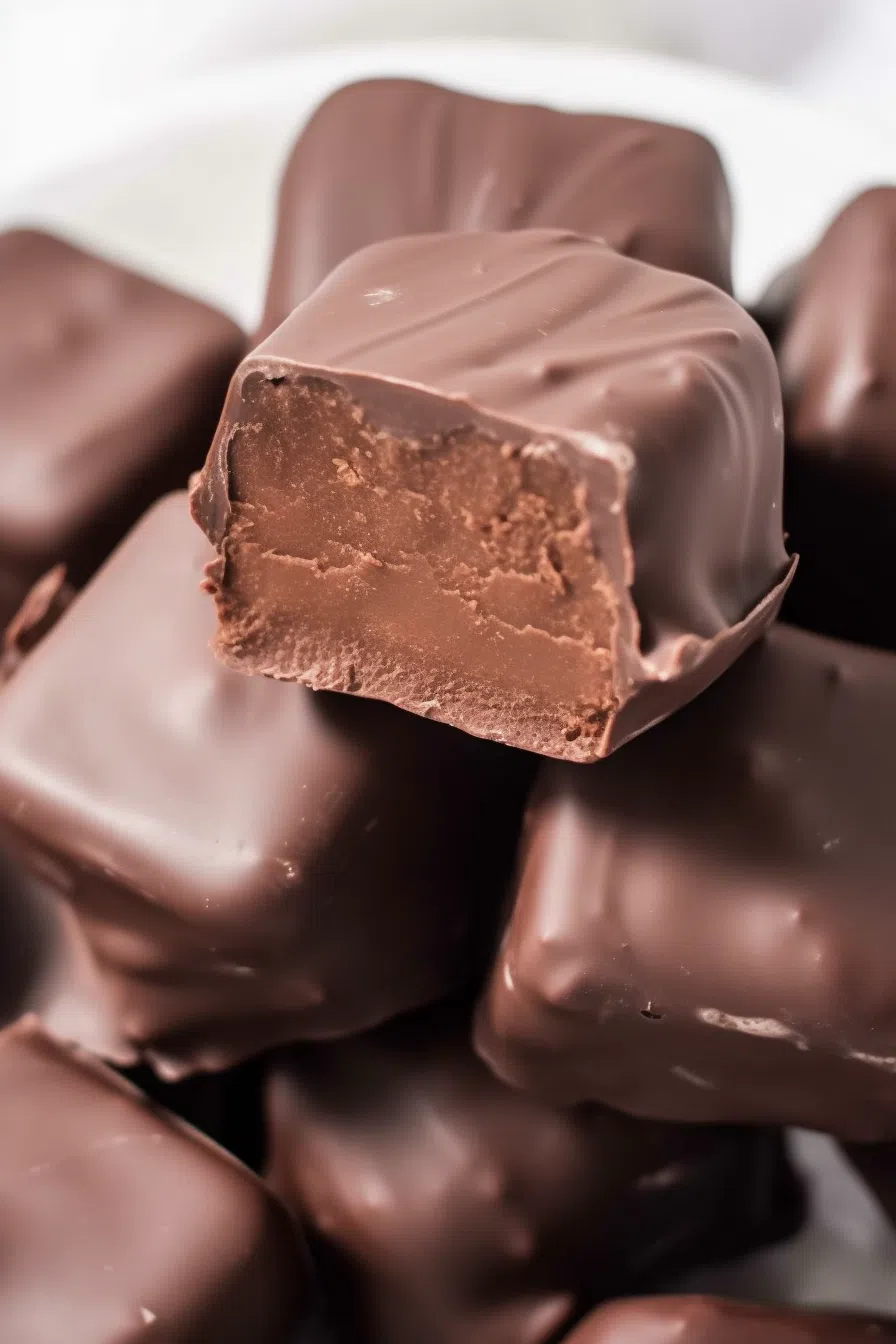
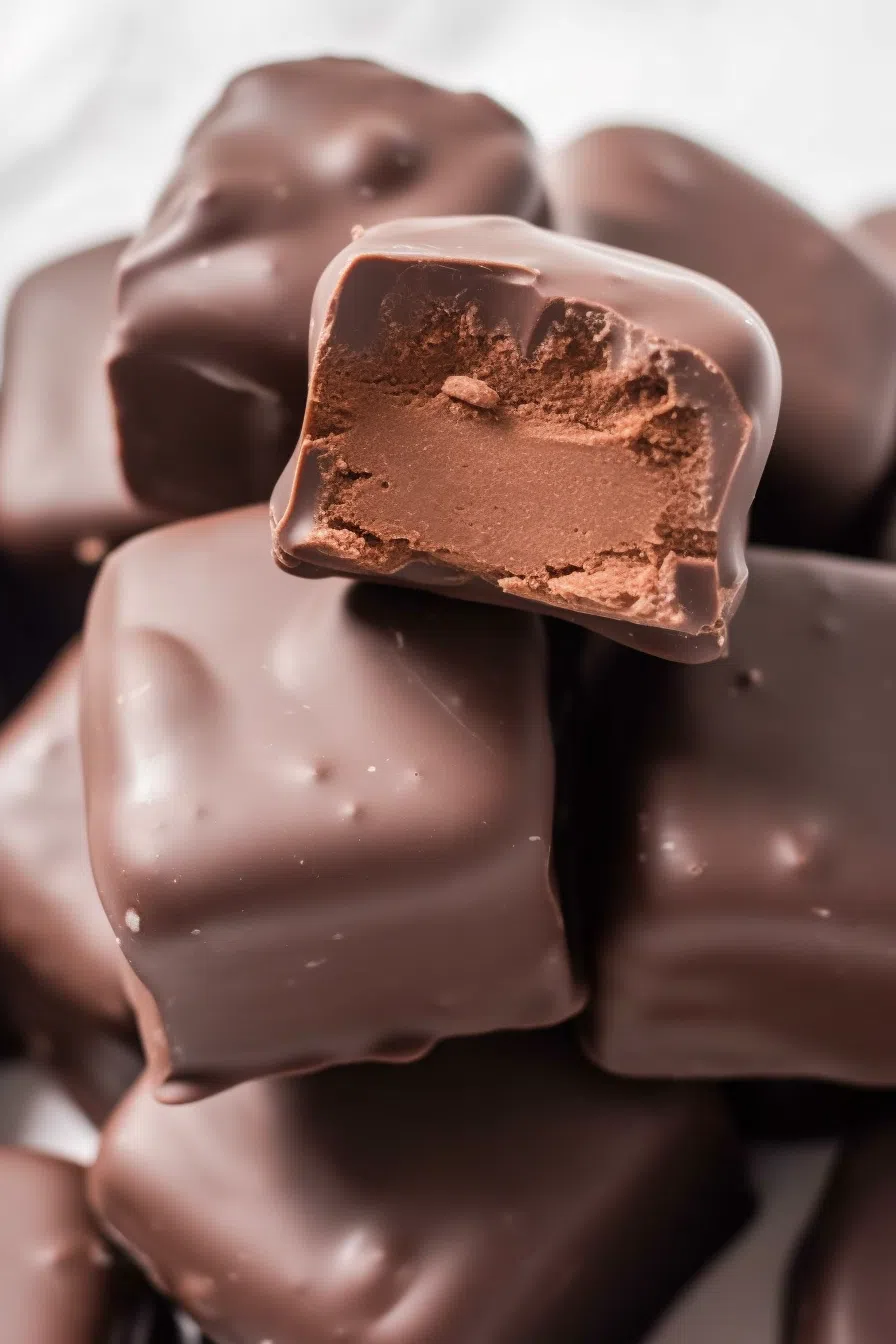
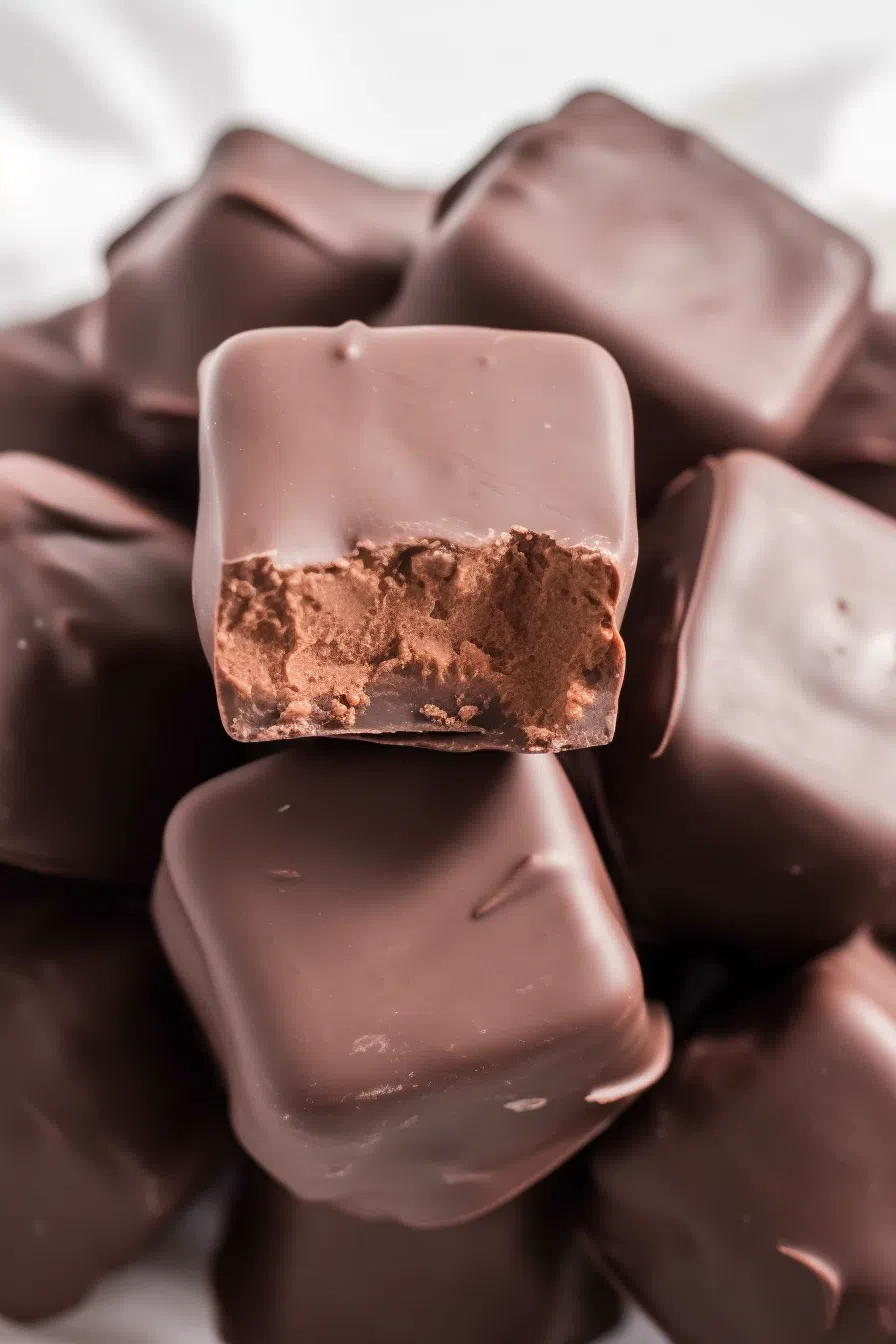
This Cool Whip Candy is a melt-in-your-mouth chocolate treat with a light, fluffy center and a crisp dark chocolate shell. So easy, so good!
So, confession time—I have a slight addiction to chocolate. Not the kind where you politely eat a square and call it a day. No, I’m talking full-blown, stash-in-every-drawer, midnight-craving, “oops, did I eat the whole bar?” level addiction.
Naturally, I’m always looking for the next best chocolate fix. That’s how I stumbled into making Cool Whip Candy. And by “stumbled,” I mean I was having one of those lazy but craving something amazing moments. You know the ones.
I wanted something decadent but also ridiculously easy. Something I wouldn’t have to bake (because, let’s be real, sometimes I just can’t be bothered). So I grabbed some chocolate, Cool Whip, and a little faith—and, well, this magic happened.


The first time I made these, I was honestly shocked. I expected something fine, but what I got? A chocolate treat that had this perfect balance of creamy, airy, and rich—like a fancy chocolate truffle met a mousse and had the most delicious baby. And the best part? It takes three ingredients and almost no effort.
If that doesn’t convince you to try it, I don’t know what will.
Why You’ll Love This Cool Whip Candy Recipe?
- Three ingredients. Yep, just three. No weird, hard-to-find stuff.
- No baking, no stress. Your oven gets a break. So do you.
- The texture is next level. Fluffy, airy chocolate inside. Crisp, snappy shell outside.
- It’s freezer-friendly. You can make a batch and hoard them for when the cravings hit.
- Completely customizable. Want peanut butter inside? Do it. Prefer white chocolate? Go for it.
Ingredient Notes:
This Cool Whip Candy works because of its simplicity. Every ingredient plays its part—no fillers, no extras, just straight-up deliciousness.
- Milk Chocolate – This makes up the inside of the candy. It melts down beautifully and blends with the Cool Whip to create a dreamy, mousse-like texture.
- Cool Whip – The magic ingredient. It transforms the chocolate from something dense into something light and airy.
- Dark Chocolate Melting Wafers – These create the crisp outer shell. Melting wafers work best for a smooth, glossy finish, but you can use chocolate chips if that’s what you have.
Pro Tip: Try swapping the milk chocolate for white chocolate for a fun twist. It gives you that gorgeous contrast when you bite into it!
How To Make Cool Whip Candy?
Alright, let’s get to it. If you can melt chocolate and stir, you got this.
Step 1: Melt the Milk Chocolate
Throw your milk chocolate into a microwave-safe bowl. Heat it in 30-second bursts, stirring after each, until it’s smooth and fully melted. Should take about a minute, maybe a minute and a half.
Now, and this is important, let it cool down for 15-20 minutes before mixing it with the Cool Whip. If it’s too warm, it’ll melt the Cool Whip instead of blending properly.
Step 2: Mix with Cool Whip
Once the chocolate is at room temp (ish), gently fold in the Cool Whip. It’ll start looking weird at first, kind of stiff, but keep folding—it’ll come together into a thick, mousse-like mixture.
Step 3: Freeze & Cut Into Squares
Line an 8-inch baking dish with
Once it’s solid, lift it out onto a cutting board and use a sharp knife to cut it into bite-sized squares—about 36 pieces. If you want bigger chunks, go for it. Your candy, your rules.
Now, put the squares back on a parchment-lined tray and stick them back in the freezer for another 30 minutes. This makes dipping them in chocolate so much easier.
Want To Save This Recipe?
Step 4: Melt the Dark Chocolate & Coat the Candy
Melt the dark chocolate wafers in the microwave just like you did before—30-second bursts, stir in between.
Grab a fork, dip each frozen chocolate square into the melted dark chocolate, and make sure it’s fully coated. Let any excess drip off, then place it back on the
Step 5: Let Them Set & Enjoy!
Let the chocolate shell harden at room temp, or speed things up by throwing them back in the freezer for 5-10 minutes. Once the chocolate is set, you’re good to go.
Try to eat just one. I dare you.
Storage Options:
- Freezer: These candies stay perfect in an airtight container for up to 3 months. Grab one whenever the mood strikes.
- Fridge: Want them a little softer? Store them in the fridge instead, where they’ll last about a week.
Variations and Substitutions:
Want to play around with flavors? Here are some fun ideas:
- White Chocolate Version – Swap milk chocolate for white chocolate in the filling for a lighter, sweeter flavor.
- Crunch Factor – Sprinkle chopped nuts, crushed pretzels, or toasted coconut over the top before the chocolate sets.
- Peanut Butter Swirl – Stir in a couple of tablespoons of melted peanut butter into the chocolate mixture before freezing.
- Dairy-Free Option – Use dairy-free whipped topping and dairy-free chocolate—it totally works!
What to Serve with Cool Whip Candy?
Not that you need to serve them with anything, but if you want to be extra, here are a few fun pairings:
- Coffee or Espresso – The slightly bitter coffee + the sweet chocolate? Unreal.
- Vanilla Ice Cream – Chop these up and use them as a topping. Trust me.
- A Dessert Board – Add these alongside cookies, fruit, and other small treats for an easy, fancy-looking spread.
Frequently Asked Questions:
Can I use real whipped cream instead of Cool Whip?
Nope. It has too much moisture and won’t hold up in the freezer. Stick with Cool Whip.
My chocolate mixture got weirdly stiff. What happened?
Your melted chocolate was probably too warm when you mixed it in. Make sure it’s cooled down to room temp before adding the Cool Whip.
Can I make these ahead of time?
Absolutely. They freeze beautifully, so they’re perfect for making in advance.
If you’ve made it this far, let’s be real—you need to try this Cool Whip Candy. It’s easy, it’s chocolatey, and it’s kind of impossible to stop eating.
So, what’s your take—are you trying the classic milk chocolate version or going for the white chocolate twist? Let me know in the comments!
Keep the Flavor Coming – Try These:


Cool Whip Candy
Ingredients
- 2 packages 11 ounces each Milk Chocolate
- 1 tub 8 ounces Cool Whip, thawed
- 24 ounces Dark Chocolate Melting Wafers
Instructions
- In a glass bowl microwave the milk chocolate for 1 minute until it melts. Stir it well. Continue microwaving for 30 seconds if needed. Allow the chocolate to cool down to room temperature, which usually takes 15 to 20 minutes.
- Prepare Baking Dish. Line an 8-inch baking dish, with parchment paper.
- In a bowl gently combine the milk chocolate with the thawed Cool Whip until they are thoroughly mixed even if the chocolate becomes slightly hard.
- Pour the mixture into the dish. Spread it evenly. Place it in the freezer for 30 minutes. Once frozen cut it into 36 squares.
- Arrange the cut squares on a baking sheet lined with parchment paper and return them to the freezer for another 30 minutes.
- Follow the instructions on the package to melt the dark chocolate wafers using a microwave.
- Dip each frozen square, into the chocolate ensuring that they are fully coated. Then place them back on the parchment paper to allow them to harden.
- Store your candies in the freezer until you're ready to serve them. Enjoy!
Notes
I’m Bitty, owner of nodashofgluten.com, where I share simple, delicious recipes for all tastes, including gluten-free. Check out my “About Me” page for more info!