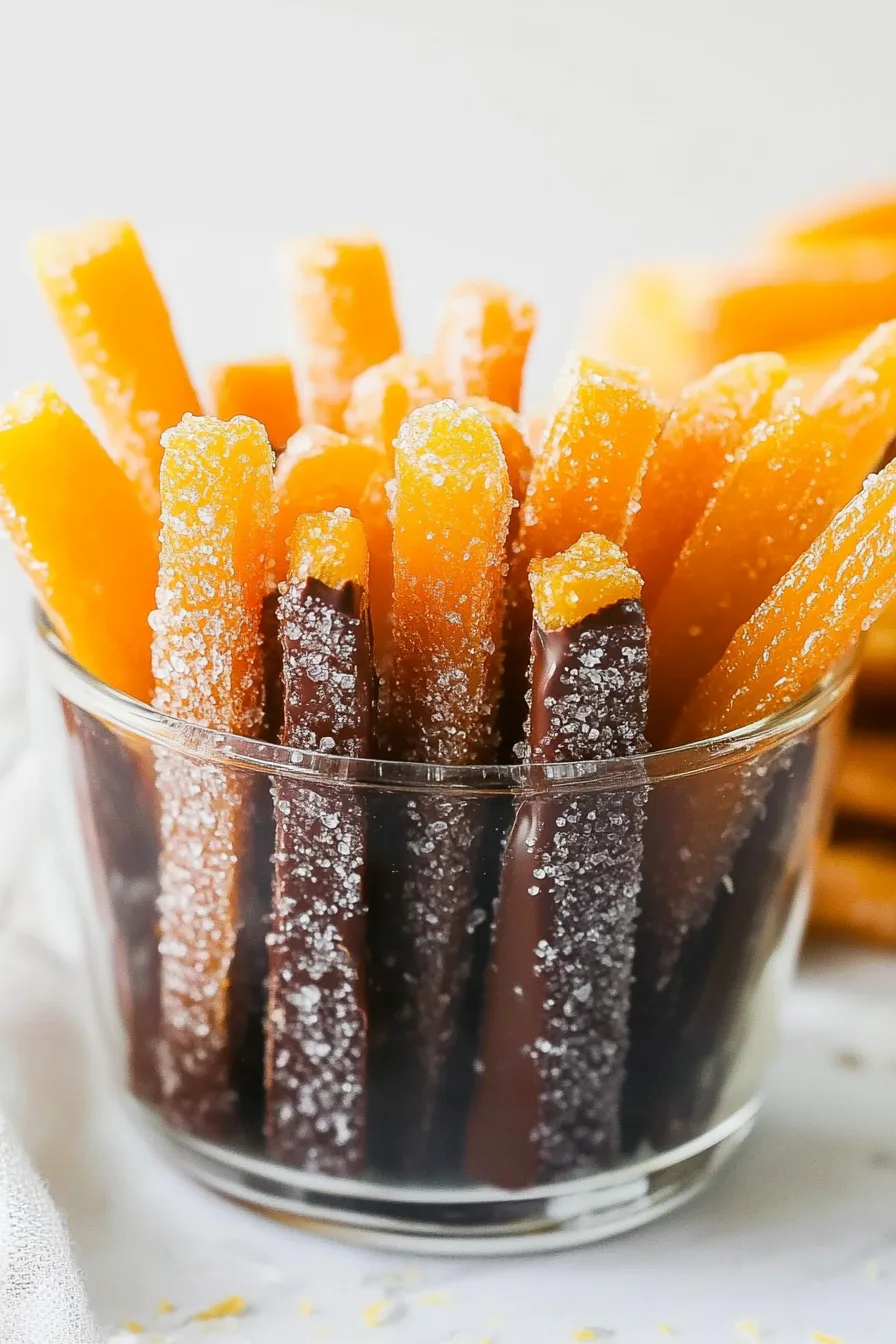
This Chocolate Covered Orange Peels recipe transforms simple orange peels, sugar, and chocolate into an elegant, homemade candy treat.
I’ll be honest — this Chocolate Covered Orange Peels recipe was born out of guilt. Real, citrus-scented guilt. I was standing at my kitchen counter one morning, peeling oranges for juice, and the peels were just too beautiful to throw away. They smelled like sunshine — that mix of fresh, bright, and slightly bitter — and I thought, there’s no way these belong in the trash.
It took me right back to a little trip to Italy years ago. I’d stumbled into this old candy shop tucked between a gelato stand and a perfume store — you know the kind, where everything is behind glass and the owner has probably been making sweets since before Wi-Fi existed. There were trays of glossy candied peels, dipped in chocolate so dark it looked almost black. I bought a small box that cost way too much and told myself I’d “save them for later.” Naturally, I ate all of them on the walk back to the hotel.


Fast forward to my kitchen years later — sticky counters, sugar boiling, a slightly impatient version of myself wondering if it was worth it — and it hit me. The smell was the same. The way the orange softened in the syrup, the sound of the spoon tapping against the pot, that same cozy sweetness that makes your kitchen feel alive.
So yeah, this Chocolate Covered Orange Peels recipe isn’t just candy. It’s nostalgia. It’s a little mess, a little patience, and a lot of “wow, I actually made this?”
Why You’ll Love This Chocolate Covered Orange Peels Recipe?
It’s simple, really — this recipe makes you feel like you’ve pulled off something fancy without actually needing to know how to temper chocolate or use a candy thermometer (though it helps if you do). It’s half rustic, half elegant — and somehow both at once.
I love how it takes something ordinary, like orange peels, and turns it into this gorgeous little treat that looks like it came straight out of a boutique candy shop. You get that chewy bite, the soft sweetness, a little bitterness that sneaks in and keeps things interesting, and the silky finish of melted chocolate. It’s one of those perfect combinations you didn’t know you were missing until you tried it.
And if you’re anything like me, you’ll end up nibbling a few before they even make it into the chocolate. Don’t pretend you won’t.
Ingredient Notes:
Here’s what makes this Chocolate Covered Orange Peels recipe work like magic — and a few small things I learned the hard way:
-
Oranges: Go organic if you can. Since we’re using the peel, it’s worth skipping all those waxy coatings.
-
Sugar: Regular granulated sugar is great for candying, but rolling them in turbinado gives this beautiful golden sparkle — and a tiny crunch.
-
Chocolate: I lean toward semisweet or dark because it balances the sugar, but honestly, if you’re a milk chocolate person, live your truth.
-
Toppings: Crushed nuts, coconut flakes, even a pinch of sea salt — you can dress these up however you like.
-
Patience: Not an ingredient, technically, but crucial. The drying step is what turns these from “sticky orange spaghetti” into actual candy.
Pro tip: Don’t skip the boiling step at the beginning. It’s the secret to getting rid of that bitterness without losing all the flavor.

How To Make Chocolate Covered Orange Peels?
Step 1: Get your setup ready.
Line a baking sheet with foil or parchment — you’ll use it later when the peels are ready to dry. It’s like setting the stage before the performance.
Step 2: Slice the oranges.
Cut the tops and bottoms off two large oranges, then make four vertical cuts around each one. Peel away the skin in big segments and slice them into even strips, about ¼ inch wide. Keep the pith on — it softens beautifully once candied.
Step 3: Boil and soften.
Toss the peels into boiling water and let them simmer for 15 minutes. Drain, rinse, and repeat if your oranges were on the bitter side. This step makes them tender and ready for candying.
Step 4: Make the simple syrup.
In a saucepan, combine 2 cups of sugar and 2 cups of water. Bring it to a simmer until the sugar dissolves completely. Don’t rush it — you’re building the base for that chewy, glossy texture.
Step 5: Candy the peels.
Add your orange strips into the syrup and let them gently bubble for about 45–50 minutes. Stir occasionally and just… enjoy the smell. Seriously. The kitchen will smell like an orange orchard in summer. When they’re translucent and soft, they’re done.
Step 6: Coat in sugar and dry.
Lift each strip out of the syrup (tongs help here), roll them in sugar, and lay them out on your baking sheet. Try not to let them touch — they’ll glue themselves together faster than toddlers with stickers. Let them dry for at least 24 hours, uncovered.
Step 7: Dip in chocolate.
Once the peels are dry and firm, melt your chocolate in a double boiler. Dip each strip about three-quarters of the way, let the excess drip off, and lay them on a wax-paper-lined tray. Sprinkle with nuts, jimmies, or whatever makes you happy before the chocolate sets.
Step 8: Cool and store.
When the chocolate’s firm, store them in an airtight container with wax paper between layers. Or… just eat them right away like I usually do.

Want To Save This Recipe?
Storage Options:
These will keep for up to a month in the fridge — but honestly, I’ve never managed that. Every time I open the container, I tell myself I’ll “just take one.” You can also freeze them (just wrap tightly in wax paper), and they’ll thaw perfectly at room temperature.
Pro tip: if you store them in the fridge, let them sit out for a few minutes before eating. The chocolate softens just enough to melt on your tongue, and it’s divine.
Variations and Substitutions:
Once you’ve mastered this Chocolate Covered Orange Peels recipe, you’ll want to experiment. And honestly, you should.
-
Other citrus: Grapefruit, lemon, or blood orange work beautifully too.
-
Chocolate swap: Dark for intensity, milk for sweetness, white for drama.
-
Spice it up: Add a cinnamon stick or some cardamom to the syrup for a cozy winter version.
-
Fancy toppings: Crushed pistachios, toasted coconut, or flaky sea salt.
-
Half-dipped: Go for a “rustic look” and only dip halfway. It’s chic.

What to Serve with Chocolate Covered Orange Peels?
These little gems are amazing on their own, but if you want to go the extra mile:
-
Coffee or espresso: That bitterness balances the sweet perfectly.
-
A glass of bubbly: Champagne and chocolate orange? Don’t knock it till you’ve tried it.
-
Cheese boards: I know it sounds weird, but that sweet-bitter combo next to creamy brie? Perfection.
-
Dessert platters: Mix with truffles, cookies, and candied nuts for a dessert spread that looks straight out of Pinterest.
Frequently Asked Questions:
Why did my peels turn out bitter?
You probably skipped the boiling step — or maybe didn’t boil long enough. That step’s non-negotiable.
Can I use milk chocolate instead of dark?
Absolutely! Milk makes them creamier and sweeter — it’s all about what you love.
How long do they last?
Up to a month in the fridge, but realistically? A week, tops. They vanish fast.

Every time I make this Chocolate Covered Orange Peels recipe, it reminds me that sometimes, the best things come from what we almost throw away. There’s something oddly satisfying about turning scraps into something elegant — something that looks and tastes like it came from a fancy box, but actually came from your own kitchen.
It’s a little messy, a little indulgent, and honestly, one of those recipes that makes you proud of yourself. So grab some oranges, melt some chocolate, and give it a go. You’ll see what I mean.
And hey — if your kitchen smells like happiness afterward? That’s how you know you did it right.
Keep the Flavor Coming – Try These:


Chocolate Covered Orange Peels recipe
Ingredients
- 2 large organic oranges
- 2 cups granulated sugar
- 2 cups water
- 1 cup turbinado or granulated sugar for coating
- 12 ounces 340g semisweet chocolate finely chopped
- Colored jimmies or finely chopped nuts optional, for garnish
Instructions
Prepare the pan
- Line a half sheet pan or rimmed baking sheet with foil or parchment paper. Set aside for later use.
Prepare the orange peels
- Trim ¼ inch off the top and bottom of each orange. Using a sharp paring knife, cut the peel into four large vertical segments, keeping the pith attached. Carefully remove each peel section in one piece. Slice each section into uniform ¼-inch-wide strips.
Boil the orange peels
- Bring a medium saucepan of water to a boil. Add the orange peel strips and simmer for approximately 15 minutes. Drain the peels in a colander, rinse under cool water, and drain again. This process removes excess bitterness from the peels.
Prepare the simple syrup
- In a medium saucepan, combine 2 cups of sugar and 2 cups of water. Place over medium heat and stir gently until the sugar dissolves completely.
Candy the orange peels
- Add the boiled peels to the sugar syrup and bring to a simmer. Adjust the heat to maintain a steady, gentle simmer. Cook the peels for 45–50 minutes, stirring occasionally, until they become tender and translucent.
Coat with sugar and dry
- Using tongs, remove the candied orange peels from the syrup and transfer them into a bowl containing 1 cup of sugar. Toss until well coated. Arrange the sugared peels in a single layer on the prepared baking sheet, ensuring they do not touch. Allow them to air-dry at room temperature for 24 hours, or until the coating feels dry and firm.
Melt the chocolate
- Once the peels are fully dry, prepare a double boiler by placing a heatproof bowl over a pot of gently simmering water. Add the chopped semisweet chocolate to the bowl and stir until melted and smooth. Alternatively, melt the chocolate in short intervals in a microwave-safe bowl, stirring between each heating.
Dip the orange peels
- Line another baking sheet with wax paper. Dip each orange peel strip into the melted chocolate, covering approximately three-quarters of its length. Allow the excess chocolate to drip off before placing it on the prepared wax paper. If desired, sprinkle chopped nuts or jimmies over the wet chocolate for decoration.
Set and store
- Let the chocolate-covered orange peels rest at room temperature until the chocolate has fully set. Transfer the candies to an airtight container, layering them with sheets of wax paper to prevent sticking. Refrigerate for up to one month.
Notes
I’m Bitty, owner of nodashofgluten.com, where I share simple, delicious recipes for all tastes, including gluten-free. Check out my “About Me” page for more info!