

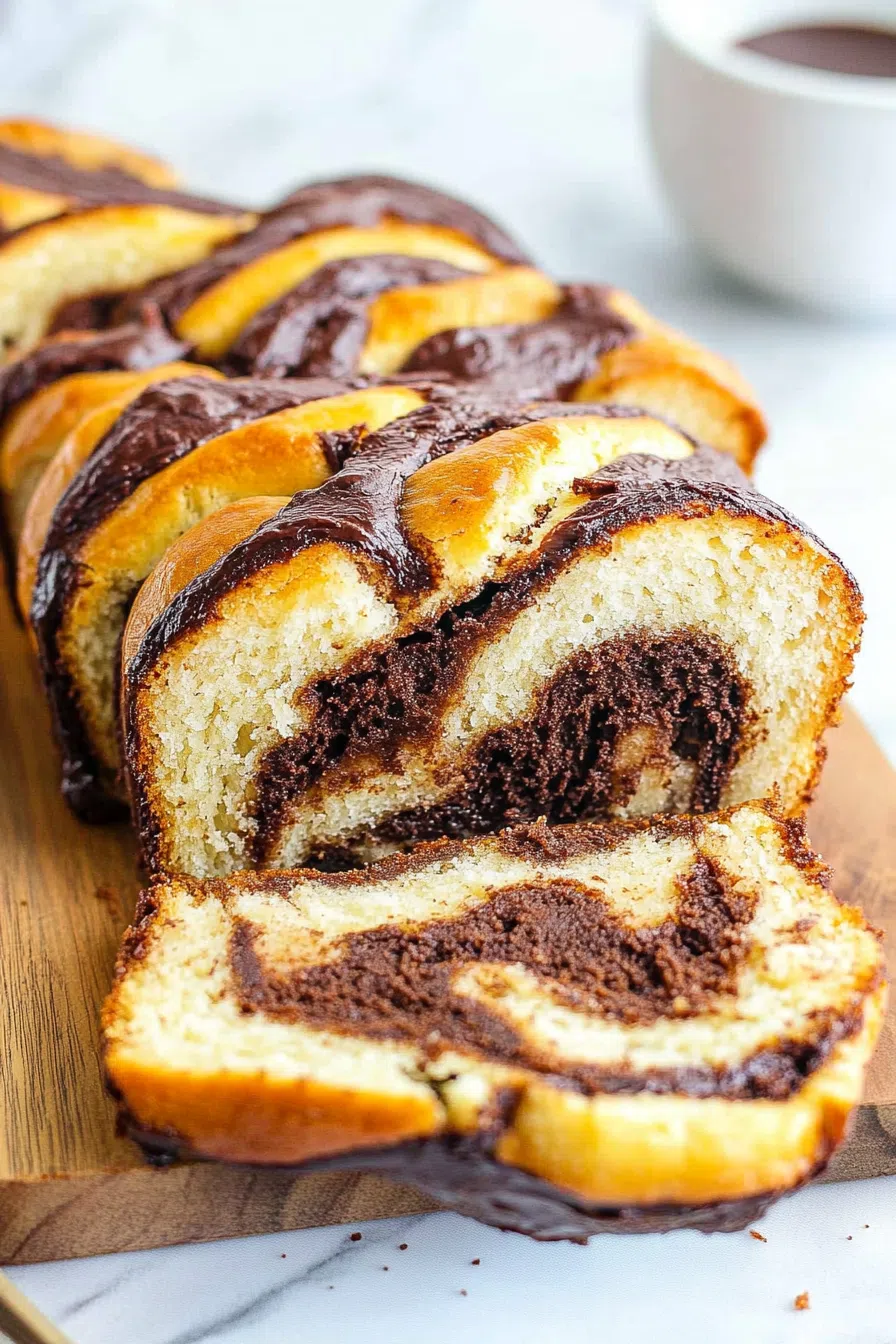
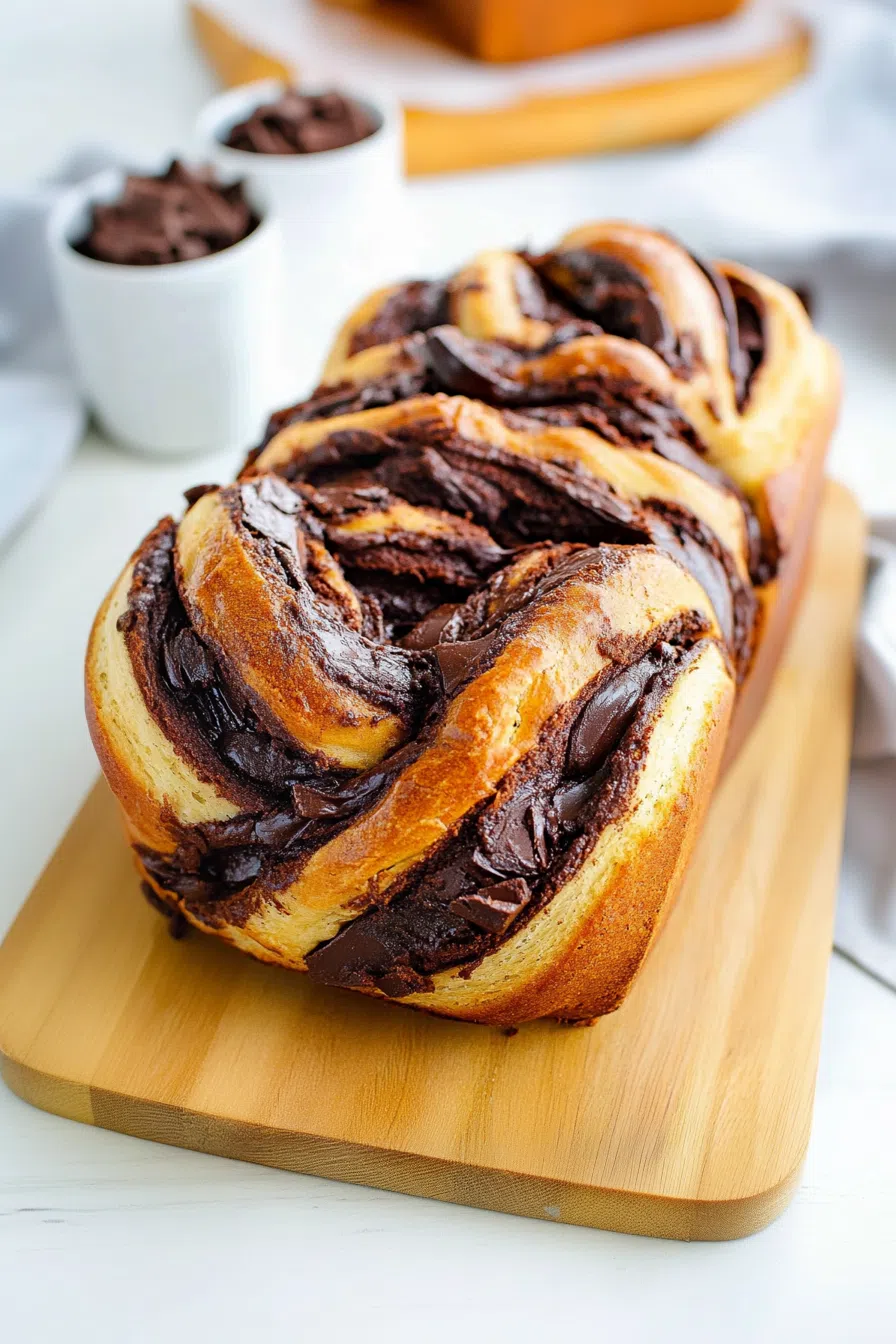
Chocolate babka made with soft buttery dough, rich cocoa, melted chocolate, and sugar syrup. A sweet, twisted loaf worth every minute.
Let me be honest right out of the gate: I had no business trying to bake a chocolate babka the first time I did. It was a Saturday. I was wearing mismatched socks, my kitchen was already a war zone from breakfast (somehow), and the only reason I even considered it was because I saw a photo on Instagram that looked too good to scroll past.
So naturally, I thought, “Sure, I can make that. How hard could it be?”
Spoiler: It’s a little hard.


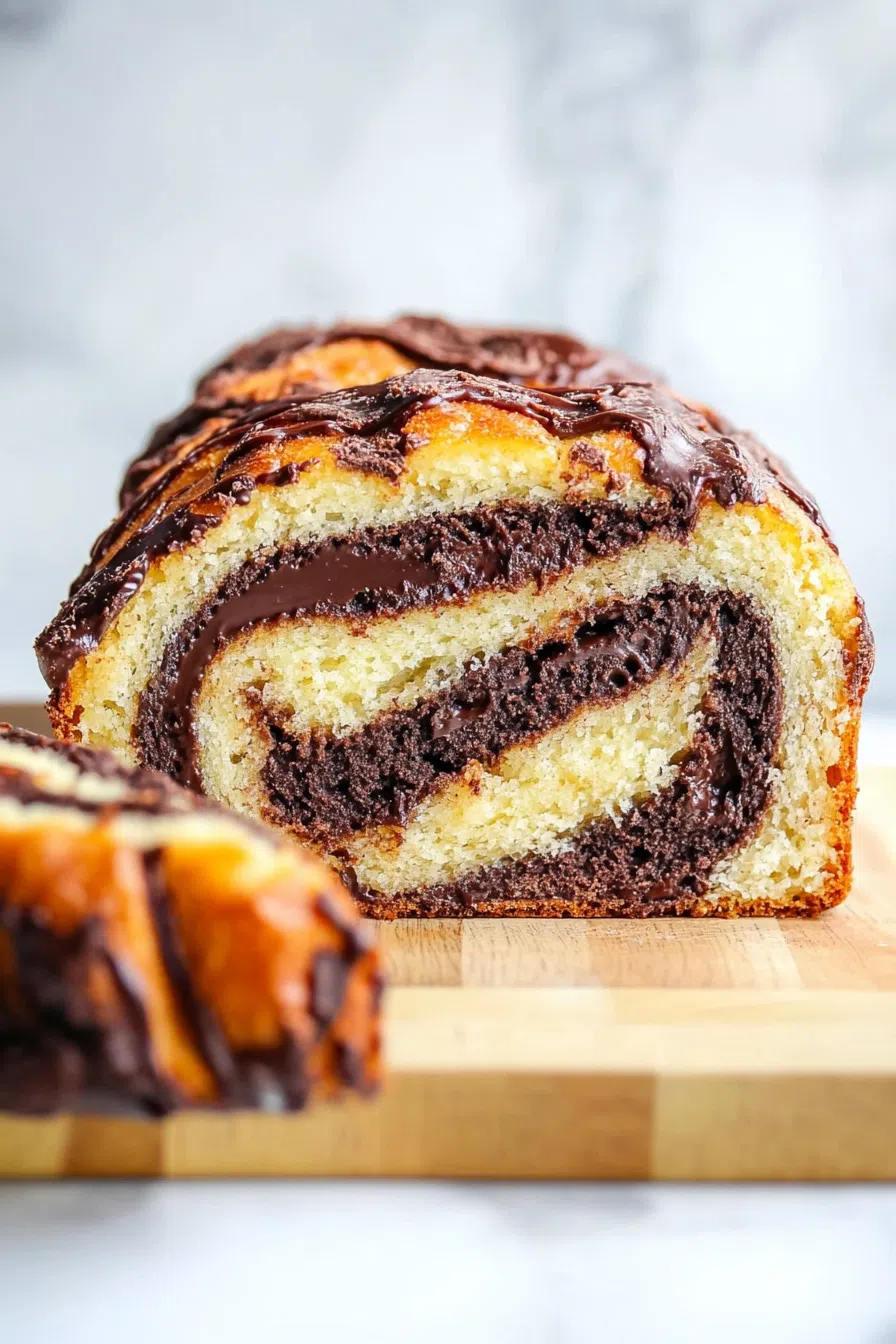
But here’s the thing—it’s also magic. The moment I sliced into that first loaf and saw those shiny, chocolatey swirls? Game over. I forgot about the flour in my hair, the mixing bowl I dropped mid-knead, and the moment I panicked when the dough looked like it wasn’t rising (it was, just verrry slowly). It became one of those bakes that hits you right in the chest—warm, messy, nostalgic, and a little bit fancy even when it’s slightly overbaked on one side.
Now, I make chocolate babka when I’m craving something cozy and special. It takes time, yeah—but not in a bad way. More like the kind of slow baking that gives you space to breathe. Space to make something beautiful. Or ugly. Honestly, I’ve made both. Either way? Still tastes like joy.
Why You’ll Love This Chocolate Babka Recipe?
I’m not here to lie to you—this recipe takes effort. But not the “ugh, I regret this already” kind. More like the “omg I can’t believe I made this” kind of effort. There’s something kind of sacred about homemade babka. It’s sweet but not cloying, rich without being heavy, and stunning even when your braids look more like twisted socks than art.
This chocolate babka is soft and pillowy inside with those deep, dark cocoa swirls that feel like they belong in a bakery that smells like cinnamon and costs $9 a slice. But guess what? You get two whole loaves with this recipe. That means you can give one away… or just freeze it and pretend to forget it’s there until you’re having a rough day and need emergency chocolate bread. (Been there.)
It’s comfort food that also makes you feel slightly accomplished. Like, “I just baked something beautiful and now I’m eating it in my pajamas.”
Ingredient Notes:
Let’s walk through it like we’re baking together and you’re raiding your pantry in socks.
-
Bread flour (4¾ cups) – I’ve tried it with all-purpose. It’s fine, but bread flour gives you that perfect balance of soft and chewy. It’s worth the trip to the store.
-
Instant yeast (3 tsp) – The kind that doesn’t need blooming. I once used active dry and just waited a little longer for the rise—still worked.
-
Whole milk (⅔ cup, warm) – Like a baby’s bath. Not lava. Not cold. Use your finger to test it. Real science here.
-
Eggs (3) – Let them come to room temp or just drop them in warm water for 10 minutes like I do when I forget.
-
Unsalted butter (10 tbsp, plus extra) – This dough is luxurious, and butter is the reason. Don’t skimp.
-
Chocolate (6 oz, chopped) – Use real chocolate bars, not chips. I made that mistake once and the filling came out sad.
-
Cocoa powder (½ cup) – Unsweetened. Dutch-processed works great. Adds depth.
-
Sugar – It’s used in the dough, filling, and syrup, but it never feels too much. Just… balanced.
-
Water (for the syrup) – Yes, syrup sounds fussy. It’s not. It takes two minutes and makes your loaves look like they came from a place with French music playing in the background.
How To Make Chocolate Babka?
This isn’t a TikTok-style “dump and done” recipe. It’s a vibe. It’s a process. And that’s what makes it special.
Step 1: Make the dough
Mix flour, yeast, and salt. Add warm milk and eggs. If you’ve got a stand mixer, this is where it earns its keep. Mix until it starts to look like a shaggy mess that might turn into dough. Rest for 10 minutes. Trust the process.
Step 2: Add butter
Now slowly—slowly—add in the butter, one tablespoon at a time. It’ll look like a crime scene for a minute. Mine always does. But eventually it becomes shiny, elastic, and kinda glorious. When it’s no longer clinging to the bowl, you’re golden.
Step 3: First rise
Plop the dough into a greased bowl. Cover it. Let it hang out for 90 minutes at room temp, then transfer to the fridge. Overnight is ideal. But if you’re impatient (hi), give it at least an hour. I’ve done it both ways, and honestly, it’s a little more flavorful with the overnight chill—but not a deal-breaker.
Step 4: Make the filling
Melt chocolate, butter, cocoa, and sugar together on low heat. Stir constantly. Don’t leave it alone unless you want to scrape chocolate off your burner. Ask me how I know.
Step 5: Roll, fill, and freeze
Split the dough in half. Roll it into a rectangle. Spread half the chocolate. Leave a border at the top. Roll tightly. Wrap and freeze for 10 minutes (this helps with slicing). Do it all again with the other half.
Step 6: Slice and braid
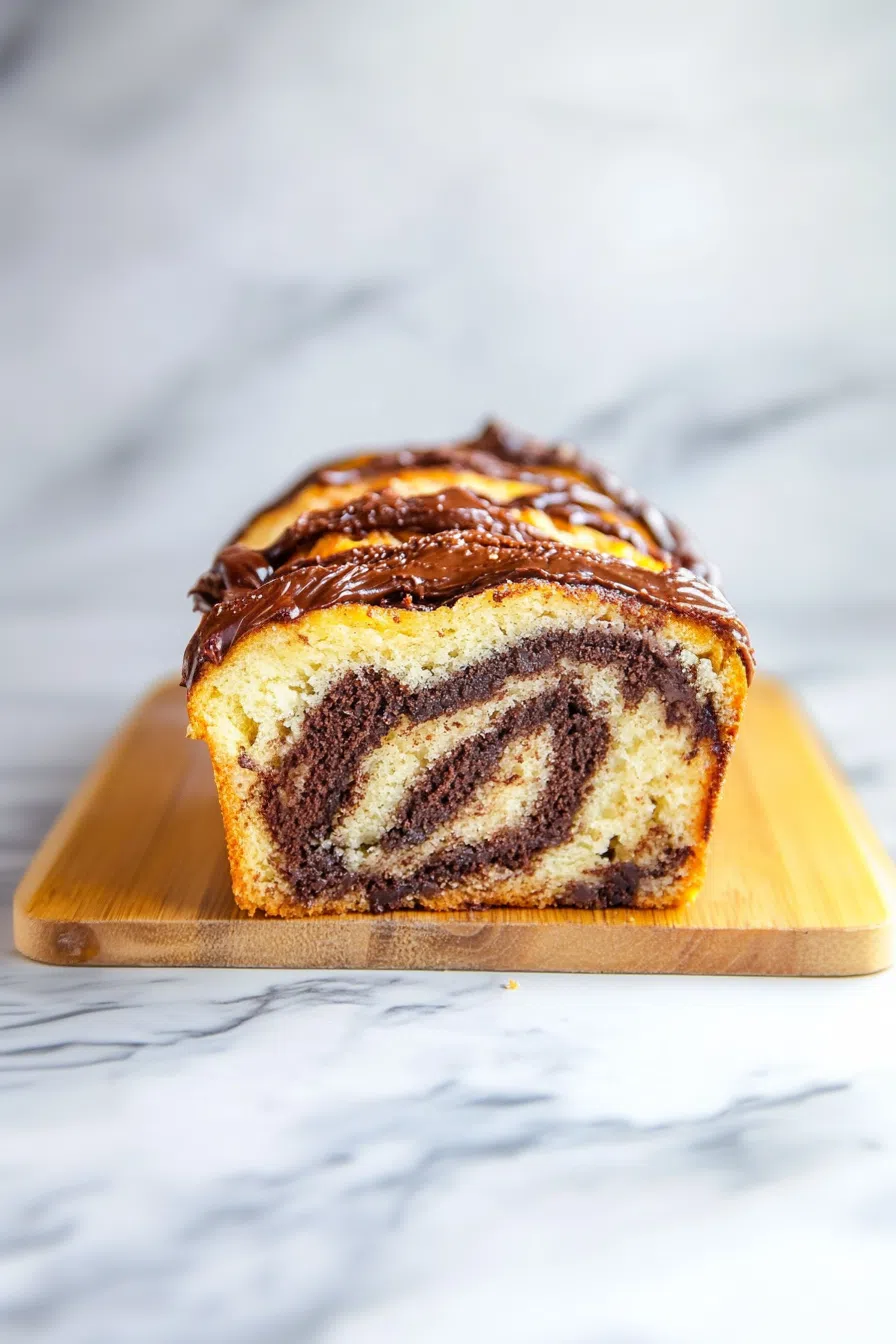
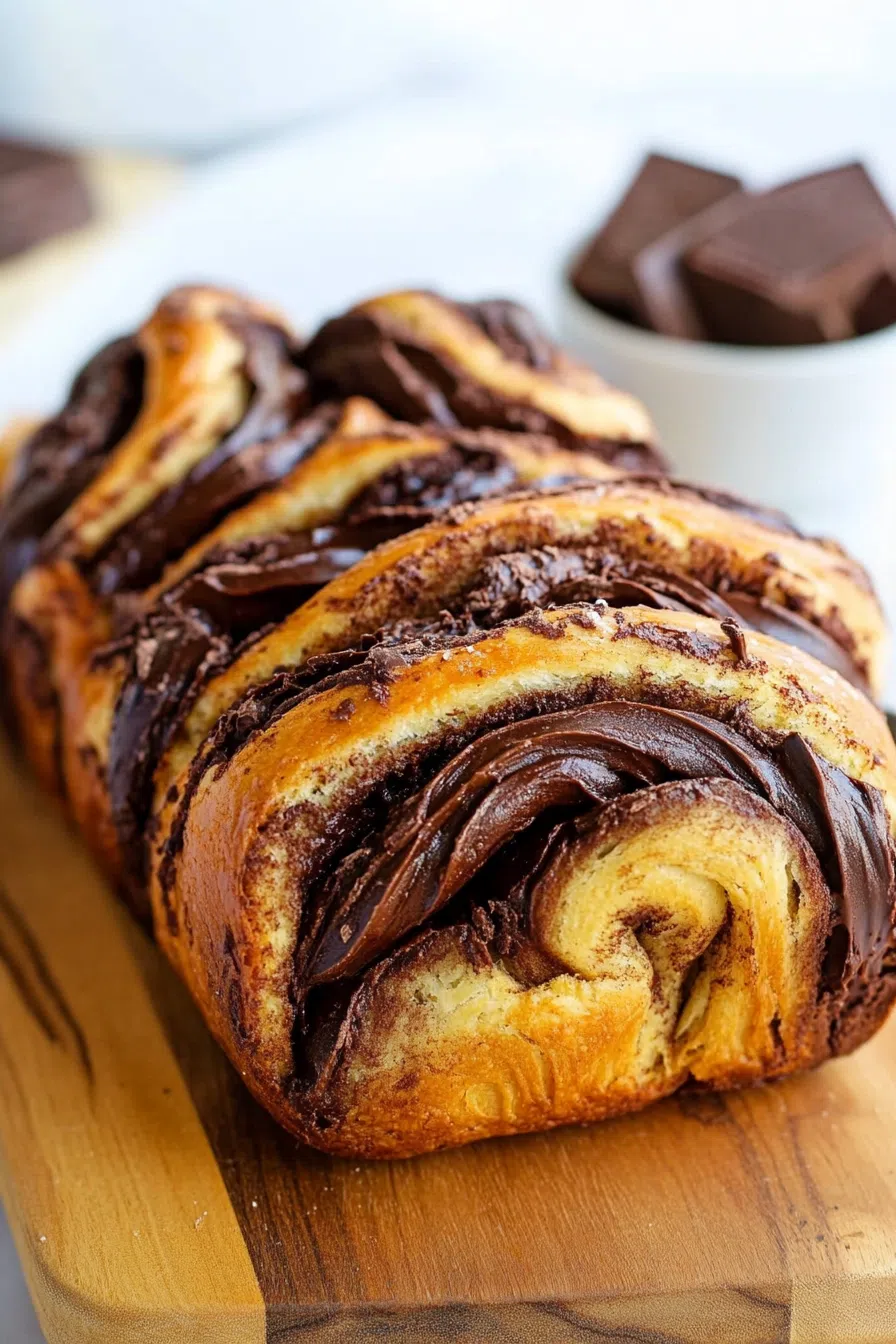
Take out the chilled dough, slice it lengthwise, and twist the two halves together like a weird chocolate rope. It doesn’t need to be perfect. In fact, it rarely is. That’s kind of the charm.
Want To Save This Recipe?
Step 7: Second rise
Let the braided loaves rest in parchment-lined pans for 1½ to 2 hours. They should puff up and start peeking over the edges.
Step 8: Bake
Bake at 350°F for 35 minutes. Your kitchen will smell like heaven. You’ll want to eat it immediately. Don’t. Wait for the syrup.
Step 9: Syrup it up
While the loaves are still hot, brush with syrup. It’ll sizzle and soak in. This is what gives babka that signature glossy, sticky top. Trust me, it’s not optional.
Step 10: Cool (or not)
Cool in the pan for 10 minutes, then lift out using the parchment. Try to wait until it’s fully cool before slicing. Or do what I do—burn your fingers slicing off the end and eat it straight off the cutting board. No regrets.
Storage Options:
Keeps on the counter for about 3–4 days if wrapped well. But honestly, it’s usually gone before that. You can freeze it—just wrap it tightly in foil and toss in a zip-top bag. Reheat slices in the oven for that warm, just-baked feel. Not that I’ve ever hidden a slice in the freezer for emergencies or anything… nope.
Variations and Substitutions:
This chocolate babka is a great starting point—but feel free to go wild:
-
Add orange zest to the dough. It makes the whole loaf taste like a chocolate-orange truffle.
-
Sprinkle chopped hazelnuts over the filling. Hello, Nutella energy.
-
Use dark chocolate if you like things less sweet.
-
Don’t want to make the filling? Slather on some Nutella or cookie butter. No one’s judging you here.
What to Serve with Chocolate Babka?
You can eat it standing at the counter with a cup of coffee. That’s the default. But if you want to get a little fancy:
-
Pair with espresso or strong black coffee – balances out the richness.
-
Add a side of fresh berries – something tart works really well.
-
Make French toast with leftover slices – yep. That’s real. And it’s amazing.
Frequently Asked Questions:
What if my dough doesn’t rise much?
Sometimes the fridge rise is subtle. As long as it feels puffy and soft, you’re good.
Can I skip the syrup?
Sure. But then don’t be sad when it’s a little dry on day two.
Do I need a stand mixer?
It helps. But you can do this by hand with some patience, arm strength, and possibly a podcast to distract you.
So… ready to bake your first chocolate babka? Or maybe you’ve made one before and you’re just here for a reminder that baking is messy and unpredictable and still so dang worth it. Either way, I hope this one gives you that warm, proud, chocolate-covered kind of joy.
If you bake it, let me know. Seriously. Tag me, send a pic, or just tell me if your kitchen exploded like mine did. Let’s swap stories.
Keep the Flavor Coming – Try These:

Chocolate Babka
Ingredients
For the Dough:
- 4¾ cups bread flour
- ⅓ cup granulated sugar
- 3 teaspoons instant yeast
- 1 teaspoon kosher salt
- ⅔ cup whole milk lukewarm (approximately 100°F)
- 3 large eggs at room temperature
- 10 tablespoons unsalted butter softened, plus additional for greasing loaf pans
For the Chocolate Filling:
- 6 ounces semi-sweet chocolate chopped
- ½ cup unsalted butter
- ½ cup granulated sugar
- ½ cup unsweetened cocoa powder
For the Syrup:
- ½ cup water
- ⅔ cup granulated sugar
Instructions
Prepare the Dough
- In the bowl of a stand mixer, whisk together the bread flour, sugar, instant yeast, and salt. Add the warm milk and eggs. Using the dough hook attachment, mix on low speed for approximately 5 minutes, or until the mixture forms a rough dough.
Knead and Incorporate Butter
- Increase the mixer speed to medium and knead the dough for 5 additional minutes, or until it begins to pull away from the sides of the bowl. Allow the dough to rest for 10 minutes. Resume mixing on medium speed and add the softened butter, one tablespoon at a time, incorporating each portion before adding the next. Continue kneading for 5–8 minutes, or until all butter is fully incorporated. Knead for an additional 10 minutes, until the dough forms a smooth, elastic ball and no longer clings to the sides of the bowl.
First Rise
- Transfer the dough to a lightly greased bowl. Cover with plastic wrap or a fitted lid and allow it to rise at room temperature for 1½ hours. Then refrigerate the dough for at least 1 hour or up to 2 days.
Prepare the Chocolate Filling
- In a small saucepan over low heat, melt the chopped chocolate, butter, sugar, and cocoa powder. Stir continuously until smooth. The texture may appear grainy due to the sugar, but this will resolve during baking.
Shape the Babka
- Divide the chilled dough into two equal portions. On a lightly floured surface, roll one portion into a 10×15-inch rectangle. Spread half of the chocolate filling evenly over the dough, leaving a ½-inch border at the top. Roll the dough tightly from the short end into a log. Wrap in plastic wrap and freeze for 10 minutes. Repeat with the second portion of dough.
Braid and Pan the Loaves
- Grease two 9×5-inch loaf pans and line them with parchment paper, allowing excess to hang over the edges. Remove one log from the freezer and slice it lengthwise. Twist the two halves together with the cut sides facing outward. Place the braided dough into the prepared loaf pan. Repeat with the second log.
Second Rise
- Cover both pans with plastic wrap and allow the dough to rise at room temperature for 1½ to 2 hours, or until it reaches nearly the top of the pans.
Bake
- Preheat the oven to 350°F (175°C). Bake the loaves for approximately 35 minutes, or until the tops are golden and a skewer inserted into the center emerges clean or with a small amount of melted chocolate.
Prepare and Apply the Syrup
- While the loaves bake, combine the water and sugar in a saucepan over medium heat. Simmer until the sugar is completely dissolved, then remove from heat. While the baked loaves are still warm, brush them generously with the syrup, dividing it evenly between both.
Cool and Serve
- Allow the loaves to cool in their pans for 10 minutes. Lift them out using the parchment overhang and transfer to a wire rack to cool completely before slicing and serving.
Notes
I’m Bitty, owner of nodashofgluten.com, where I share simple, delicious recipes for all tastes, including gluten-free. Check out my “About Me” page for more info!

