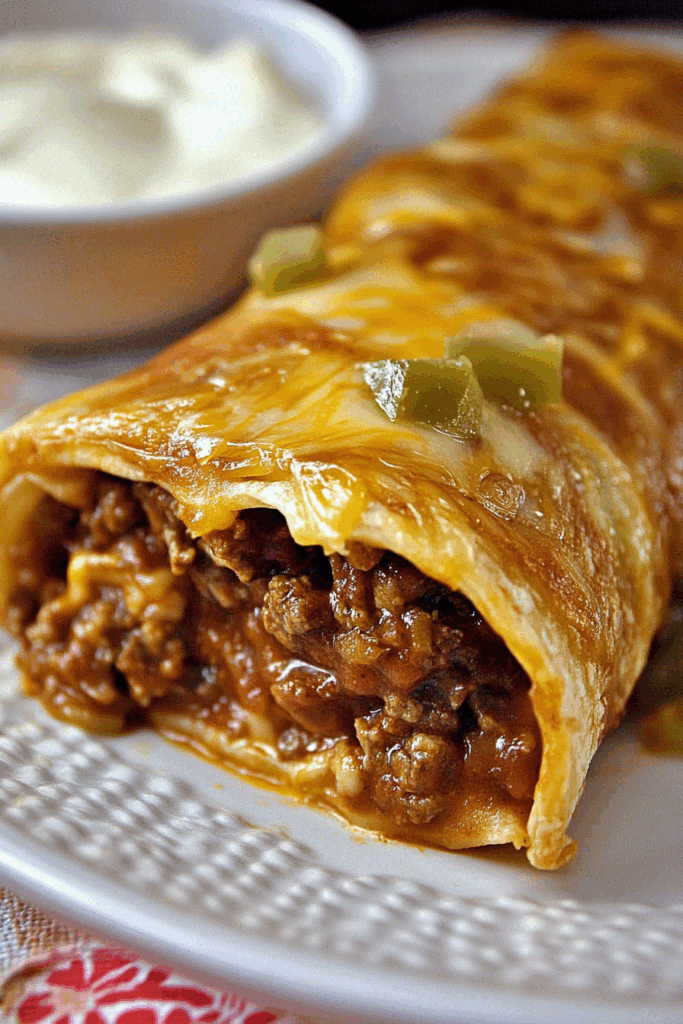
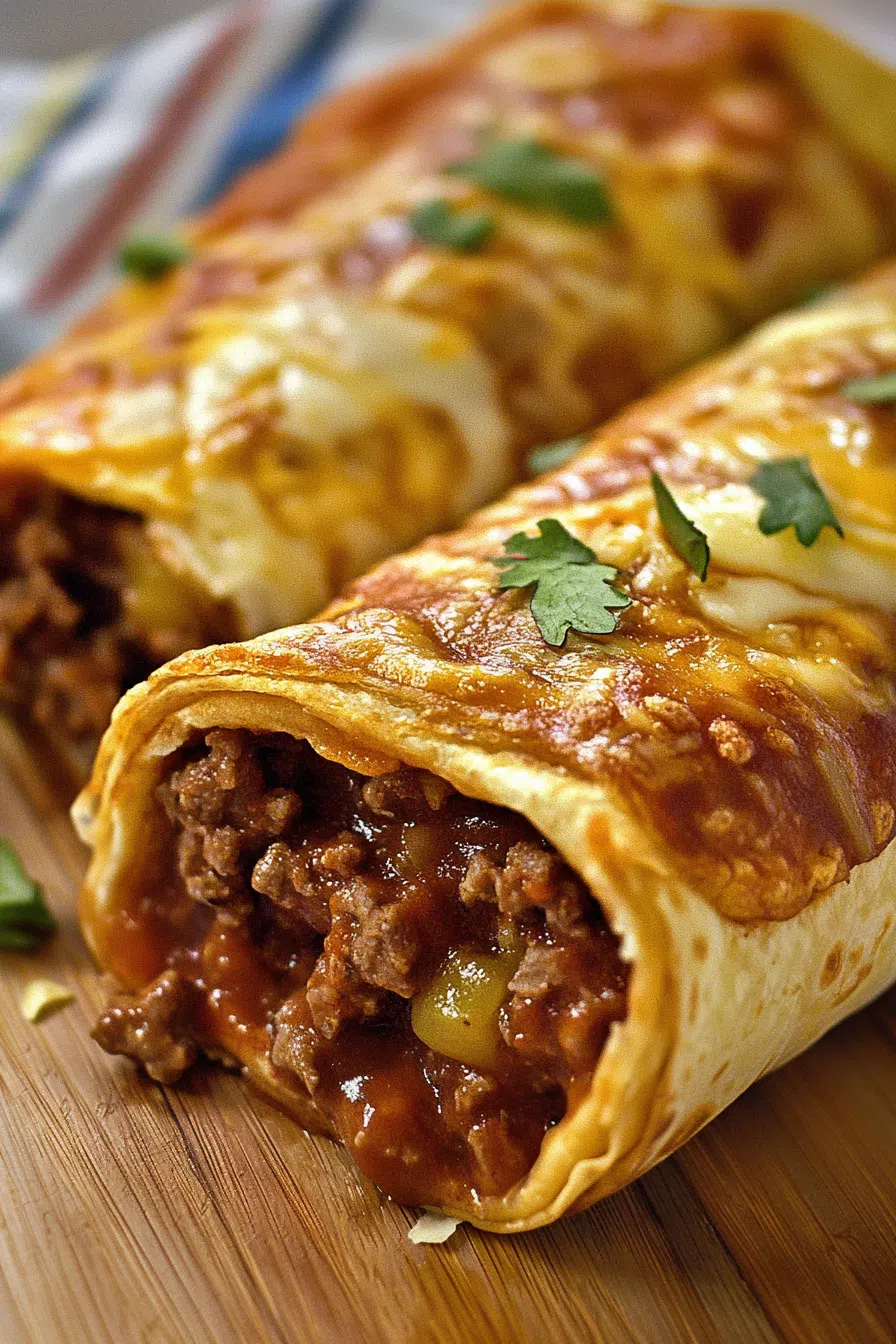
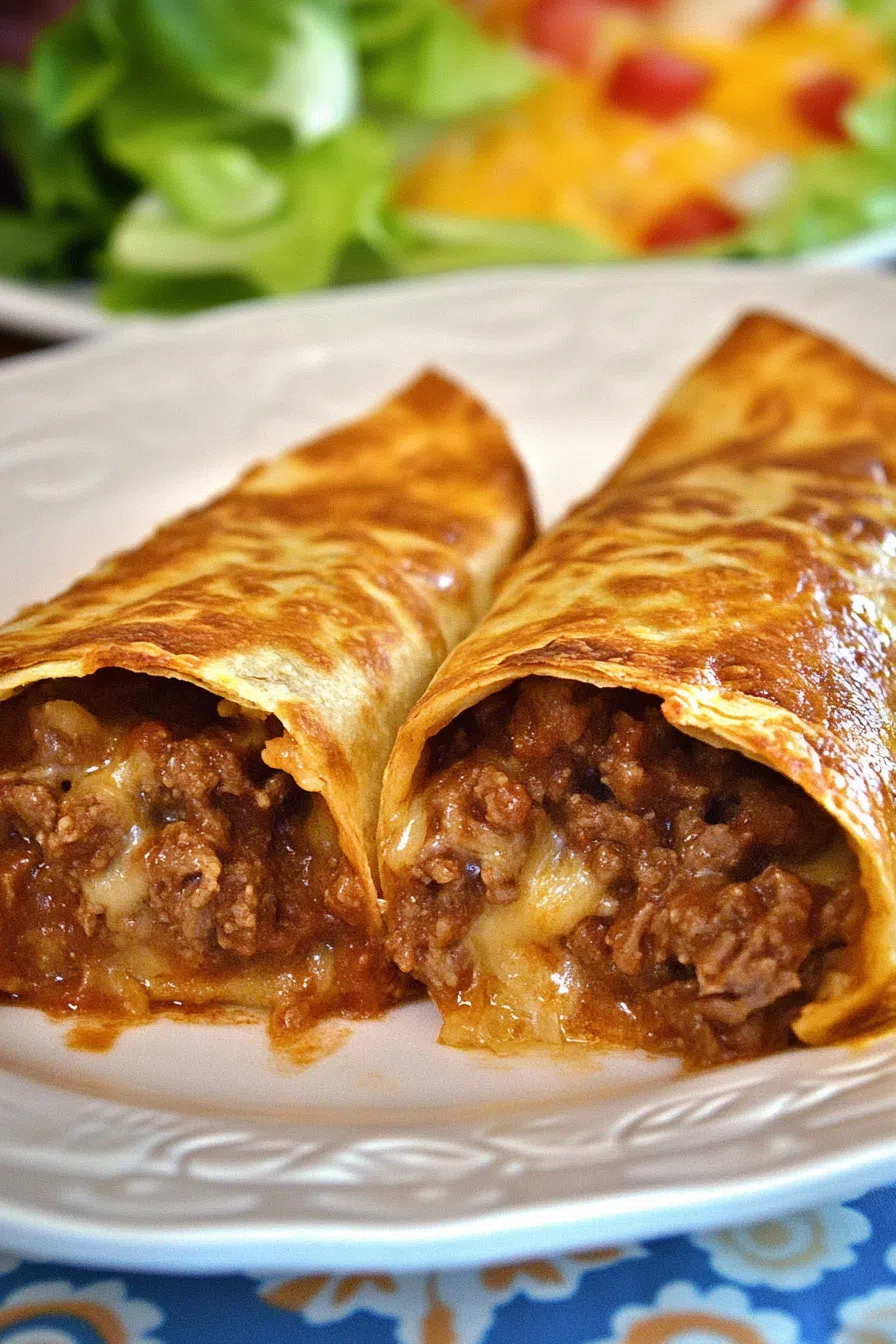
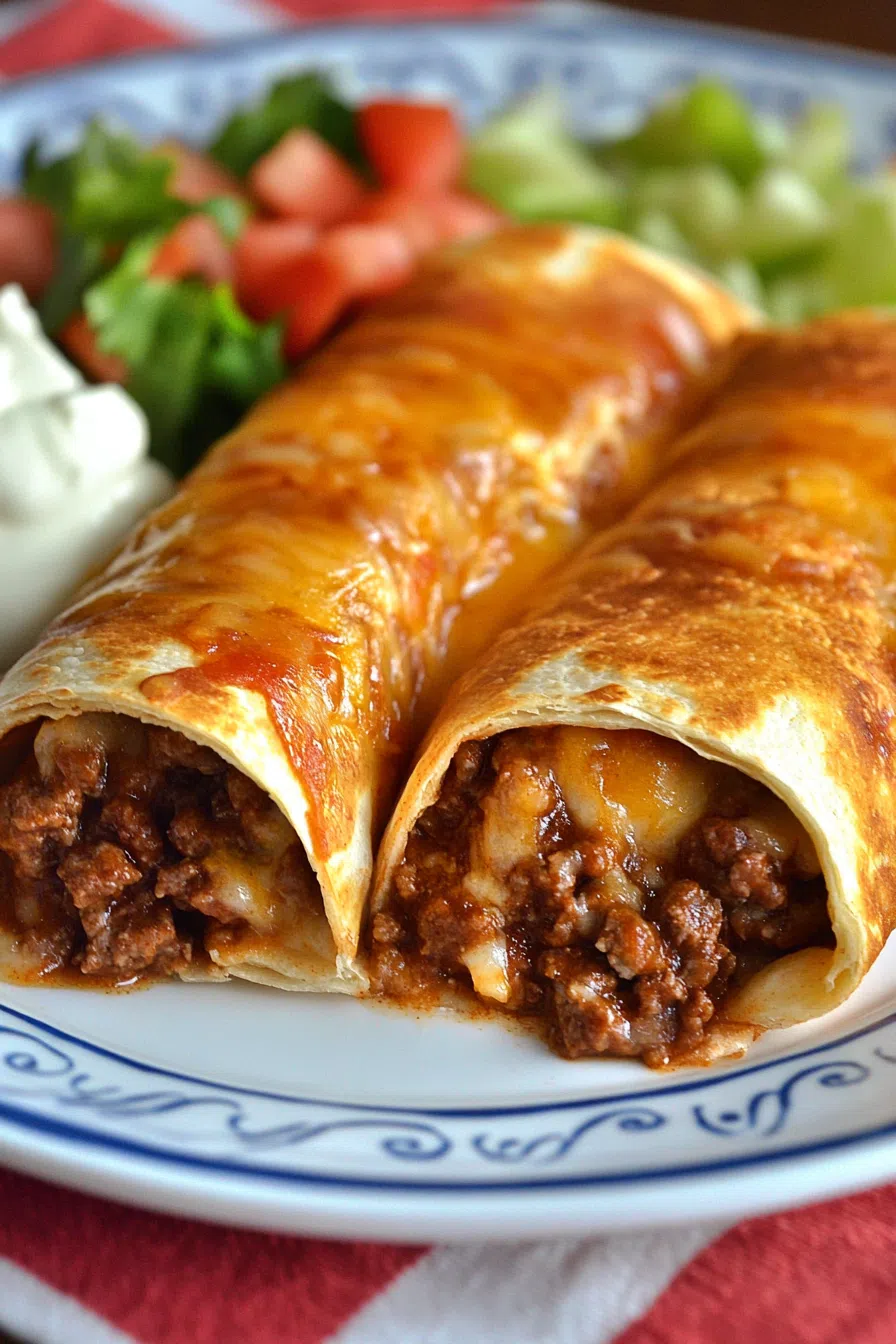
Cheesy beef and bean chimichangas made with ground beef, refried beans, tomato sauce, and jalapeños, pan-fried until golden and crispy.
You know how some recipes stick with you—not because they’re fancy or anything, but because they got you through something? That’s what these beef and cheese chimichangas are for me.


I made these during the first lockdown, when grocery runs were once-a-week max, stress levels were high, and everyone was suddenly home. All the time. I’d thrown together whatever I could find—frozen ground beef, a dusty can of beans, tortillas that were juuust past their prime (but not moldy, so… fair game). I remember standing in the kitchen, exhausted and borderline teary, thinking, this better taste good because I have nothing else.
And you know what? They did. They were crispy, cheesy, saucy, and surprisingly comforting. I remember my son dancing in his seat with the first bite and my husband just raising an eyebrow like, okay, this is legit. And me? I ate two and didn’t talk for ten minutes. Just… sat there, chewing and breathing. They didn’t solve the world’s problems, obviously, but they made that night better. Sometimes that’s enough.
Why You’ll Love This Beef and Cheese Chimichangas Recipe?
Well, they’re not trying to be Instagram-famous. They’re not on-trend or “elevated” or served on a slate board with a deconstructed drizzle of something unpronounceable. Nope. These are messy, golden brown, filled-to-the-brim tortilla pockets of beefy, cheesy joy. They’re the kind of meal that makes you sigh after the first bite and go, “Okay, this is dinner.”
They’re easy, adaptable, and deeply satisfying. And listen, I’m not saying you should ditch your taco Tuesday plans, but… if tacos are the reliable best friend, these chimichangas are the fun cousin who shows up uninvited, brings a piñata, and turns your week around.

Ingredient Notes:
Here’s the thing. The ingredients for beef and cheese chimichangas aren’t meant to impress. They’re meant to work. They’re pantry-friendly, forgiving, and let’s be honest—you probably have most of it already.
-
Ground beef (1½ lbs): Nothing complicated here. I’ve used lean, fatty, frozen, thawed. They all work. Just cook it and drain it. Boom.
-
Refried beans (1 can): They make the filling creamy and honestly? Kind of comforting. I’ve made them without and regretted it.
-
Onion & garlic: Chop ’em, toss ’em in. Don’t stress if your onion’s looking a little sad. It’ll cook down.
-
Chili powder, cumin, oregano: No need to measure perfectly. Just give it that warm Tex-Mex backbone.
-
Tomato sauce (24 oz total): Half for the filling, half for that saucy goodness on top.
-
Green chilis & jalapeños (canned, 4 oz each): Use both if you want a kick. Skip the jalapeños if your tastebuds prefer gentle encouragement.
-
Taco blend cheese (1½ cups): I’ve also used sharp cheddar, mozzarella, and a mystery mix once. All good.
-
10 flour tortillas (10-inch): Warm them a bit so they don’t tear. Cold tortillas are chaos.
-
Oil: You only need about an inch. We’re not deep-frying here—just giving it a golden jacket.
-
Salt & pepper: Always to taste. I go heavier on the pepper, but you do you.
How To Make Beef and Cheese Chimichangas?
Step 1: Cook the Beef and Build the Flavor
Toss your ground beef in a big pan and cook it until it’s brown and crumbly. Drain the grease (unless it’s a stressful day—then leave a little for flavor). Stir in the beans, onion, garlic, chili powder, cumin, oregano, and about ½ cup of your tomato sauce. It’ll look messy, and that’s okay. Let it all simmer together for 5 minutes. Your kitchen will start to smell like something worth waiting for.
Step 2: Warm Your Tortillas
Microwave ’em for like 30 seconds. Just enough to soften. I once skipped this and ripped three trying to roll them. Learn from my mistakes.
Step 3: Roll Like You Mean It
Scoop the filling into the center of each tortilla. Don’t overfill (even though it’s so tempting). Fold the bottom up, tuck in the sides, then roll it tight like a burrito. If it keeps unraveling, stab a toothpick through it. No shame.
Step 4: Fry Time
Pour oil into a skillet—just an inch or so. Heat it until a tortilla scrap sizzles when it hits the pan. Carefully lay in a chimichanga or two and cook until golden and crispy on both sides. Flip gently. Don’t walk away. These brown fast.
Step 5: Saucy Situation
While the chimis are cooling on a paper towel-lined plate (very important—no one likes a soggy bottom), pour the rest of the tomato sauce, green chilis, and jalapeños into a saucepan. Heat until warm and bubbly. Taste. Adjust if needed. Add a little sugar if it’s too acidic. Salt if it’s flat.
Step 6: Assemble & Devour
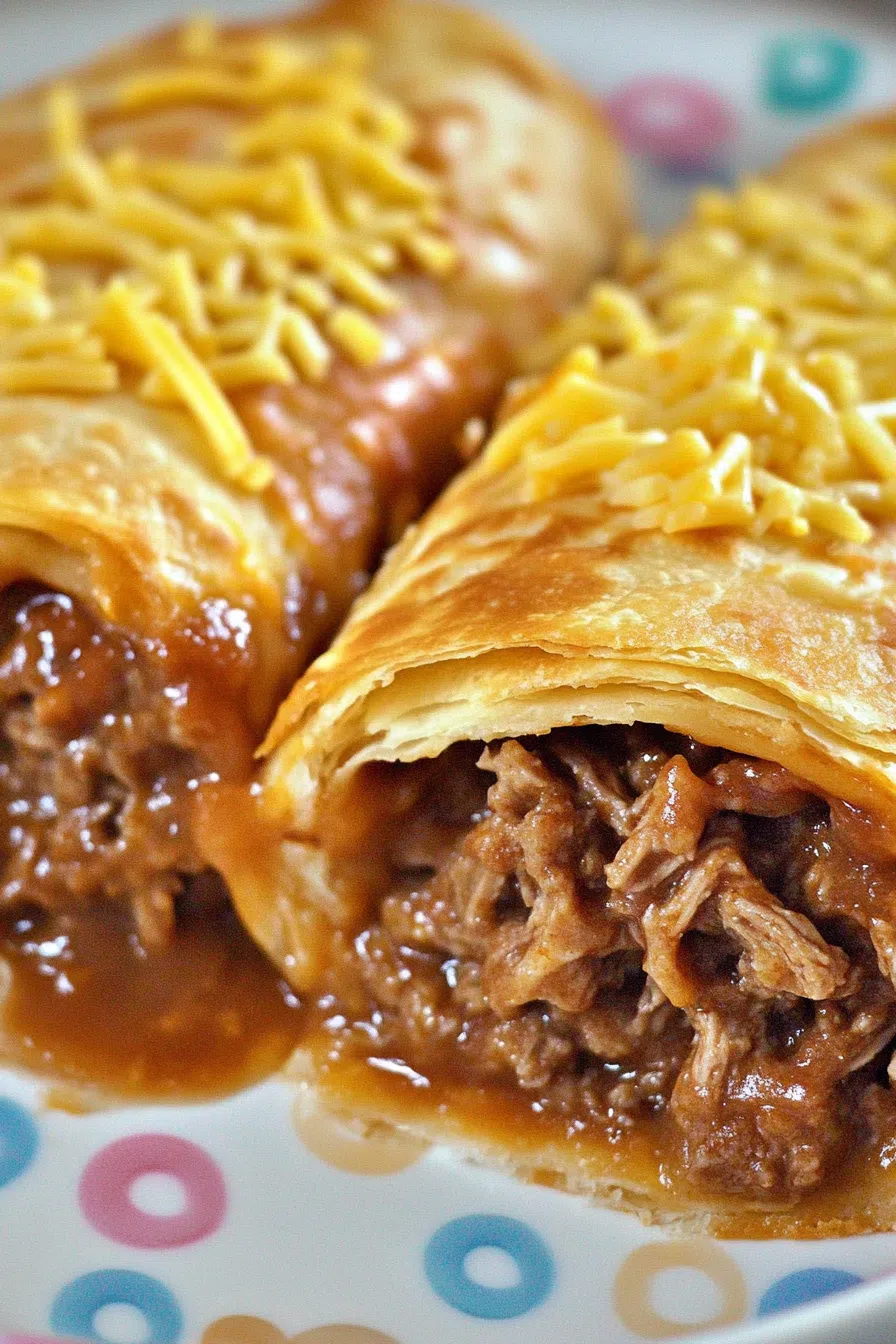
Place chimichangas on a plate. Spoon that spicy tomato sauce on top like a generous grandma. Sprinkle cheese. Maybe throw on some sour cream or guac if you’re feeling extra. Eat while still warm and crispy. It’s not the time to check emails, friend.
Want To Save This Recipe?
Storage Options:
Cool leftovers completely before storing (unless you’re into condensation ruining your crispiness—been there). Wrap in foil or pop in a container. Store in the fridge for 3–4 days.
Reheat in the oven at 350°F until warmed through. The microwave will work… but expect soft, not crispy.
To freeze: skip the sauce, wrap each chimichanga individually, and freeze for up to 2 months. Reheat in the oven and top with sauce later. Future you will thank you. Probably out loud.
Variations and Substitutions:
-
No beef? Use shredded rotisserie chicken. Or leftover steak. Or pulled pork. Heck, I once used chopped veggie dogs. It worked.
-
No beans? Leave them out or sub in black beans or corn.
-
Want it spicier? Add hot sauce or more jalapeños. Feeling bold? A splash of chipotle adobo sauce.
-
Vegetarian? Skip the meat and load it with sautéed peppers, onions, beans, and rice. Still great.
What to Serve with Beef and Cheese Chimichangas?
Because even stars need a supporting cast.
-
Cilantro lime rice – Light and zippy. Balances the richness.
-
Guac & chips – Obviously.
-
Simple salad with lime vinaigrette – It makes you feel like you’ve got your life together.
-
Jarritos or homemade lemonade – Refreshing and nostalgic.
-
A cold beer or a frozen margarita – Enough said.
Frequently Asked Questions:
Can I bake instead of fry?
Yep. Brush them with oil, place on a baking sheet, and bake at 400°F for about 20–25 minutes. They won’t be as golden, but they’ll still taste amazing.
Do they freeze well?
They do! Freeze before saucing. Reheat in the oven, then add sauce and cheese fresh.
Can I prep them ahead?
Absolutely. Make the filling, roll them, and refrigerate for up to 24 hours before frying or baking. Great for when you want dinner ready but not right now.
If you try these beef and cheese chimichangas, I hope they give you what they gave me—comfort, joy, a moment to breathe between bites. Maybe even a smile from someone across the table who usually just scrolls through dinner.
And hey, if you add something weird and it ends up being amazing? Tell me. Seriously. I live for that stuff.
Can’t wait to hear what you think.
Keep the Flavor Coming – Try These:


Beef and Cheese Chimichangas
Ingredients
- 1½ pounds ground beef
- 1 15 oz can refried beans
- ½ medium onion finely chopped
- 2 teaspoons minced garlic
- 2 teaspoons chili powder
- 1 teaspoon ground cumin
- ½ teaspoon dried oregano
- Salt and black pepper to taste
- 10 10-inch flour tortillas
- 24 ounces tomato sauce
- 4 ounces canned diced green chiles
- 4 ounces canned chopped jalapeños
- 1½ cups shredded taco blend cheese
- Oil for frying
Instructions
Prepare the beef filling:
- In a large skillet over medium-high heat, brown the ground beef until fully cooked. Drain any excess fat. Add the refried beans, chopped onion, minced garlic, ½ cup of the tomato sauce, chili powder, cumin, oregano, salt, and pepper. Stir the mixture thoroughly and cook for an additional 5 minutes, allowing the flavors to meld and the onion to soften slightly.
Warm the tortillas:
- Place the flour tortillas on a microwave-safe plate and warm them in the microwave for 30–40 seconds. This will make them more pliable and easier to roll without tearing.
Assemble the chimichangas:
- Divide the beef mixture evenly among the tortillas, placing the filling in the center of each. Fold one end of the tortilla over the filling, tuck in the sides, and continue to roll it tightly to form a sealed packet. Secure the seam side with a toothpick if needed.
Fry the chimichangas:
- Pour approximately 1 inch of oil into a deep-sided skillet. Heat the oil over medium-high heat. Carefully place the rolled chimichangas seam-side down into the hot oil. Fry each chimichanga until it is golden brown and crispy on all sides, turning as needed. Once cooked, transfer to a paper towel-lined tray to drain excess oil.
Prepare the sauce:
- In a separate saucepan, combine the remaining tomato sauce, diced green chiles, and chopped jalapeños. Heat the mixture over medium heat until warmed through. Season with additional salt and pepper to taste if desired.
Serve:
- Place the cooked chimichangas on serving plates. Ladle the warmed sauce over the top of each chimichanga, then sprinkle generously with shredded cheese. Serve immediately while hot.
Notes
I’m Bitty, owner of nodashofgluten.com, where I share simple, delicious recipes for all tastes, including gluten-free. Check out my “About Me” page for more info!