

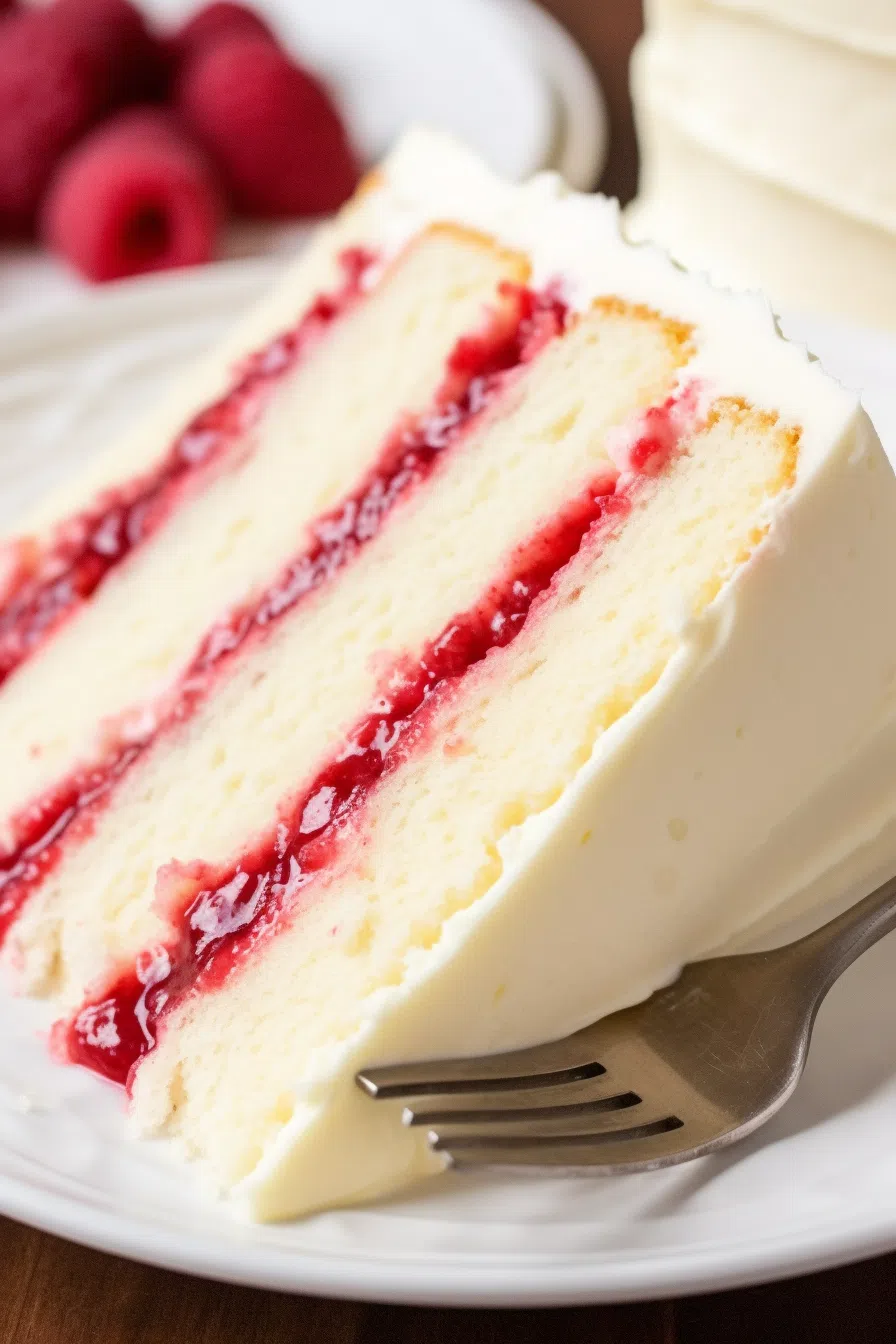
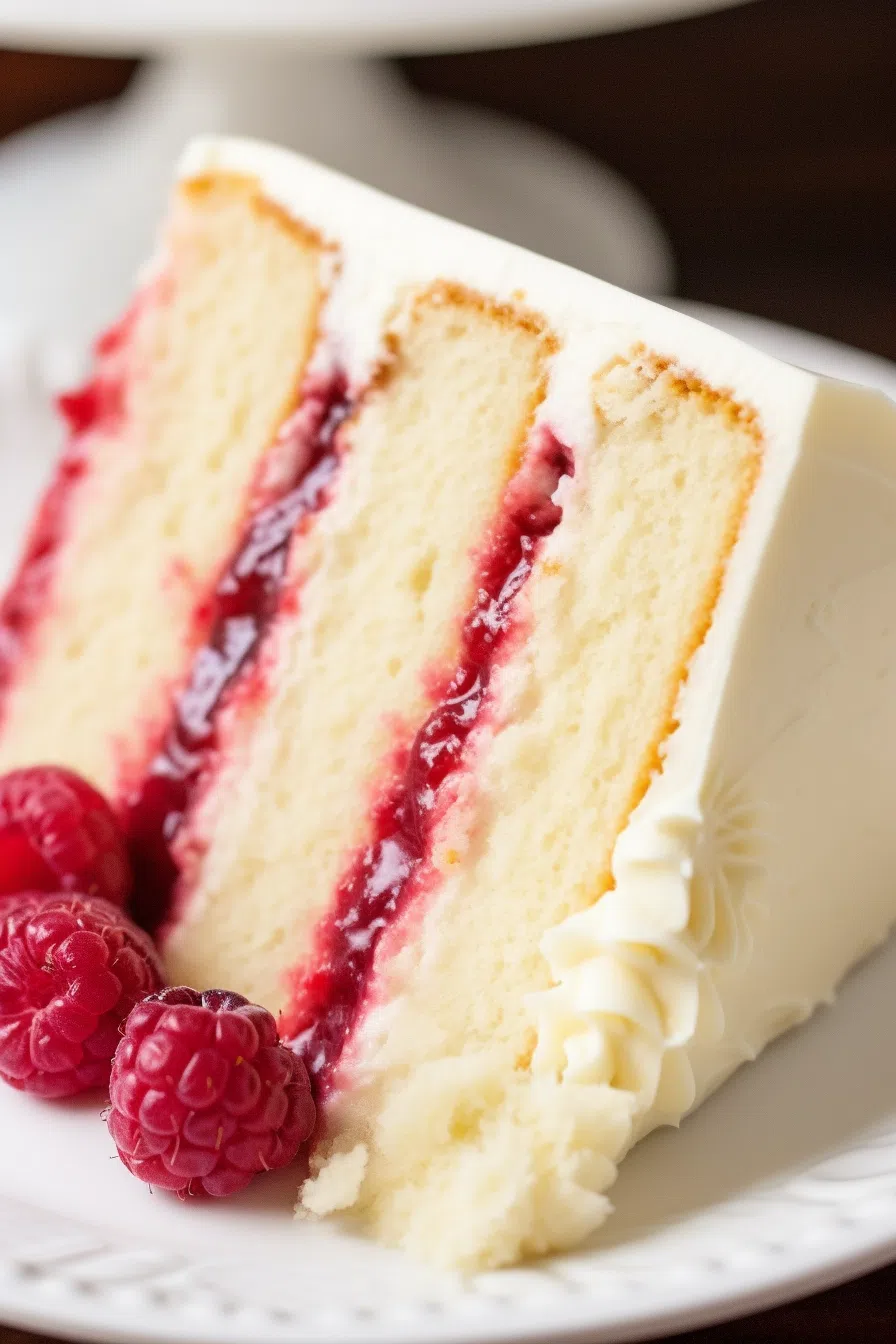
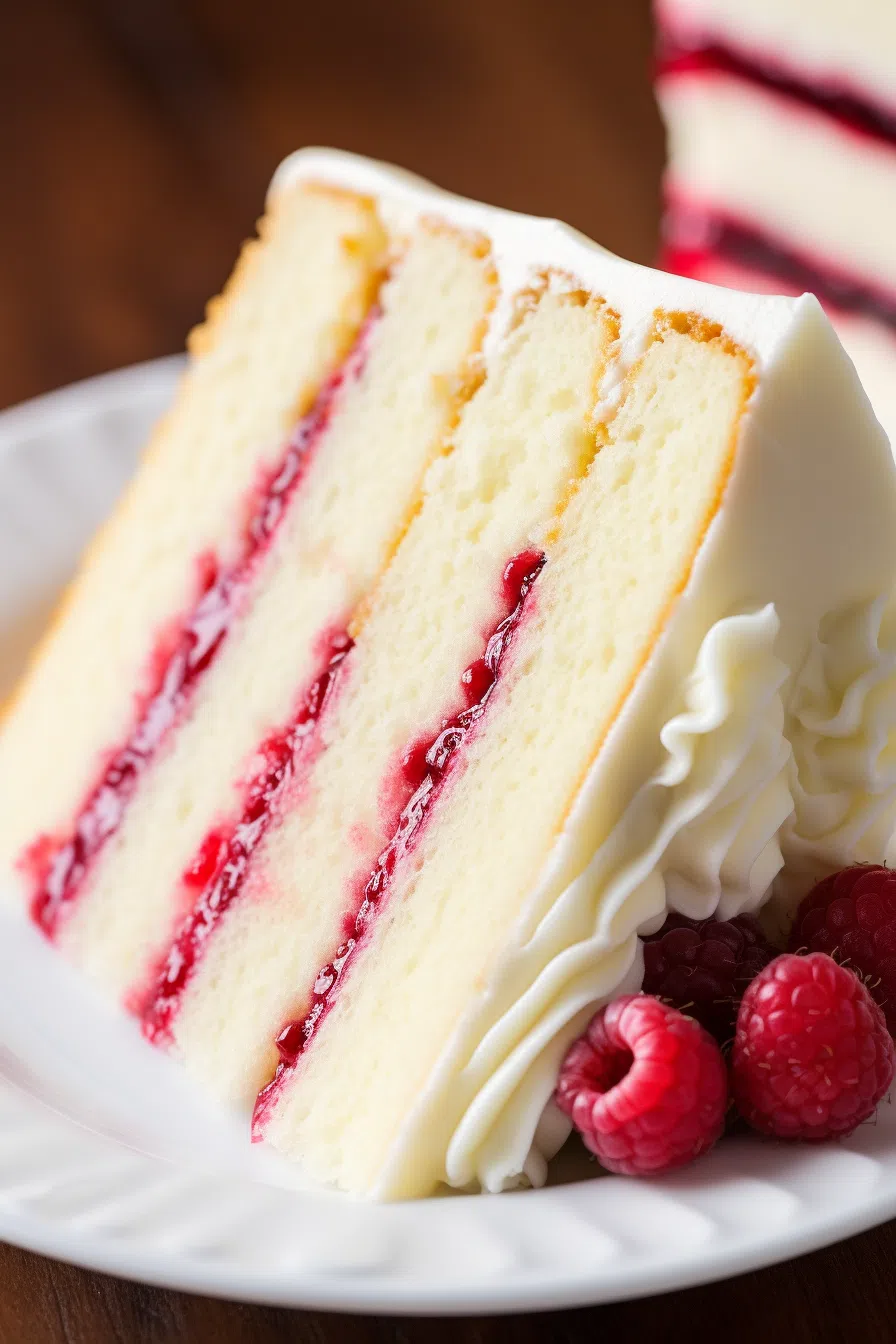
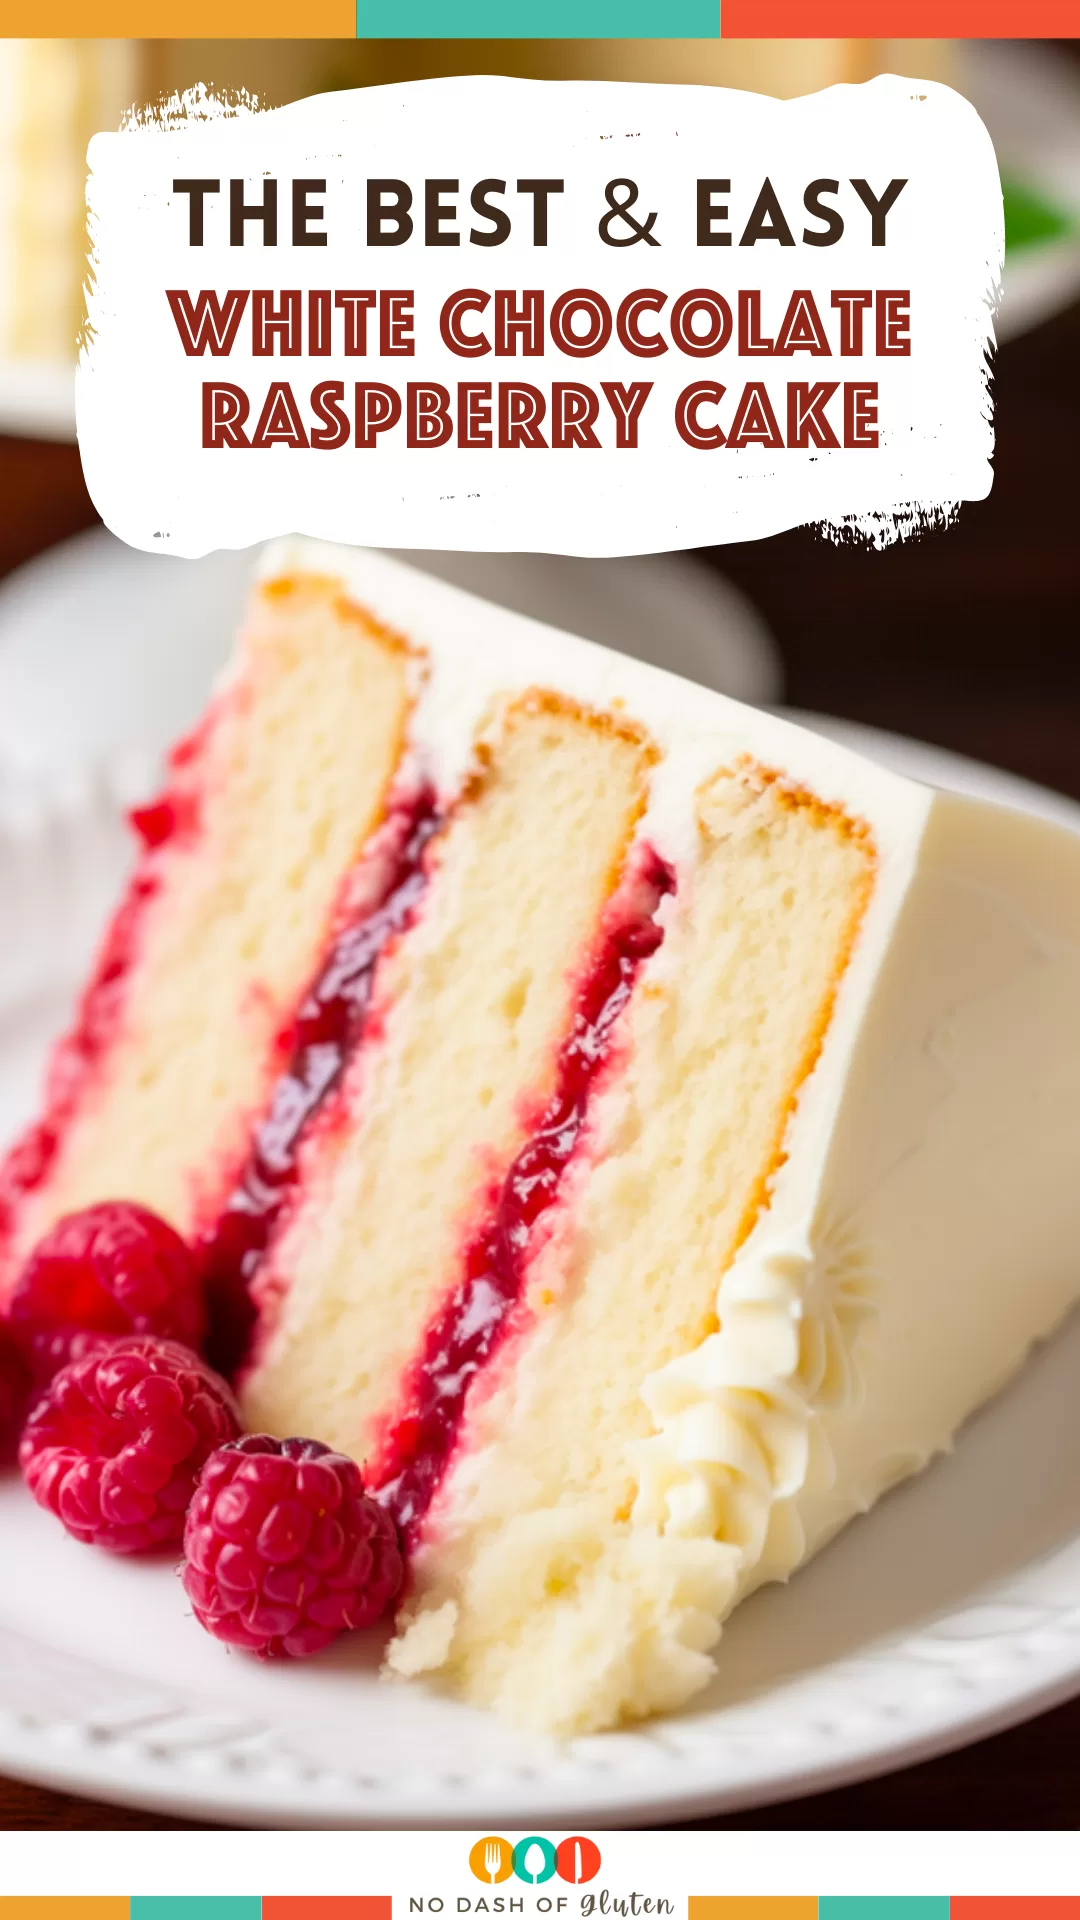
This White Chocolate Raspberry Cake is made with white cake, raspberry filling, and a creamy white chocolate frosting—pure heaven!


You know that feeling when a dessert just gets you? Like, you didn’t even know you were in the mood for cake until this dreamy combo of tart raspberries and rich white chocolate came into your life? That’s exactly how I felt the first time I baked this White Chocolate Raspberry Cake. I was in the middle of a gloomy Tuesday afternoon, craving something, and next thing I knew—raspberries, white chocolate, lemon zest… boom. A cake was born.
And let me tell you—this one? She’s a showstopper. I made it for a brunch once and someone called it “a bakery masterpiece,” which is a lot coming from someone who typically swears by boxed mix. But really, it’s that balance of flavors—the brightness of the raspberries, the soft lemon in the cake, that creamy frosting—it’s basically a flavor hug.
Why You’ll Love This White Chocolate Raspberry Cake Recipe?
This isn’t just another pretty cake—it’s a celebration of contrast. The sweet white chocolate and the tangy raspberry swirl together like they were made for each other. The cake itself is super tender thanks to the sour cream (never skip the sour cream!), and the homemade raspberry filling actually tastes like real fruit. The frosting is so silky you could eat it with a spoon. It’s elegant enough for a bridal shower but cozy enough for a Sunday afternoon with a mug of coffee.
Ingredient Notes:
Before you panic at the length of the ingredient list, hear me out. Each part is simple—and totally worth it.
-
Raspberries: Use fresh or frozen. Just don’t skip the lemon zest—it’s tiny but mighty.
-
Cake Flour: This keeps the cake soft and tender. All-purpose can work, but cake flour really does make a difference.
-
Sour Cream: Adds moisture and a hint of tang. Don’t sub it out unless you really have to.
-
White Chocolate Chips: Go for the good stuff—trust me, you’ll taste the difference in the frosting.
-
Heavy Cream: Helps the frosting stay light and whipped—not dense and overly sweet.
-
Simple Syrup: Keeps the cake layers moist. Yes, it’s an extra step. Yes, it’s worth it.
How To Make White Chocolate Raspberry Cake?
Step 1. Make the Raspberry Filling
Toss your raspberries, sugar, lemon zest, and lemon juice into a pot. Add water and simmer until it smells like a summer dream. Strain it, thicken with cornstarch, and chill. The hardest part? Not eating it all with a spoon before it hits the cake.
Step 2. Bake the Cake Layers
Cream the butter and sugar until fluffy like clouds, then add egg whites. Alternate your dry ingredients with the sour cream, lemon, and vanilla mixture until it’s all smooth and luscious. Divide it up into pans and bake. Your kitchen will smell like a bakery, guaranteed.
Step 3. Brush on the Simple Syrup
Mix sugar and water until it dissolves. Brush this over your cake layers once they’re cool—it locks in moisture and flavor like magic.
Step 4. Whip Up the White Chocolate Buttercream
Beat your butter, add lemon and vanilla, then slowly whip in powdered sugar, cream, and your melted white chocolate. This stuff is dangerously good.
Want To Save This Recipe?
Step 5. Assemble and Frost
Brush each cake layer with syrup, then build your cake with layers of buttercream and that tangy raspberry filling. Frost the whole thing and chill. Decorate however your heart desires—fresh berries, white chocolate curls, a little edible glitter if you’re feeling fancy.
Storage Options:
This cake keeps really well. Store it in the fridge, covered, for up to 4 days. Want to freeze it? Wrap individual slices in plastic wrap and foil, and they’ll be good for up to 2 months. Just thaw in the fridge overnight.
Variations and Substitutions:
-
Chocolate Fan? Sub the white cake with a light chocolate cake for a raspberry truffle vibe.
-
No sour cream? Use full-fat Greek yogurt instead.
-
Don’t have raspberries? Strawberries or blackberries work beautifully too—just strain the seeds.
-
Make it gluten-free: Swap the cake flour with a good 1:1 gluten-free flour blend.

What to Serve with White Chocolate Raspberry Cake?
-
A chilled glass of rosé or a hot cup of earl grey tea
-
A scoop of vanilla bean ice cream for extra decadence
-
Fresh raspberries on the side for a pop of color and flavor
Frequently Asked Questions:
Can I make this cake ahead of time?
Totally! Bake the cake layers and make the filling the day before. Assemble the next day—it actually helps the flavors deepen.
Can I use raspberry jam instead of making the filling?
You could, but homemade really does make this special. If you’re short on time, just make sure your jam isn’t too runny.
How do I keep my frosting from melting?
Use room temperature butter and make sure your white chocolate has cooled before adding it in. Also, refrigerate the cake before serving if your kitchen is warm.
I’d love to know if you give this one a try!
Drop a comment, tag me in your pics, or just shout from your kitchen window, “I made the cake!”—I’ll feel it in my soul.
Keep the Flavor Coming – Try These:


White Chocolate Raspberry Cake
Ingredients
Raspberry Cake Filling:
- 3 c of fresh or frozen raspberries 375 grams
- 2/3 c granulated sugar 133 grams
- 2 teaspoon lemon juice 8 grams
- 2 teaspoon fresh lemon zest 5 grams
- 1/4 c + 2 tablespoon water divided (90 grams) - first part added to raspberry mixture, second part used to make the cornstarch slurry
- 2 tablespoon cornstarch 15 grams
White Cake Recipe:
- 1 c unsalted butter room temperature (226 grams)
- 3 c granulated sugar 600 grams
- 1 c pasteurized egg whites from a carton or 7 egg whites room temperature (235 grams)
- 3 c cake flour 360 grams
- 2 1/2 teaspoon baking powder 10 grams
- 1 teaspoon fine salt 6 grams
- 1 1/2 c full-fat sour cream room temperature (360 grams)
- 1/4 c vegetable oil 56 grams
- 2 tablespoon lemon juice 24 grams
- 2 teaspoon fresh lemon zest 5 grams
- 1 teaspoon vanilla extract 4 grams
Simple Syrup:
- 2/3 c water 160 grams
- 2/3 c granulated sugar 133 grams
White Chocolate Buttercream Frosting:
- 2 c unsalted butter room temperature (452 grams)
- 2 tablespoon lemon juice 24 grams
- 2 teaspoon fresh lemon zest 5 grams
- 2 teaspoon vanilla extract 8 grams
- 1 teaspoon fine salt 6 grams
- 7 c powdered sugar 875 grams
- 1/3 c heavy cream or whipping cream 80 grams
- 1 1/2 c white chocolate chips melted and cooled (260 grams)
Instructions
Raspberry Filling:
- In a saucepan combine raspberries, sugar, lemon juice, lemon zest and a portion of the water. Bring it to a boil. Then let it simmer for 10 to 15 minutes.
- Strain the mixture. Then add a mixture of cornstarch and the remaining water. Boil it again until it thickens.
- Let it cool down and refrigerate.
White Cake Layers:
- Preheat the oven to 325°F/163°C. Prepare your cake pans by lining them with parchment paper and greasing them.
- Cream together butter and sugar then add the egg whites.
- In a bowl whisk together the ingredients (flour, baking powder, salt).
- Alternate adding the ingredients and wet ingredients (sour cream, oil, lemon juice, lemon zest, vanilla) to the butter mixture.
- Divide the batter among your pans. Bake for around 40 to 42 minutes.
- Once baked let the cakes cool down before leveling their tops and sides.
Simple Syrup:
- Boil water, along with sugar until all of the sugar dissolves. Let it cool down.
White Chocolate Frosting:
- Start by beating the butter in a bowl. Then add lemon juice, lemon zest, vanilla extract, and salt to it.
- Gradually add sugar while also adding cream. Finally mix in melted chocolate.
Assembly:
- Brush each cake layer with syrup.
- Layer your cakes by spreading frosting between them along, with raspberry filling.
- Apply a coat of frosting over the assembled cake to seal in any crumbs before refrigerating it for some time.
- Apply the coat of frosting. Adorn it according to your preferences.
Notes
I’m Bitty, owner of nodashofgluten.com, where I share simple, delicious recipes for all tastes, including gluten-free. Check out my “About Me” page for more info!

12 Responses
We are on 45 minutes of baking time and still have a ways to go since the center is still mobile. I only used two baking pans, maybe it should be in the instructions to divide between three and these are starting to flow over the top. I think it is going to be a really good cake.
Hi Debbie! Thank you so much for your feedback—I truly appreciate it. Baking times can vary depending on the oven and how thick the cake layers are, so it makes sense that using two pans instead of three could cause a longer baking time and possible overflow. I’ll add a note in the recipe about dividing the batter into three pans to prevent this from happening to others.
I’m glad you’re still excited about how the cake is turning out—hopefully, all that extra bake time just means extra deliciousness in the end! Let me know how it turns out once it’s finished baking. 😊
I’m going to make this cake for my sister’s gender reveal but I’m wondering if I make it the day before how do I store the cake? In the fridge will it still taste fresh for the night after?
Thank you
Hi Mariah! 😊
Making this cake the day before is a great idea! To keep it fresh, I recommend storing it in the fridge. Just cover it well with plastic wrap or store it in an airtight container to protect it from absorbing any fridge odors. This will help maintain its freshness. Before serving, you can take it out of the fridge about an hour in advance to let it come to room temperature, which brings out the flavors even more.
Hope it turns out beautifully for the big reveal! 🎉
The cake was a huge hit for the gender reveal. Everyone absolutely loved it. We found that it was a little more of a dense texture (kinda reminded me of a pound cake) instead of moist and light. I used my stand mixer to make the cake, could this be an over mixing issue? The batter was also very thick. Wondering if you know there’s something I did wrong. Thank you
Could you use meringue powder, and substitute of the egg whites?
Yes, you can use meringue powder as a substitute for egg whites in the recipe. Just follow the instructions on the meringue powder packaging to replace the egg whites with the equivalent amount of meringue powder and water. This will give you a similar texture and stability in your cake layers.
This is my second time baking this cake. SUPER tasty. It’s always a hit. The simple syrup in between layers is a game changer in making it moist. Thank yoouuuu!!! <3
Hello can I use all purpose flour instead of cake flour?
I am planning to do this cake .. looks delicious!
I dont see anywhere the size of the pan for this recipe. Could you please let me know.
Thanks
WHAT SIZE PANS?
Hi Lora! I use 8-inch round cake pans for this cake—they give you those beautiful tall layers that really showcase all the raspberry filling and frosting.