These Tom Thumb Bars mix dark brown sugar, coconut, nuts, and a buttery crust into the coziest, chewiest dessert you didn’t know you needed.
Let me tell you something weird: I didn’t mean to make Tom Thumb Bars.
I was digging through a very chaotic drawer of recipes—like, old folded papers, splattered magazine clippings, one index card with a cryptic “bake ‘til it looks done?” instruction—and I found a little notebook from my grandma. The kind of notebook that smells faintly like cinnamon and time.
There it was. Tom Thumb Bars. Underlined twice, in blue pen. No explanation. I didn’t remember ever eating them, and the name honestly made me laugh. But I had everything on hand—flour, coconut, eggs, brown sugar—so I thought, what the heck?
Baked them once. Brought them to my neighbor. She texted me: what are these and can I marry them?


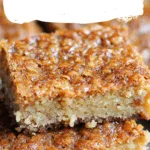
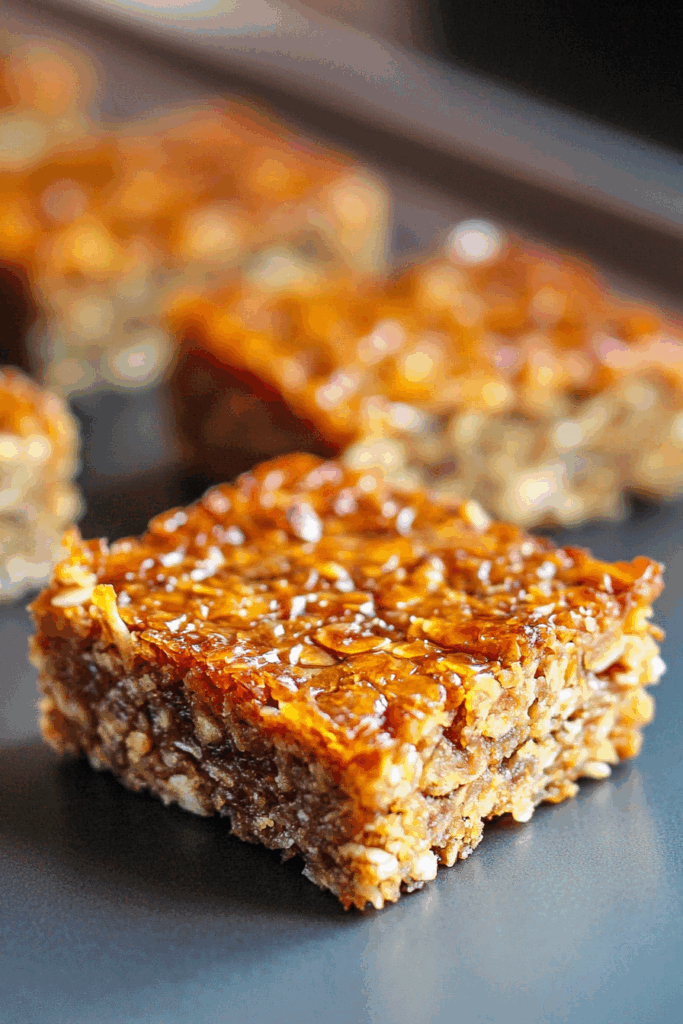
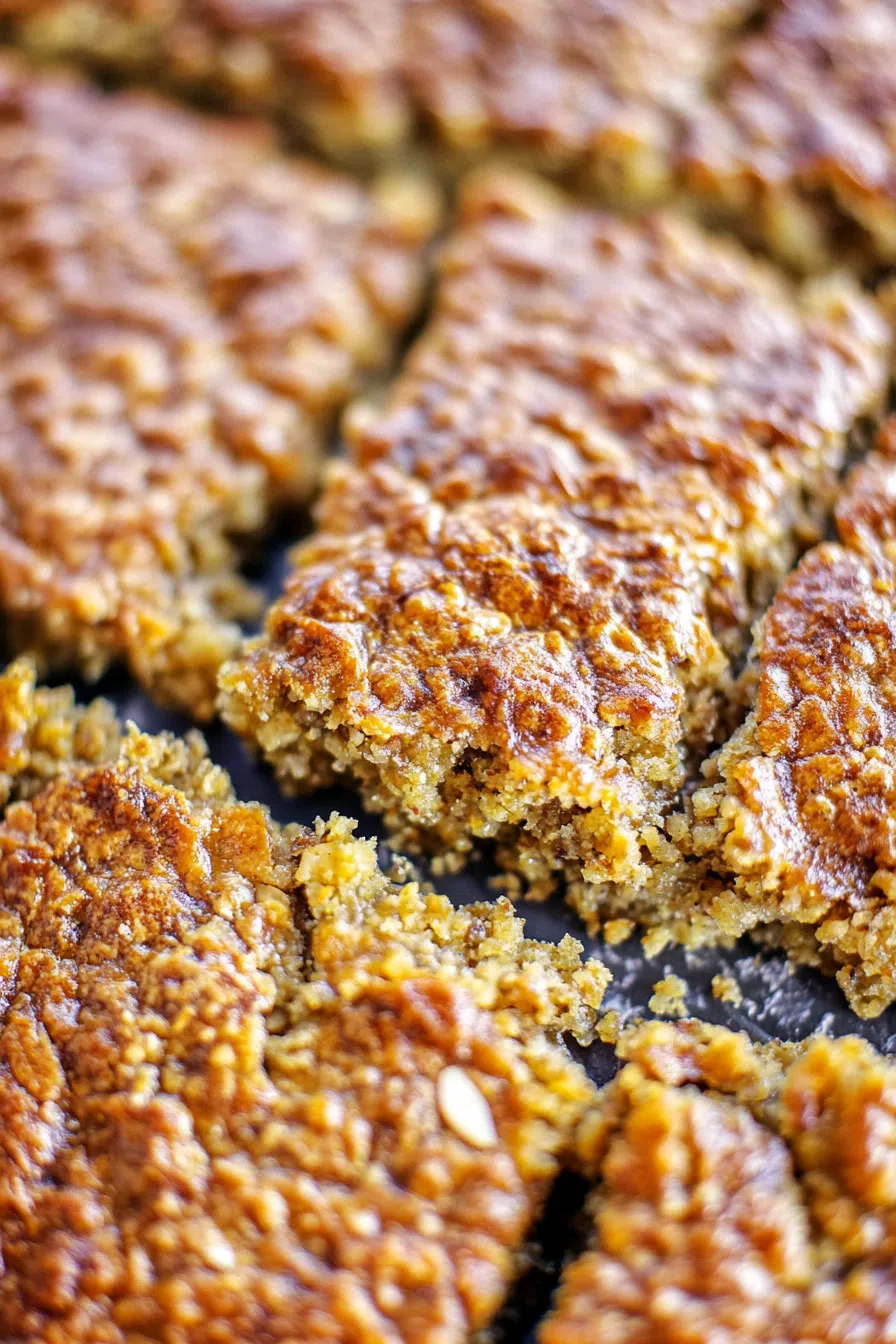
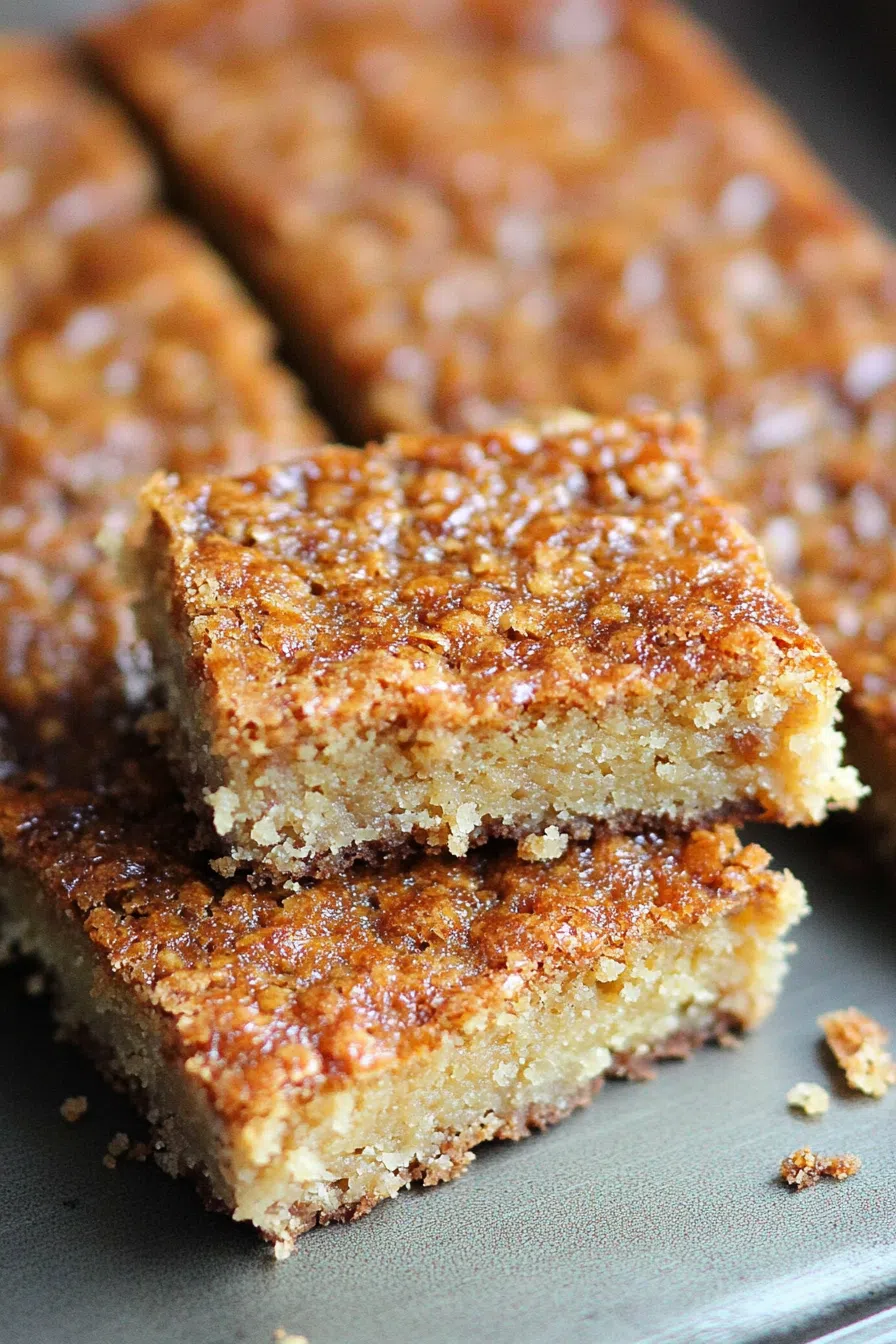
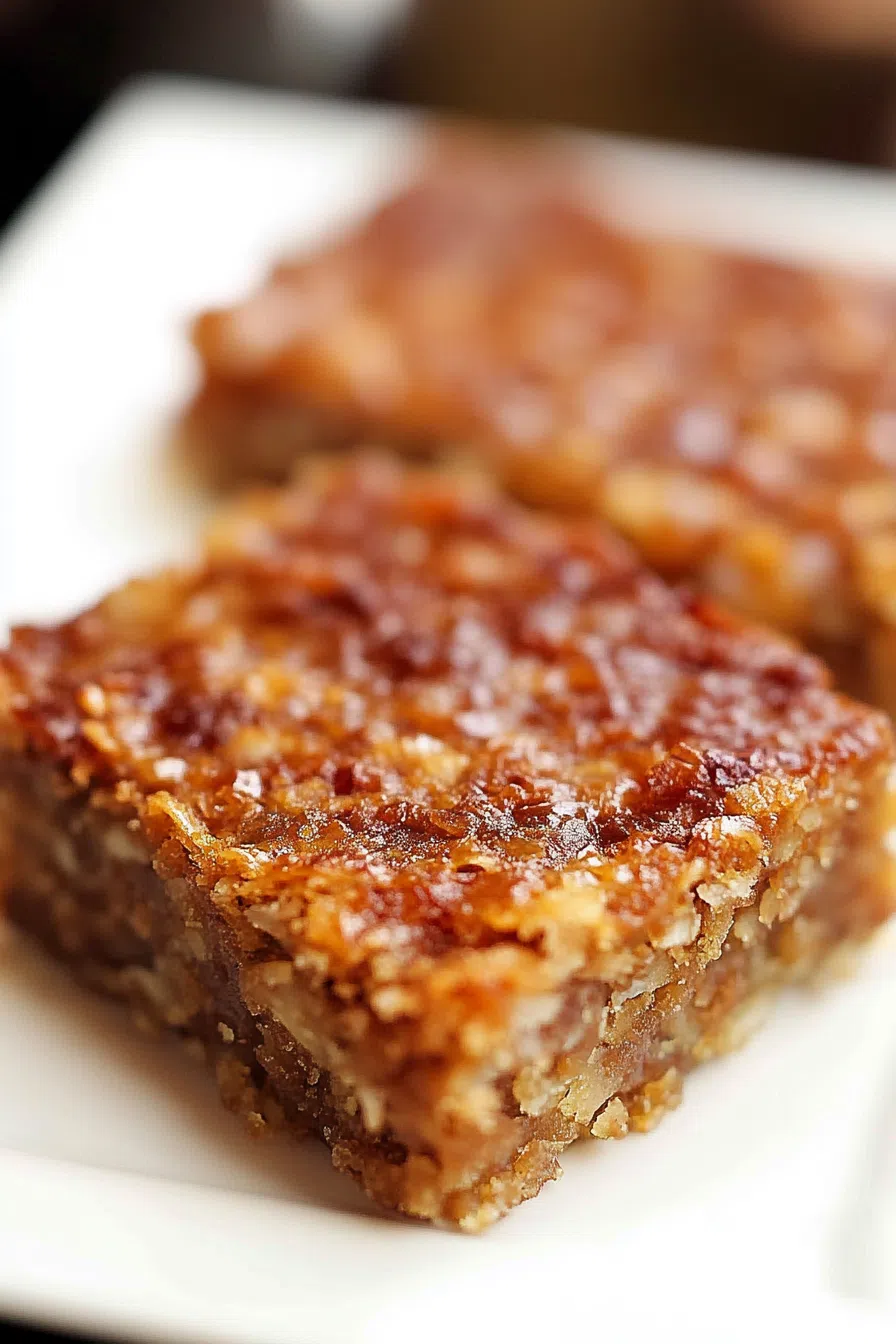
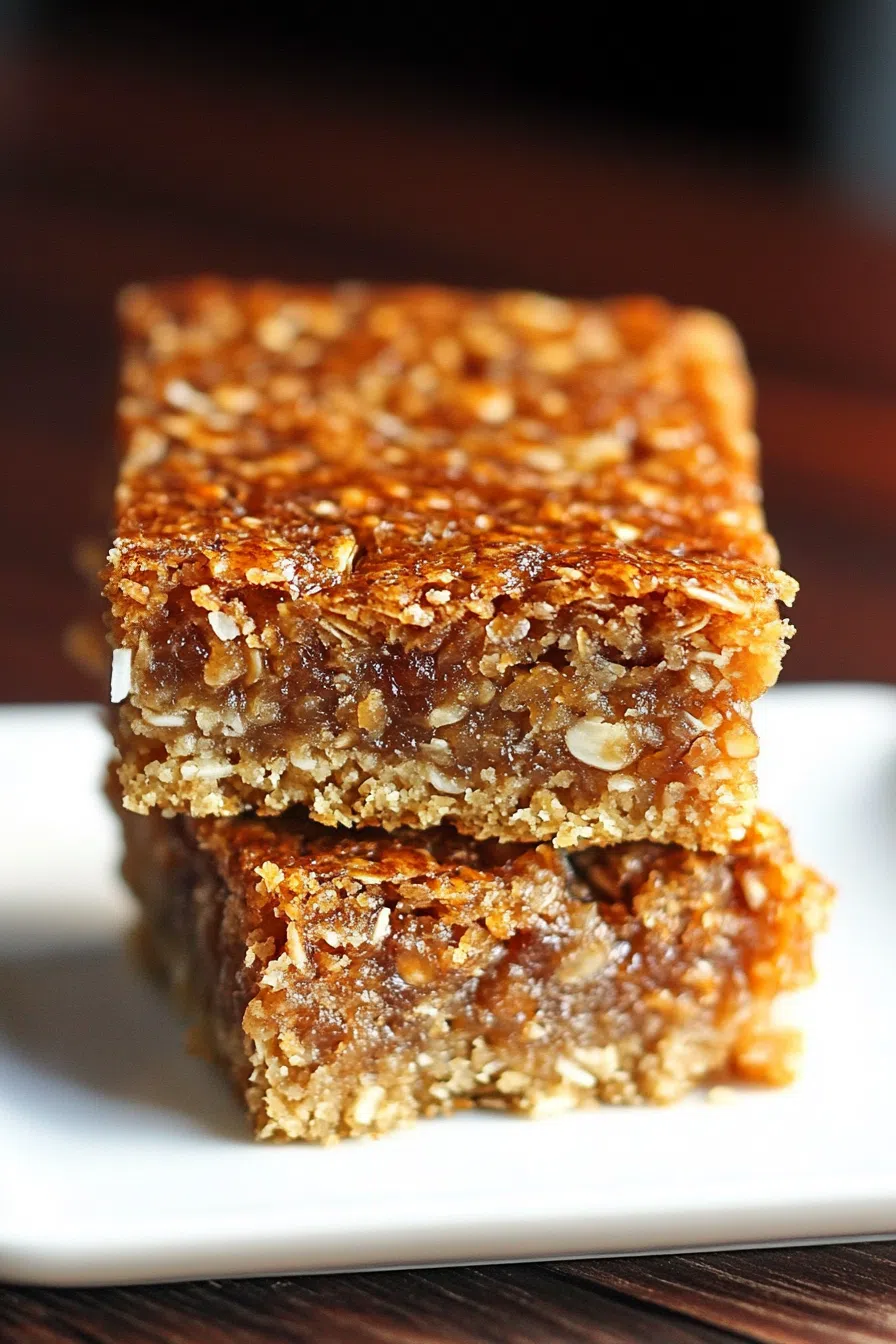
Made them again. This time I paid attention. I realized the edges get all chewy and caramelized, like the crust of a coconut macaroon had a love child with the top of a pecan pie. The middle stays soft, almost creamy. The crust underneath? Buttery and subtle, like it’s just trying to hold everything together without stealing the show.
I still don’t know who Tom Thumb was, or what he has to do with dessert. But these bars? These are staying.
Why You’ll Love This Tom Thumb Bars Recipe?
You know those desserts that don’t look fancy but totally blindside you with flavor? That’s these. Tom Thumb Bars are old-school, sure, but they hit in a way modern desserts don’t always pull off. They’re not too sweet, not too fussy. You make a crust, mix up a topping, bake, done. And somehow, it feels like you did something special.
I don’t even know how to describe the flavor without sounding dramatic—it’s cozy, sticky, chewy, buttery… a little nutty (aren’t we all?), and the coconut gives it that toasty crunch around the edges that’s borderline addictive.
They’re also ridiculously portable. Take them to a bake sale, a picnic, or honestly, eat one over the sink in your pajamas while everyone’s asleep. No judgment. Been there.

Ingredient Notes:
I know ingredient notes are supposed to be practical, but I’m gonna talk to you like a person here.
-
Butter – Real butter, softened. Salted or unsalted? Honestly? I’ve used both. Didn’t ruin anything.
-
Dark brown sugar – You could use light, sure. But dark brown gives it that rich, almost molasses-y depth that makes it feel like autumn even in June.
-
Flour – All-purpose. Simple. It holds the crust together and keeps the topping from collapsing into goo. Not that goo would be the worst thing.
-
Salt – Yes, even dessert needs salt. It cuts the sugar and makes everything more… alive? Balanced? You get it.
-
Eggs – The glue. They puff the topping just enough to give it structure but keep it soft.
-
Vanilla extract – Optional if you forget it, but don’t skip it on purpose. It warms things up.
-
Sweetened shredded coconut – The kind you find in a bag near the chocolate chips. You want that sticky, chewy sweetness.
-
Chopped nuts – Pecans? Yes. Walnuts? Also yes. No nuts? Still good. Allergic? Please don’t sue me.
How To Make Tom Thumb Bars?
Step 1: Preheat and pretend you cleaned your kitchen
Set the oven to 325°F. Grease a 9×13-inch pan. I usually just swipe it with butter and call it a day. Parchment is great if you want easier cleanup or sharper bar edges, but let’s be honest—sometimes I skip it.
Step 2: Crust time
Mix together your butter and brown sugar in a big bowl until it’s smooth-ish. Don’t overthink it. Stir in the flour and salt until it forms something that looks like sandy dough. Press it into the bottom of your pan. It’ll look too thin, but it’s not. Just trust me. Bake for 13–15 minutes, until it starts to look golden around the edges.
Step 3: While that’s baking, mix the good stuff
In another bowl (or the same one, if you’re low on clean dishes), whisk together brown sugar, a little flour, and baking powder. Add in the eggs and vanilla and whisk until it gets a little airy. Not whipped—just lighter. Fold in coconut and nuts.
Step 4: Layer it up
Take the crust out. Pour the topping right on top, spread it gently so it reaches the corners. Don’t worry if it looks a little messy. Into the oven it goes, another 20–25 minutes. Watch for those toasty golden edges. That’s when you know it’s ready.
Step 5: Cool. Wait. Then slice (and devour)
Let them cool completely. Not warm. Not “just set.” Cooled. If you cut too early, you’ll have a gooey (delicious) mess. If you wait, you’ll get clean slices and those magical chewy edges.
Want To Save This Recipe?
Storage Options:
They keep great in an airtight container for 3–4 days. Fridge or counter is fine—fridge makes them extra chewy, which honestly I kinda love.
And yes, you can freeze them. Wrap ’em up, pop them in a container, and they’ll last a couple months. Just don’t tell your future self they’re in there unless you’re ready to commit.
Variations and Substitutions:
These Tom Thumb Bars are old-school, but they’re not stuck in their ways.
-
Swap pecans for walnuts. Or vice versa. Or skip ‘em if they’re not your thing.
-
Add chocolate chips. Semi-sweet works great. I wouldn’t do white chocolate here, but that’s just me.
-
Try a gluten-free flour blend. One-to-one subs work just fine. These bars don’t need to rise or act fancy.
-
Toast the coconut. You’ll get a little extra nuttiness. Just don’t burn it. I’ve done that. It’s not great.
What to Serve with Tom Thumb Bars?
These are good straight from the pan. But if you want to get fancy-ish:
-
Warm one up and put a scoop of vanilla ice cream on top
-
Eat with strong coffee (iced or hot—whatever your vibe is)
-
Pair with berries if you need to pretend it’s a balanced dessert
-
Crumble one over yogurt. Weird? Maybe. Delicious? Yup.
Frequently Asked Questions:
Are these like magic bars?
Kinda. But without the chocolate or graham crust. More caramel, more chew. They feel like the cooler, quieter cousin of the magic bar.
Do I really need to cool them before slicing?
Yes. I know, it’s hard. But if you don’t, they’ll fall apart and you’ll end up just eating the whole pan with a spoon. (Which… is not the worst.)
Where did the name come from?
I have no clue. Maybe it’s an old midwestern thing? Or maybe someone just made a small batch once and thought, “Hey, Tom Thumb!” If you know, tell me.
That’s the whole story on Tom Thumb Bars—from a crumpled recipe card to my go-to “just trust me” dessert. They’re chewy, golden, a little toasty around the edges, and way more than the sum of their parts.
If you make them, tell me how it goes. Did your crust come out thinner than expected? (It’s supposed to.) Did you burn your tongue eating one too soon? (Relatable.) Let’s swap stories and share some sweet nostalgia.
Keep the Flavor Coming – Try These:


Tom Thumb Bars
Ingredients
For the Crust:
- ⅔ cup unsalted butter softened
- 1¼ cups all-purpose flour
- ⅔ cup dark brown sugar packed
- 1 teaspoon salt
For the Topping:
- 1 cup dark brown sugar packed
- 2 tablespoons all-purpose flour
- 1 teaspoon baking powder
- 3 large eggs
- 1 teaspoon vanilla extract
- 1 cup chopped walnuts or pecans
- 1¾ cups sweetened shredded coconut
Instructions
Preheat and prepare the baking dish:
- Preheat the oven to 325°F (165°C). Grease a 9x13-inch baking pan with butter or non-stick spray and set aside.
Prepare the crust:
- In a large mixing bowl, combine the softened butter and brown sugar. Mix until fully incorporated and smooth. Add the flour and salt, and stir until the mixture forms a soft dough.
- Transfer the dough to the prepared pan and press it into an even, thin layer across the bottom. Bake for 13–15 minutes, or until the edges are just beginning to turn golden. Remove from the oven and set aside.
Prepare the topping:
- While the crust is baking, in a separate bowl, whisk together the brown sugar, flour, and baking powder until combined. Add the eggs and vanilla extract. Mix for 1–2 minutes until slightly airy and lighter in color.
- Fold in the chopped nuts and shredded coconut until evenly distributed throughout the mixture.
Assemble and bake the bars:
- Spread the prepared topping over the baked crust, smoothing it into an even layer. Return the pan to the oven and bake for an additional 20–25 minutes, or until the topping is set and the edges are golden brown.
Cool and serve:
- Allow the bars to cool completely in the pan before slicing into squares. Serve at room temperature.
Notes
I’m Bitty, owner of nodashofgluten.com, where I share simple, delicious recipes for all tastes, including gluten-free. Check out my “About Me” page for more info!