Creamy roasted garlic hummus made with chickpeas, tahini, lemon, and crispy garlic topping—your snack table will thank you.
You know how some recipes just sneak up on you? Like, one minute you’re casually scrolling recipes, and the next, you’re elbow-deep in garlic skins wondering how you became a homemade hummus evangelist? That’s me. That’s this recipe.


I never really planned to be a hummus-from-scratch person. Honestly, I was fine grabbing a tub from the store. It’s easy, right? Until one weekend, I had a lazy afternoon and way too much garlic sitting on the counter. Boom. Life-changing roasted garlic hummus was born. And by “born,” I mean I nearly burnt my first batch because I forgot to set a timer. But hey, lesson learned (mostly).
Since then, I’ve been that person who brings a bowl of homemade hummus to every family potluck, looking way more put-together than I actually am. My aunt still thinks I spent hours on it. Should I tell her? Nah.
Why You’ll Love This Roasted Garlic Hummus Recipe?
Alright, real talk. This isn’t just another hummus recipe. This one? It’s special. You’ve got that deep, sweet roasted garlic flavor that doesn’t punch you in the face like raw garlic does. It’s mellow. Smooth. Kinda like garlic’s way of saying, “Hey, let’s be friends.”
And then there’s the tahini. Oh, tahini. It makes everything rich and creamy, but not heavy. Lemon juice jumps in to brighten things up (because otherwise it could get a little meh, you know?). And let’s not forget the crispy garlic chips on top. Those are non-negotiable. People will think you’re some gourmet wizard, but it’s really just garlic fried in oil. Shh, our secret.
Ingredient Notes:
Look, we’re keeping this simple. No weird ingredients. No fancy gadgets. Just good ol’ pantry staples, doing their thing.
-
Garlic Heads (Two Whole Beauties): Roasting them turns them from “whoa, that’s strong” to “I could eat this with a spoon.” And yes, you will be tempted.
-
Olive Oil: Splurge a little here. This is the time to break out the good stuff. Not your “meh, it’ll do” bottle from last year.
-
Lemon Juice: Fresh, always fresh. Don’t even think about that bottled stuff unless it’s a lemon emergency.
-
Tahini: This stuff is like peanut butter’s cooler cousin. Give it a good stir before measuring, though. It loves to separate when you’re not looking.
-
Chickpeas (Canned Works Just Fine): Drain ‘em, rinse ‘em, done. We’re not peeling skins here, folks. We’ve got better things to do.
-
Cayenne Pepper: Optional, but a tiny pinch makes people say, “Ooh, what’s that little kick?”
-
Parsley: Not just for looks. It adds a fresh pop at the end that makes you feel like a pro.

How To Make Roasted Garlic Hummus?
Step 1: Roast the Garlic Like a Pro (Or at Least Pretend To)
Crank up the oven to 350°F. Take those garlic heads, peel off the papery layers (this part’s oddly satisfying), and chop off the top so the cloves are peeking out. Wrap them up like little foil gifts and roast for an hour. Yes, a whole hour. Use that time to…I don’t know, catch up on your favorite show? Just don’t forget they’re in there (learned that the hard way).
Step 2: Crispy Garlic Chips – Your New Snack Obsession
While the oven does its thing, heat up 2 tbs olive oil in a pan over medium-low. Toss in the thin garlic slices and let them slowly turn golden. Watch them like a hawk, though—one second they’re perfect, the next they’re charcoal. Scoop ‘em out and set aside on a paper towel. Save that oil. It’s liquid gold.
Step 3: Squeeze, Scoop, and Blend It All Up
Once the roasted garlic is cool enough to handle (unless you enjoy burning your fingertips), squeeze out those soft, sweet cloves. Into the food processor they go, along with chickpeas, minced garlic, salt, and a pinch of cayenne. Pulse it a few times until it looks kinda chunky and rustic.
Step 4: The Creamy Magic Happens Here
Mix lemon juice and water in one bowl. In another, stir together the tahini and that garlicky oil from earlier. Now, with the processor running, slowly stream in the lemon-water mixture. Pause, scrape down the sides (yep, messy but worth it), then slowly drizzle in the tahini-oil combo. Keep blending until it’s silky smooth. Like, so smooth you’ll want to dive in headfirst.
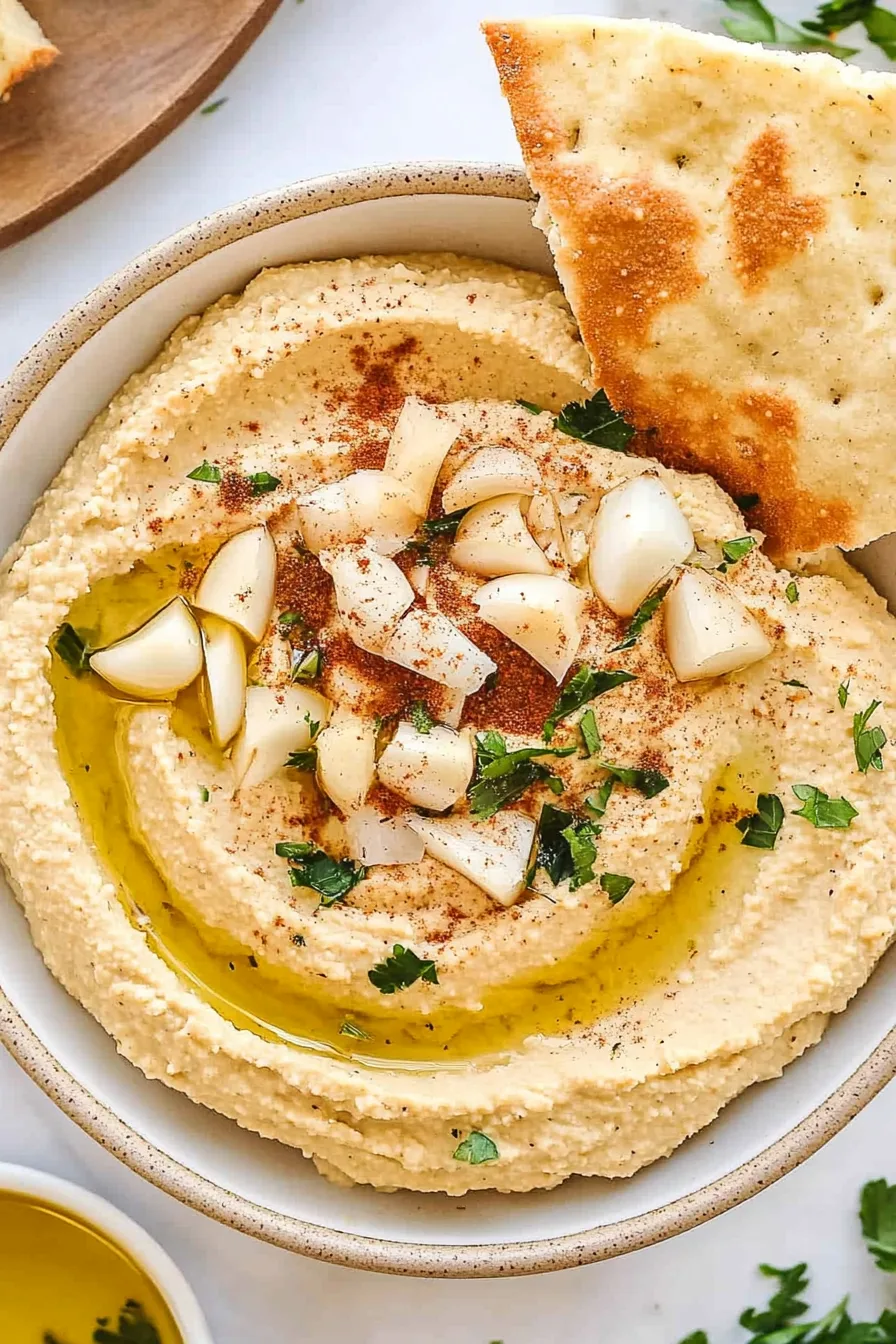
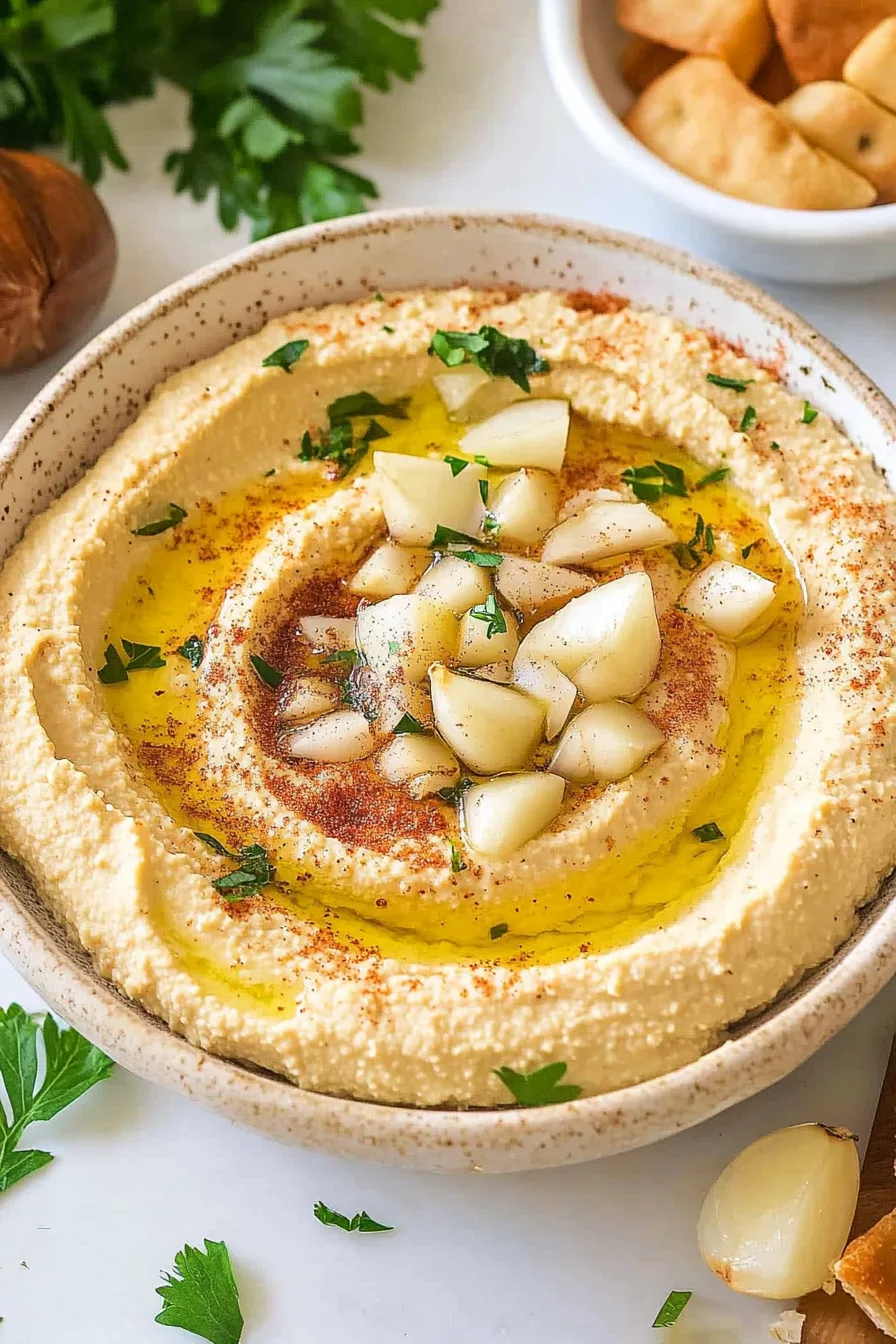
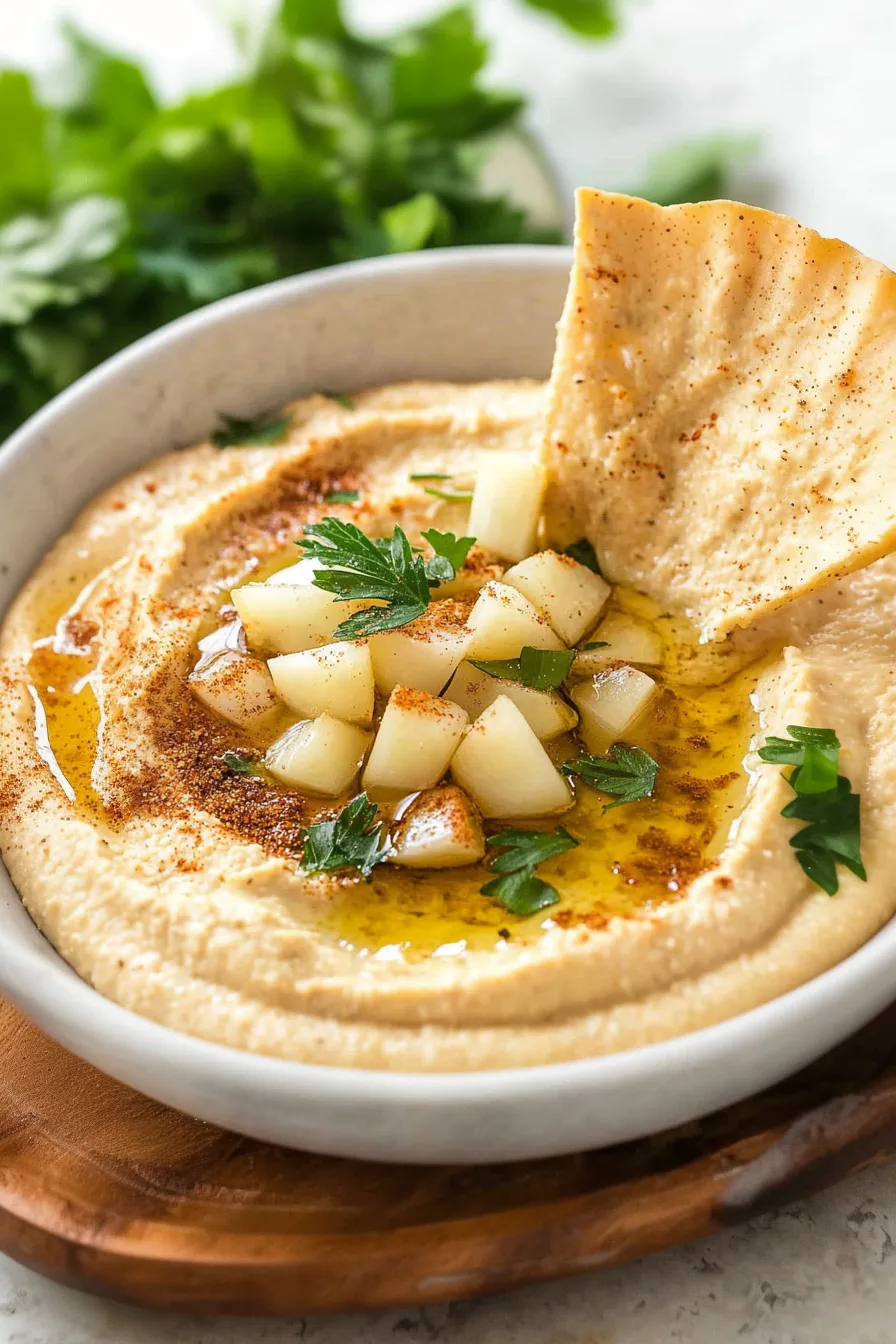
Step 5: The Finishing Touches (A.K.A. The “Look How Fancy I Am” Part)
Scoop that gorgeous roasted garlic hummus into a bowl. Sprinkle those golden garlic chips on top. Add a hit of fresh parsley. Drizzle some extra olive oil for good measure. Cover it up and let it sit for at least 30 minutes. Waiting is the hardest part, but trust me, the flavors get better the longer they hang out together.
Storage Options:
If you’re lucky enough to have leftovers (unlikely), this roasted garlic hummus will chill in the fridge for up to 5 days. Just pop it in an airtight container. Honestly, it gets even better after a day or two. Pro tip: hide it behind something boring, like a bag of celery. People don’t go snooping there.
Want To Save This Recipe?
Variations and Substitutions:
You’re the boss of your hummus. Wanna switch it up? Here’s how:
-
Roasted Red Pepper Hummus: Blend in a roasted red pepper. Boom. Sweet and smoky vibes.
-
Extra Lemon Zing: Double the lemon juice if you’re a citrus fanatic.
-
Avocado Hummus: Add a ripe avocado. It’ll be the creamiest, greenest hummus you’ve ever had.
-
No Tahini? Try Almond Butter: It’s a different flavor but still delicious.
-
Herby Twist: Fresh basil, cilantro, or even dill—choose your adventure.
What to Serve with Roasted Garlic Hummus?
I mean, you could eat it straight from the bowl (no judgment), but here are some fancier ideas:
-
Pita Bread or Chips: Classic. Can’t go wrong.
-
Veggie Sticks: Carrots, cucumbers, bell peppers—the works.
-
Rustic Crackers: Crunchy, seedy, delicious.
-
Grilled Chicken or Shrimp: Dollop some hummus on top for an instant flavor upgrade.
-
Sandwich Spread: Way better than mayo. Trust me.
Frequently Asked Questions:
Can I freeze hummus?
You can, but honestly? I wouldn’t. The texture changes, and it’s just not the same. If you do freeze it, let it thaw slowly and give it a good stir with some olive oil to revive it.
Do I have to peel the chickpeas for smoother hummus?
Look, if you’ve got an hour to kill and you enjoy tedious tasks, go for it. But roasted garlic already makes this hummus silky and smooth, so…I’d say skip it.
Can I cheat and use jarred minced garlic?
Oof. I mean, you could, but you’d be missing out on the magic of freshly roasted garlic. Jarred just doesn’t cut it here. Go fresh. It’s worth the tiny bit of extra effort.

Alright, you’ve made it to the end. Now, are we making roasted garlic hummus today or what? If you do, send me a pic or tag me—I live for that stuff. Can’t wait to see you join the homemade hummus club!
Keep the Flavor Coming – Try These:
Roasted Garlic Hummus
Ingredients
- 2 whole heads of garlic unpeeled
- 2 tablespoons olive oil
- 2 cloves garlic thinly sliced
- 3 tablespoons fresh lemon juice from 1 to 2 lemons
- 1/4 cup water
- 6 tablespoons tahini well-stirred
- 1 14-ounce can chickpeas, drained and rinsed
- 1 clove garlic minced (approximately 1/2 teaspoon)
- 1/2 teaspoon salt
- Pinch of cayenne pepper
- 1 tablespoon fresh parsley minced
Instructions
- Preheat the oven to 350°F (175°C). Carefully remove the outer papery skins from the two heads of garlic, ensuring the cloves remain intact. Trim approximately the top quarter of each garlic head to expose the cloves. Wrap the garlic tightly in aluminum foil and place it on a baking sheet. Roast in the preheated oven for approximately 1 hour, or until the garlic becomes tender and caramelized. Allow the garlic to cool for about 10 minutes before handling.
- Prepare the crispy garlic chips. While the garlic is roasting, heat 2 tablespoons of olive oil in a small skillet over medium-low heat. Add the thinly sliced garlic cloves and cook gently, stirring occasionally, until they become golden and crisp, approximately 12 to 15 minutes. Carefully transfer the garlic chips to a paper towel-lined plate using a slotted spoon. Reserve the garlic-infused oil for later use.
- Extract the roasted garlic. Once the roasted garlic has cooled, gently squeeze the softened cloves from their skins into a small bowl. You should have approximately 1/4 cup of roasted garlic.
- Prepare the lemon-water and tahini mixtures. In a small bowl, combine the fresh lemon juice and 1/4 cup of water. In a separate bowl, whisk together the tahini and the reserved garlic-infused olive oil until smooth.
- Process the chickpeas and garlic. In the bowl of a food processor, combine the drained chickpeas, roasted garlic cloves, minced raw garlic, salt, and cayenne pepper. Process the mixture for approximately 15 seconds, until it forms a coarse paste. Scrape down the sides of the bowl to ensure an even blend.
- Incorporate the liquid ingredients. With the processor running, slowly drizzle the lemon juice and water mixture through the feed tube in a steady stream. Pause to scrape down the sides of the bowl as needed. Continue processing for 1 minute to allow the ingredients to emulsify.
- Add the tahini-oil blend. With the machine running, gradually pour the tahini and olive oil mixture into the processor. Blend for an additional 1 to 2 minutes, or until the hummus achieves a smooth and creamy consistency. Scrape down the sides of the bowl as needed to ensure thorough blending.
- Garnish and rest. Transfer the hummus to a serving bowl. Sprinkle the prepared crispy garlic chips and minced fresh parsley over the top. Cover the bowl with plastic wrap and allow the hummus to rest at room temperature for at least 30 minutes to allow the flavors to meld.
- Serve. Prior to serving, drizzle the surface of the hummus with a light additional coating of olive oil. Serve with pita bread, fresh vegetables, or your choice of accompaniments.
Notes
I’m Bitty, owner of nodashofgluten.com, where I share simple, delicious recipes for all tastes, including gluten-free. Check out my “About Me” page for more info!