
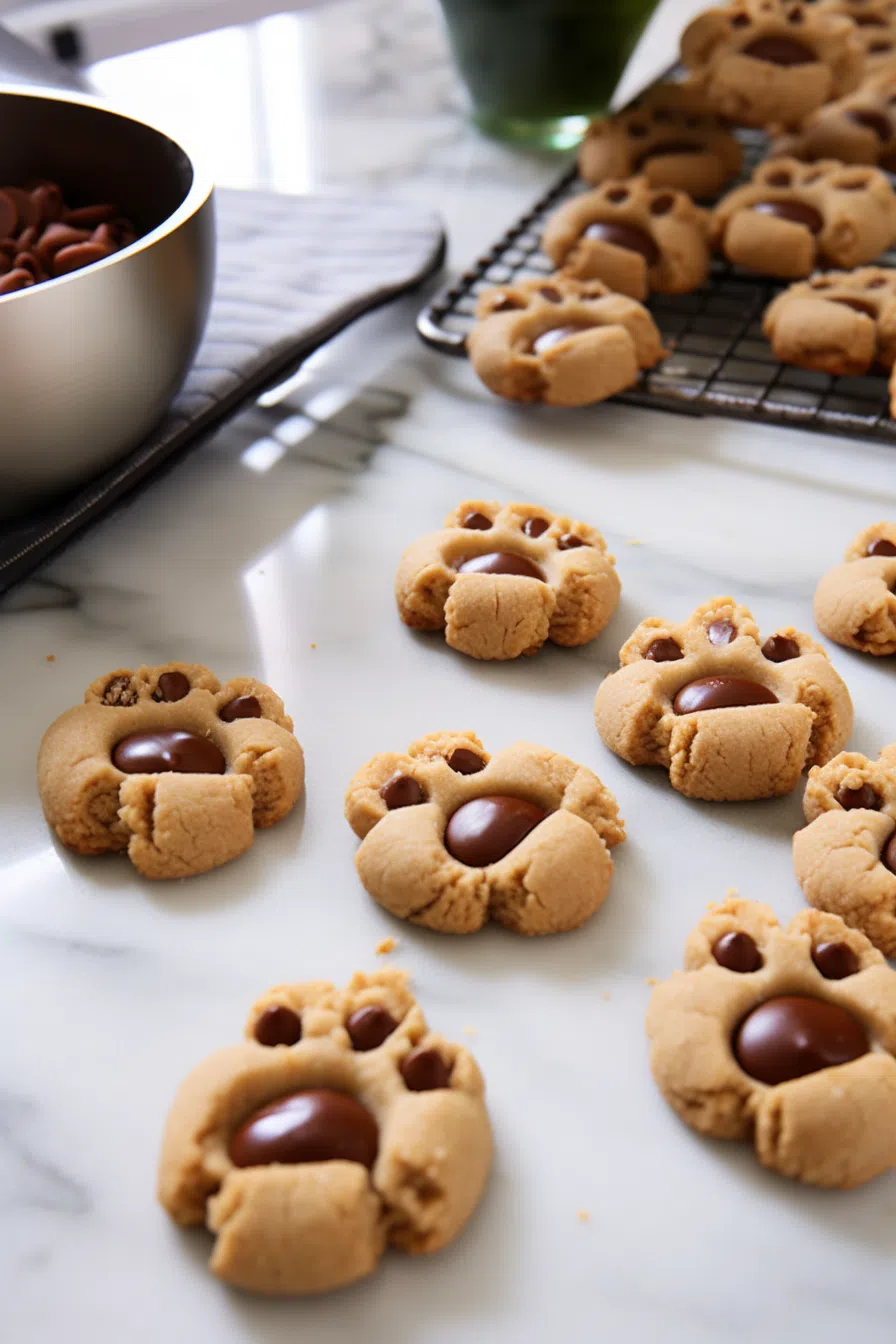
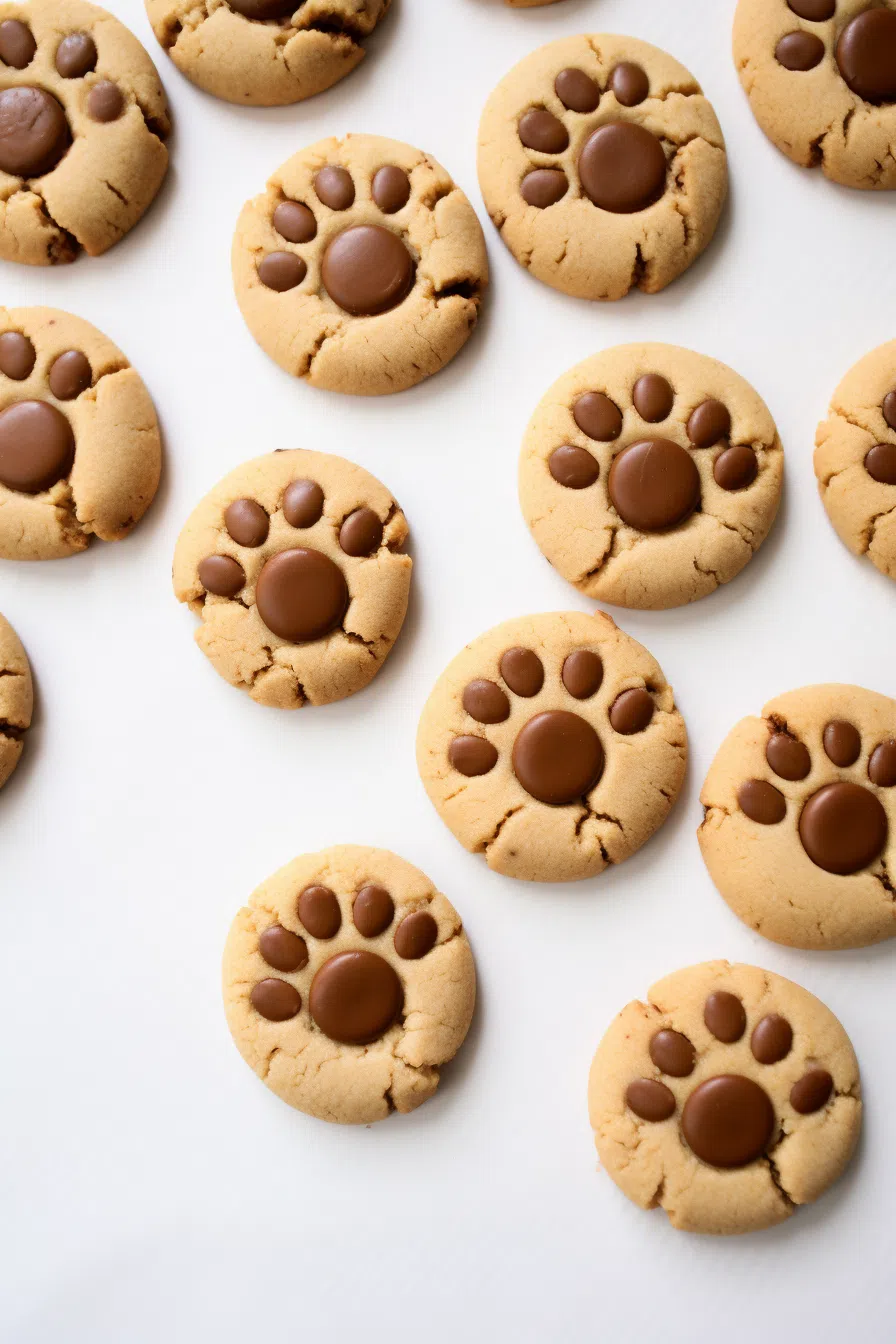
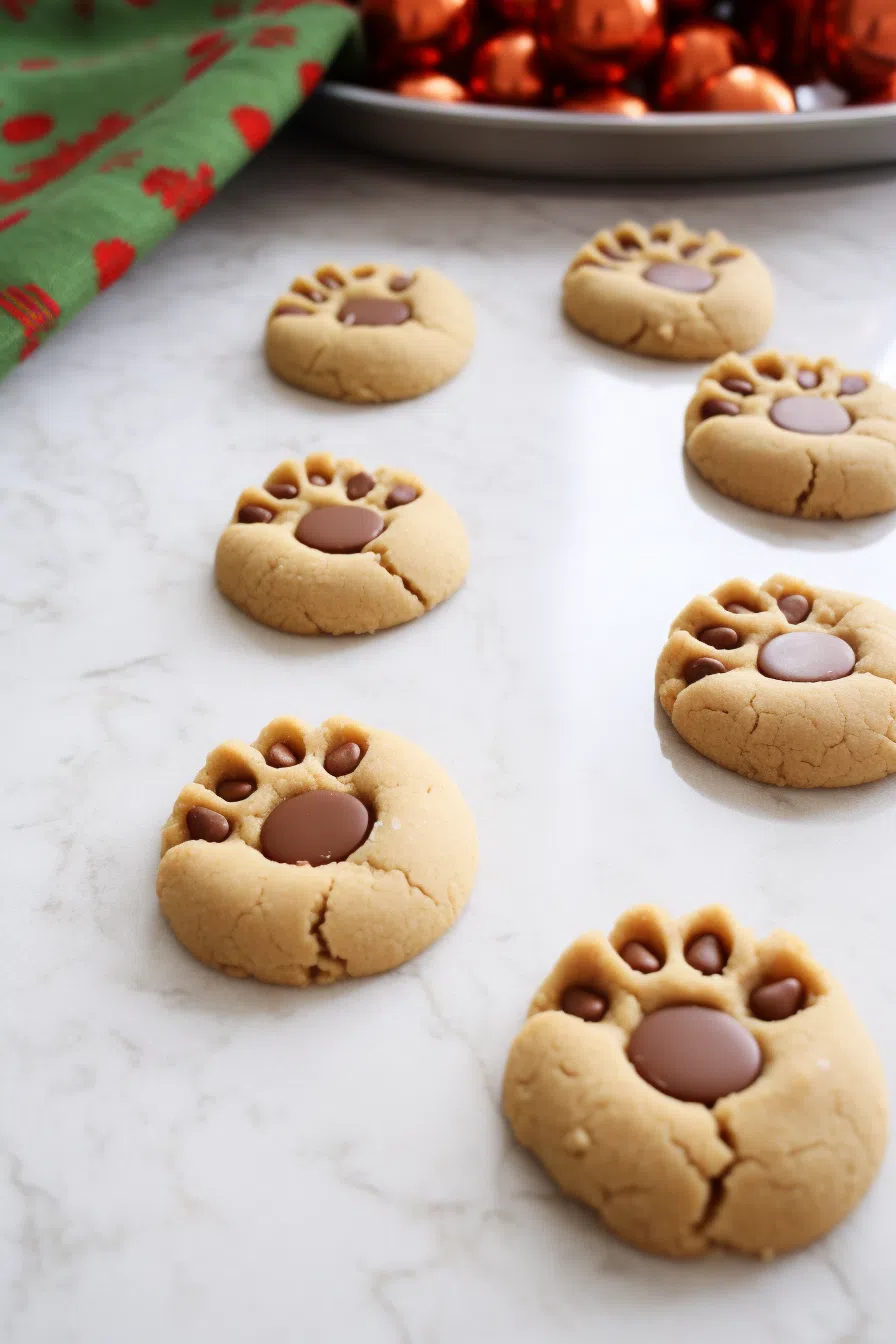
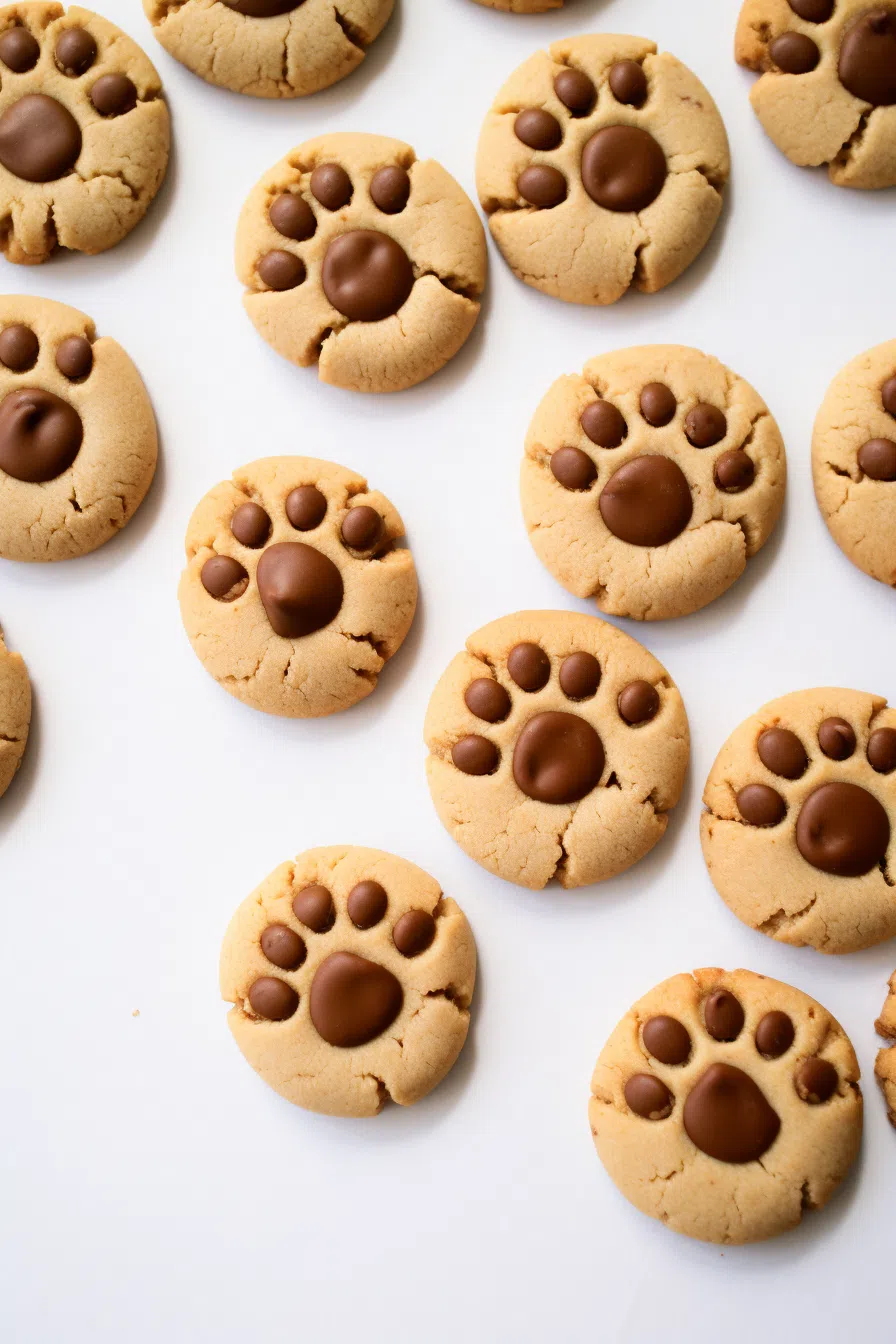
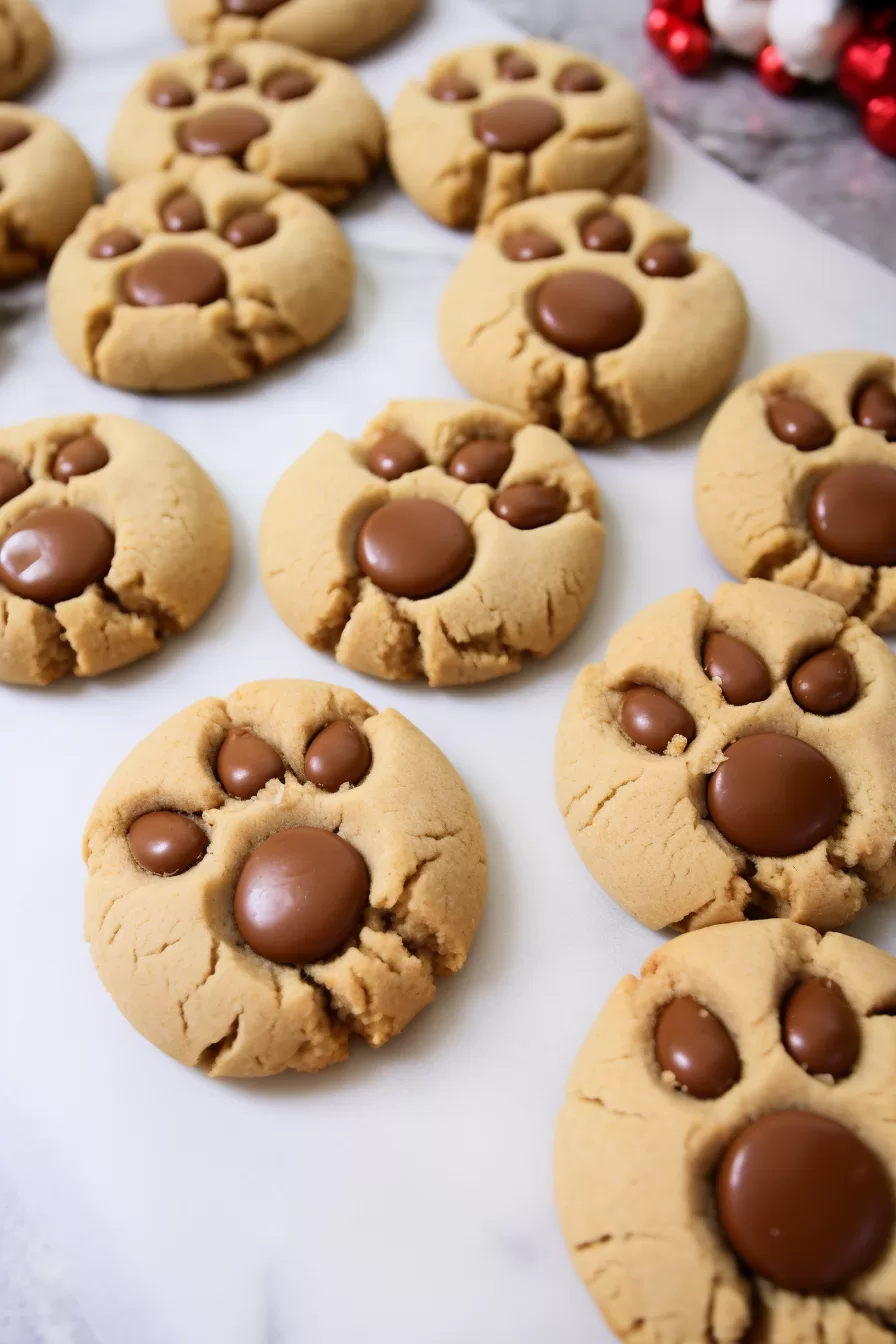
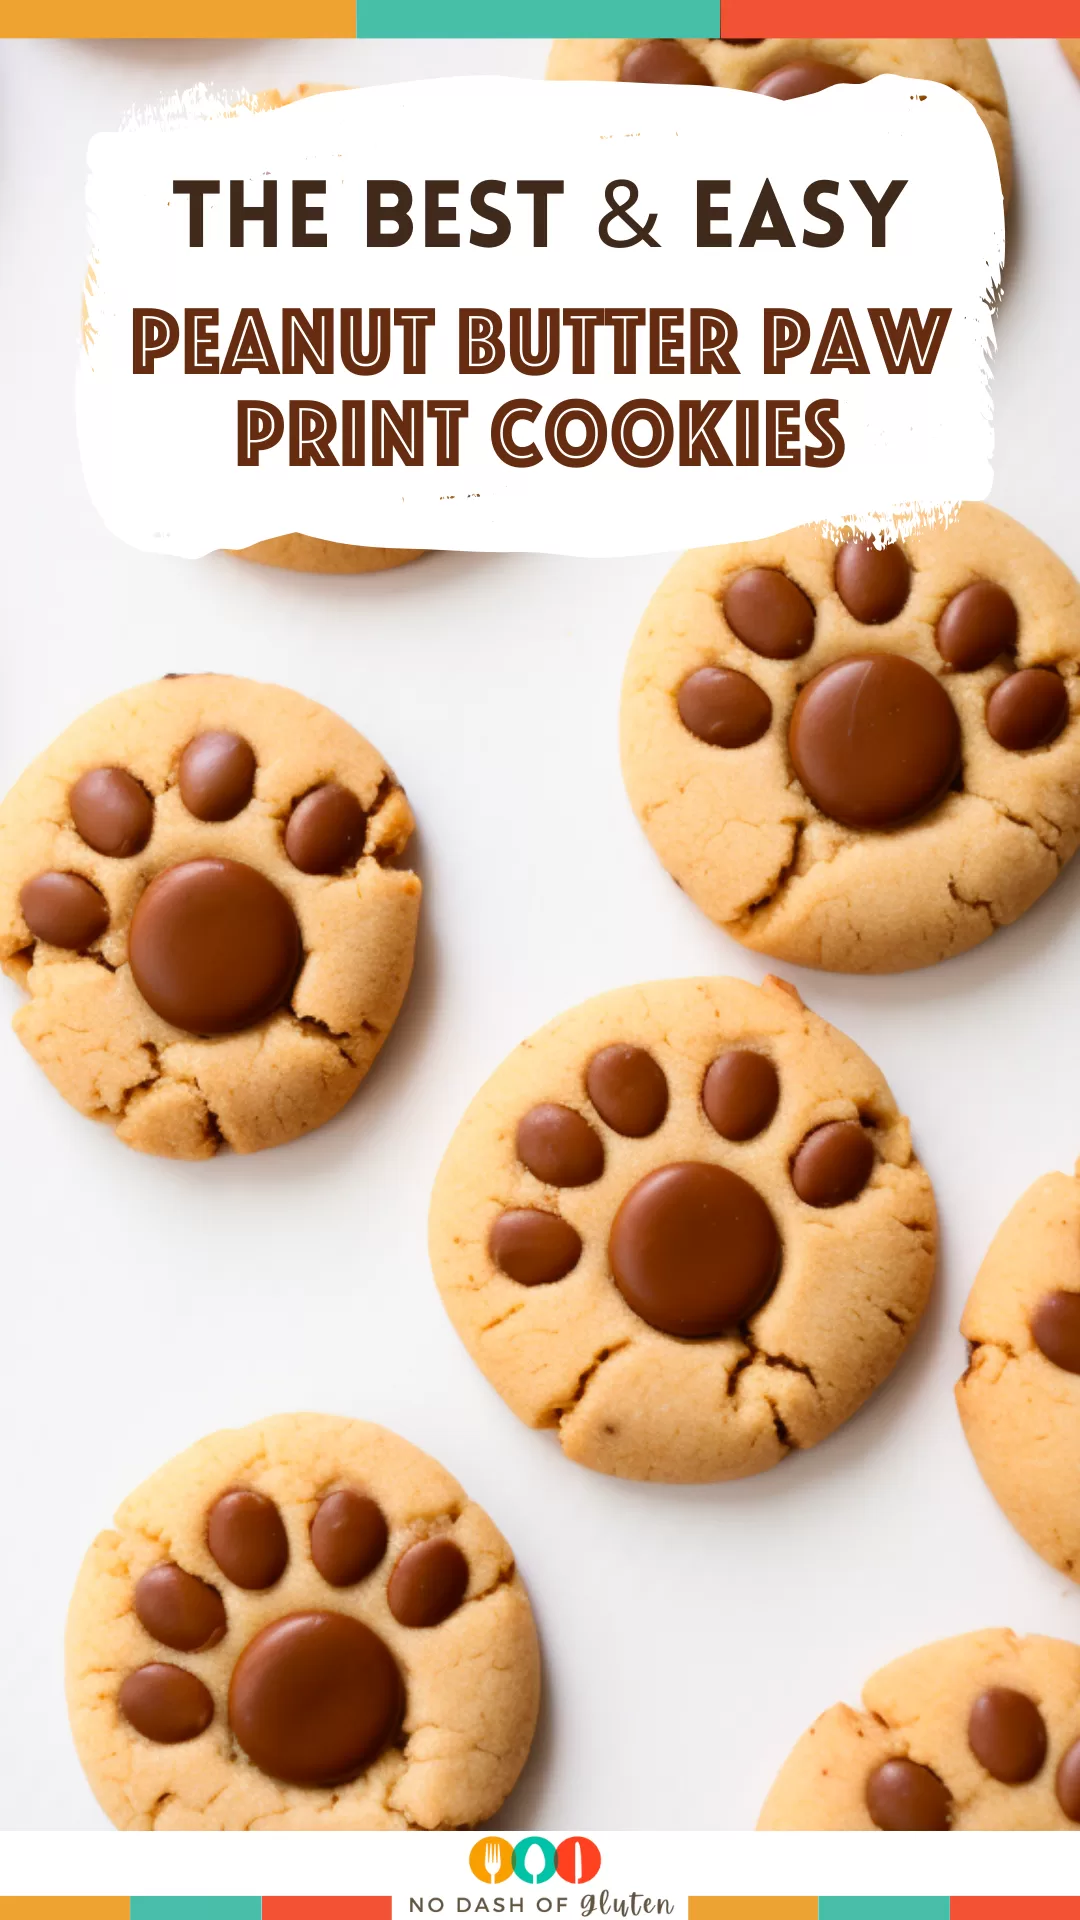
These Peanut Butter Paw Print Cookies combine creamy peanut butter, melty chocolate disks, and chocolate chips for the cutest (and tastiest!) treat.


Okay, confession time. I’m a sucker for anything paw print related. Blame it on growing up in a house with two golden retrievers who thought they were lapdogs (even though they weighed more than me). So when my niece asked me to make “puppy cookies” for her birthday party, I knew exactly what we were baking.
We spent the afternoon making these Peanut Butter Paw Print Cookies, and honestly? It was the most fun I’ve had in ages. There’s something about shaping little paws out of chocolate chips that feels therapeutic. The best part? Watching the kids’ faces light up when they saw them. They were convinced I had some secret dog bakery hookup. Nope, just good ol’ Auntie magic (and a lot of peanut butter).
Why You’ll Love This Peanut Butter Paw Print Cookies Recipe?
First off, who can resist a paw print cookie? Not me. But these aren’t just adorable; they’re downright delicious. Here’s why you’ll love them too:
- Soft and chewy peanut butter base. Think of your favorite peanut butter cookie, but better.
- Chocolate on chocolate! You get a creamy chocolate disk plus three little chocolate chip toes on every cookie. Double the chocolate = double the fun.
- Easy to make. No fancy equipment, no chilling dough (because who has time for that?), and you can knock out a batch in under an hour.
- Perfect for parties. Kids’ birthdays, baby showers, dog rescue fundraisers… they’re always the hit of the dessert table.
- Memory makers. Whether you bake them with kids, friends, or just as a solo treat-yourself project, they’ll leave you smiling. (Trust me.)
Ingredient Notes:
If you’re like me, you like knowing the why behind the ingredients. So here’s the scoop on what makes these Peanut Butter Paw Print Cookies tick.
- Butter (½ cup, softened): Unsalted works best, but if all you’ve got is salted, just cut back a smidge on added salt.
- Creamy Peanut Butter (1 cup): I’m a Jif girl. Natural peanut butter gets too oily and makes the dough unpredictable.
- Granulated Sugar + Light Brown Sugar (1 cup + ½ cup): The mix keeps things sweet but adds a little chew from the molasses in brown sugar.
- Eggs (2 large): Room temp if you can swing it. They blend better and help make the cookies tender.
- Vanilla Extract (½ tsp): Adds warmth. Skip it if you must, but I always think it gives PB cookies that extra “something.”
- All-Purpose Flour (2 cups): The structure, plain and simple.
- Baking Soda (2 tsp): Lifts the dough just enough for a perfect puff.
- Salt (½ tsp): Non-negotiable! It keeps things from tasting one-note sweet.
- Chocolate Melting Disks (48): These are your paw pads. I like Ghirardelli, but use whatever makes your chocolate-loving heart happy.
- Chocolate Chips (144): Three per cookie, for the toes. I usually go semi-sweet but have been known to go wild with white chocolate.
How To Make Peanut Butter Paw Print Cookies?
Step 1: Get That Oven Hot
Preheat your oven to 350°F. No surprises there. Line a couple of baking sheets with
Step 2: Cream It All Together
In a big bowl, cream together your butter, peanut butter, granulated sugar, and brown sugar. You’re going for smooth and fluffy. I always give it an extra minute because watching that buttery peanutty swirl is oddly satisfying.
Step 3: Eggs & Vanilla—The Dream Team
Crack in those eggs and splash in the vanilla. Mix until you’ve got something that looks like a peanut butter cloud.
Step 4: Dry Team Joins the Party
In a second bowl (or the same one, if you’re rebellious like me), stir together the flour, baking soda, and salt. Gradually add the dry to the wet. The dough’s thick, so prepare for a bit of an arm workout if you’re mixing by hand.
Step 5: Roll ‘Em Out
Scoop out tablespoon-sized chunks of dough and roll them into balls. Plop them on your baking sheet, giving them space to spread. No cookie crowding!
Step 6: Bake Time
Want To Save This Recipe?
Pop the tray into the oven and bake for 7-9 minutes. You’re looking for slightly puffy and just golden around the edges. They’ll still look soft in the middle—and that’s perfect.
Step 7: Paw Print Time!
Here’s where the magic happens. While the cookies are still warm, gently press a chocolate disk into the center of each. Then add three chocolate chips above it in a triangle to make the toes. You will feel like a cookie artist.
Step 8: Cool & Admire
Let them cool on a rack. Or eat one warm. No judgment. (I always do.)
Storage Options:
Honestly, they don’t last long in my house, but if you have the willpower:
- Room temp: Keep in an airtight container for up to 5 days.
- Freezer: You can freeze the baked cookies for up to 3 months. Just layer with parchment and pop them in a freezer bag.
- Freeze the dough: Scoop, freeze, and bake fresh later. Just tack on an extra minute or two of baking time.
Variations and Substitutions:
- Chunky Peanut Butter: Adds extra texture! Just be warned—it can make the dough crumbly.
- Nut-Free: Sunflower seed butter works if you’re baking for nut allergies.
- Different Chocolates: White chocolate disks, dark chocolate chips, even caramel-filled ones if you’re feeling fancy.
- Gluten-Free Flour: A good 1:1 gluten-free flour swap works fine. Been there, done that for my gluten-free pals!
- Seasonal Fun: Use pastel chips for Easter paws or red/green ones for Christmas. Why not?
What to Serve with Peanut Butter Paw Print Cookies?
- Milk: Obvious but always right.
- Hot Chocolate: With a pile of whipped cream on top.
- Coffee: Because cookies for breakfast is a vibe.
- Ice Cream: Sandwich two cookies together with a scoop of vanilla? Yes, please.
- Party Platters: They’ll be the star of the show at your next potluck, guaranteed.
Frequently Asked Questions:
Can I use crunchy peanut butter instead of creamy?
You sure can! Just be ready for a slightly crumbly dough. Embrace the rustic charm.
Do I have to use chocolate disks?
Nope! Feel free to swap in Reese’s Minis, Rolos, or even a Hershey’s Kiss.
Why are my cookies flat?
Chances are your butter was too soft (or melted). Or maybe you skipped measuring the flour. It happens. They’ll still taste amazing, pinky promise.

If you bake a batch of these Peanut Butter Paw Print Cookies, I want to see them! Seriously, tag me on Instagram or drop me a comment. Did your kids love them? Did your coworkers ask for the recipe? Spill the tea!
Can’t wait to hear how they turn out—and hey, save me one, will ya?
Keep the Flavor Coming – Try These:

Peanut Butter Paw Print Cookies
Ingredients
- ½ c butter softened
- 1 c creamy peanut butter
- 1 c granulated sugar
- ½ c light brown sugar packed
- 2 large eggs
- ½ tsp vanilla extract
- 2 c all-purpose flour
- 2 tsp baking soda
- ½ tsp salt
- 48 chocolate melting disks
- 144 chocolate chips
Instructions
- Preheat your oven to 350°F.
- In a bowl beat together the butter, peanut butter, granulated sugar and brown sugar until they become smooth.
- Add the eggs and vanilla extract to the mixture. Mix them well.
- In another bowl gently stir the flour, baking soda and salt together until they are evenly combined.
- Add the dry ingredients to the wet mixture while blending them thoroughly.
- Use a tablespoon to scoop out portions of dough onto a baking sheet. Shape them into tablespoons, with about two inches of space between each cookie.
- Place the baking sheet in your preheated oven. Bake for 7 to 9 minutes. The cookies should appear puffy. Set when done.
- After removing from the oven press a chocolate disk into the center of each cookie. Create a paw print by placing three chocolate chips around it.
- Transfer your cookies onto a wire rack to cool completely.
Notes
I’m Bitty, owner of nodashofgluten.com, where I share simple, delicious recipes for all tastes, including gluten-free. Check out my “About Me” page for more info!

One Response
My daughter is a veterinary technician and I baked these for her to take to work and she said her co-workers raved about them!