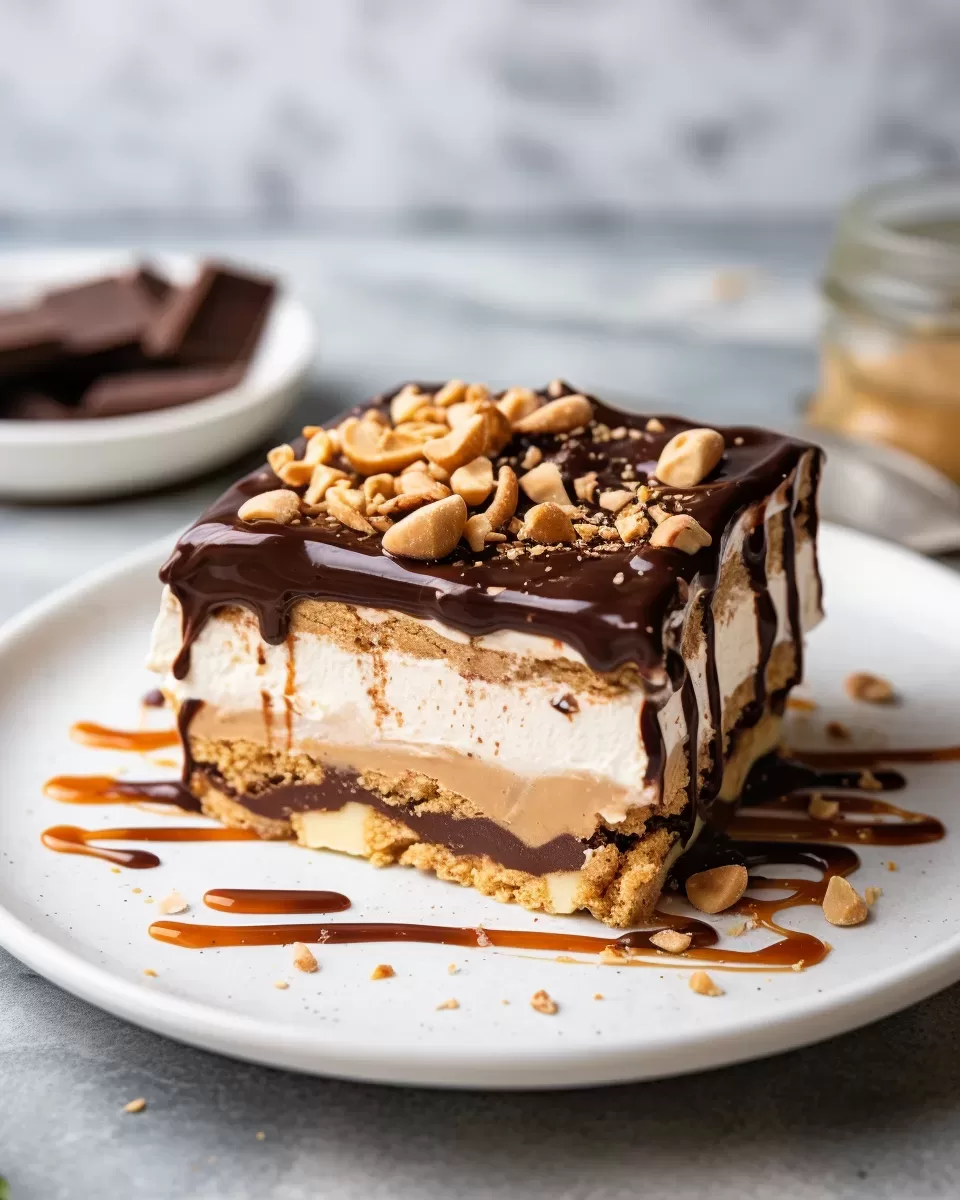
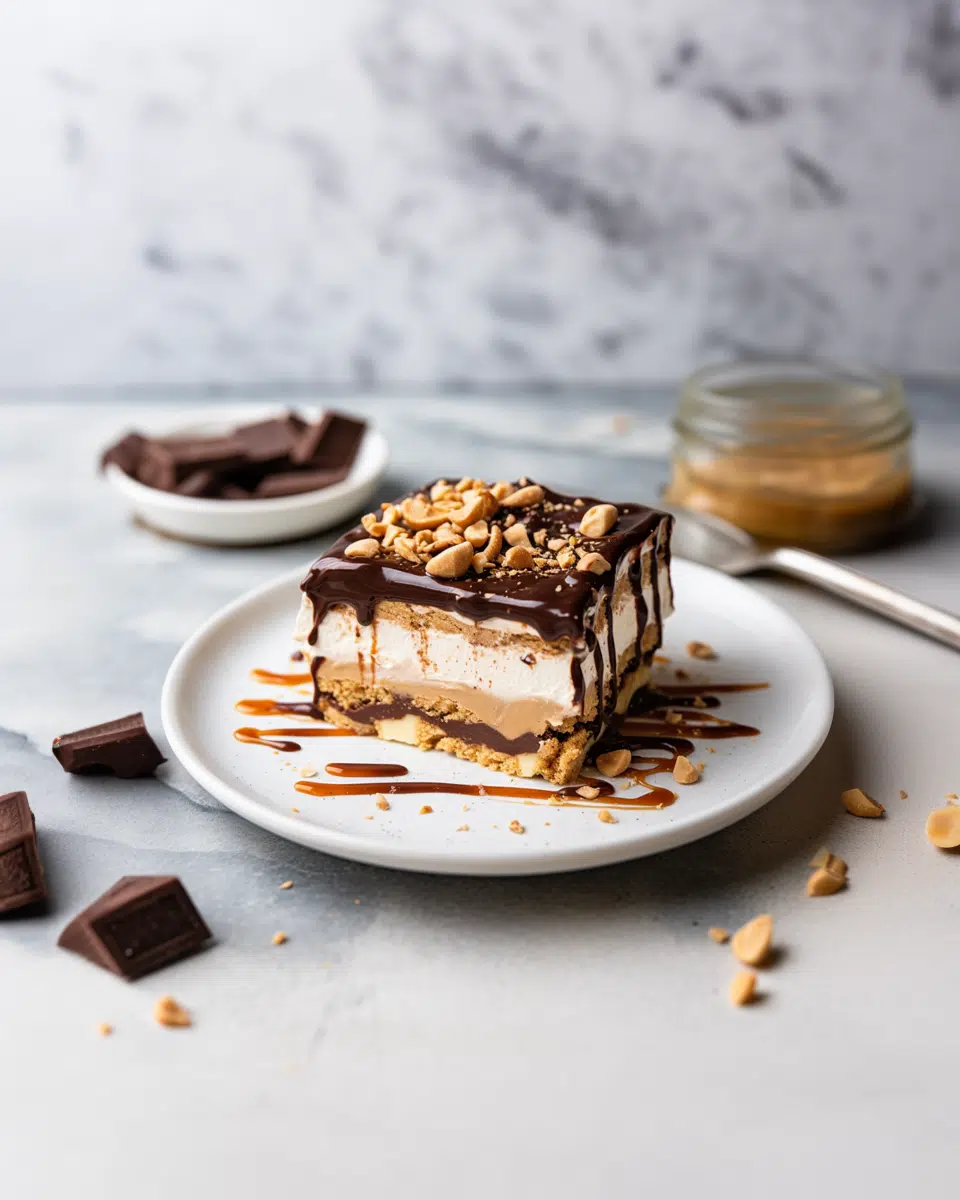
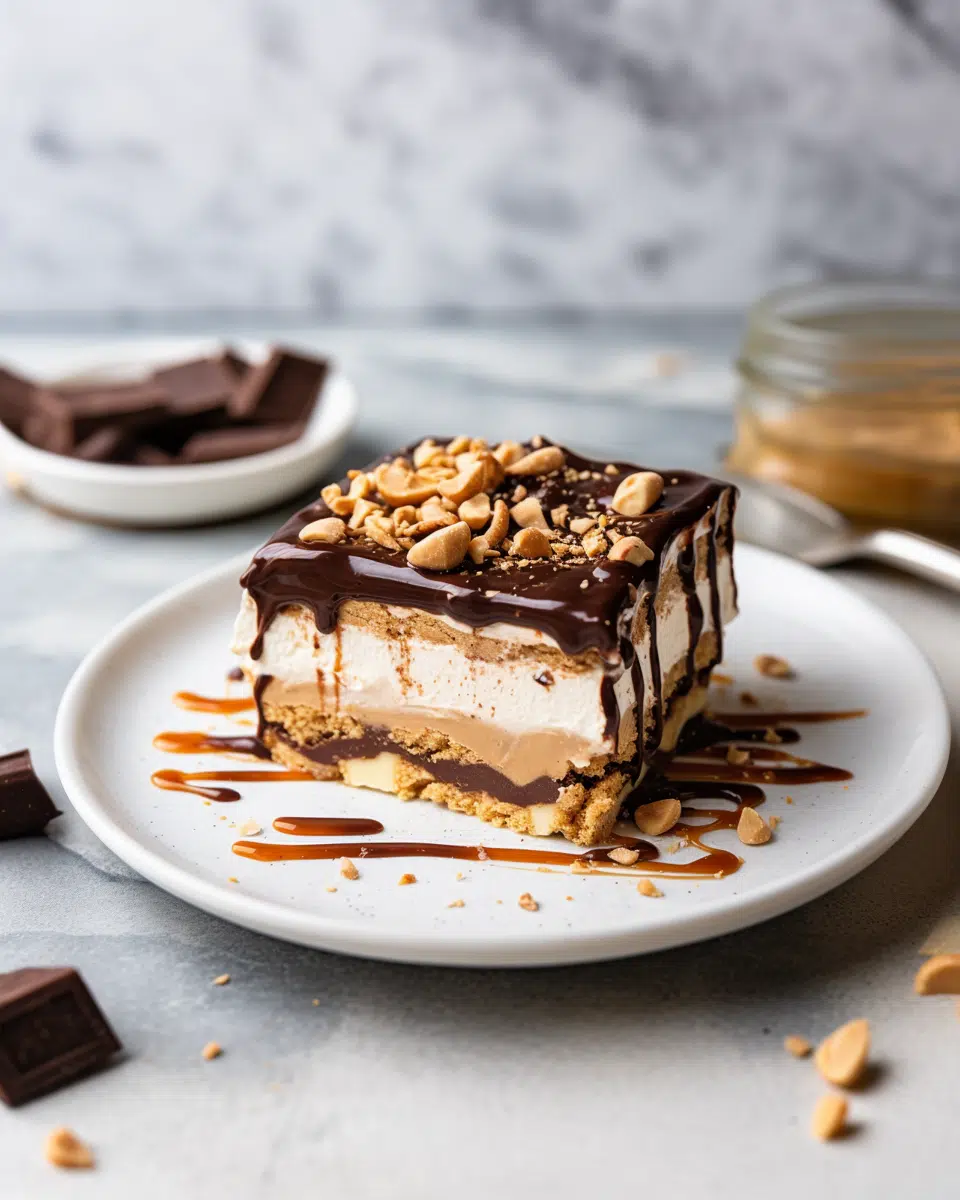
Peanut Butter Crunch Lasagna – Experience an explosion of flavors with our Peanut Butter Crunch Lasagna. This heavenly dessert blends the deliciousness of chocolate, the smoothness of peanut butter, and the tantalizing crunch of Oreo cookies. With layers that harmonize flawlessly this treat is simply irresistible.


The first time I prepared this Peanut Butter Crunch Lasagna I found myself completely immersed in a world of taste. As my husband and child savored each bite their faces lit up with delight. It was indeed a moment of success forever engraved in our family’s journey.
What makes this Peanut Butter Crunch Lasagna truly special?
What differentiates this dessert is its combination of textures. The buttery Oreo crust forms a base for the velvety peanut butter layer that strikes the balance between sweetness and nuttiness. Adding to its decadence the rich chocolate layer brings a touch of indulgence. Let’s not forget about the assortment of toppings that surprise your taste buds with every bite – from chopped Reese’s Mini Peanut Butter Cups, to crunchy peanut butter chips.
What You Need To Make This Peanut Butter Crunch Lasagna Recipe?
Oreo Cookies: To create an Oreo crust it’s essential to finely crush the cookies. Using a food processor can work wonders here as it creates a texture that blends perfectly with the butter. Classic Oreo cookies are recommended for that flavor.
Peanut Butter Layer:
Cream Cheese: Make sure the cream cheese is softened at room temperature to achieve a creamy texture when mixed with ingredients.
Smooth Peanut Butter: For a rich flavor profile opt for quality smooth peanut butter.
Powdered Sugar: To avoid any lumps. Ensure a velvety finish sift the sugar before adding it to the mixture.
Milk: You can use any type of milk you prefer. Whole milk adds richness to the recipe if desired.
Whipped Topping (Cool Whip): The light and airy nature of Cool Whip complements the peanut butter layer perfectly adding a delicate touch to the indulgence.
Chocolate Layer:
Instant Chocolate Pudding: When using chocolate pudding make sure to choose instant variety pudding for easy mixing due to its smaller granules.
Milk: For layering purposes use less milk than indicated on the pudding box. This will result in a consistency ideal for layering.
Topping:
Whipped Topping: If you prefer a homemade touch you can prepare your whipped cream instead of using store-bought whipped topping. Store-bought whipped topping, such as Cool Whip offers convenience and a smooth texture.
Reese’s Mini Peanut Butter Cups: These delightful treats add bursts of peanut butter goodness. You may want to consider chopping some extra for toppings.
Peanut Butter Chips: These chips provide a crispy texture. Enhance the peanut flavor. Feel free to adjust the quantity based on your preference.
Chocolate Syrup (optional): A drizzle of chocolate syrup adds a touch of sophistication. For the best taste opt for a high-quality chocolate syrup.
Steps To Make Peanut Butter Crunch Lasagna:
OREO CRUST:
Step 1: Using a food processor finely crush the Oreo cookies until they resemble crumbs.
Step 2: Mix in the butter to create a mixture.
Step 3: Press the Oreo mixture firmly into a 9″ x 13″ pan or glass dish to form a crust.
Step 4: Place the crust in the freezer while you move on to the next layer.
Want To Save This Recipe?
PEANUT BUTTER LAYER:
Step 5: Using your mixer at medium speed blend softened cream cheese, milk and peanut butter until the mixture becomes fluffy and light.
Step 6: Gradually add sugar to ensure everything combines well.
Step 7: Gently fold in the whipped topping for an airy and indulgent layer.
Step 8: Spread the peanut butter layer evenly over the Oreo crust.
Step 9: Return the pan to the freezer as you move on to the next layer.
CHOCOLATE LAYER:
Step 10: In a bowl mix chocolate pudding with milk until it reaches a creamy consistency.
Step 11: Spread the pudding mixture over the peanut butter layer. Let it set for 5 minutes, in the refrigerator.
TOP IT OFF:
Step 12: Finish off the peanut butter lasagna by spreading whipped topping over the chocolate layer.
Step 13: Sprinkle chopped Reese’s Mini Peanut Butter Cups and peanut butter chips on top of the whipped topping. To add a touch of appeal you can drizzle chocolate syrup on the top.
Step 14: Make sure to refrigerate your Peanut Butter Crunch Lasagna for a minimum of 3 hours allowing the layers to blend together into a combination of flavors and textures.
Tip:
To elevate the deliciousness of your Peanut Butter Crunch Lasagna you might want to consider a slight tweak to the peanut butter layer. After spreading the regular peanut butter mixture, over the Oreo crust try gently folding in some finely chopped roasted peanuts. This will add a crunch and a burst of nutty goodness that perfectly complements the richness of the peanut butter. With this addition, every bite will become an experience filled with sweetness, creaminess and delightful crunchiness.
Frequently Asked Questions:
Can I use crunchy peanut butter for an added crunch?
Of course! Although the recipe suggests using smooth peanut butter substituting it with chunky peanut butter will definitely add a texture.
Can I make this dessert ahead of time for a party?
Absolutely! In fact this dessert often tastes better when made a day before. Allowing the flavors to blend gives an enjoyable experience.
Is there a gluten-free version of this recipe?
Certainly! To make a gluten Peanut Butter Crunch Lasagna simply replace the Oreo cookies with gluten-free chocolate cookies and ensure that the pudding mix you use is certified gluten-free.
Keep the Flavor Coming – Try These:


Peanut Butter Crunch Lasagna
Ingredients
Crust:
- 36 Oreo Cookies
- ⅓ cup melted butter
Peanut Butter Layer:
- 8 ounces softened cream cheese
- 1 cup smooth peanut butter
- 1 cup powdered sugar
- ¼ cup milk
- 1 ½ cups whipped topping e.g., Cool Whip
Chocolate Layer:
- 2 boxes of instant chocolate pudding 4-serving size
- 2 ¾ cups milk
Topping:
- Whipped topping
- 1 bag of Reese’s Mini Peanut Butter Cups
- Peanut butter chips
- Chocolate Syrup optional
Instructions
OREO CRUST:
- Start by crushing Oreo cookies in a food processor until they become finely crushed.
- Next mix in melted butter until the mixture becomes consistent and well combined.
- Press this mixture into a 9" x 13" pan. Place it in the freezer to set.
PEANUT BUTTER LAYER:
- Using a mixer blend softened cream cheese, peanut butter and milk together until they become fluffy and well incorporated.
- Gradually add sugar to the mixture while continuing to blend. Then gently fold in whipped topping until everything is evenly mixed.
- Spread this layer, over the Oreo crust you prepared and return it to the freezer for some time to set.
CHOCOLATE LAYER:
- In a bowl combine chocolate pudding mix with milk. Mix vigorously until the mixture thickens up nicely.
- Spread this chocolatey mixture over the peanut butter layer you prepared earlier. Allow it to chill briefly in the refrigerator.
TOPPING:
- To add a finishing touch, layer on some whipped topping followed by Reese's Mini Peanut Butter Cups and peanut butter chips generously.
- For a touch of elegance, you can optionally drizzle some chocolate syrup over the top of your creation.
CHILL:
- Place your dessert in the refrigerator, for at least 3 hours or more so that all those delightful layers can fully set and meld together before indulging in each scrumptious bite.
Notes
I’m Bitty, owner of nodashofgluten.com, where I share simple, delicious recipes for all tastes, including gluten-free. Check out my “About Me” page for more info!