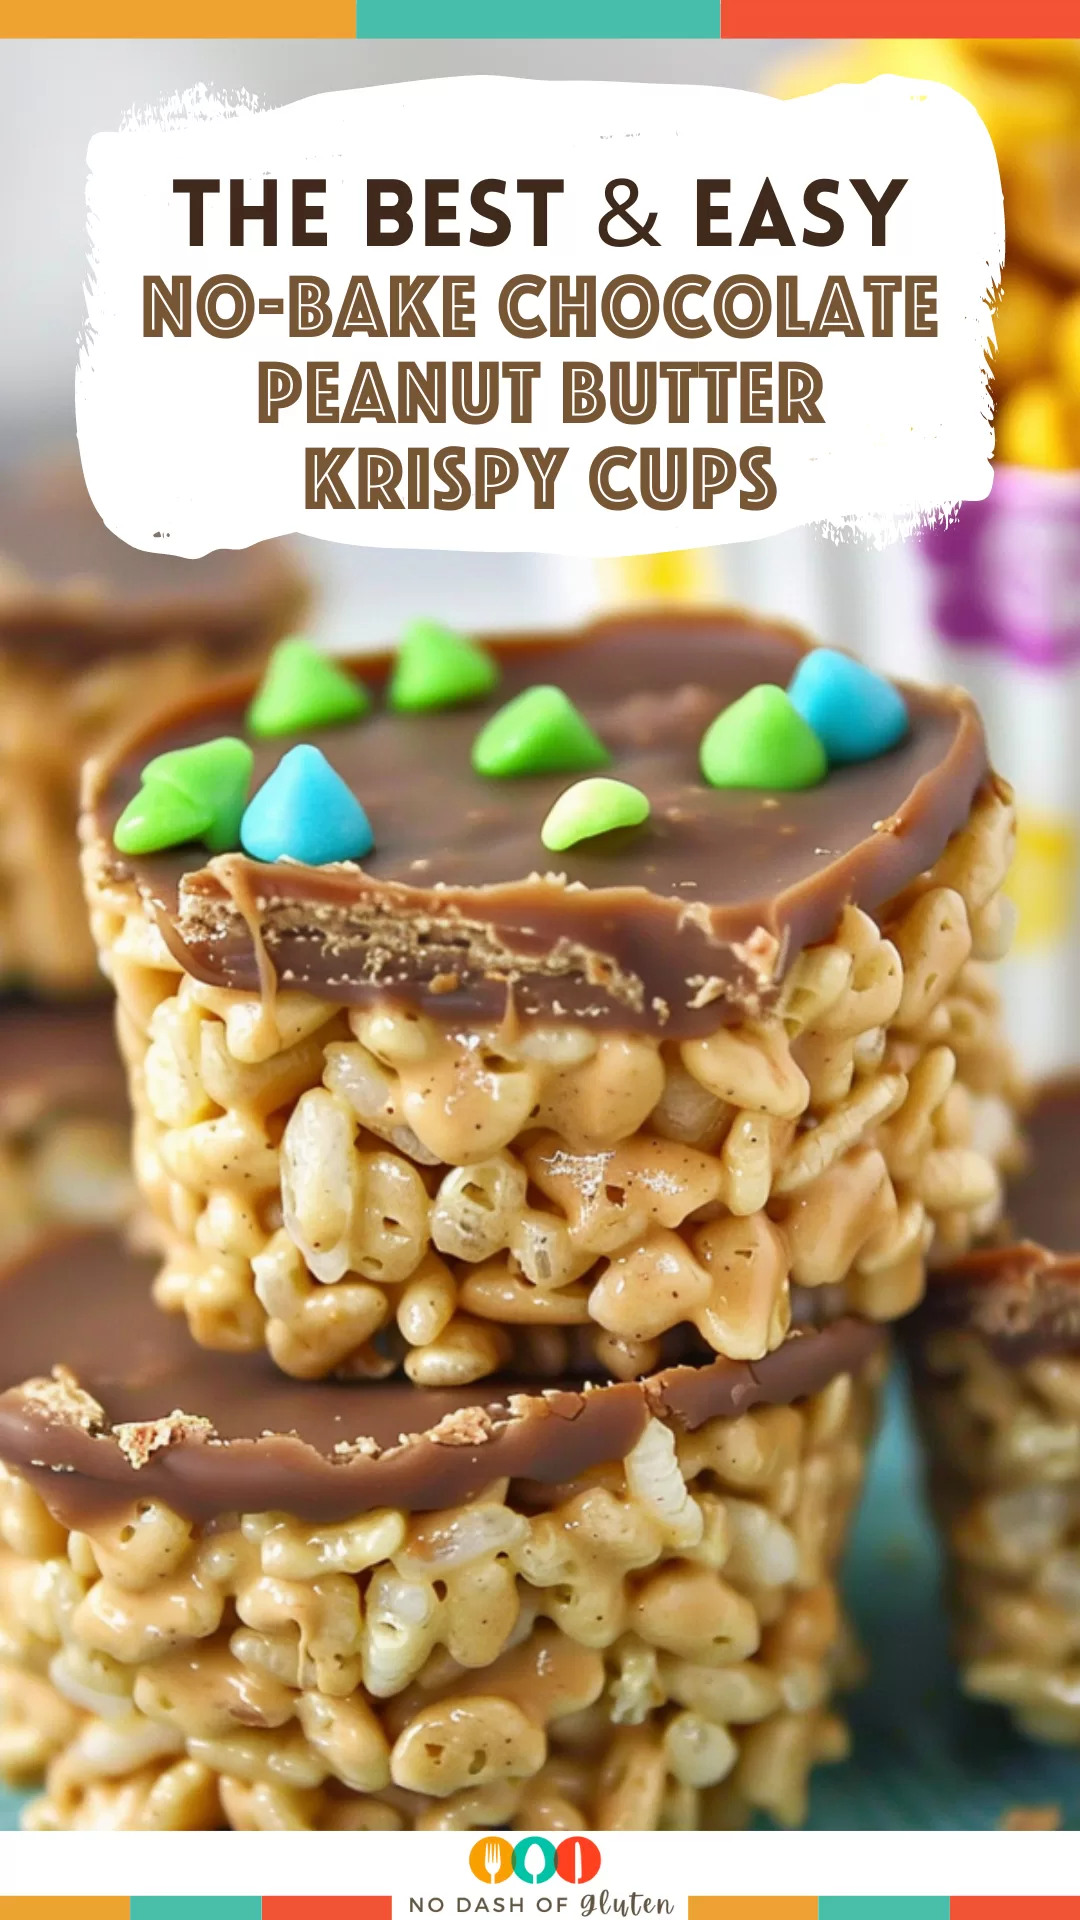
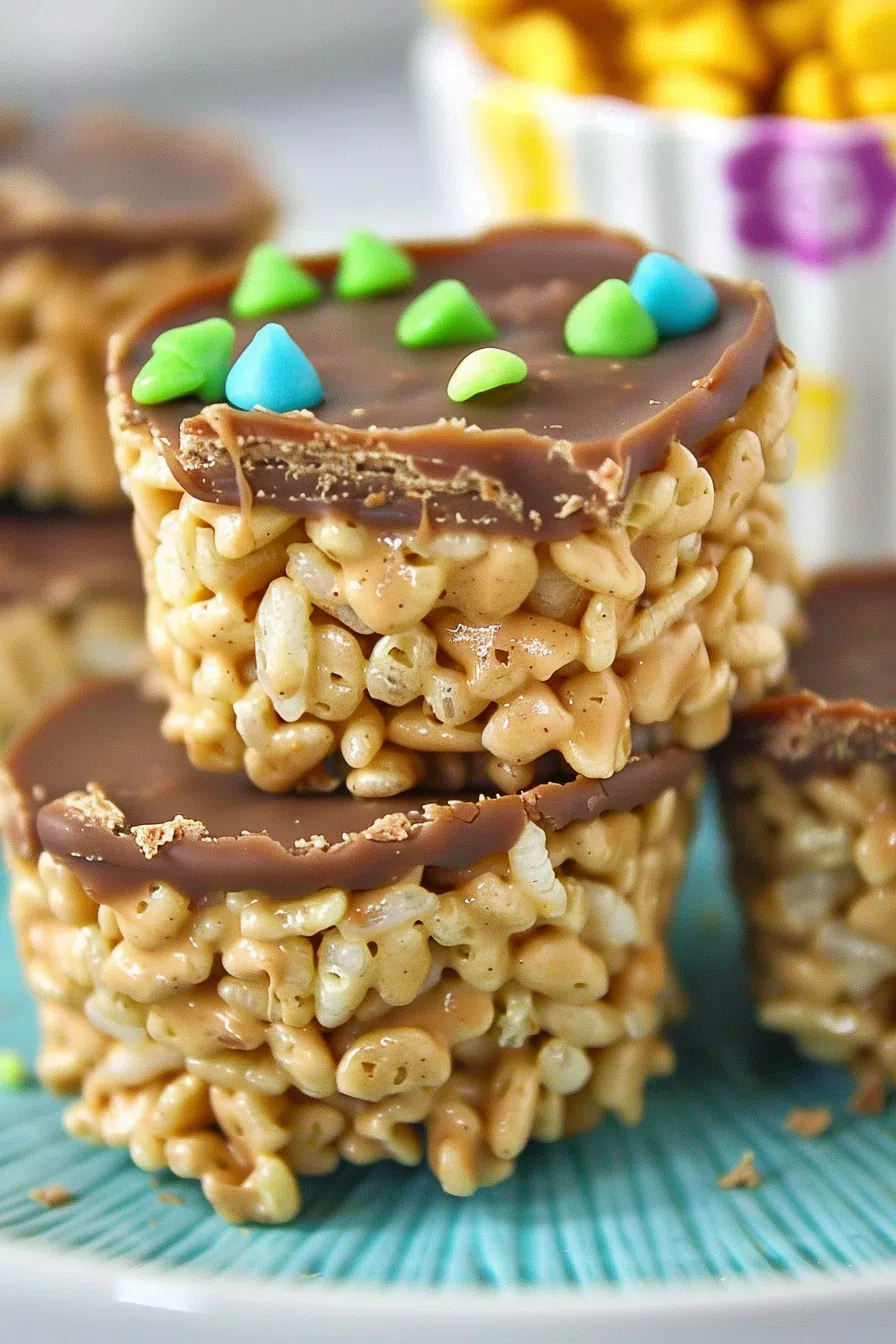
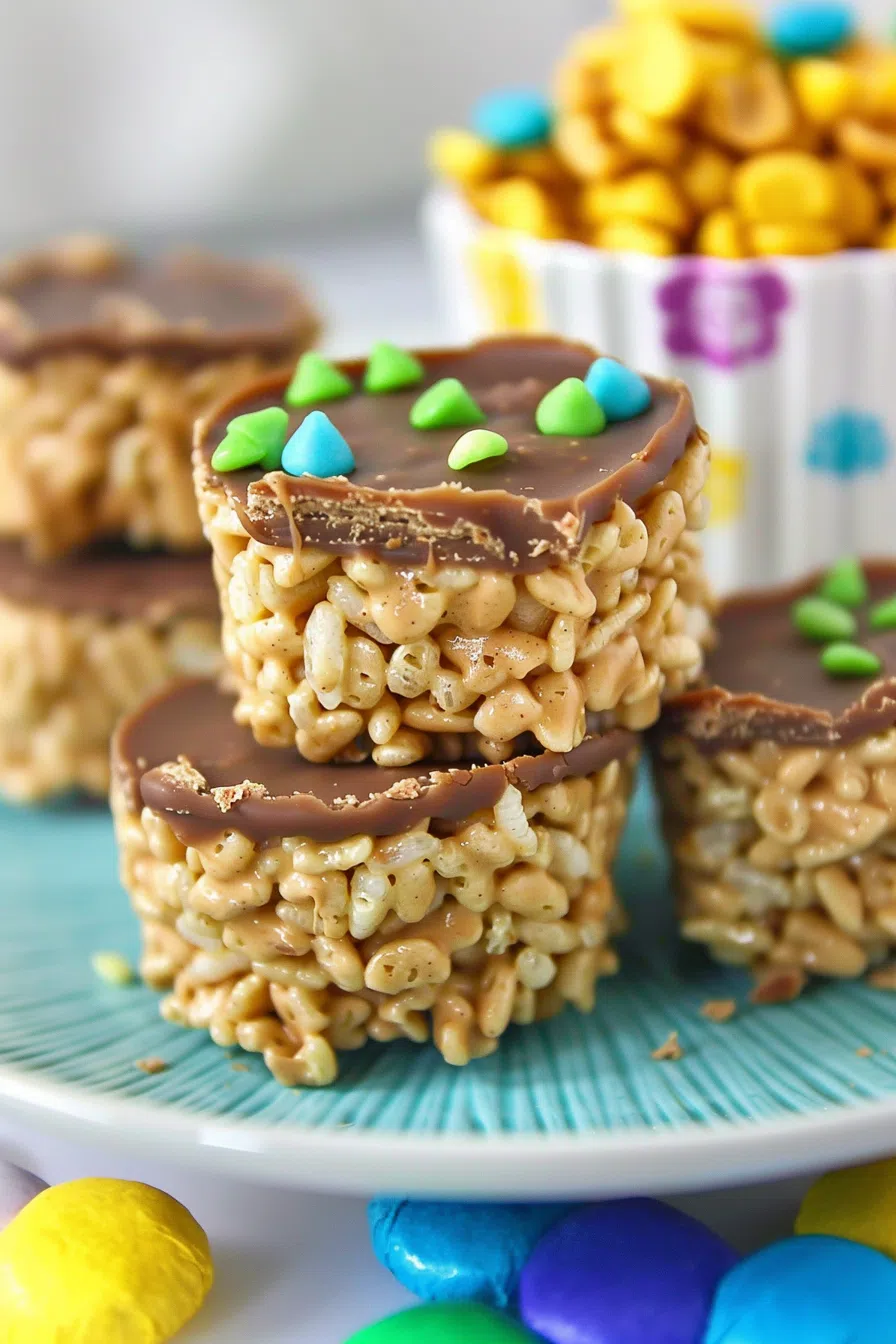
These No-Bake Chocolate Peanut Butter Krispy Cups are made with peanut butter, honey, Rice Krispies, and chocolate chips—simple and seriously addicting.
Okay, I’ve got to confess something. The first time I made these No-Bake Chocolate Peanut Butter Krispy Cups, I was in one of those moods—you know the kind. I’d had a long day, everything on my to-do list was still very much to-do, and I was standing in front of the pantry at 9:07 PM looking for something, anything, that didn’t require me to function like a person.
I wasn’t in the mood to bake. I didn’t want to mix batters, preheat anything, or risk burning a tray of whatever-should-have-been-cookies. But I did want something that tasted like the comfort food equivalent of a weighted blanket.


And then I remembered this little recipe I scribbled down once—probably from a friend’s mom or a potluck or maybe a Pinterest scroll at midnight. I had peanut butter. I had chocolate. I had a half-full box of Rice Krispies left over from my son’s cereal obsession phase. I melted, stirred, pressed, poured, chilled… and by 9:34 PM, I was eating one straight out of the fridge. Cold chocolate, sticky sweet cereal, and that glorious, peanut buttery crunch? That little cup might’ve actually saved my week.
Now I make them whenever I want to feel like I’ve accomplished something—without, you know, actually doing a lot. And isn’t that what no-bake desserts are for?
Why You’ll Love This No-Bake Chocolate Peanut Butter Krispy Cups Recipe?
Let’s be real: you probably already love chocolate and peanut butter. Who doesn’t? These No-Bake Chocolate Peanut Butter Krispy Cups take that iconic combo and toss in a crunch factor that feels like a celebration. Here’s why they’re a win:
-
No oven required. No preheating, no baking, no “did I leave it in too long?” panic.
-
Fast. Like, 10 minutes and done fast. The hardest part is waiting for them to set in the fridge.
-
Kid-approved, adult-devoured. My kid calls them “cereal cupcakes,” and my neighbor once ate four in one sitting.
-
One bowl, one pan. You’ll barely dirty any dishes, and that alone deserves an award.
-
They keep well… if you hide them. (Which I 100% recommend.)
Bottom line: they’re a little nostalgic, a little indulgent, and completely no-fuss. Just joy in a muffin cup.

Ingredient Notes:
Let’s talk ingredients. Because if you’re like me, you probably already have all this in your kitchen right now. And if not, your local corner store definitely does.
-
Peanut Butter: I usually go creamy, because smooth filling is my jam. But if you’re in a mood—or want texture—go for chunky. Bonus points if it’s the natural kind with the oil you have to stir in. Feels fancy.
-
Honey: I use it as the glue. Sweet and sticky. If you’re out, you can swap in maple syrup, but heads up—it won’t hold quite as firm and might give you softer cups.
-
Salt: Yes, even just a pinch. It makes everything taste more. Don’t skip it. Trust me.
-
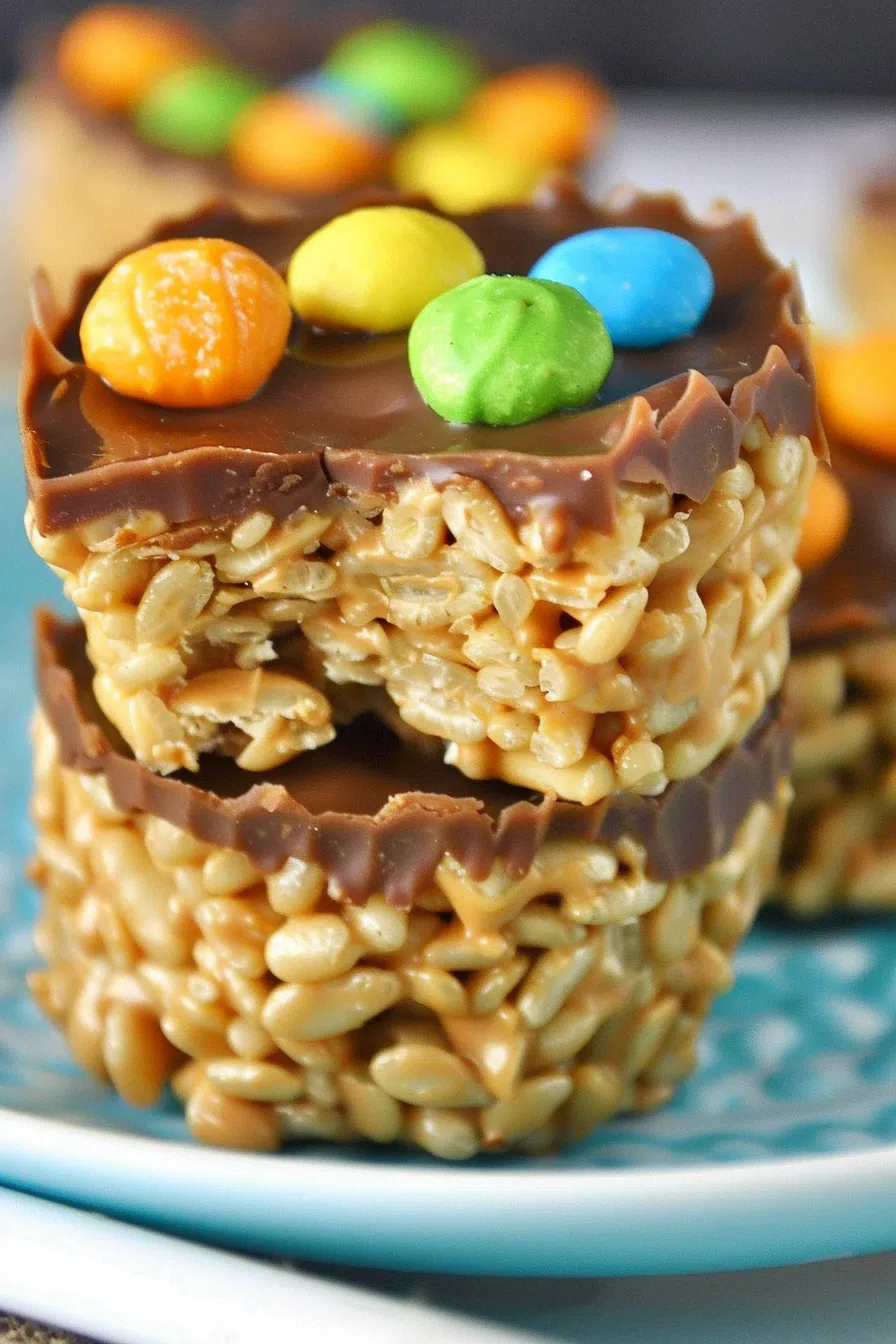
Rice Krispies: The classic. Don’t use stale cereal (been there, regret it), and honestly, any puffed rice cereal will work if the name brand’s not available.
-
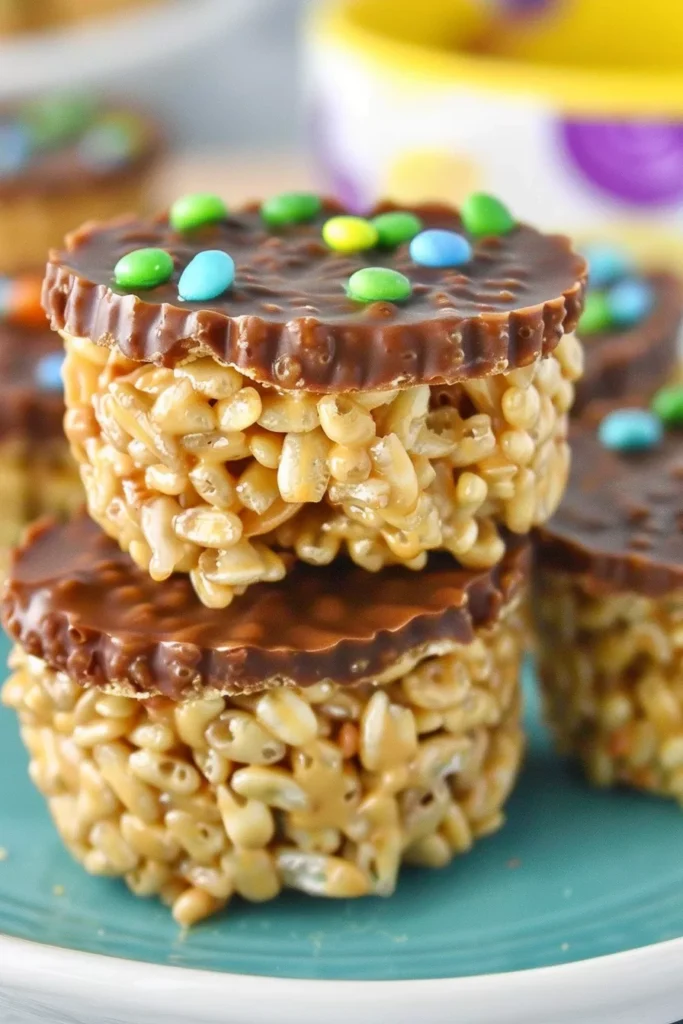
Chocolate Chips: Semi-sweet is my go-to because it hits the “sweet but not cloying” note just right. Dark chocolate makes these a little more grown-up. Milk chocolate makes them taste like candy bars. No wrong choices.
How To Make No-Bake Chocolate Peanut Butter Krispy Cups?
Step 1: Prep your muffin tin
Line a standard muffin tin with paper liners. Or, if you’re like me and ran out last time and forgot to buy more, a little nonstick spray will do. Just know it’s messier. These aren’t pristine bakery treats—they’re gloriously imperfect.
Step 2: Melt the base
Grab a small saucepan. Toss in your peanut butter, honey, and that tiny but mighty pinch of salt. Stir over low heat until it’s smooth and just starting to get glossy. Don’t wander off—it’s quick and sneaky.
Step 3: Mix with cereal
In a big bowl (the one you always think is too big but ends up being just right), combine the cereal and your warm PB-honey mix. Stir like your life depends on it. It’s sticky, and that’s okay. If a spoon won’t do the job, I’ve totally gone in with clean hands. No shame.
Step 4: Press into the pan
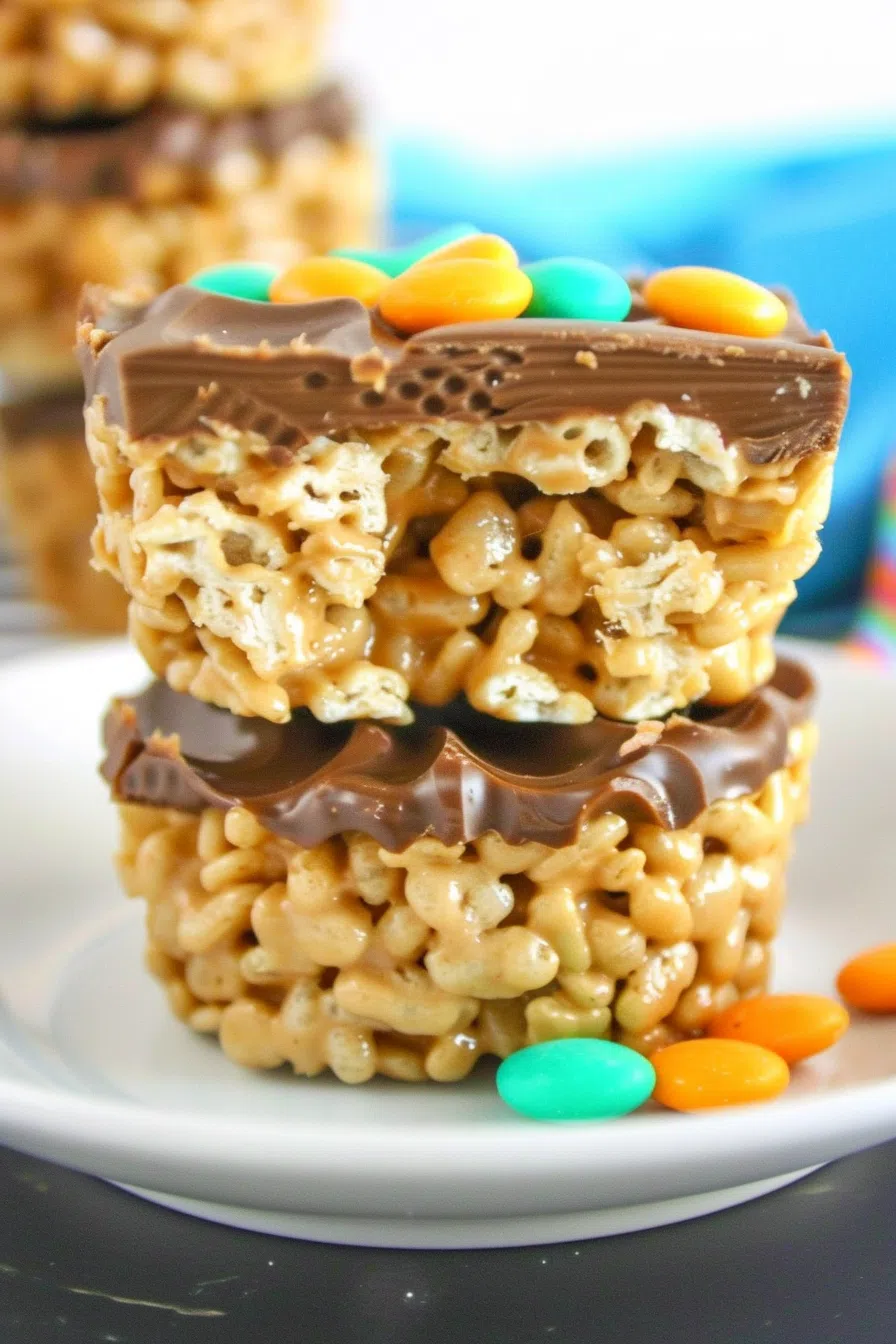
Scoop about 2/3 full into each muffin cup and press down firmly. Use the back of a spoon or your fingers. You want them compact but not cemented. Think granola bar energy, not brick.
Step 5: Melt the chocolate
Microwave your chocolate chips in short bursts, stirring every 20 seconds until smooth and dreamy. Don’t overdo it or you’ll get sad, scorched chocolate. Spoon over each cup and gently smooth. Or not. Swirls are charming.
Step 6: Chill and wait (ugh)
Stick the tray in the fridge for about an hour, or until the tops are set. Or cheat and throw them in the freezer for 25 minutes if patience isn’t your strong suit.
Want To Save This Recipe?
Then? Eat one. Preferably straight from the fridge with the door still open, pretending like no one can see you.
Storage Options:
Keep them in an airtight container in the fridge for up to a week. They’re amazing cold. Like, I almost like them better that way. You can also freeze them—just layer with parchment paper so they don’t stick. Let them thaw for a bit if you’re not into the “frozen chocolate tooth break” vibe.
Oh, and pro tip: store them behind something boring (like frozen peas or last year’s soup). It’s stealth mode for snackers.
Variations and Substitutions:
You’re totally allowed to riff. In fact, I encourage it.
-
Swap the PB: Almond butter, sunflower seed butter, cookie butter. You get the idea.
-
Top it off: Add flaky sea salt, crushed pretzels, or chopped peanuts on the chocolate layer before it sets. Game changer.
-
Use white chocolate or butterscotch chips. I did this once and people thought I bought them. I didn’t.
-
Mini muffin tin = mini cups. More bites. Less guilt? Debatable.
What to Serve with No-Bake Chocolate Peanut Butter Krispy Cups?
Honestly? They go with everything. But here’s what I pair them with on different days:
-
Coffee. Any kind. These are basically a grown-up Reese’s with a crunch.
-
Cold milk. Classic. Like you’re 10 again and just got home from school.
-
Wine. Don’t judge. Red works. Sweet wine works. Wine always works.
-
Zero things. Just a fork. Or fingers.
Frequently Asked Questions:
Can I use syrup instead of honey?
Sure! Just expect them to be a little softer. Still tasty though.
Can I make them nut-free?
Yep! Sunflower seed butter is a great sub. And if you use allergy-friendly cereal, you’re good to go.
Can I double the recipe?
You should. They go fast. Especially when “just one more” becomes six.
Seriously—if you make these No-Bake Chocolate Peanut Butter Krispy Cups, tell me everything. Did you go chunky? Did your kid eat the tops off and leave the bottoms like mine? Did you sneak one for breakfast and call it “protein”?
Tag me. Email me. Send a carrier pigeon. Just don’t forget to stash one in the back of the fridge for Future You. Trust me—you’ll thank yourself later.
Here’s to no ovens, sticky fingers, and treats that make ordinary days feel like a win.
Keep the Flavor Coming – Try These:


No-Bake Chocolate Peanut Butter Krispy Cups
Ingredients
- 1 c peanut butter creamy or chunky
- 6 tbsp honey
- 1 pinch salt
- 3 c Rice Krispies cereal
- 2 c chocolate chips melted (semi-sweet recommended)
Instructions
- Prepare a muffin pan with liners. Or a bit of cooking spray.
- In a small pot. Gently heat peanut butter, honey, and salt. Until smooth.
- In a bowl. Mix the Rice Krispies with the peanut butter mixture. Until well coated.
- Fill each muffin cup about 2/3 full with the cereal mix. Pressing down firmly.
- Melt the chocolate chips in the microwave. Spoon the melted chocolate over each cup.
- Chill the muffin tray in the fridge. Until the chocolate sets. Then they're ready to enjoy!
Notes
I’m Bitty, owner of nodashofgluten.com, where I share simple, delicious recipes for all tastes, including gluten-free. Check out my “About Me” page for more info!