

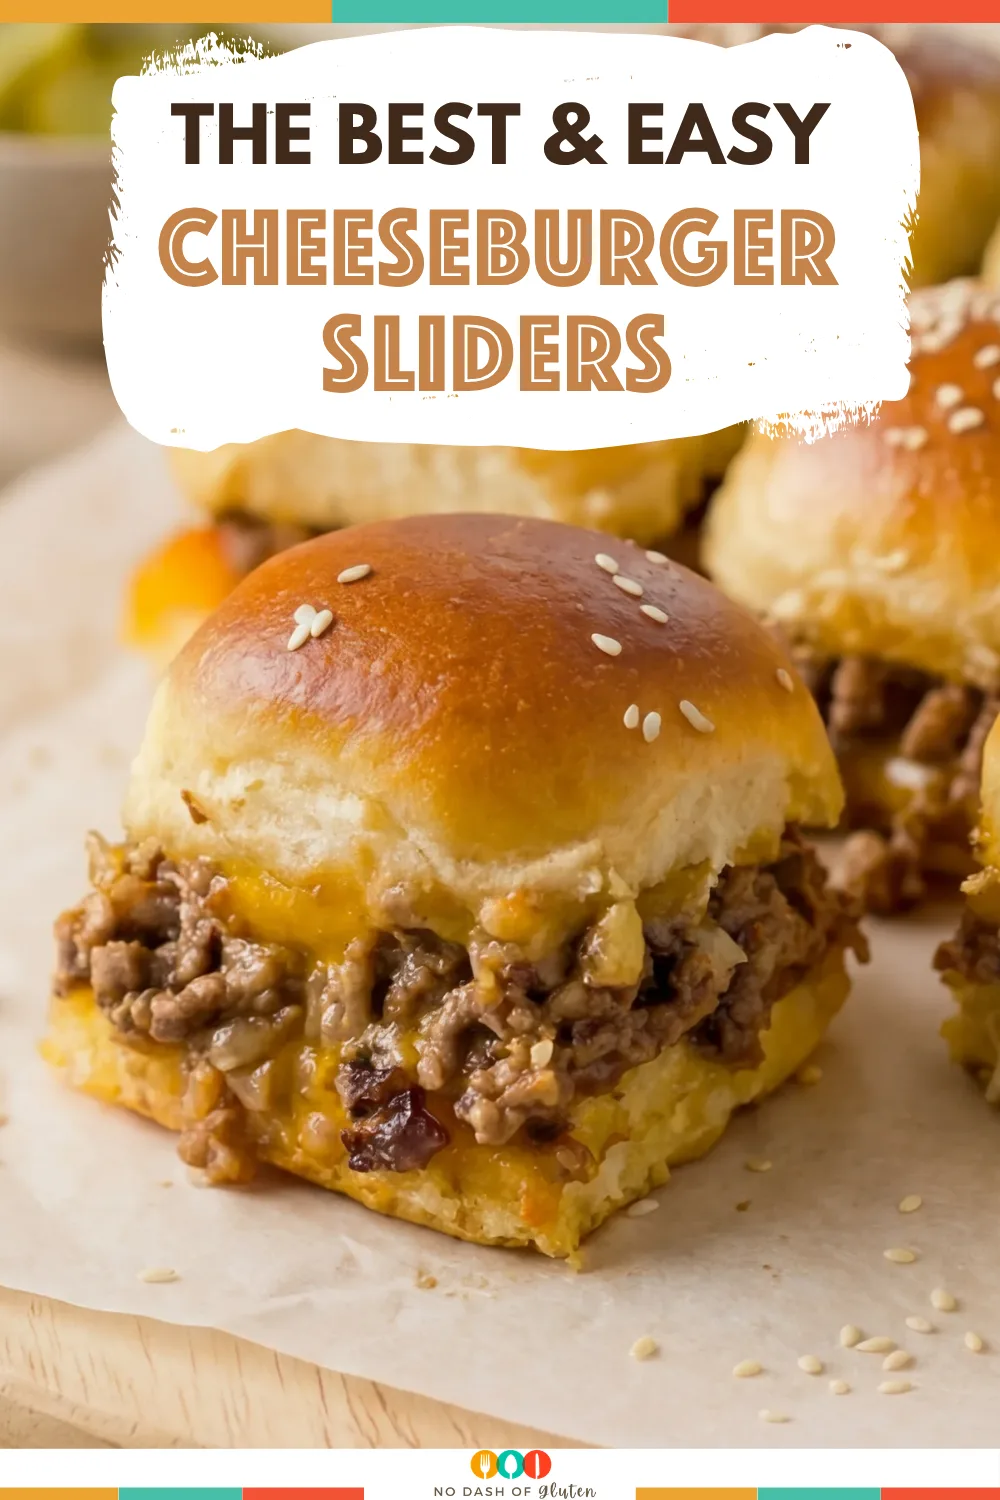
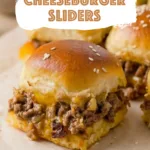
Easy Cheeseburger Sliders – Looking for a quick and delicious lunch or dinner? This Easy Cheeseburger Sliders recipe combines all the classic flavors of a cheeseburger in convenient, bite-sized sliders! With juicy ground beef, melted cheddar, and soft dinner rolls, this recipe is perfect for family meals or parties. Ready in just 30 minutes, it’s a simple, satisfying way to serve up a crowd-pleaser.

The first time I made these sliders, it was a spontaneous family dinner night. My husband and kids were craving something comforting but quick, and I didn’t feel like spending too much time in the kitchen. I threw together some ground beef and dinner rolls, and the result was these cheeseburger sliders! The kids went crazy over them, and my husband had seconds (and thirds!). Now, these sliders are on our weekly menu rotation because they’re just that good.
Why You’ll Love These Cheeseburger Sliders?
This recipe stands out for its simplicity and versatility. The cheeseburger sliders are packed with juicy, seasoned ground beef, perfectly melted cheddar cheese, and fluffy dinner rolls that bake to golden perfection. The melted butter and sesame seed topping give them that “fresh from the diner” feel, while the quick preparation time makes them an easy option for busy weeknights. Plus, you can easily customize these sliders by adding your favorite toppings or using different cheeses.
Ingredient Notes:
- Ground Beef: I prefer using lean ground beef (90/10 or 93/7 fat content) because it keeps the sliders juicy without too much grease. Stick with lean ground beef, either 90/10 (10% fat content) or 93/7 (7% fat content). If you only have ground beef with a higher fat content, don’t worry, you can use it, just be sure to spoon out the extra fat and liquid after cooking. This helps keep your cheeseburger sliders from getting soggy while still locking in that great beefy flavor.
- Cheddar Cheese: You can use sliced cheese, shredded cheese, or even both for that gooey, melty goodness. Feel free to experiment with different cheeses, like Monterey Jack or Swiss.
- Dinner Rolls: Any soft, fluffy rolls will work, but I find that using pre-packaged dinner rolls makes the process even faster.
- Mayonnaise: Adding mayo to the cooked beef adds a rich, creamy texture that really ties everything together.
- Sesame Seeds: This little touch gives the sliders a classic burger feel—almost like you’re eating them at a burger joint!
How To Make Cheeseburger Sliders:
These cheeseburger sliders come together quickly and easily. Just follow the steps below, and you’ll have a batch of cheesy, crowd-pleasing sliders ready in about 30 minutes.
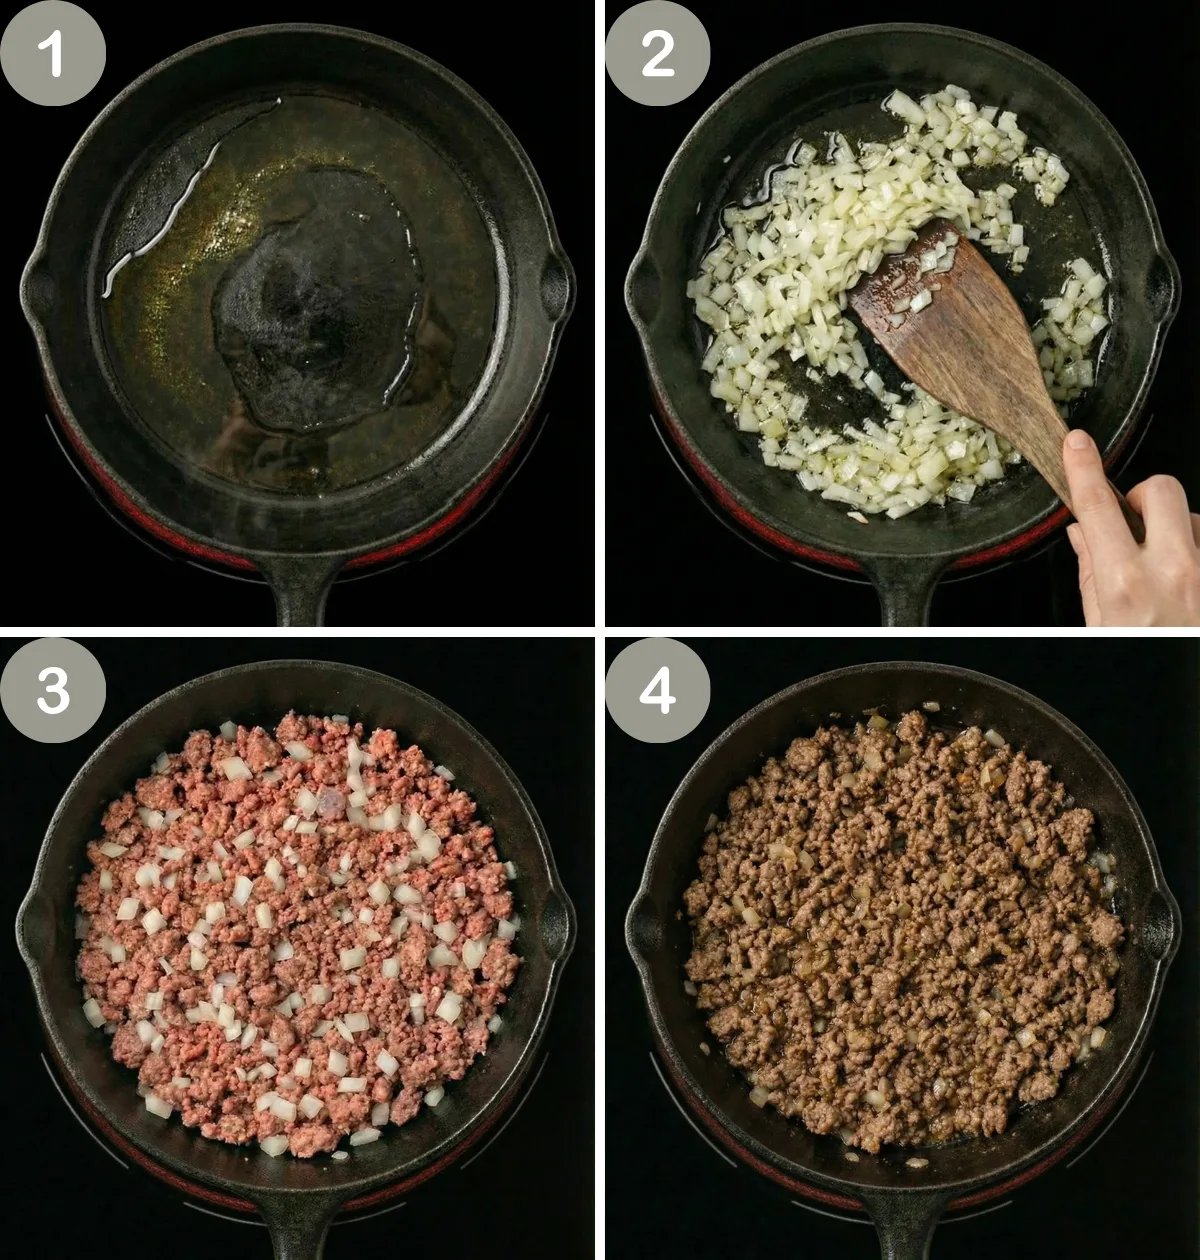
Step 1: Preheat Oven: Start by preheating your oven to 350°F and butter the bottom of a large baking sheet to prevent sticking—this ensures those delicious sliders come out perfect every time!
Step 2: Cook Beef: Heat up a large skillet with a splash of olive oil over medium-high heat. Add your diced onions and sauté for a minute until they become fragrant. Toss in the ground beef, break it up with a spatula, and season with salt, pepper, and garlic powder. Let it cook until the beef is nicely browned, around 5-7 minutes. Drain any excess grease so the sliders aren’t too oily, especially if you used a higher fat ground beef, so the sliders aren’t too oily. Spoon out any extra fat and liquid, leaving just the juicy, flavorful beef for your cheeseburger sliders.
Step 3: Mix with Mayo: Once the beef is cooked, stir in the mayo. It gives the mixture a creamy texture and a slightly tangy flavor that elevates the filling.
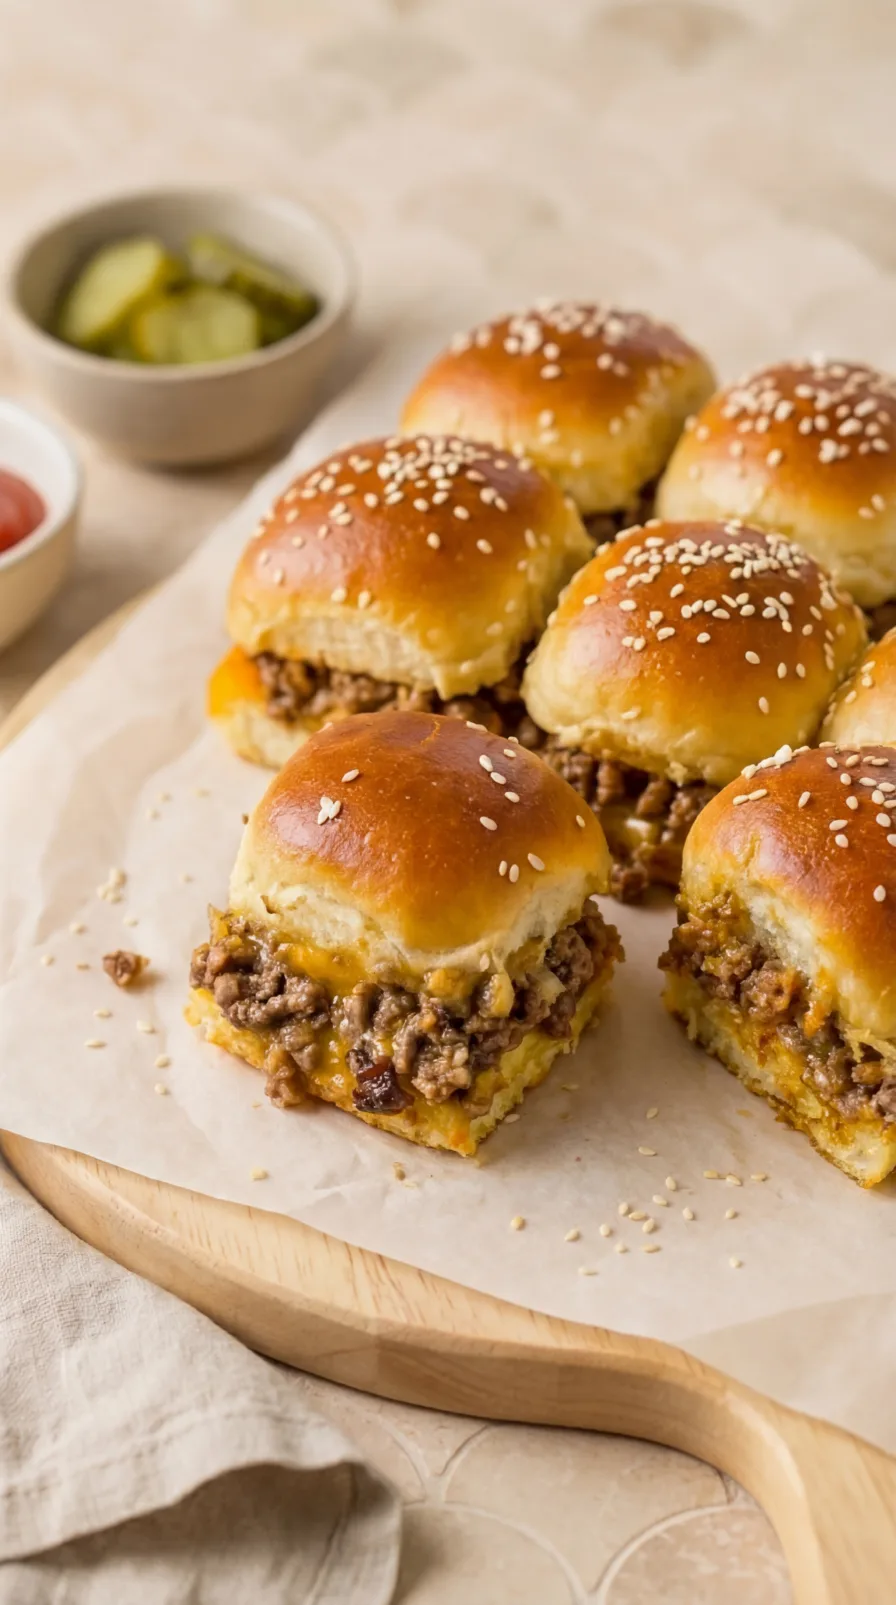
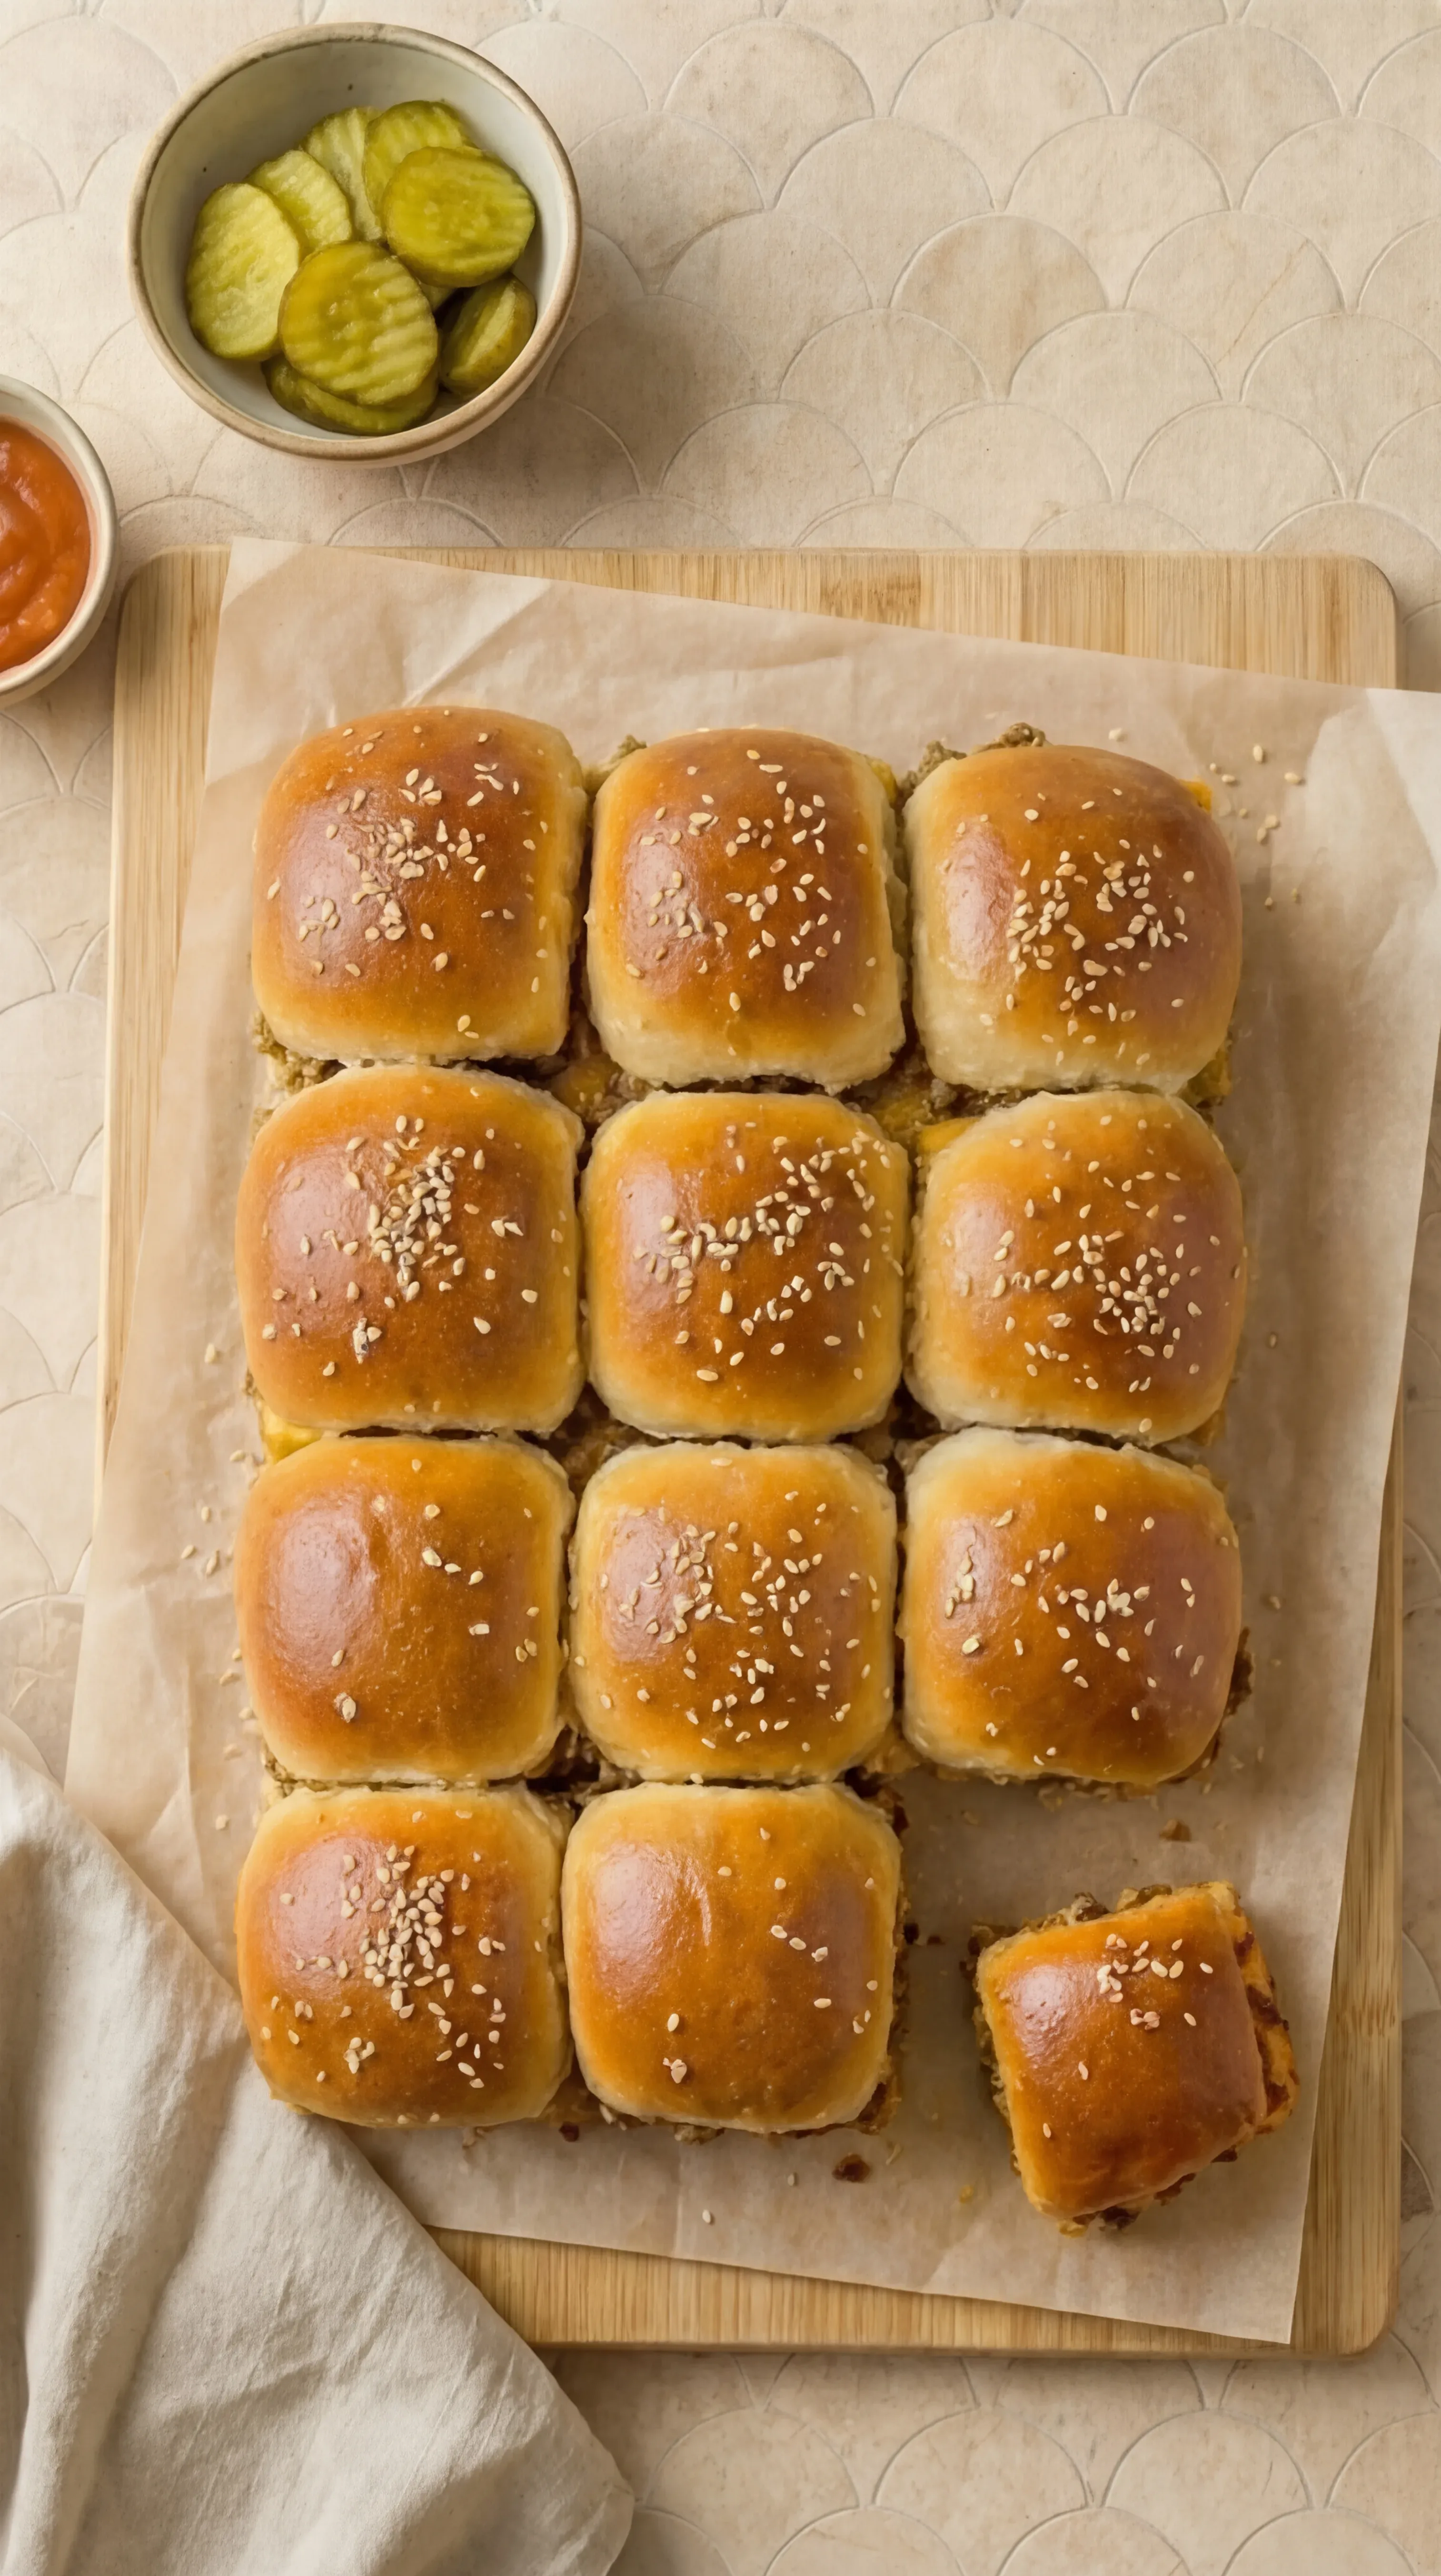
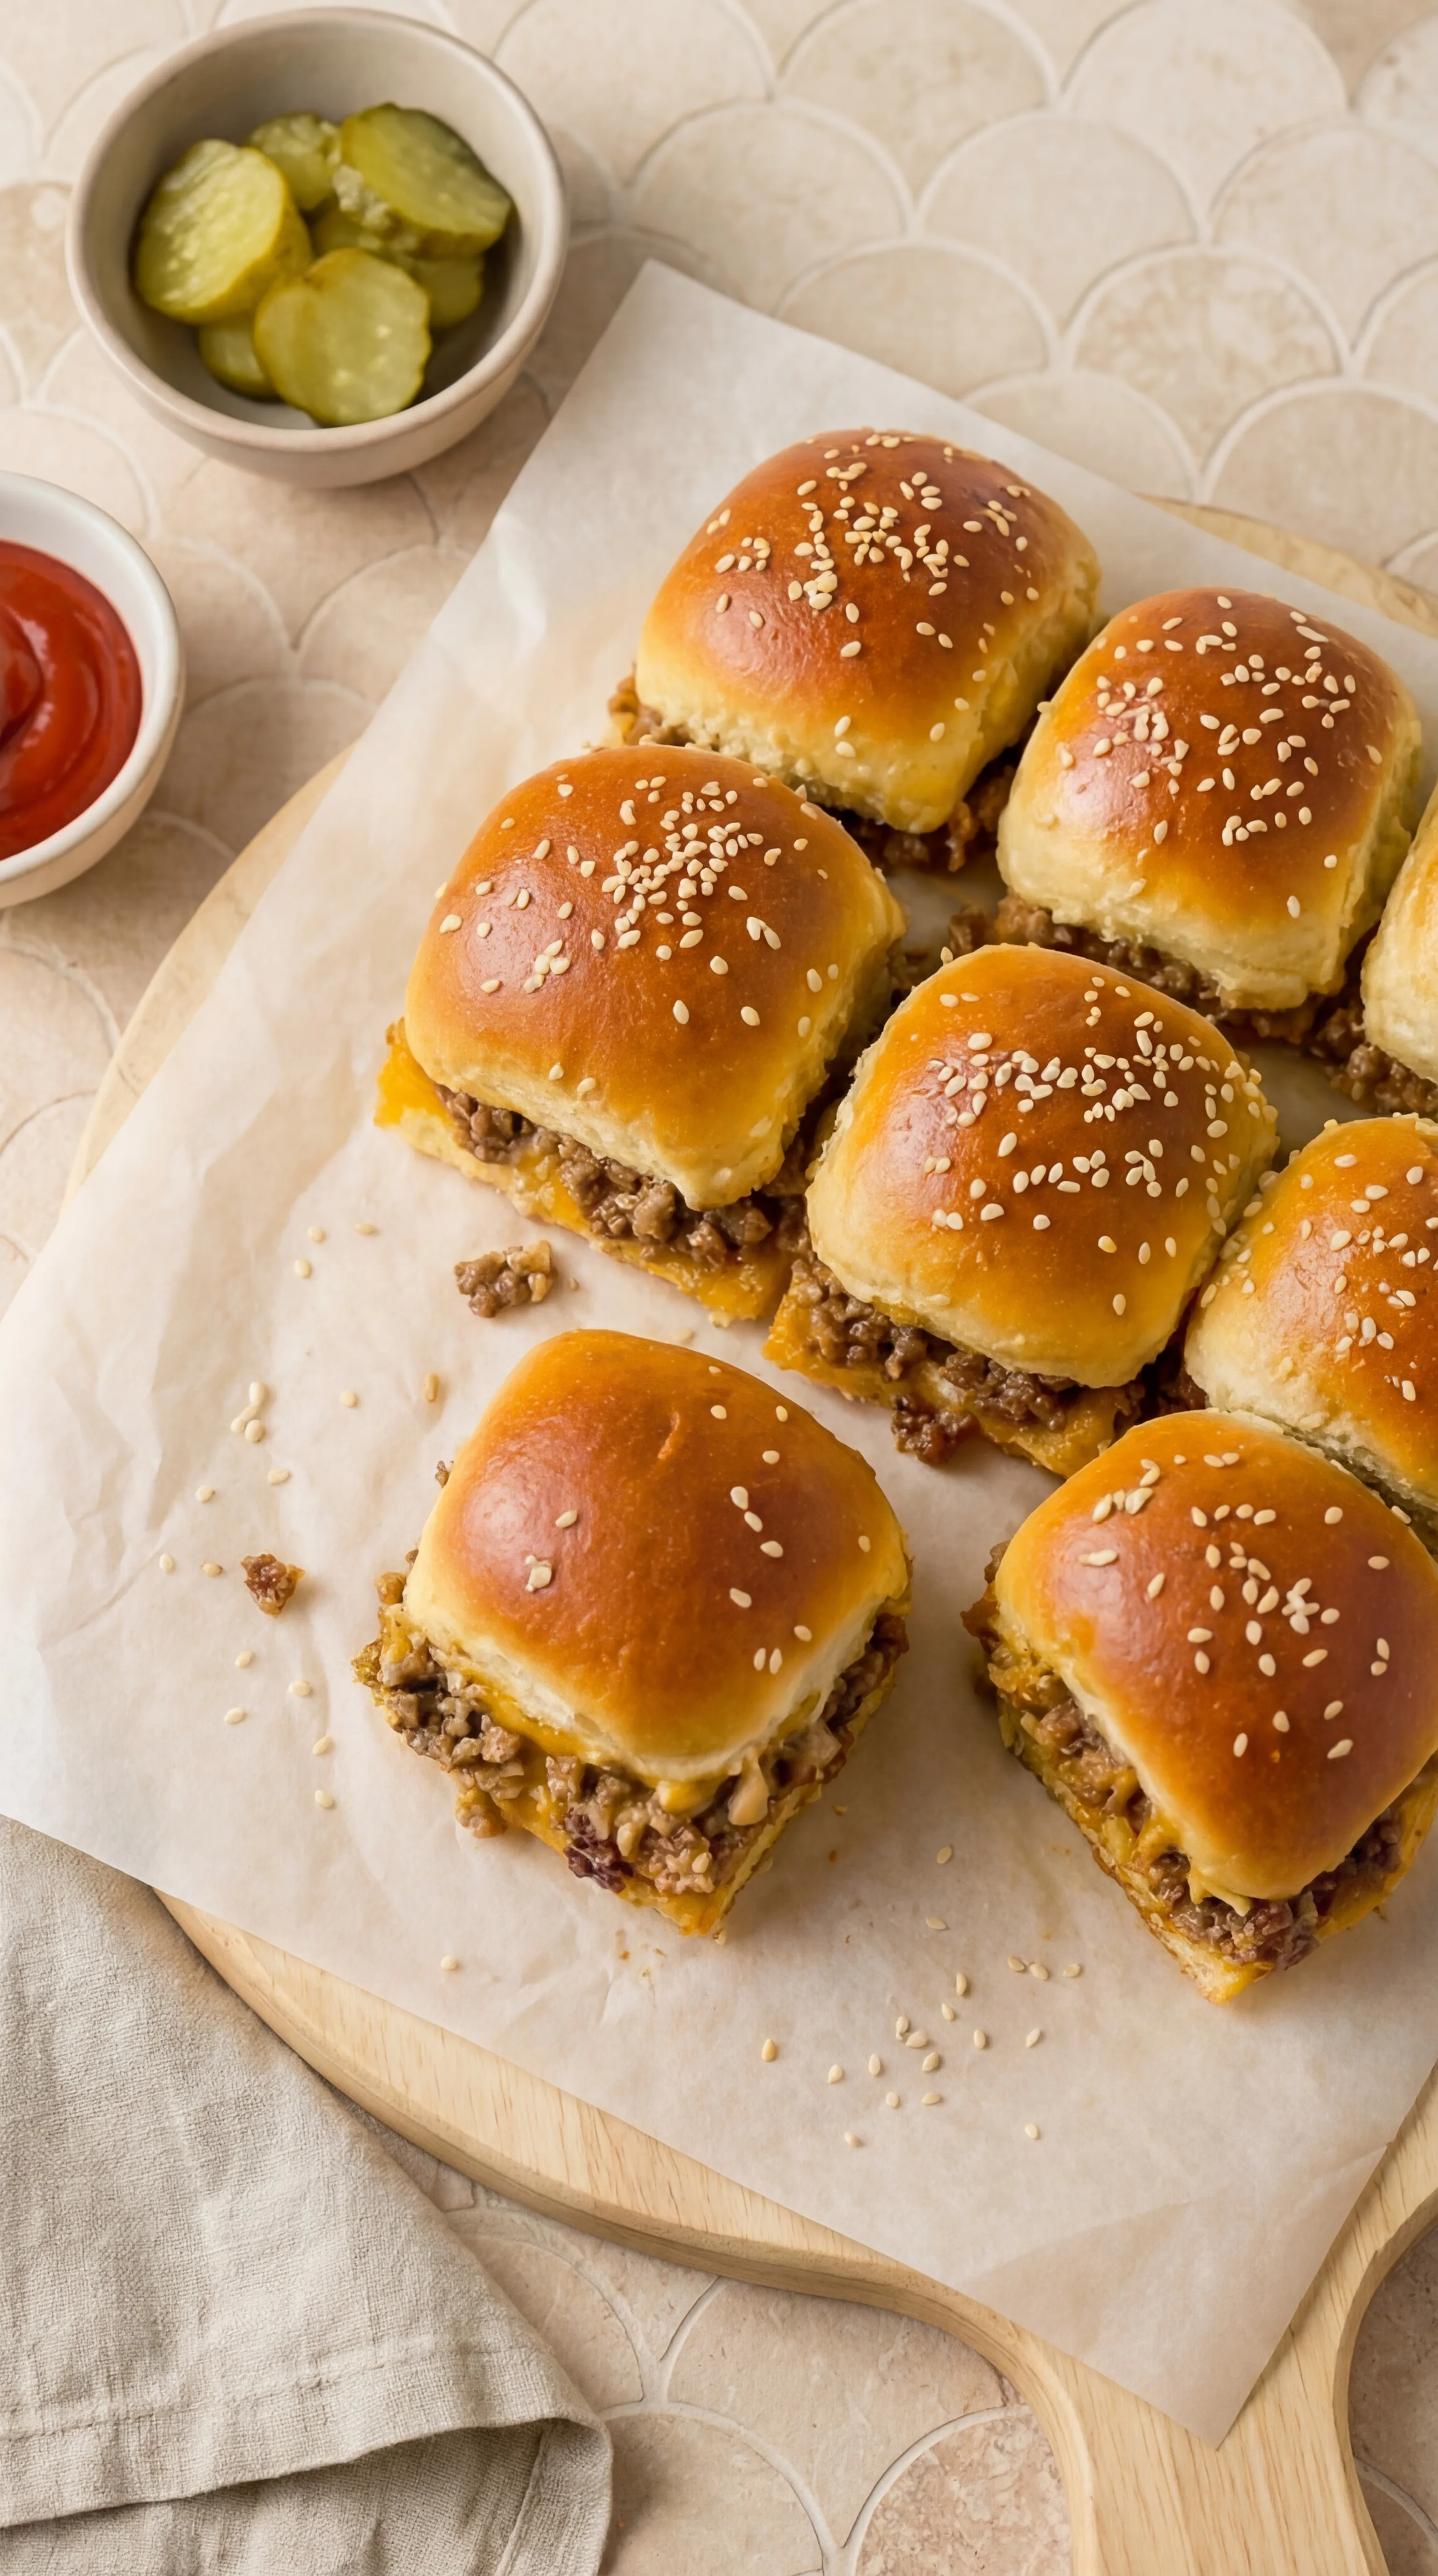
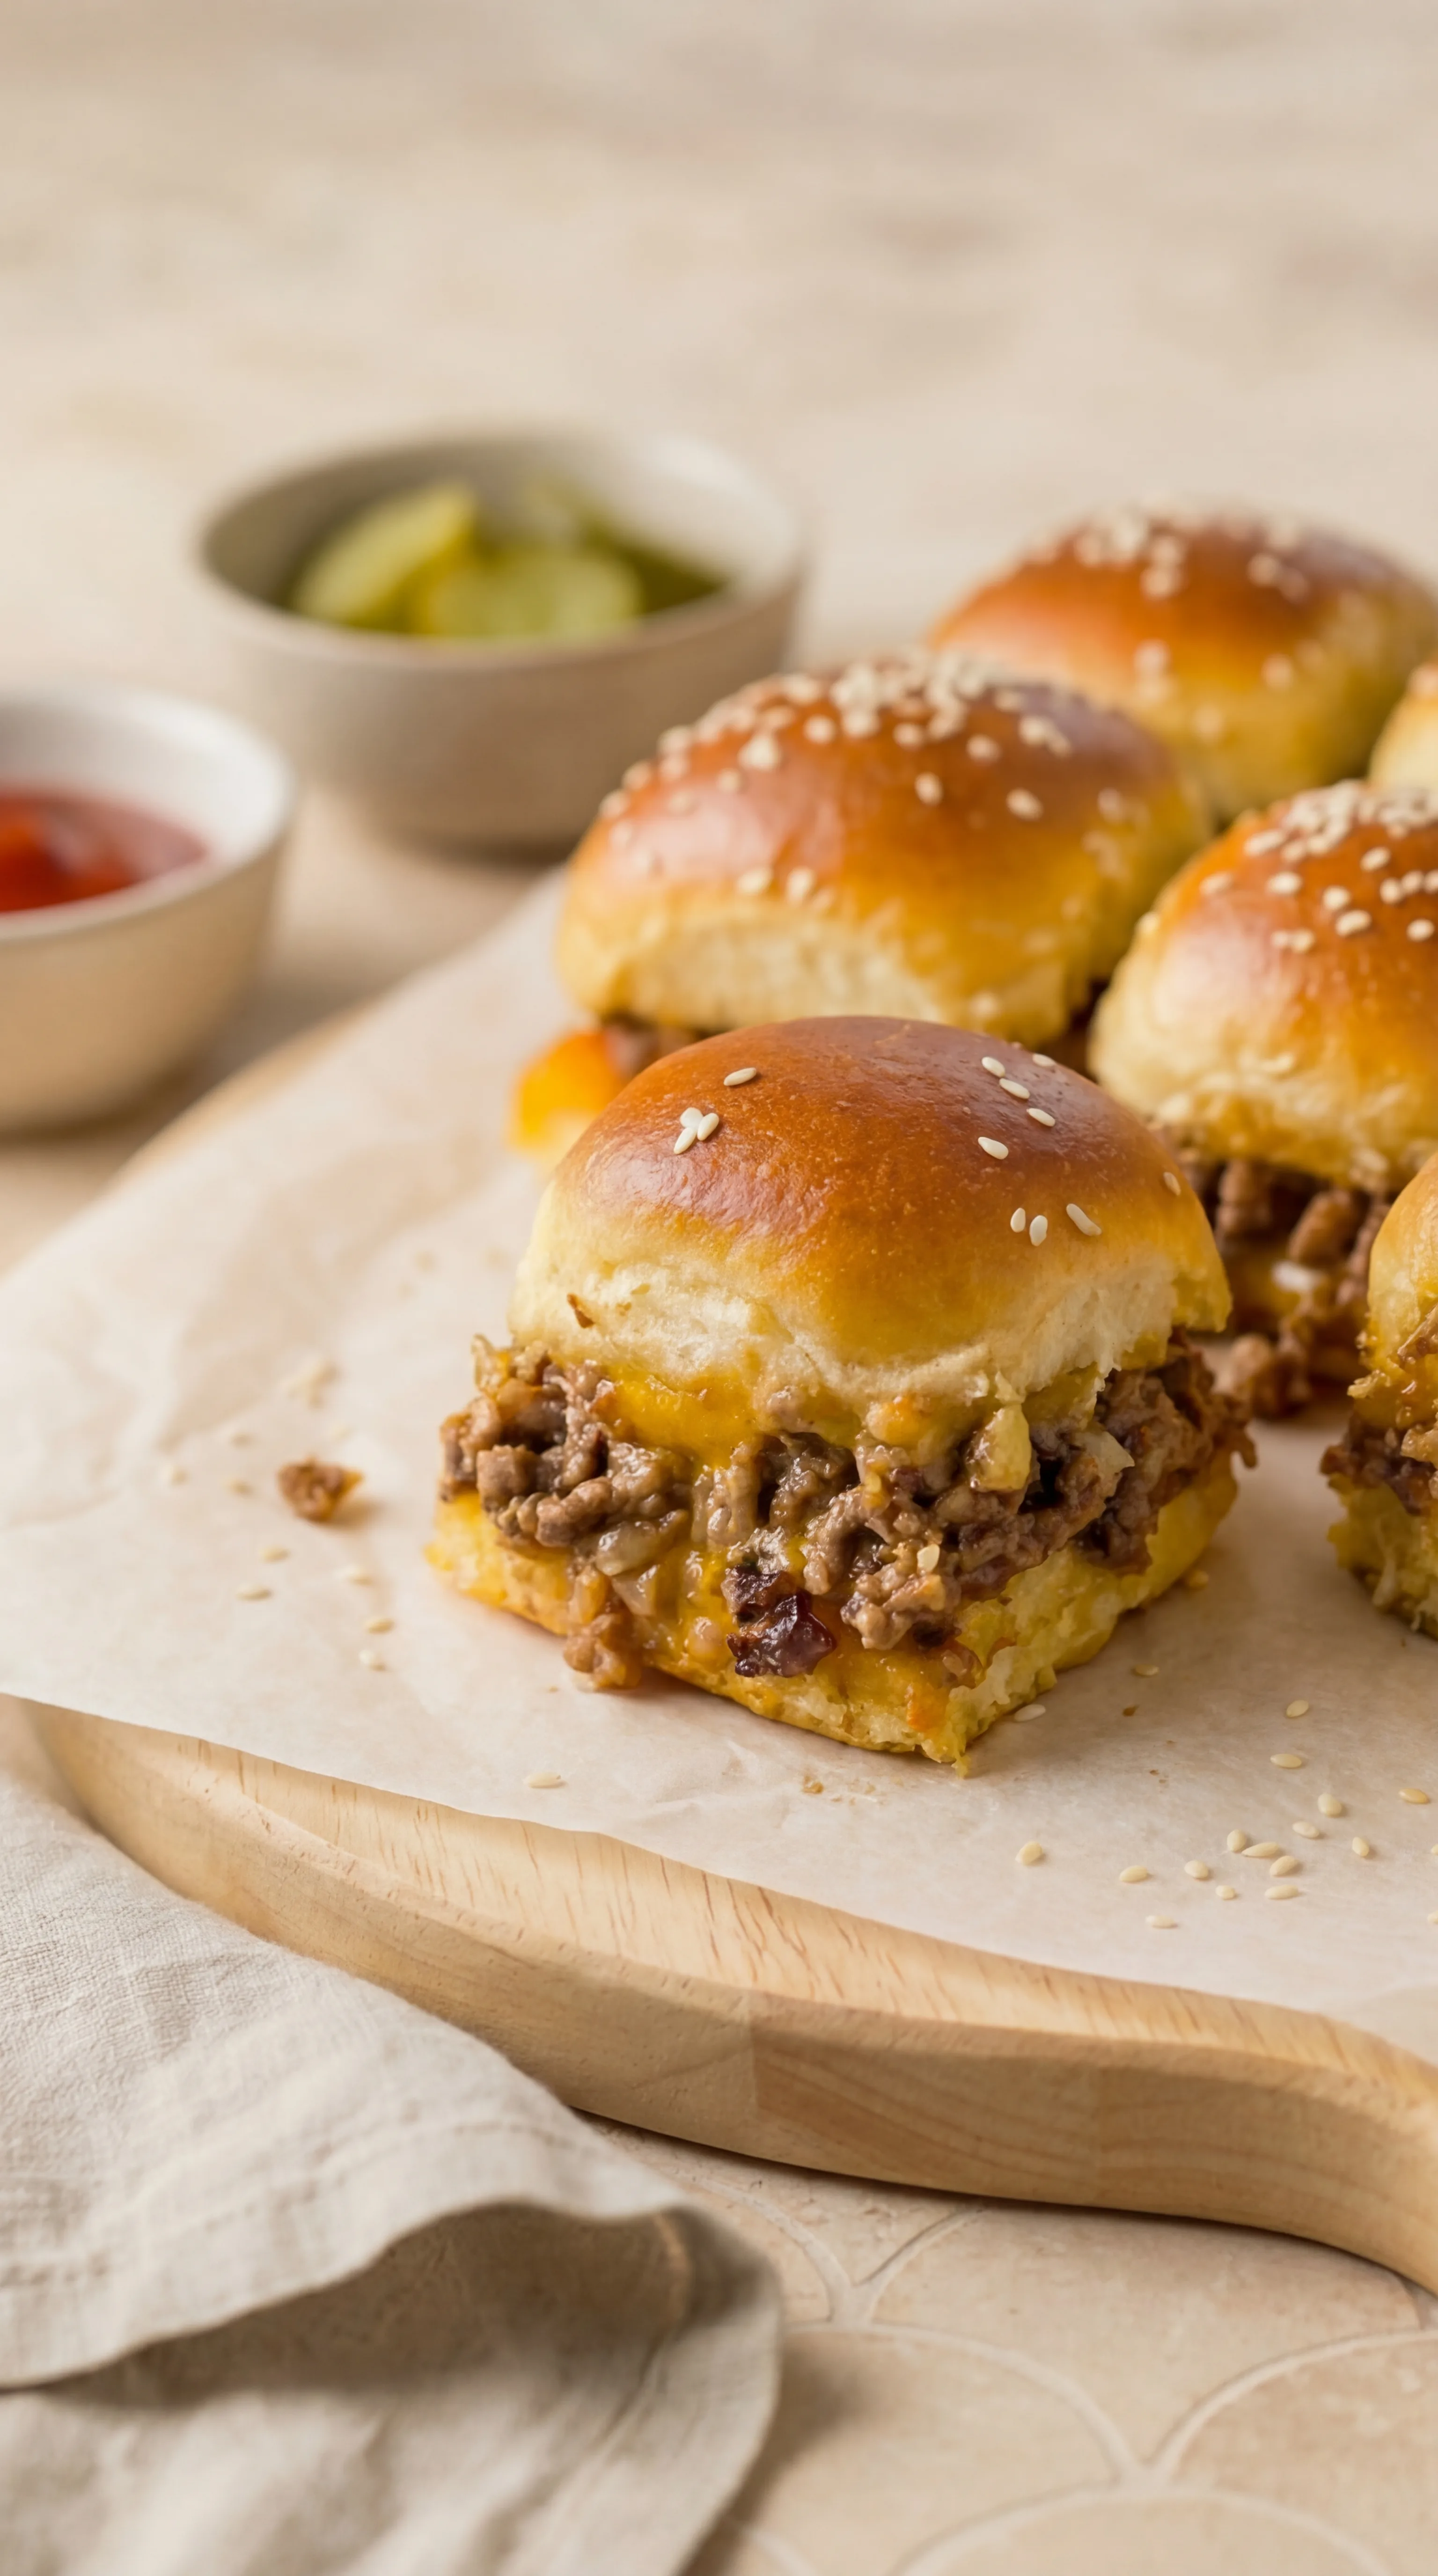
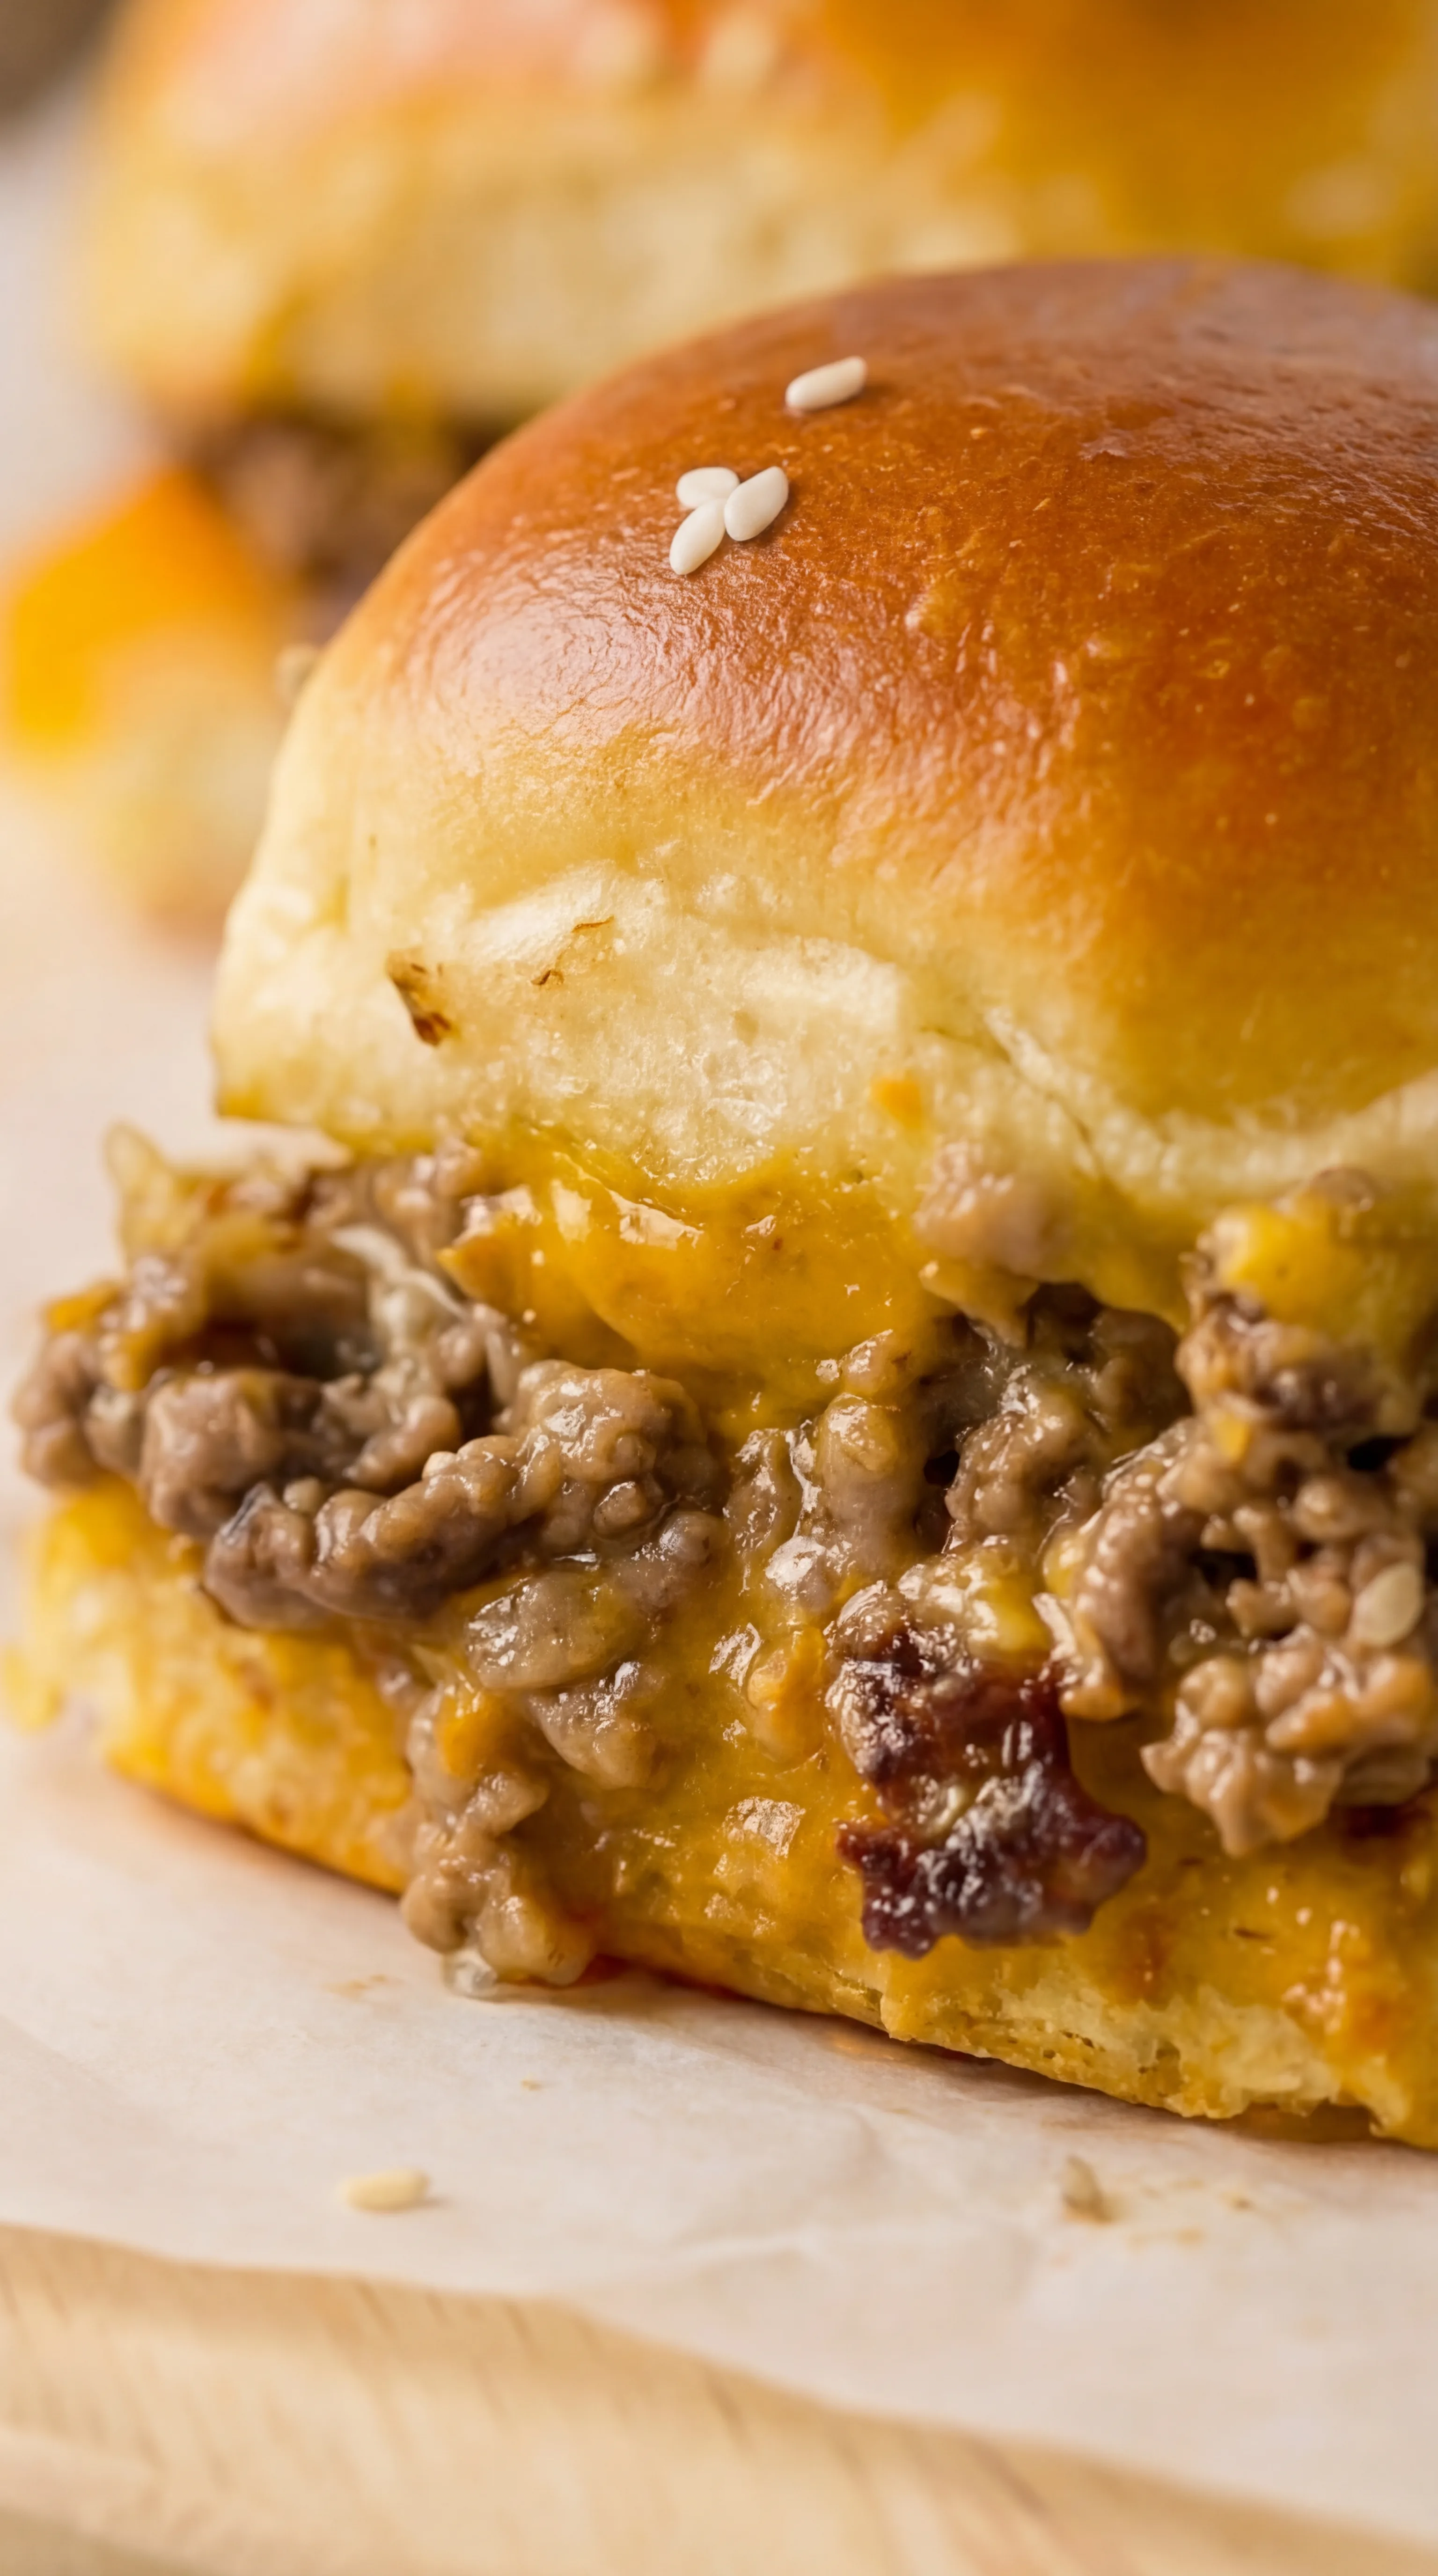
Step 4: Assemble Sliders: Slice your dinner rolls in half and lay the bottom halves on the buttered baking sheet. Layer slices of cheddar cheese on the bread first, then spread the cooked beef mixture evenly over the cheese. Sprinkle shredded cheddar on top for extra gooey goodness.
Step 5: Finish and Bake: Place the top halves of the buns on the beef mixture. Brush them with melted butter and sprinkle sesame seeds over the tops. Bake for 12-15 minutes, or until the cheese is melty and the buns are golden brown and crispy. Let them cool for a minute, then dig in!
Do I Need to Cover the Sliders While Baking?
Nope, leave the foil in the drawer! Bake your cheeseburger sliders uncovered. This lets the tops get deliciously golden and just a little bit crisp, while also helping any steam escape. If you cover them, the rolls can get steamy and end up a bit soggy, not what you want for that irresistible, slightly toasted bite when you pick one up. Uncovered baking keeps everything melty, cheesy, and just the right amount of soft on the inside with a perfect top.
Pro Tip: To get an extra flavor boost, try toasting the bottom halves of the rolls with a little butter and garlic powder before adding the beef and cheese. This not only gives the sliders a delicious garlic kick but also helps prevent the bread from getting soggy from the beef mixture. And if you’re feeding a crowd, you can double the recipe easily, just prep everything ahead of time, bake when you’re ready, and your guests will think you went all out! Plus, you can customize these sliders by adding different toppings like pickles, crispy bacon, or even jalapeños for a little heat.
Sliders are super versatile; serve them as an appetizer, for lunch, or as a main course at dinner. They pair perfectly with chilled dill pickles on the side, or with crispy baked potato wedges. Since they have that classic cheeseburger vibe, try dipping them in your favorite condiments. Ketchup, mustard, mayo, or even a homemade burger sauce all work wonderfully. Mix and match to make them your own.
Want To Save This Recipe?
Storage Options
Leftovers keep really well, which honestly makes these Cheeseburger Sliders even more lovable. Store them in an airtight container in the fridge for up to 3 days. When reheating, the oven works best to keep the buns slightly crisp, just warm at 300°F (150°C) for about 8–10 minutes.
You can also freeze baked sliders for up to 2 months. Wrap tightly and thaw overnight in the fridge before reheating.
Variations and Substitutions
These Cheeseburger Sliders are super flexible, so feel free to tweak them depending on what you have on hand.
- Different Cheese: Try American, Colby Jack, Swiss, or Pepper Jack for a little kick.
- Extra Flavor: Add Worcestershire sauce, mustard, or ketchup to the beef mixture.
- Add Toppings: Pickles, crispy bacon, jalapeños, or caramelized onions are all amazing.
- Lighter Option: Use ground turkey or chicken instead of beef.
- Gluten-Free: Swap the dinner rolls for gluten-free slider buns.
- No Mayo: Substitute with cream cheese or a little sour cream for similar creaminess.
Honestly, once you make these, you’ll probably start experimenting automatically.

What to Serve with Cheeseburger Sliders?
These Cheeseburger sliders pair perfectly with simple, comforting sides that complete the meal without extra effort.
- French Fries – the classic burger companion everyone expects.
- Coleslaw – creamy crunch that balances the richness.
- Potato Wedges – hearty and perfect for dipping.
- Mac and Cheese – extra cheesy comfort food favorite.
- Pasta Salad – light and great for gatherings.
- Dill Pickles – tangy bite that cuts through the richness.
Frequently Asked Questions:
Can I make these Cheeseburger Sliders ahead of time?
Yes. You can assemble the sliders, cover them with plastic wrap, and refrigerate for up to 24 hours before baking. Bake them just before serving for the best melty texture.
What other toppings can I add?
Feel free to get creative. Pickles, mustard, ketchup, or even caramelized onions all work great. Customize them however you like.
Can I freeze leftover sliders?
Yes, you can freeze the sliders after baking. Wrap them tightly in plastic wrap and store in a freezer-safe container for up to 2 months. Reheat in the oven for best results.
What’s the best way to reheat a single slider?
If you only need one or two, the microwave works perfectly. Heat uncovered for about 15–20 seconds, or until the beef is warmed through and the cheese is melted.
Can I make a smaller batch for fewer people?
Absolutely. Simply cut all the ingredients in half. The baking time stays the same, making it easy to prepare a smaller portion.
Other Slider Ideas To Try
Absolutely! Cheeseburger sliders are just the beginning. You can whip up a variety of tasty sliders with the same easy method:
- Meatball Sliders: Layer cooked meatballs and marinara sauce with melty mozzarella. Then bake until bubbly for an Italian-inspired twist.
- Pulled Pork or BBQ Chicken Sliders: Just pile on some saucy pulled pork or shredded BBQ chicken. Top with coleslaw if you like a little crunch.
- Ham & Swiss Sliders: Add slices of ham, Swiss cheese, and a brush of honey mustard. These are especially popular at parties.
- Philly Chicken Sliders: Mix shredded cooked chicken with your favorite sauce. And add ranch or blue cheese for extra flavor.
Really, you can get creative and use whatever fillings you have on hand, think turkey and cranberry for the holidays, or even veggie sliders with grilled mushrooms and peppers. The best part? The assembly stays the same, so you can make a big batch for any occasion!
Keep the Flavor Coming – Try These:

Easy Cheeseburger Sliders
Ingredients
- 2 pounds lean ground beef 90/10 or 93/7
- 1/2 tablespoon olive oil
- 1 teaspoon salt
- 1 teaspoon black pepper
- 1 teaspoon garlic powder
- 1/2 large yellow onion finely chopped
- 1/4 cup mayonnaise
- 8 slices medium cheddar cheese
- 6 ounces shredded medium cheddar cheese or more slices if preferred
- 24 dinner rolls or 2 packs of 12
- 2 tablespoons melted unsalted butter plus extra for greasing the pan
- 1 tablespoon sesame seeds
Instructions
- Preheat your oven to 350°F and generously butter the base of a rimmed baking sheet.
- In a large skillet, heat 1/2 tablespoon of olive oil over medium-high heat. Add the chopped onion and ground beef, breaking up the beef as it cooks. Season with 1 teaspoon of salt, 1 teaspoon of black pepper, and 1 teaspoon of garlic powder. Cook until the beef is fully browned, then remove from heat.
- Drain any excess grease from the skillet, and stir in 1/4 cup of mayonnaise until well combined.
- Slice the dinner rolls in half, placing the bottom halves on the prepared baking sheet. Layer the bread with slices of cheddar cheese. Evenly spread the ground beef mixture over the cheese, using a spatula to smooth the edges. Top with the shredded cheddar cheese.
- Place the top halves of the buns on top, cut-side down. Brush the tops with 2 tablespoons of melted butter and sprinkle sesame seeds over them. Bake for 12-15 minutes, or until the cheese has melted and the tops are golden brown.
Notes
Nutrition
I’m Bitty, owner of nodashofgluten.com, where I share simple, delicious recipes for all tastes, including gluten-free. Check out my “About Me” page for more info!

5 Responses
Very easy to make. My family really enjoyed them.We will make them again.Ka
I made this for a Christmas potluck party and everyone loved them! So easy to put together with a great result. The only thing I would do next time is cut the 24 pack of buns (I used Hawaiian) in two, so much easier to cut 12 at a time.
These were great! Very simple, fast, and tasty.
Thanks so much, Summer! I’m thrilled to hear you enjoyed the Easy Cheeseburger Sliders. They’re definitely a hit when you’re looking for something quick and tasty! Glad they were a success! 😊
I made these for my husband’s poker night. I didn’t have any (I don’t eat beef), but my husband and son said they were the best damn cheeseburger sliders they’d ever had. That’s quite the endorsement! They were so good, one player, who’s been on a no bread diet for over six months gobbled down four of them! Thanks for the recipe!