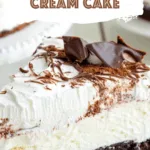
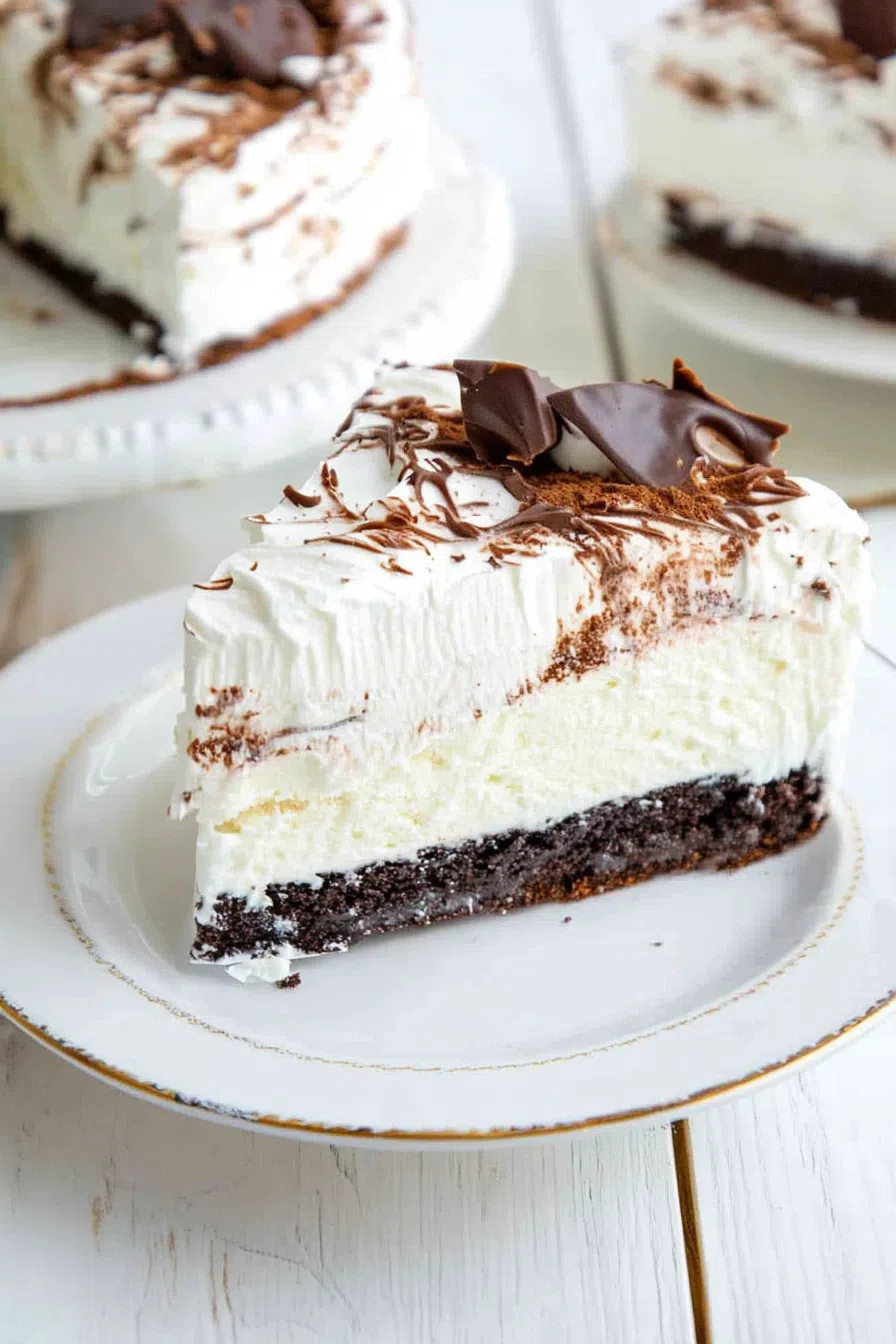
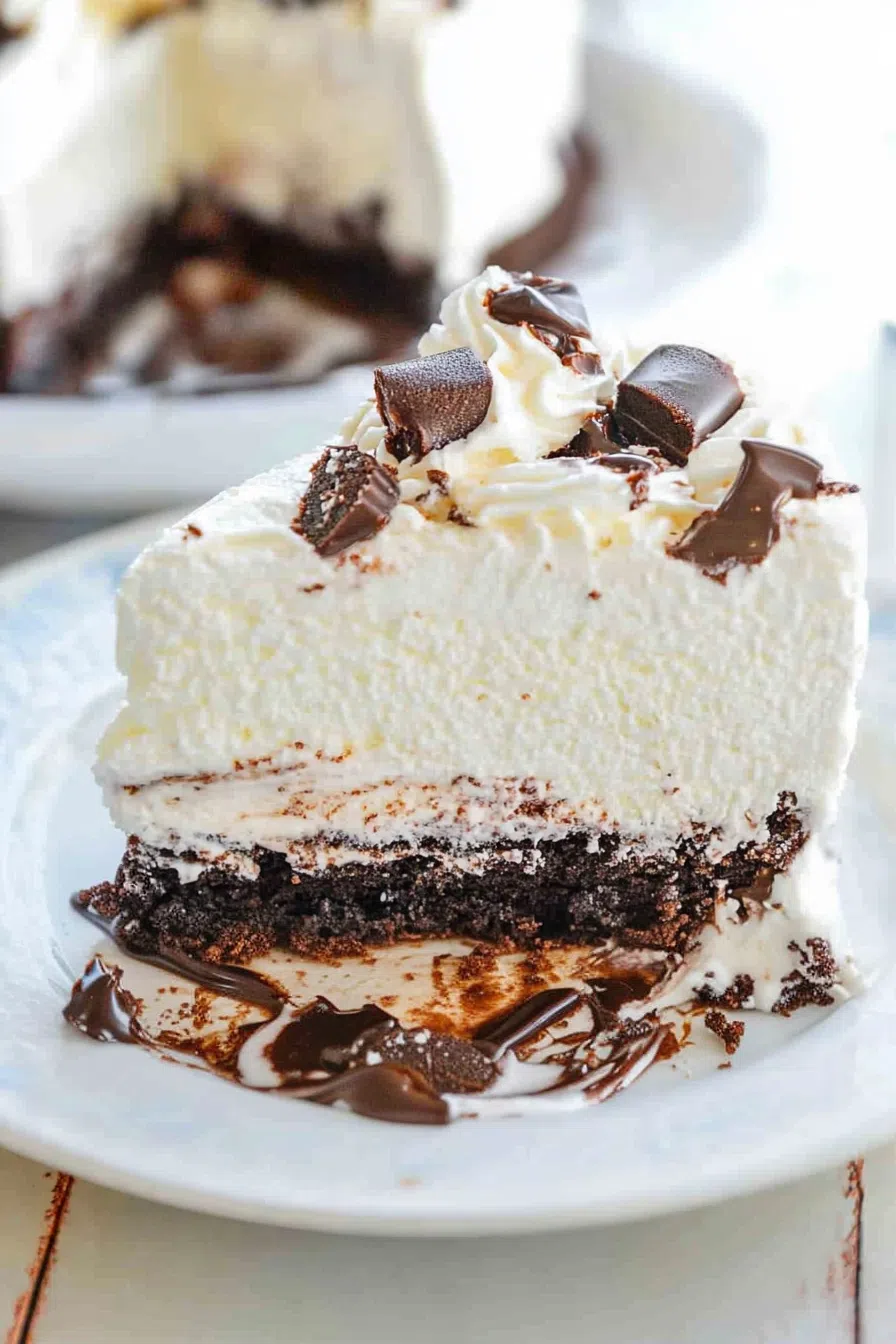
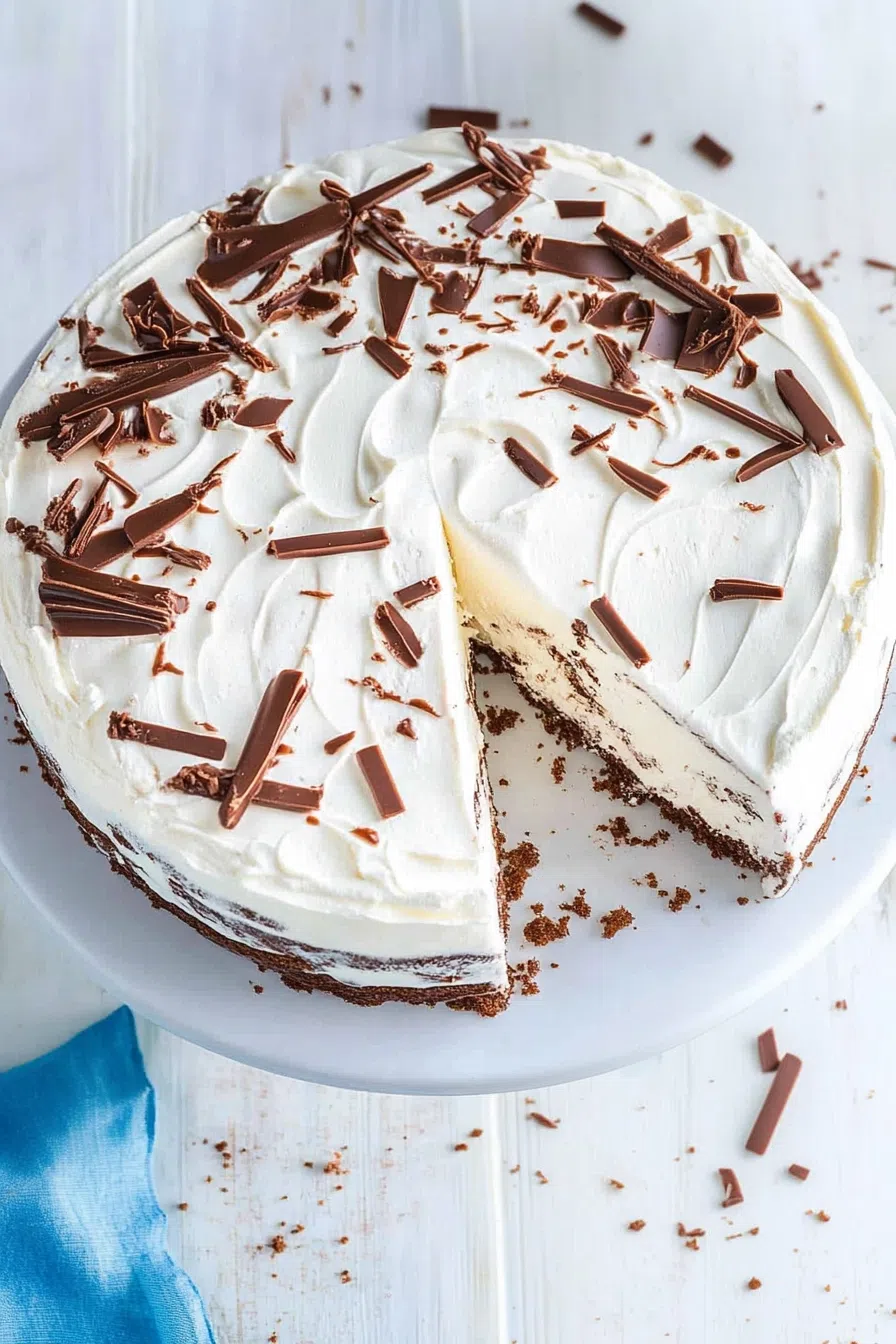
Layers of Oreo cookies, chocolate ice cream, vanilla ice cream, hot fudge, and whipped cream frosting make this dreamy Dairy Queen Ice Cream Cake unforgettable.
You ever have one of those days where you’re so tired you start Googling “desserts that require zero effort” and hope the internet hands you something magical? Yeah. That was me. Middle of summer, 90°F, everything in the kitchen felt like a personal attack—and I needed a birthday cake. Not just any cake. The cake. That classic, nostalgic, melts-in-your-mouth Dairy Queen Ice Cream Cake.
Except I didn’t feel like driving to pick one up, and by some chaotic burst of confidence (or maybe sugar withdrawal), I thought, How hard could it be?


Turns out? Not hard at all. Just a little patience, a springform pan, and a stubborn refusal to settle for store-bought. What came out of my freezer was something that looked like I’d spent hours on it, tasted like childhood birthdays, and had my sister texting me “please make that again” three days later.
So here I am. Sharing it with you. Because you deserve an ice cream cake moment too.
Why You’ll Love This Dairy Queen Ice Cream Cake Recipe?
Look, I’m not saying this Dairy Queen Ice Cream Cake clone will ruin you for store-bought forever… okay wait, I am saying that. Because here’s the thing: it’s better when it’s homemade. Not because it’s fancier or “healthier” (let’s not pretend), but because you get to layer it the way you want.
Want extra fudge in the middle? Do it. Want double vanilla, skip the chocolate? No one’s stopping you. Want to eat the leftover whipped cream straight from the bowl with a spoon? I respect that.
There’s something about the texture, too. You get that cold, smooth ice cream against the crunchy-salty cookie layer, then the thick fudge stripe that somehow makes you feel like everything in life is gonna be okay. And that fluffy whipped topping? Don’t even get me started. It’s like a cloud but with flavor. It’s dreamy.
Ingredient Notes:
Here’s what you’re working with. Nothing fancy. Nothing that’ll have you running around three stores in flip-flops. Just the good stuff:
-
Oreos (with the cream) – Don’t remove the filling. You’re not a monster. It helps bind everything.
-
Butter – I use salted butter because that little salty bite with the sweet cookies? Game changer.
-
Chocolate ice cream – I went with a classic quart from the grocery store freezer. You could get fancy with homemade, but… why?
-
Hot fudge sauce – You want the thick, almost spoon-it-out kind. Microwave it a bit so it spreads easier.
-
Vanilla bean ice cream – I love the little specks in vanilla bean—it just feels extra. But use what you have. No judgment.
-
Heavy cream – This is for the whipped topping. Don’t use the stuff from a can. I mean, you could… but you shouldn’t.
-
Powdered sugar + clear vanilla – These sweeten and flavor the whipped cream. Clear vanilla keeps the frosting white, but if you’ve only got regular? That’s real life.
-
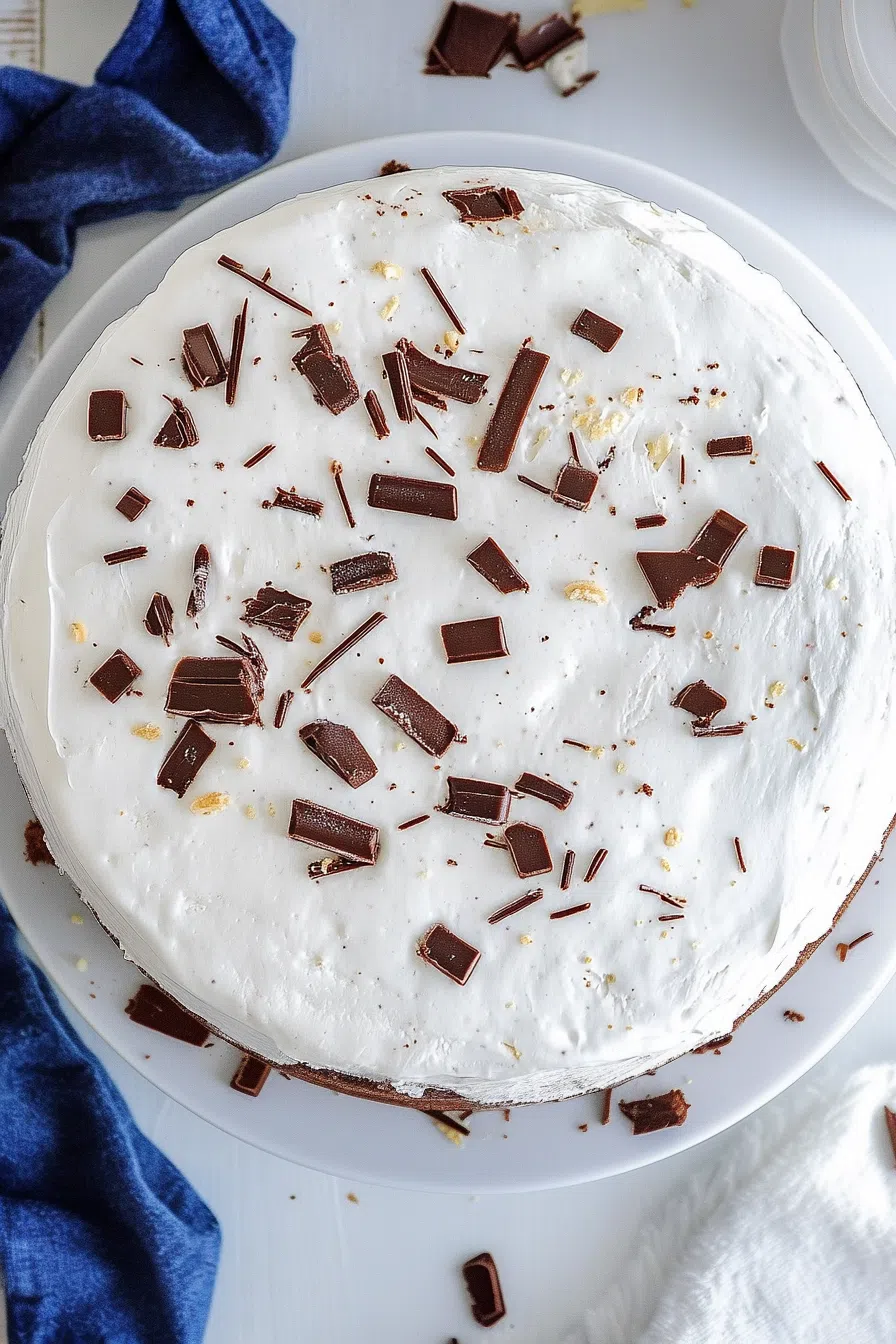
Sprinkles – Optional. Kind of. (They’re not optional.)
How To Make Dairy Queen Ice Cream Cake?
You’ll need a springform pan (or deep dish pan with plastic wrap if you’re winging it). And freezer space. Lots of it. Oh, and a little patience—it freezes in stages.
Step 1. Line that pan
Use plastic wrap to line the bottom and sides of a 9-inch springform pan. It doesn’t have to be perfect. Mine never is.
Step 2. Crush the cookies
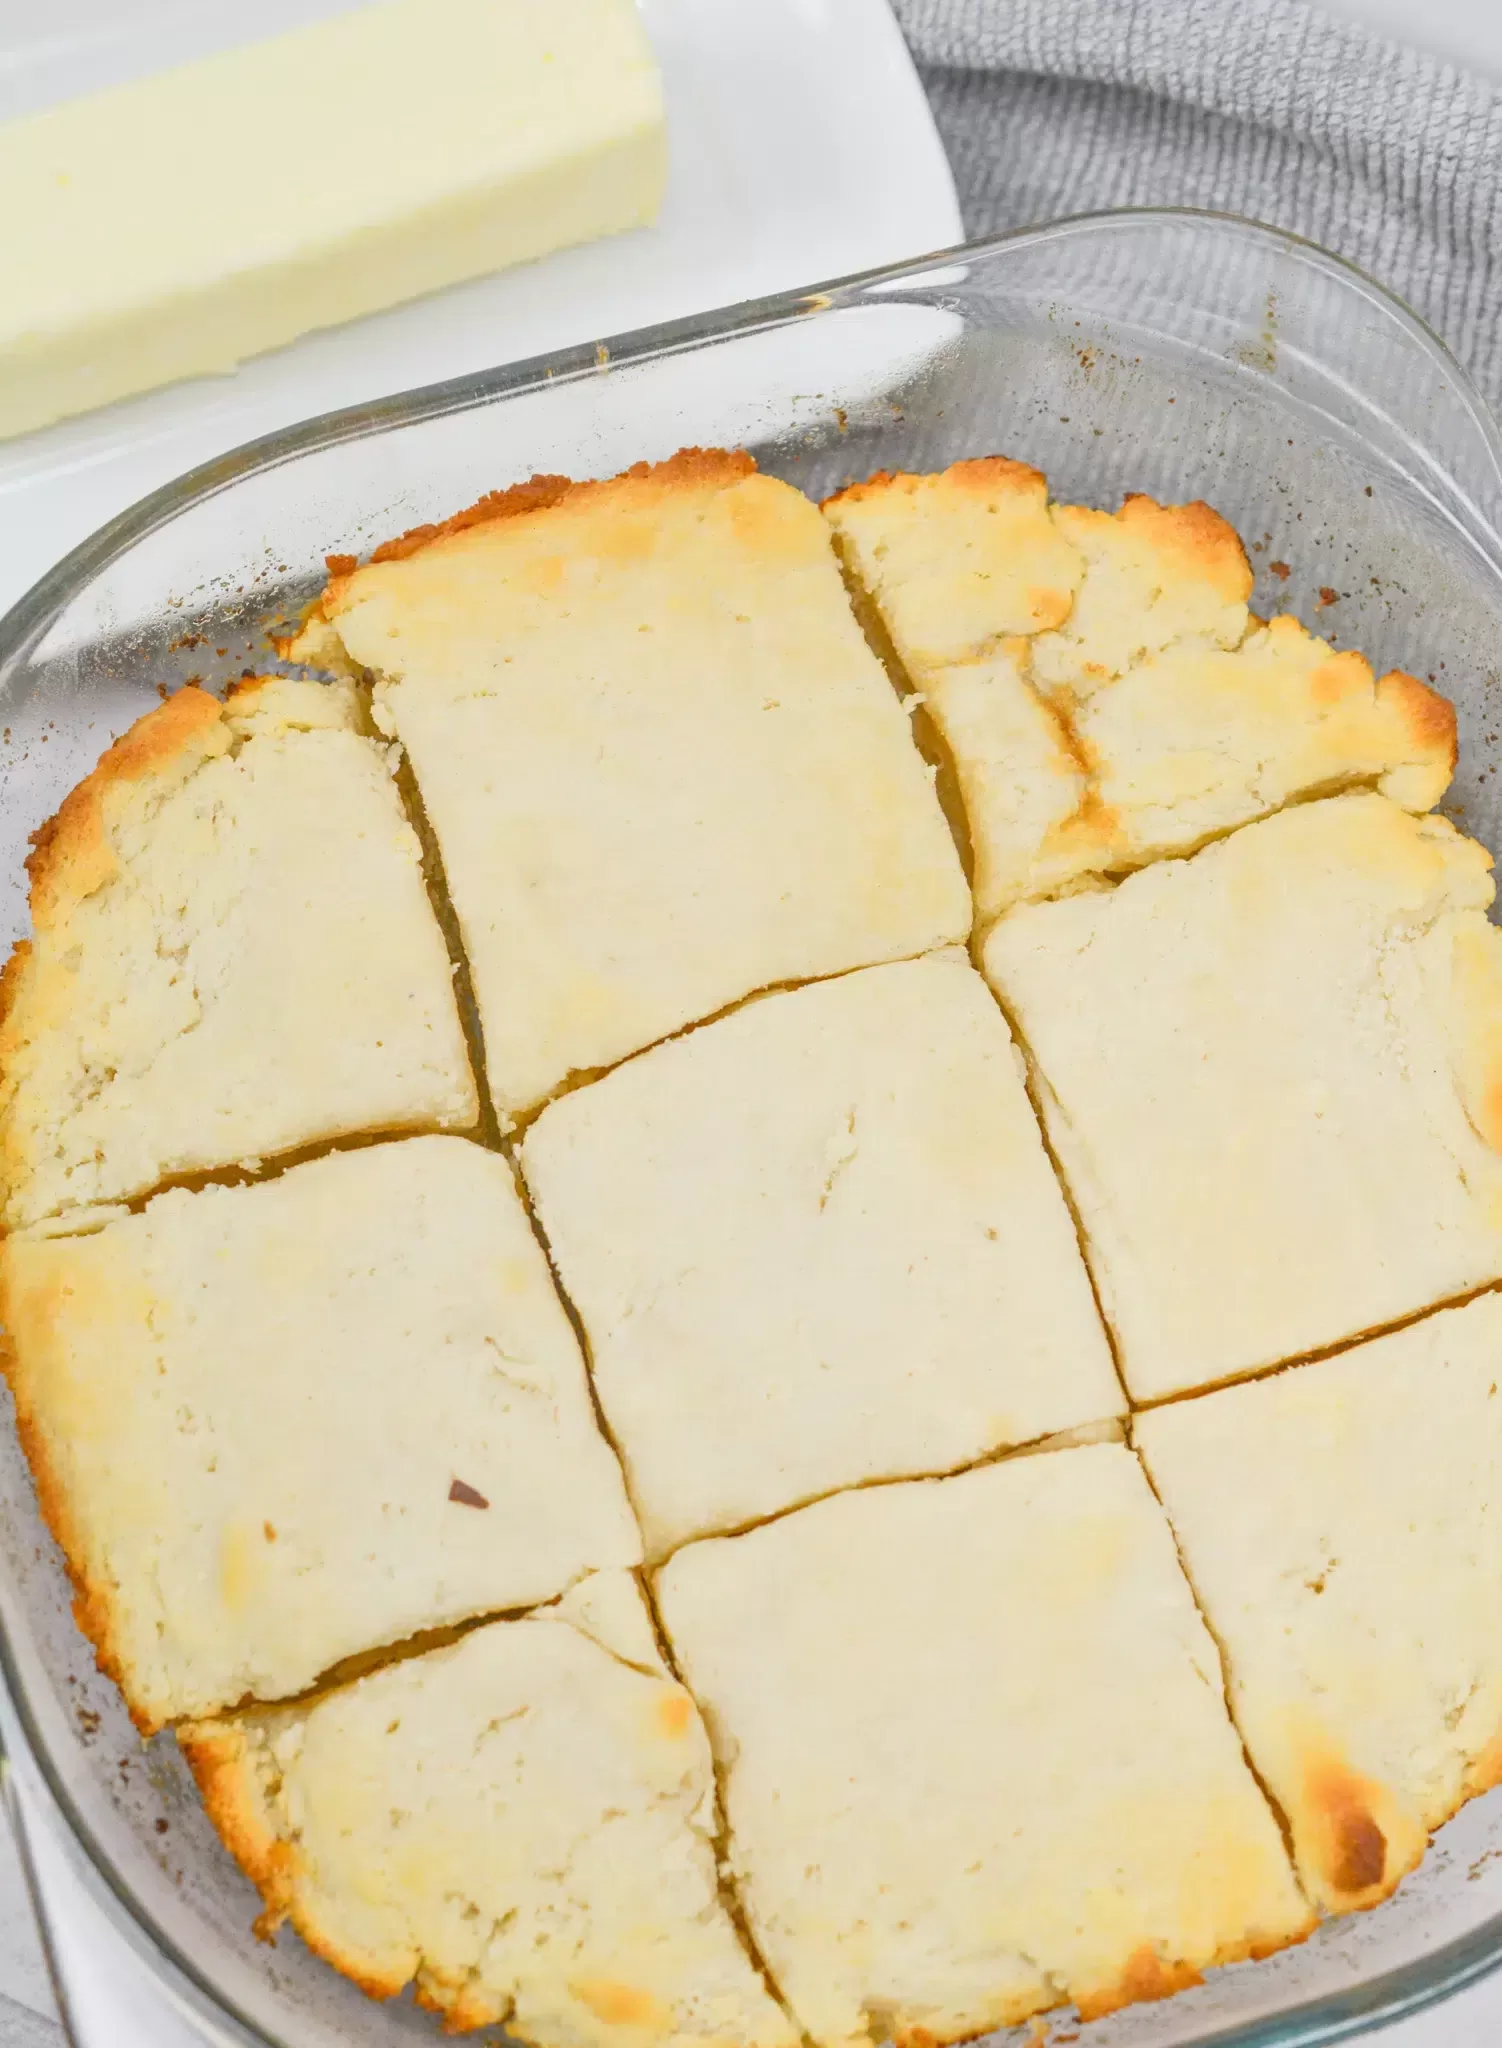
Smash 20 Oreos in a bowl (cream filling included). Mix in melted butter. Spread that out on a baking sheet and toast it in the oven for 7–8 minutes at 350°F. Let it cool completely. Seriously. Don’t skip this or the crumbs will get weirdly soggy.
Step 3. Layer the chocolate ice cream
Let it soften on the counter for like 15–20 minutes. Then spread it in your lined pan. It’s okay if it’s not totally smooth. Imperfect layers are part of the charm. Freeze until solid.
Step 4. Add fudge and crumbs
Warm the fudge (not too hot!) and spread it over the chocolate layer. Then scatter the cooled cookie crumbs over the fudge and press gently. Freeze again for at least an hour.
Step 5. Layer the vanilla ice cream
Same as before: soften, spread, smooth. Then freeze for at least 6 hours—overnight is best if you can wait. I never can.
Step 6. Whip that cream
Want To Save This Recipe?
Whip heavy cream, powdered sugar, and vanilla in a chilled bowl until it holds stiff peaks. I use a hand mixer and usually overbeat it slightly, but hey—more structure, right?
Step 7. Frost and decorate
Release the springform pan (aka the most satisfying part). Slather on the whipped cream and add sprinkles. More than you think you need. Then pop it back in the freezer until it’s party time.
Or, you know, Wednesday night Netflix and leftovers time.
Storage Options:
Wrap any extras tightly in plastic wrap or keep them in an airtight container in the freezer. Good for 4–5 days, maybe longer, but honestly? Ours never lasts that long. Someone’s always “sneaking just a sliver” at 11pm.
Variations and Substitutions:
You know how some people are like, “I followed the recipe exactly!” and others go totally rogue? I’m usually somewhere in between. So here are a few riffs I’ve tried—or want to try soon:
-
Mint chocolate chip instead of chocolate – Fresh, cool, and super nostalgic.
-
Peanut butter ice cream + crushed Reese’s – It’s a moment.
-
Salted caramel swirl instead of fudge – If you’re feeling fancy.
-
Birthday cake ice cream with rainbow cookies – For the extra-extra friend.
-
Chocolate whipped cream topping – Just add cocoa powder. Boom.
Mix and match. Make it weird. It’s your cake.
What to Serve with Dairy Queen Ice Cream Cake?
This Dairy Queen Ice Cream Cake kind of is the whole party. But if you’re into pairing things like a dessert sommelier:
-
Cold brew coffee – Especially with chocolatey variations.
-
Fresh berries – For the illusion of balance.
-
Extra fudge drizzle – I mean, yeah.
-
A side of whipped cream – Because why not double down?
Frequently Asked Questions:
Do I really need a springform pan?
Nope. It helps, but you can line a deep pie pan or loaf pan with plastic wrap and call it a day. Just be gentle when unmolding.
How do I get clean slices?
Run a sharp knife under hot water, dry it off, then cut. Repeat between slices. It feels weirdly professional.
Can I make it in advance?
Yes, and you should. It’s better the next day when everything’s had time to chill (literally and figuratively).
If you’re still on the fence about making your own Dairy Queen Ice Cream Cake, take this as your sign. It’s ridiculously satisfying to make. It’s a crowd-pleaser. It keeps well. It looks way more impressive than it actually is. And honestly, it just hits that sweet spot between nostalgia and indulgence.
Make it. Eat it. Share it (or don’t). And if you do something totally weird with it, like a Nutella swirl or cereal topping—I need to know.
Let’s talk cake.
Keep the Flavor Coming – Try These:


Dairy Queen Ice Cream Cake
Ingredients
For the Cookie Crumb Layer:
- 20 Oreo cookies crushed (including the cream filling)
- 4 tablespoons salted butter melted
For the Ice Cream Layers:
- 1 quart chocolate ice cream
- 1 quart vanilla ice cream preferably vanilla bean
For the Fudge Layer:
- 11.75 ounces hot fudge topping
For the Whipped Cream Frosting:
- 2 cups cold heavy whipping cream
- 1¼ cups powdered sugar
- 1½ teaspoons clear vanilla extract
- Chocolate or rainbow sprinkles for optional garnish
Instructions
Prepare the Springform Pan:
- Line the bottom and sides of a 9-inch springform pan with plastic wrap, ensuring full coverage. This will make removal of the cake easier once frozen.
Bake the Cookie Crumb Layer:
- Preheat the oven to 350°F (175°C). In a mixing bowl, combine the crushed Oreo cookies with the melted butter. Spread the mixture evenly on a parchment-lined baking sheet and bake for 7–8 minutes. Remove from the oven and allow it to cool completely. Once cooled, break the cookie mixture into coarse crumbs.
Form the Chocolate Ice Cream Base:
- Allow the chocolate ice cream to soften at room temperature for 15–20 minutes. Once softened, spread it into the base of the springform pan in an even layer. Place the pan in the freezer until the layer is firm.
Add the Fudge and Cookie Crumb Layers:
- Slightly warm the hot fudge topping in the microwave for approximately 15–20 seconds to make it easier to spread. Evenly spread the hot fudge over the frozen chocolate ice cream layer, followed by a layer of the cooled cookie crumbs. Return the pan to the freezer for at least 1 hour, or until firm.
Add the Vanilla Ice Cream Layer:
- Soften the vanilla ice cream at room temperature for approximately 15 minutes. Spread the softened vanilla ice cream evenly over the cookie crumb layer. Smooth the top with a spatula. Freeze the cake for a minimum of 6 hours, or preferably overnight, to ensure stability.
Prepare the Whipped Cream Frosting:
- In a chilled mixing bowl, add the heavy cream, powdered sugar, and clear vanilla extract. Beat on medium speed using an electric mixer for 3–4 minutes, or until stiff peaks form.
Assemble and Decorate the Cake:
- Remove the cake from the freezer and release the sides of the springform pan. Carefully lift the cake out using the plastic wrap and place it on a serving plate or cake stand. Frost the top and sides with the prepared whipped cream. Garnish with sprinkles, if desired. Return the finished cake to the freezer until ready to serve.
Notes
I’m Bitty, owner of nodashofgluten.com, where I share simple, delicious recipes for all tastes, including gluten-free. Check out my “About Me” page for more info!