
Make the best Copycat Claussen Pickle Recipe with crisp cucumbers, fresh dill, garlic, mustard seeds, cider vinegar, and canning salt. No boiling, no canning—just crunchy perfection!
Alright, confession time. I’ve always been that person who finishes the pickles before the sandwich is gone. You know, the one who steals extra from other people’s plates? That’s me. And if we’re talking about Claussen pickles, I might just hide the jar in the back of the fridge so no one else finds them. No shame.
A while back, I had a full-blown crisis—my grocery store stopped carrying them. I checked three different places, like a detective on a mission. Nothing. For a brief moment, I considered paying way too much for a jar online (because yes, I found people selling them like they were rare antiques). Then, reality hit—why not just make them myself?


So, after a deep dive into brining techniques (and way too much time taste-testing half-pickled cucumbers), I cracked the code. This Copycat Claussen Pickle Recipe? It’s the real deal. You get that signature snap, the bold, garlicky flavor, and that fridge-fresh crunch—all without a single weird preservative.
And now, I never have to panic about running out again. So, if you love homemade pickles (and hate soggy ones), you’re in the right place.
Why You’ll Love This Copycat Claussen Pickle Recipe?
- Crisp Like the Real Thing – No sad, mushy pickles here. This cold brine method keeps them crunchy.
- No Cooking, No Canning – Just mix, pour, and let time do the work.
- Tastes Exactly Like Claussen Pickles – If you’re obsessed with them (like I am), you’ll never buy them again.
- Make ‘Em Your Own – Love extra garlic? Want a spicy kick? You can tweak this recipe however you like.
- Ridiculously Easy – No fancy equipment. If you can cut cucumbers and pour liquid, you’ve got this.
Ingredient Notes:
I’m all for keeping things simple, but when it comes to homemade pickles, the ingredients matter.
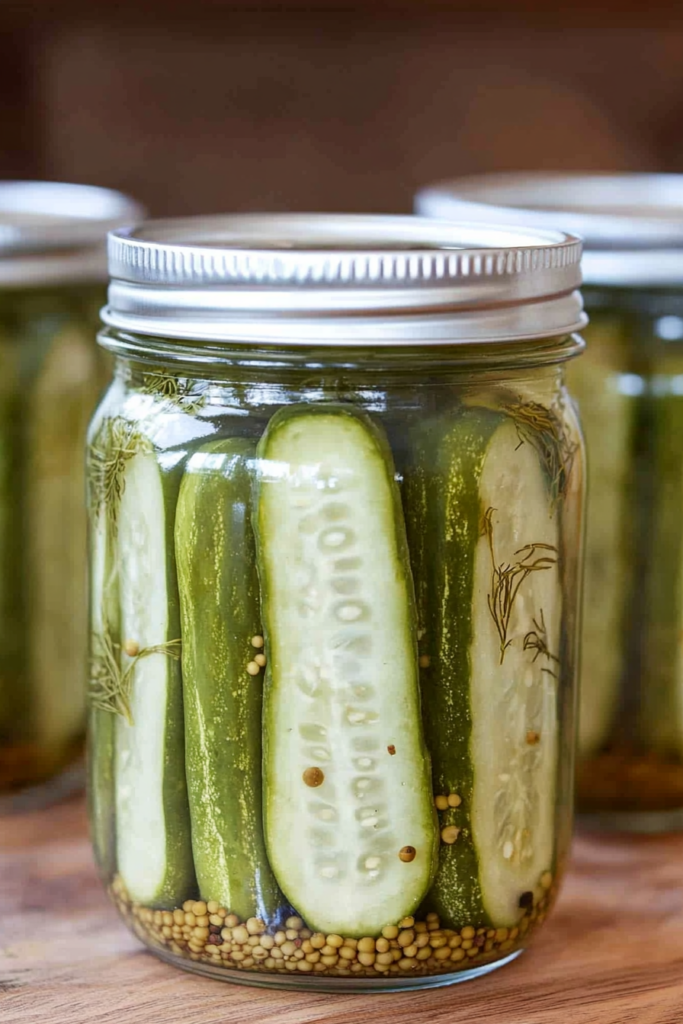
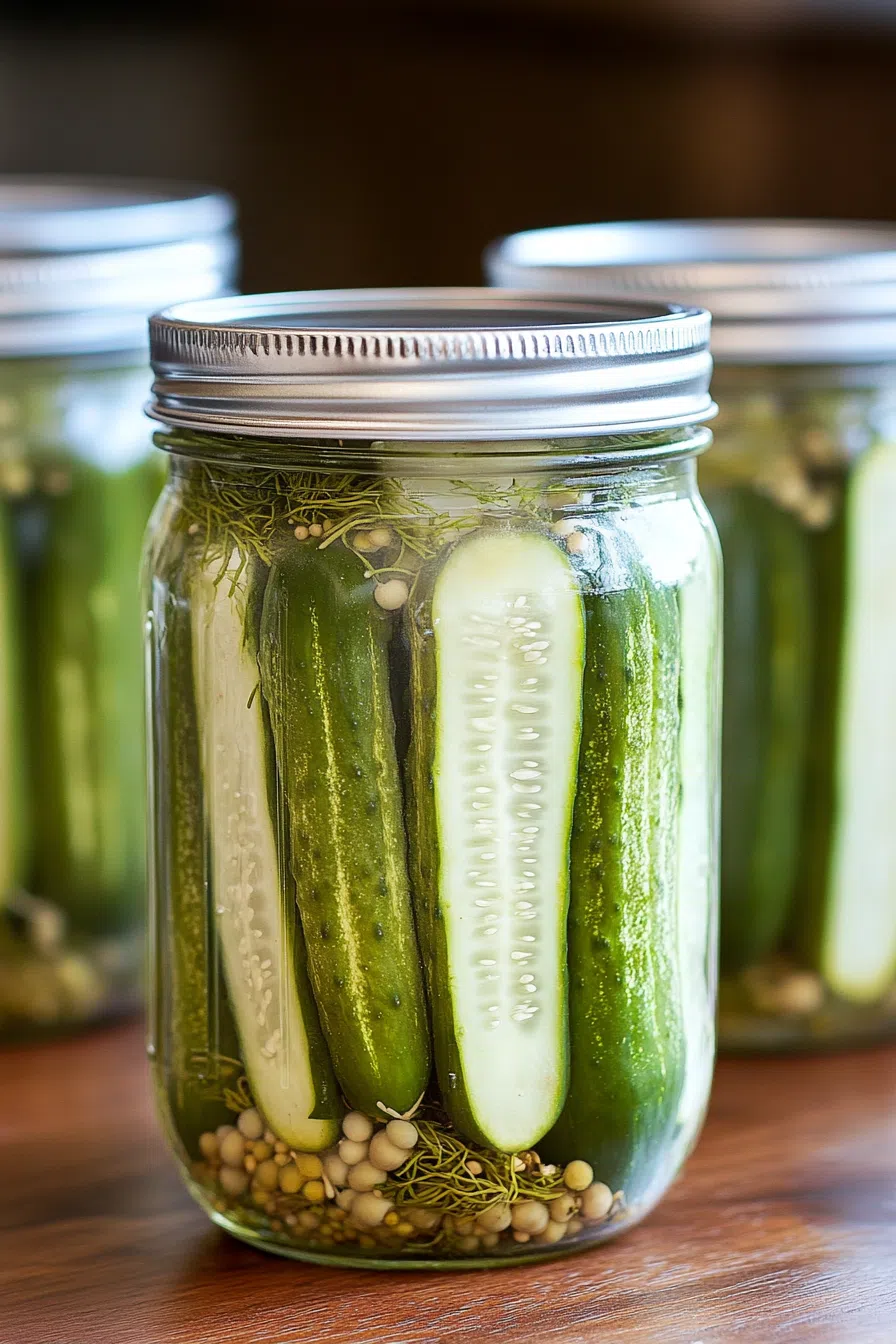
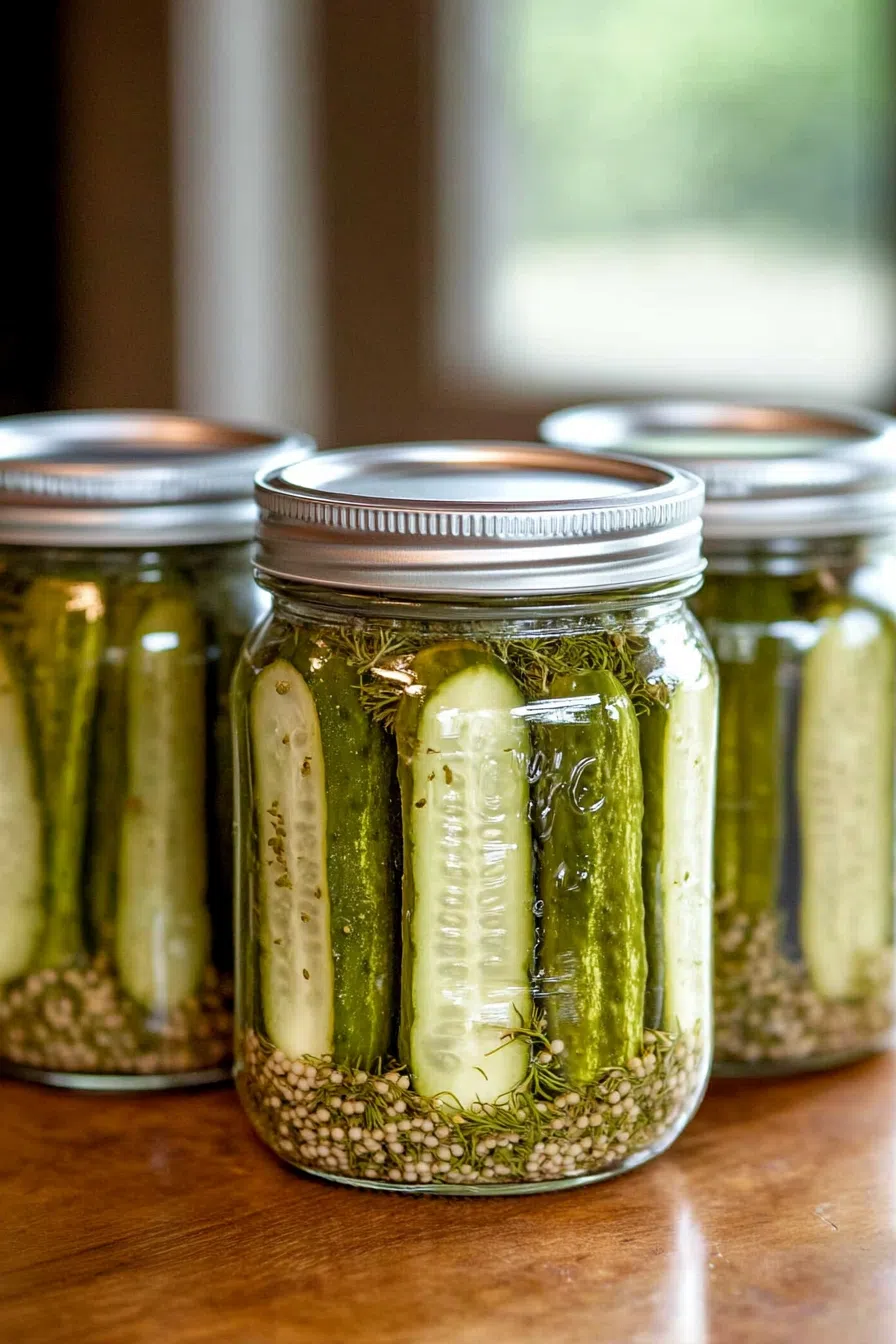
Cucumbers
Not all cucumbers can handle the pickle life. You have to use pickling cucumbers (a.k.a. kirby cucumbers). They’re small, crunchy, and perfect for soaking up that garlicky goodness. If you grab regular grocery store cucumbers—yeah, the waxed ones—you’re gonna have a bad time. Wax blocks the brine from working its magic.
Blossom End = Crunchy Insurance
Here’s a quick but important step: always chop off the blossom end of your cucumbers (that’s the end opposite the stem). It might seem nitpicky, but it’s actually a big deal—there’s a sneaky enzyme hanging out there that loves to turn your future pickles into sad, mushy duds. Trust me, if you want that signature Claussen-style crunch, snip off at least 1/8-inch from both ends. I do both just to keep the pickles uniform—and because more crunch is never a bad thing.
Garlic
Fresh garlic is non-negotiable. And no, that pre-minced stuff in a jar won’t cut it. It’s gotta be whole garlic cloves, peeled and ready to infuse that brine with bold flavor. More garlic = more happiness.
Dill
Fresh dill is everything. Dried dill just doesn’t hit the same way. If you can find dill heads (the flowering tops of the plant), grab them—they make these pickles taste extra legit.
Mustard Seeds
Tiny but mighty. They add just a hint of heat and a bit of that something special that balances out the vinegar.
Cider Vinegar
I prefer apple cider vinegar because it’s got a mellow, slightly sweet tang. White vinegar works too, but cider vinegar gives that classic Claussen pickle vibe.
Canning Salt
Regular table salt? Big nope. It has additives that mess with the brining process and can make your pickles cloudy. Stick to canning salt for the best texture and flavor.
If you’re in a pinch, coarse (not flaky) Kosher salt can work, but pickling or canning salt is always the gold standard. Table salt’s anti-caking agents not only cloud up your brine but can also leave a white sediment at the bottom of the jar. Your pickles will still be safe to eat, but let’s be honest—nobody wants murky pickle juice.
Water
Seems basic, right? But tap water has chlorine, and that can mess up fermentation. If you can, use filtered water for the best results.
Salt Content: The Salty Truth
Let’s tackle the salt situation, because it’s easy to get tripped up when comparing homemade pickles to something like a Claussen or Vlasic.
First, don’t panic if the numbers look sky-high. Most nutrition labels—and online calculators—count up every grain of salt you toss in your brine. But here’s the catch: your pickles aren’t hoarding all that sodium.
When the pickling’s done, a good chunk of that salt is left floating in the brine, not the cucumber. Unless you’re drinking the leftover liquid (no judgment), the actual salt making its way into your crunchy snack is much less.
Homemade recipes might look saltier by the numbers, but in reality, the end result tends to be similar—or even less—than some store-bought varieties. If you’re watching your sodium, remember: most of what matters is what actually stays in the bites you eat, not just what’s in the jar.
So, don’t let the math scare you off! The real taste test (and nutrition check) comes when you crunch in and enjoy.
Nutritional Lowdown: How Healthy Are These Pickles?
So, what’s the deal with homemade pickles—are they a guilt-free snack or what? Good news: they’re crazy low in calories. Each crunchy pickle has about 20 calories, mostly from carbs (just a measly 3 grams!), and a tiny amount of natural sugar.
These pickles also bring some bonus points, like a touch of vitamin A, vitamin C, calcium, and even a little potassium and iron. High in zing, super light on fat. The only thing to watch for? Sodium. Like most pickles, they pack a salty punch—so if you’re keeping things low-salt, maybe don’t eat the whole jar in one sitting. But for a crunchy, tangy, totally satisfying bite? You’re in the clear.
How To Make Copycat Claussen Pickle?
Step 1: Prep Your Cucumbers
First, wash them really well. No dirt, no debris. Then, slice them lengthwise into quarters—this helps them absorb the brine faster. If you want classic pickle spears, go for halves.
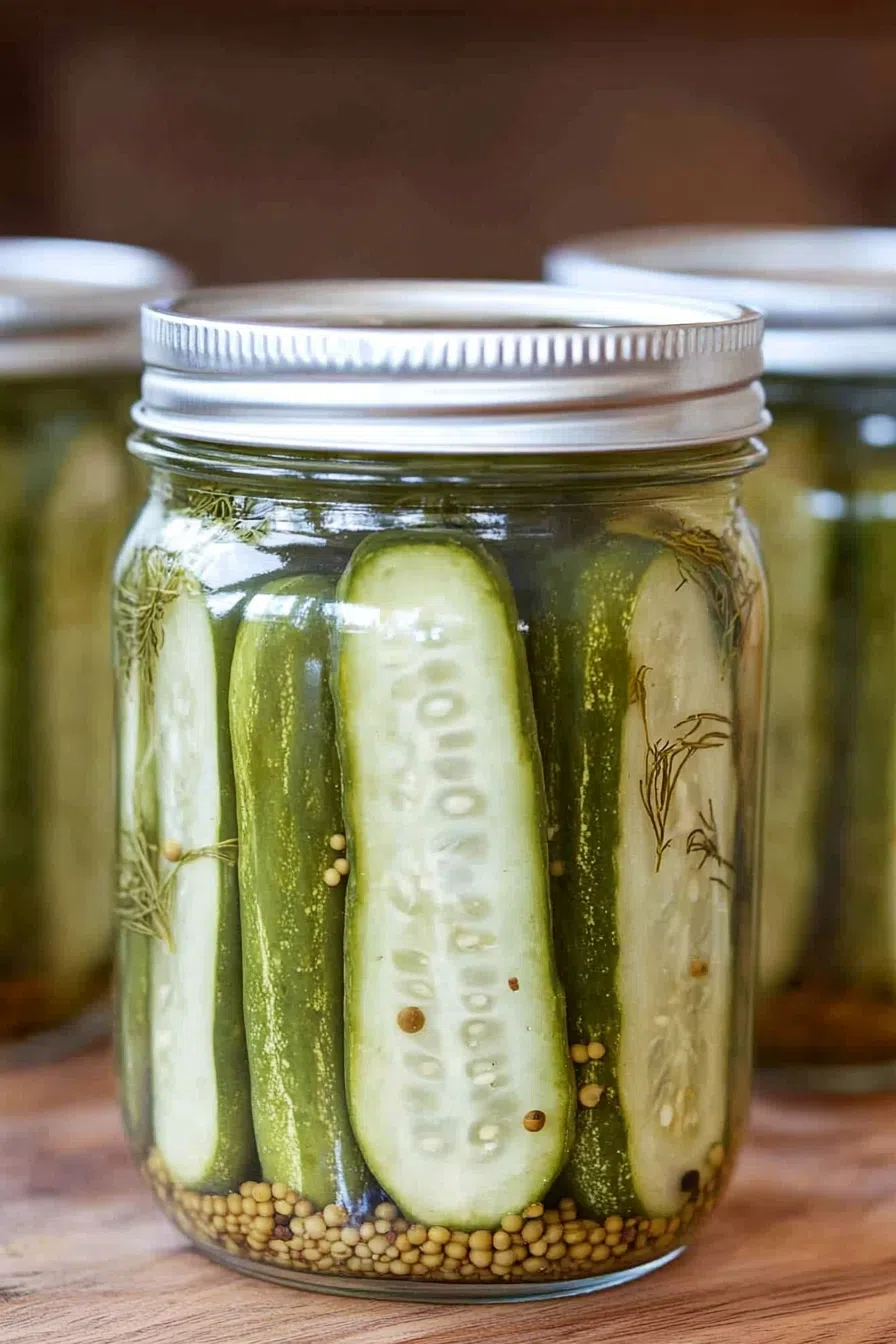
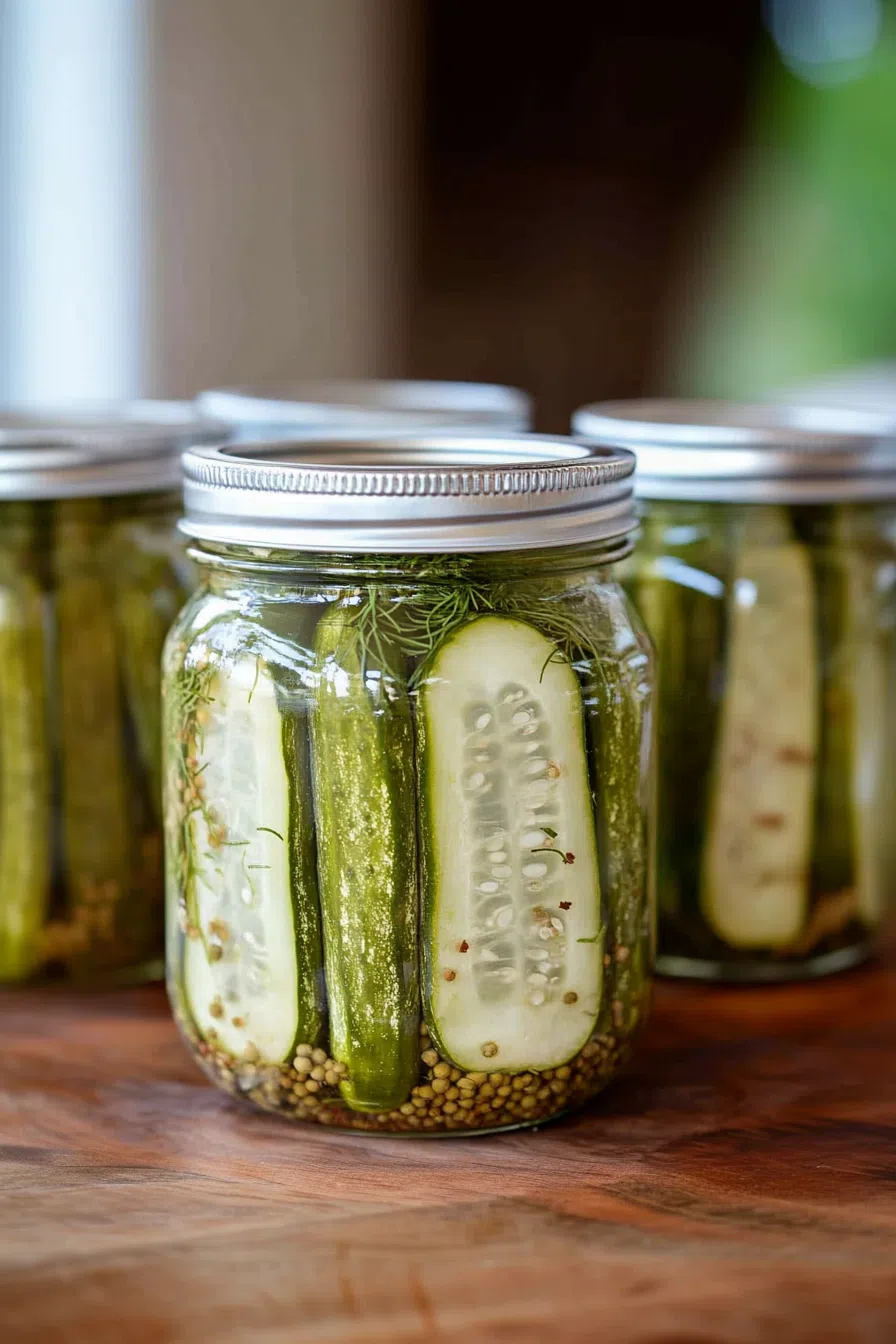
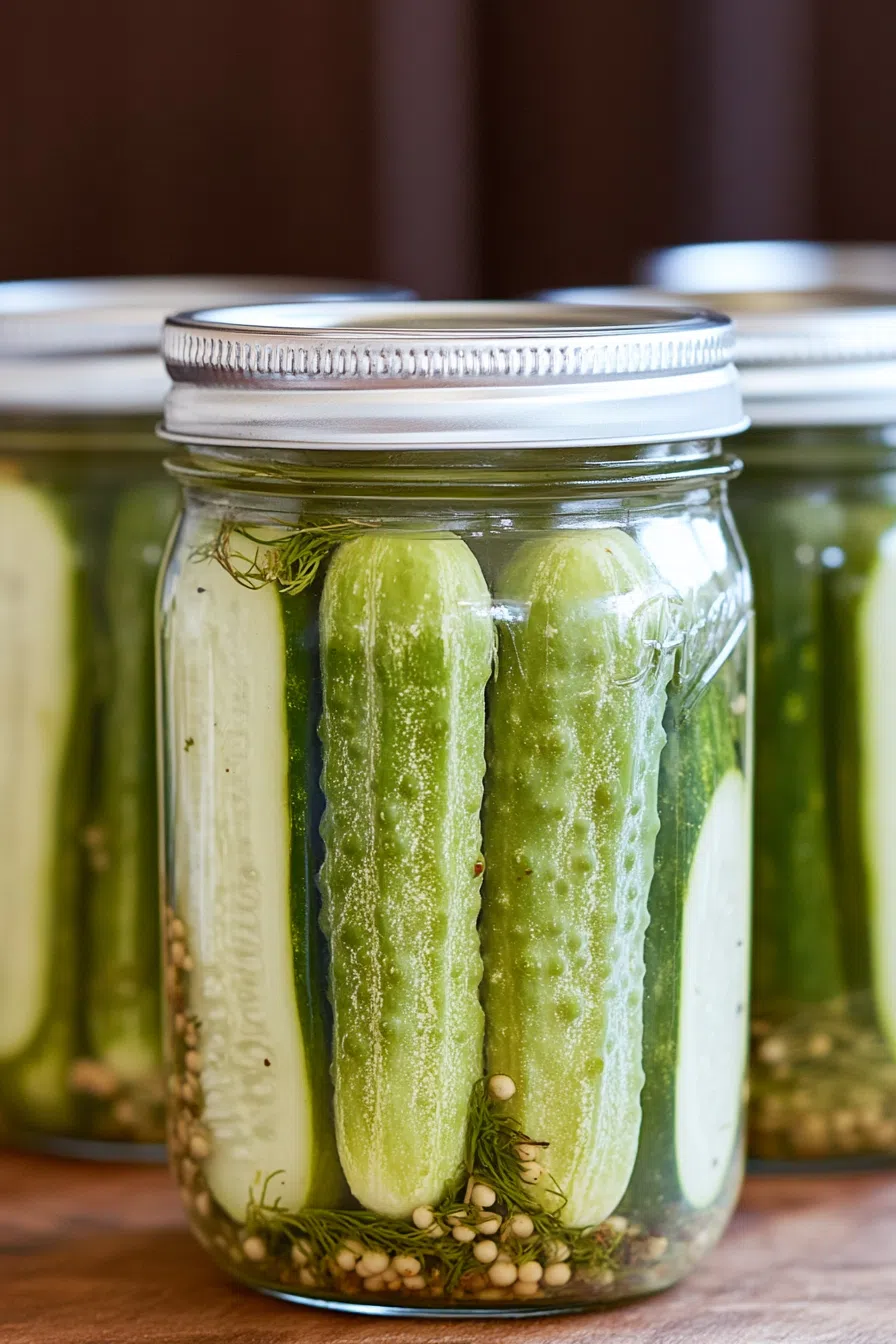
Step 2: Pack Those Jars
Grab your sterilized jars and start layering. Dill and garlic go in first, then pack in your cucumbers. Get them snug, but don’t force them in. They need a little breathing room for the brine.
Should You Divide Spices Directly Into the Jars?
Good question! You can definitely skip the step of mixing the dry spices (like mustard seeds and dill) into the brine and simply sprinkle them straight into each jar.
Here’s the upside: you’ll save time, and there’s less cleanup—no need to fish out spices just to add them back in. Just try to split the spices evenly between your jars so every batch gets all the flavor.
The only small downside? Adding the spices to the brine first helps them distribute more evenly, so every pickle gets that perfect hit of flavor. If you go the jar-by-jar route, give those jars a gentle shake once or twice as the pickles sit to help the spices mingle. (Bonus: it makes you look like a pro fermenter in action.)
Bottom line: you do you! Both ways work, and your pickles will still be garlicky, herby perfection.
Clean Hands & Tools: Protect That Brine
Quick PSA: Let’s keep your pickle game solid—clean hands and squeaky-clean tools are non-negotiable. Before you touch anything in the jar, give your hands a proper scrub with soap and warm water (think surgeon prepping for action, not just a quick rinse). The same goes for tongs, spoons, or anything else you’ll use—run them through the dishwasher or dip them in boiling water to nix any sneaky bacteria or oils. That extra minute keeps your brine crisp and your pickles living their best life—no cloudy batches or weird surprises.
Step 3: Make the Brine
In a pot, combine water, cider vinegar, canning salt, mustard seeds, and minced onion. Heat it up just until the salt dissolves, then let it cool completely. (Don’t rush this! Hot brine = sad, mushy pickles.)
Step 4: Pour and Wait
Want To Save This Recipe?
Once your brine is cool, pour it over the cucumbers until they’re fully submerged. Seal the jars and let them sit on the counter for 3 days. Shake them gently or turn them occasionally to distribute the flavor.
What to Do with Extra Brine?
Got some leftover brine hanging out after all your cucumbers are cozied up in their jars? No worries! You can save that briny magic in a sealed container in the fridge for your next round of pickling—or use it to quick-pickle other veggies like carrots, onions, or jalapeños. If you’re all set on pickles, just toss it. Easy!
Step 5: Refrigerate and Enjoy
After 3 days, transfer them to the fridge. They’ll be peak pickle in about a week, but let’s be honest—I usually sneak one after four days.
Storage Options:
These pickles will last up to a year in the fridge, but good luck keeping them that long. Just make sure they’re always submerged in brine. If the liquid level drops, top it off with a little more vinegar and water.
Fun Ways to Use Leftover Pickle Brine
Wait, about to toss that pickle brine? STOP. That tangy, garlicky liquid is basically flavor gold, and there’s zero reason to let it go to waste. Here are some creative (and delicious) ways to give your leftover brine new life:
- Quick-Pickle Anything: Drop carrot sticks, red onion slices, or even hard-boiled eggs right into that leftover brine. Let them chill in the fridge for a few days—hello, bonus pickled snacks.
- Elevate Your Potato Salad: Swap out half the vinegar in your potato (or pasta) salad recipe for pickle juice for a punchy, unexpected twist.
- Brine for Chicken or Pork: Marinate chicken breasts or pork chops in the brine for a few hours. The acidity = juicy, flavorful results every time.
- Bloody Mary Boost: Next brunch, add a splash (or two) to your next Bloody Mary. It’ll make you wonder why you ever lived without it.
- Upgrade Your Salad Dressing: Whisk some brine into your favorite vinaigrette or creamy dressing for a hit of zippy flavor—perfect on greens or drizzled over roasted veggies.
- Level-Up Grilled Veggies: Before grilling, toss vegetables in a bit of pickle juice for a tangy edge that beats boring old olive oil and salt.
No need to say goodbye to that brine—put it to work and thank yourself later.
Variations and Substitutions:
Want to mix it up? Here are a few fun ways to make these pickles your own:
- Spicy Pickles – Add red pepper flakes or sliced jalapeños for a fiery kick.
- Bread & Butter Style – Toss in sugar and sliced onions for a sweet-and-savory vibe.
- Extra Garlicky – Add even more garlic cloves (because is there such a thing as too much garlic?).
- Different Vinegars – Swap cider vinegar for white vinegar for a sharper, tangier flavor.
What to Serve with Copycat Claussen Pickle?
Don’t just eat them straight from the jar (although… no judgment). Here’s where they shine:
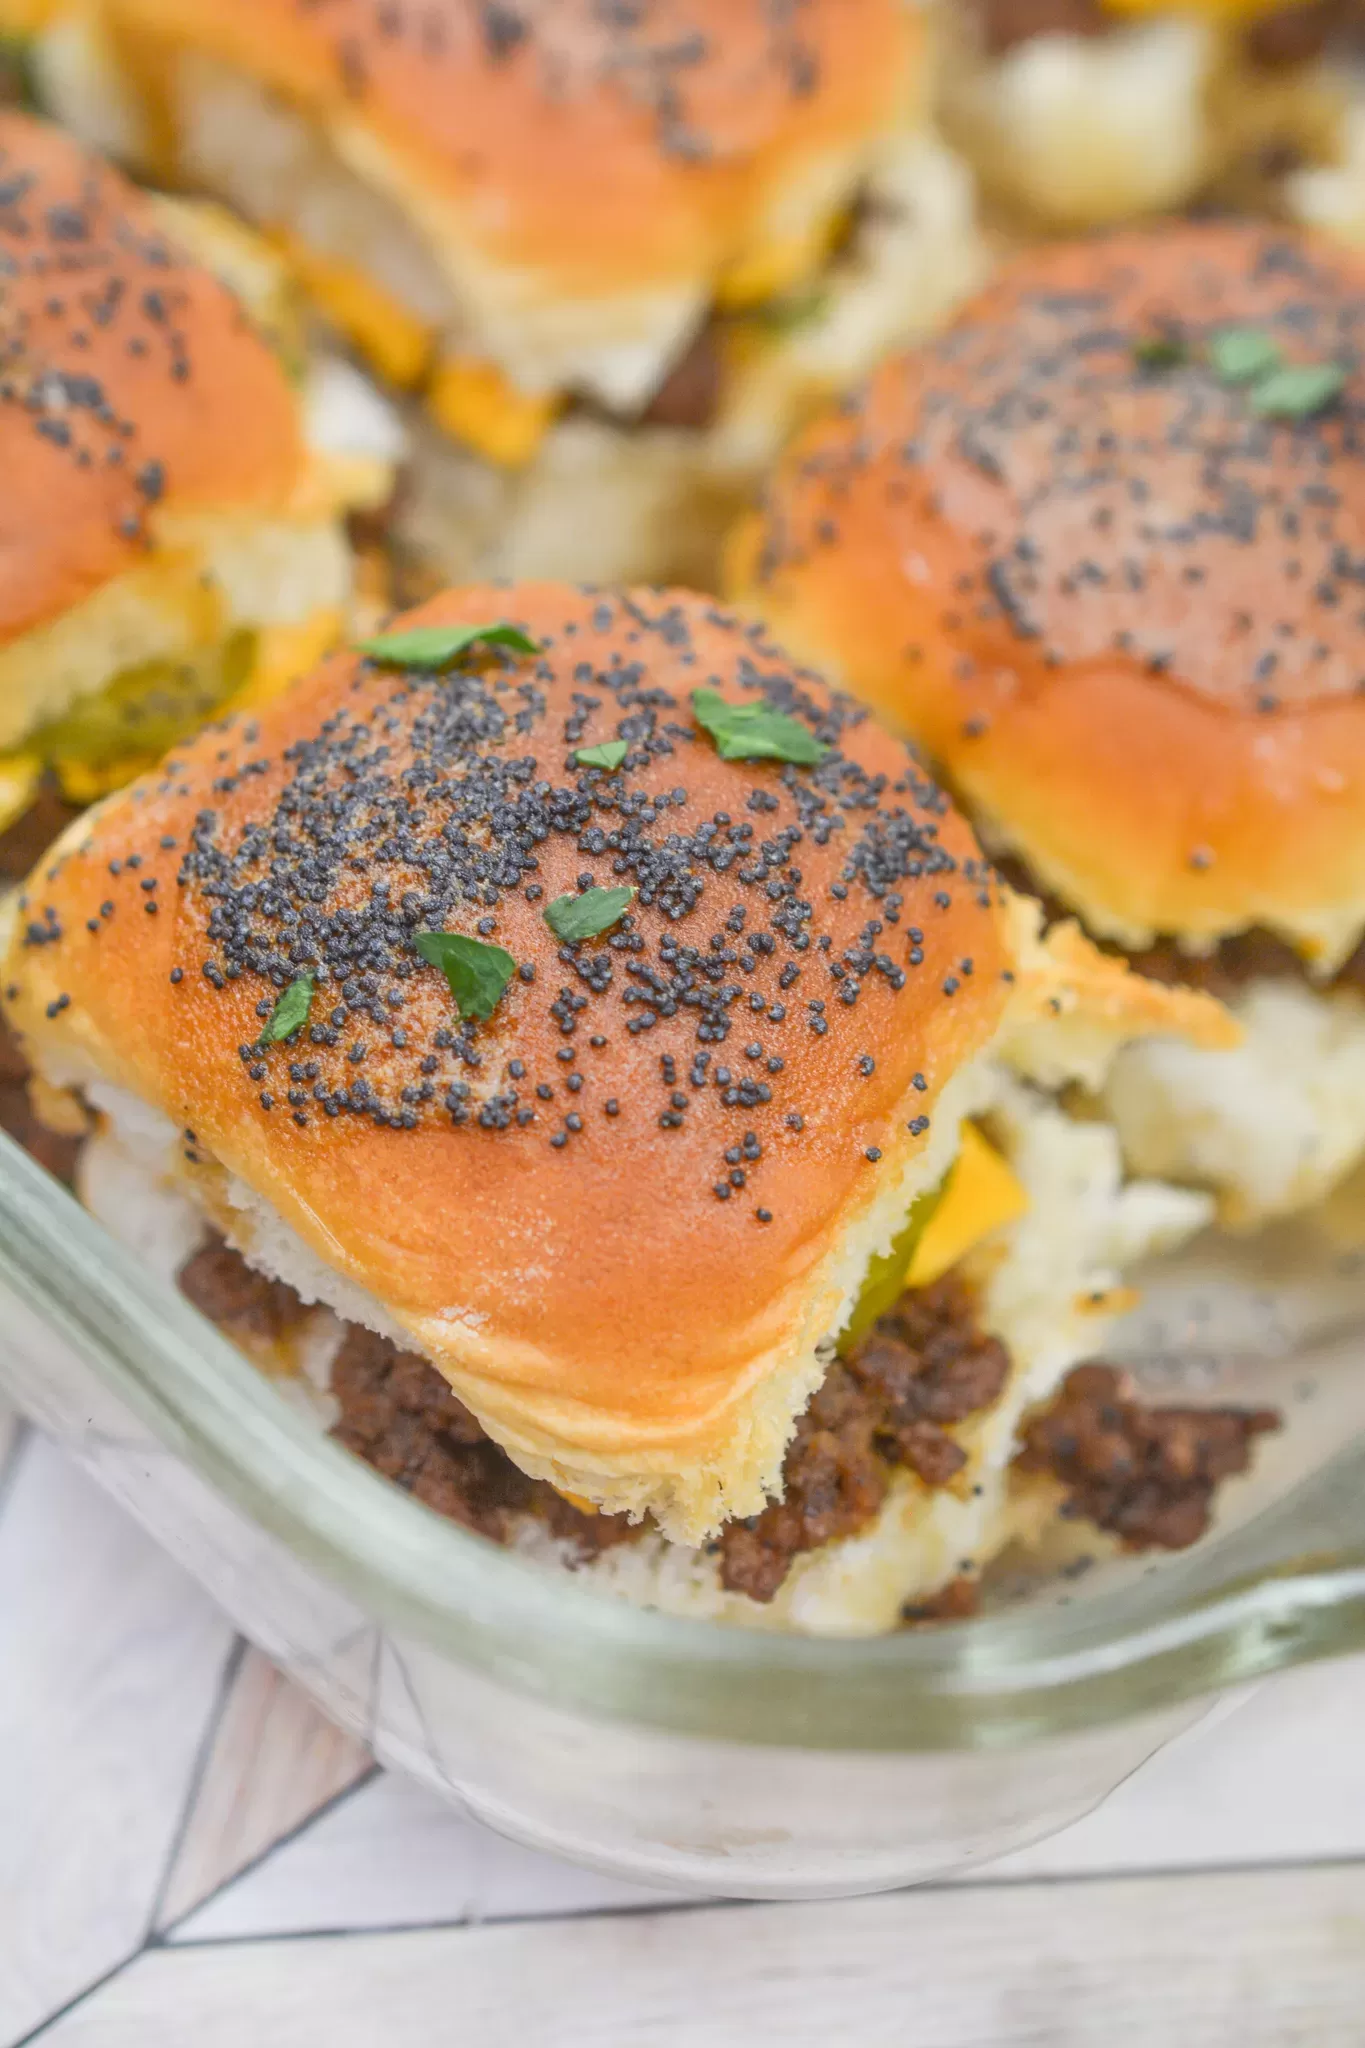
- Burgers & Sandwiches – Because obviously.
- Charcuterie Boards – Add them for a tangy bite next to meats and cheeses.
- BBQ & Grilled Meats – Perfectly balances smoky flavors.
- Potato Salad & Slaws – Chop ‘em up and mix them in for some briny goodness.
More Tasty Ways to Use Cucumbers and Pickled Veggies
If you’re on a pickle kick, you’ll love exploring some of these fresh and tangy recipes:
- Cool Cucumber Salad – Light, crisp, and bright with a splash of rice vinegar and a sprinkle of sesame seeds. The ultimate refresher on a hot day.
- Summer Sweet Corn & Chickpea Salad – Juicy corn, creamy chickpeas, and crunchy cukes tossed together for a perfect picnic side.
- Grilled Corn & Zucchini Salad – Fire-kissed veggies with a punchy vinaigrette—bonus points if you sneak in some pickled onions on top.
- Classic Pickled Beets – Earthy, sweet, and a beautiful color pop on any plate.
- Quick Pickled Red Onions – In just minutes, you’ll have the zippiest topping for tacos, burgers, or grain bowls.
Try one (or all!) next time you’ve got extra cukes or a craving for something zingy.
Frequently Asked Questions:
Can I can these pickles for shelf storage?
Nope! These are refrigerator pickles, meaning they need to stay cold. That’s what keeps them crunchy.
How soon can I eat them?
They start tasting great after 3 days on the counter, but for the ultimate pickle experience, wait a full week in the fridge.
My pickles aren’t crunchy—what happened?
Did you pour hot brine over them? That’ll ruin the texture. Also, make sure you’re using pickling cucumbers—not regular waxed ones.
For extra crunch, some pickle fanatics swear by adding 1/4 teaspoon of pickle crisper (like Ball Pickle Crisp) to each quart-sized jar. Totally optional, but if you’re after that signature snap, it’s worth a try!
Pickle Troubleshooting: Scum, Film, and Sediment
So, something weird floating in your pickle jar? Don’t panic, pickle pro—it happens to the best of us! Let’s break down what’s normal and what to do next.
Bubbly Scum or a Film on Top
Spot a bit of foam or a light film during those first few days? Totally normal—it’s just a byproduct of fermentation. All you need to do is gently skim it off and toss it. The good stuff underneath is doing just fine.
White Sediment at the Bottom
Noticed a cloudy layer or white powder settling at the bottom of your jar? No need to freak out. This is usually caused by the good bacteria working their magic, or sometimes by anti-caking agents if your salt wasn’t canning salt (don’t worry, it’s harmless). The pickles are still good to go.
Troubleshooting Tips for Success
- Always remove the blossom ends from cucumbers—leaving them on can cause spoilage.
- Wash your cukes, garlic, and any dill thoroughly before packing.
- Skim off any scum that shows up during the brining process.
- Make sure your pickles stay fully submerged in the brine—floaters are the enemy of crispness.
- Use sturdy, fresh ingredients—skip anything that looks sketchy or soft.
- Keep your jars cool. Warm temps speed up spoilage and can zap the crunch.
- If anything smells funky (like rotten eggs or mold), don’t risk it—toss the batch, clean your jars, and start fresh.
A few simple tricks and your pickles will stay crisp, tangy, and irresistible.
And that’s it—your very own homemade Claussen pickles! Give them a try, and let me know how they turn out. Or, if you’re like me, just try not to eat half the jar in one sitting. No promises.
Keep the Flavor Coming – Try These:


Copycat Claussen Pickle Recipe
Ingredients
For the Pickles:
- 1 gallon pickling cucumbers washed and sliced into spears or left whole
- 6 heads fresh dill
- 6 garlic cloves minced
- ⅓ cup instant minced onion
- ½ tablespoon mustard seeds
For the Brine:
- 1½ quarts water
- 2 cups cider vinegar
- ½ cup canning salt
Instructions
Prepare the Cucumbers and Jars
- Thoroughly wash the cucumbers, ensuring all dirt and debris are removed. Slice them lengthwise into spears, or keep them whole if preferred. Arrange the cucumbers in sterilized jars or a food-safe container, such as a gallon-sized glass jar or an ice cream pail.
Add the Flavoring Ingredients
- Distribute the dill heads, minced garlic, minced onion, and mustard seeds evenly among the jars. These ingredients will enhance the flavor of the pickles during the fermentation process.
Prepare the Brine
- In a large saucepan, combine the water, cider vinegar, and canning salt. Bring the mixture to a boil, stirring occasionally until the salt completely dissolves. Remove the brine from heat and allow it to cool to room temperature.
Pour the Brine Over the Cucumbers
- Once the brine has cooled, carefully pour it over the cucumbers, ensuring they are fully submerged. If needed, use a clean weight or small dish to keep them immersed in the brine.
Fermentation Process
- Cover the jars loosely and leave them at room temperature for three days, gently shaking or turning them occasionally to evenly distribute the brine and flavors.
Refrigerate the Pickles
- After three days, securely seal the jars and transfer them to the refrigerator. The pickles will be ready to enjoy after one week, though the flavors will continue to develop over time. They can be stored in the refrigerator for up to one year.
Notes
I’m Bitty, owner of nodashofgluten.com, where I share simple, delicious recipes for all tastes, including gluten-free. Check out my “About Me” page for more info!


13 Responses
Best pickles ever! Been using this recipe for years. My family loves them!
Friends of mine use this recipe and We were always over asking for more jars of pickles so they gave me your recipe.
I can now make my own.
Thank you.
Hi RK! That absolutely made my day—I’m so glad your friends shared the recipe with you! There’s something special about being able to make your own batch at home, especially when it’s a favorite. Hope your fridge is fully stocked now! 😊 Let me know how your first batch turns out!
-Bitty
Calussen doesn’t use apple cider vinegar.
Hi Pete, you’re right that the original Claussen pickles don’t list apple cider vinegar — I use it here because it adds a slightly sweeter, more rounded tang than white vinegar, which I personally like for balancing the garlic and dill. If you want to stick closer to the original, you can absolutely swap it for white vinegar in the same amount.
Nowhere do I see how many jars and size of jars 1 serving should be. How do I know how to split the ingredients up?
This recipe makes about 1 gallon total, which you can split into smaller jars (quart jars work best). Just divide the cucumbers and flavoring ingredients evenly between your jars, then pour the brine over until everything is submerged.
So do you distribute the minced onion and mustard seed evenly among the jars or do you with that with the brine? The receipe is different then the information above. Thanks
Great question! You’ll want to divide the dill, garlic, minced onion, and mustard seeds evenly among the jars before pouring in the brine. That way, each jar gets the right flavor balance. The cooled brine goes in last, covering everything completely.
Is this recipe safe for water bath canning?
Hi there! These are refrigerator pickles, which means they’re not safe for water bath canning. The cold brine method is what keeps them crunchy, but they must be stored in the fridge to stay safe and fresh.
I loved your recipe and this was my first time making pickles! Thank you! However I noticed a slight variation – the first set of instructions says to securely seal them before leaving on the counter for three days, the second set says loosely. I may be overthinking it, but I didn’t have the lids on very tight. I just now sealed them and put them in the fridge after 3 days on the counter. Hope it’s okay 😀
These are the favorite pickle in my crowd. I tried a couple other recipes this year, but everybody asked for this one exclusively from now on.