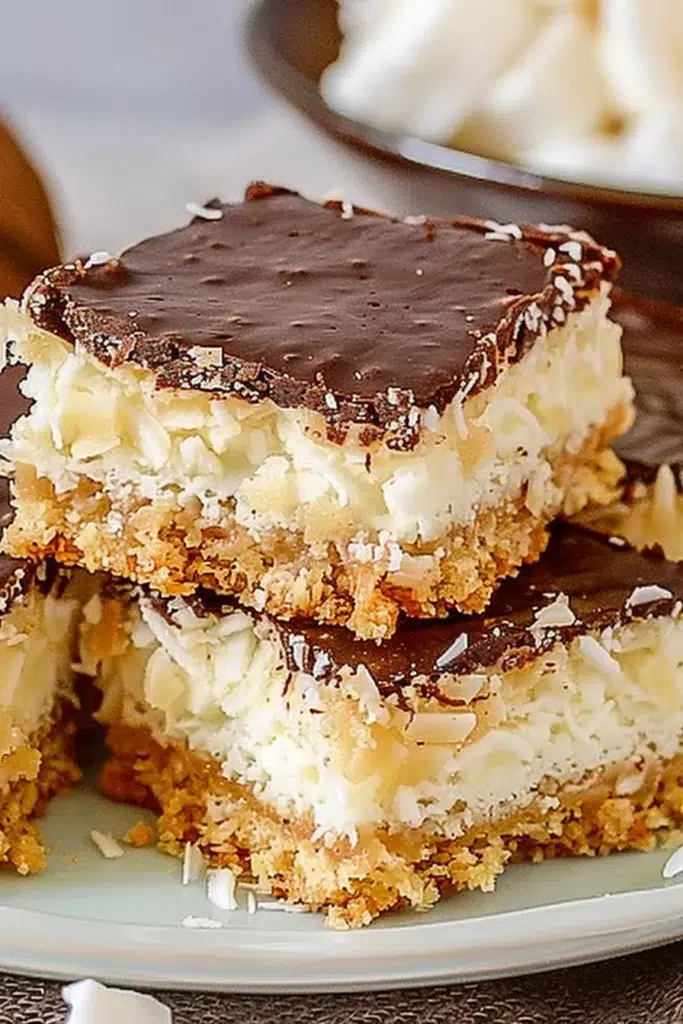
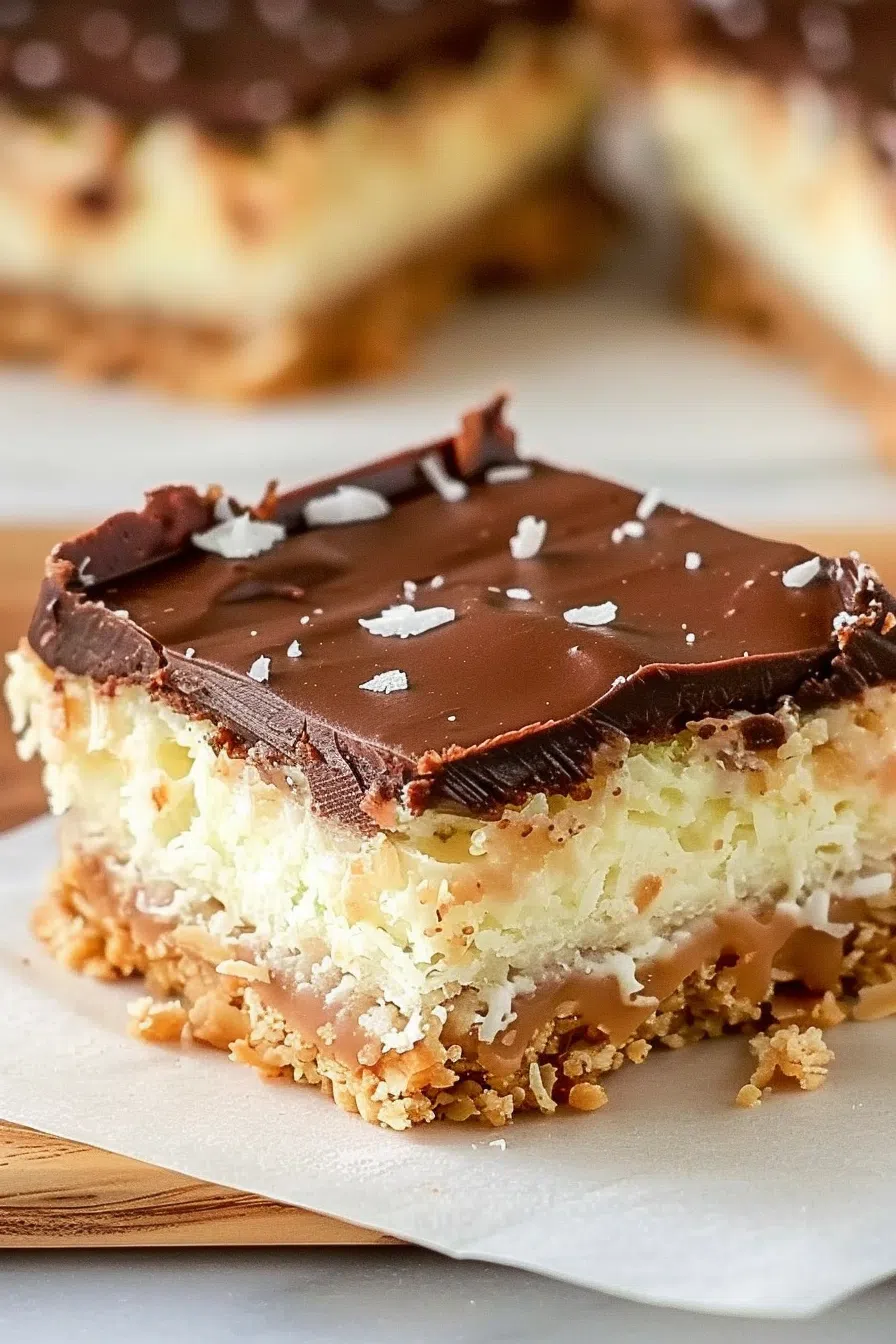
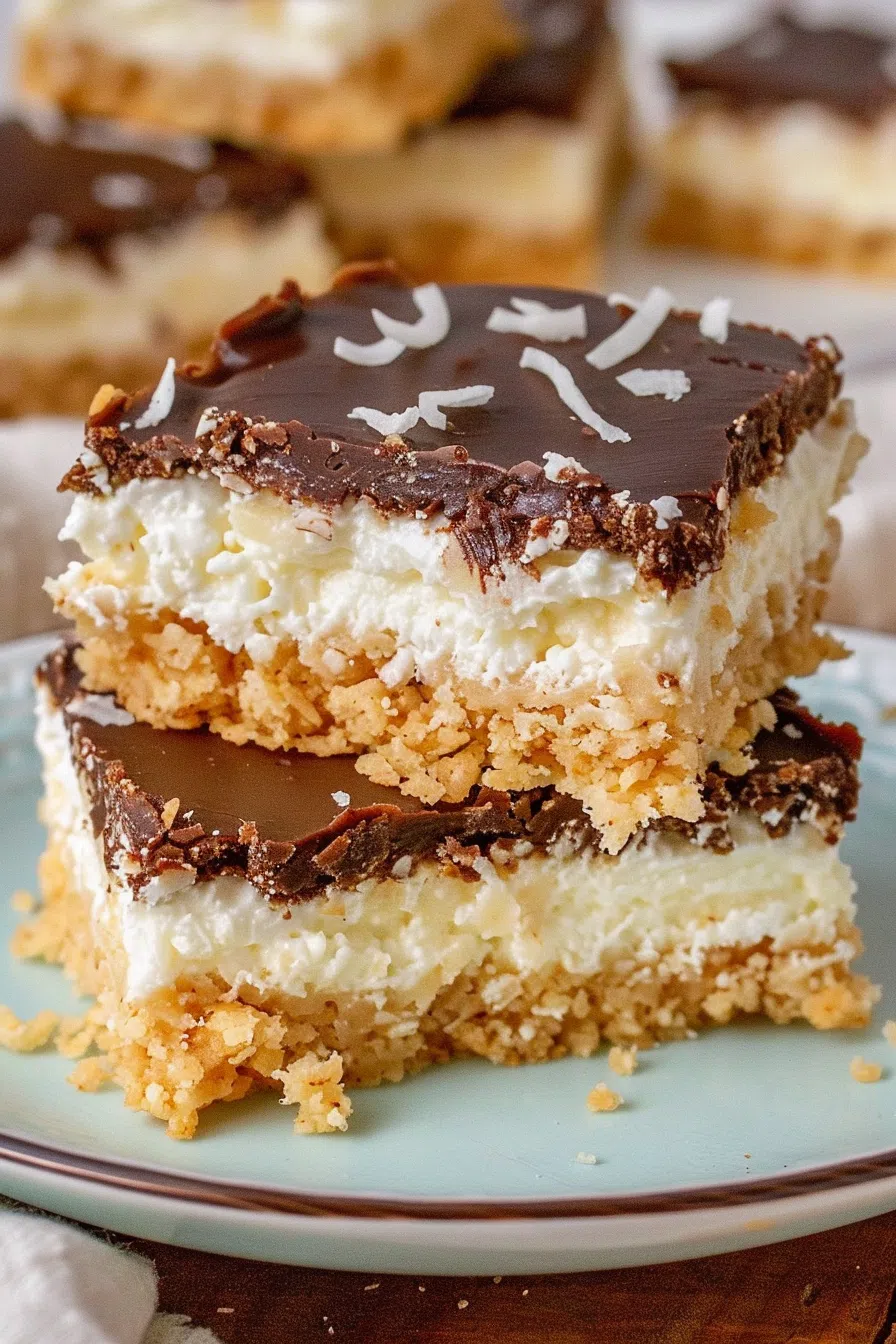
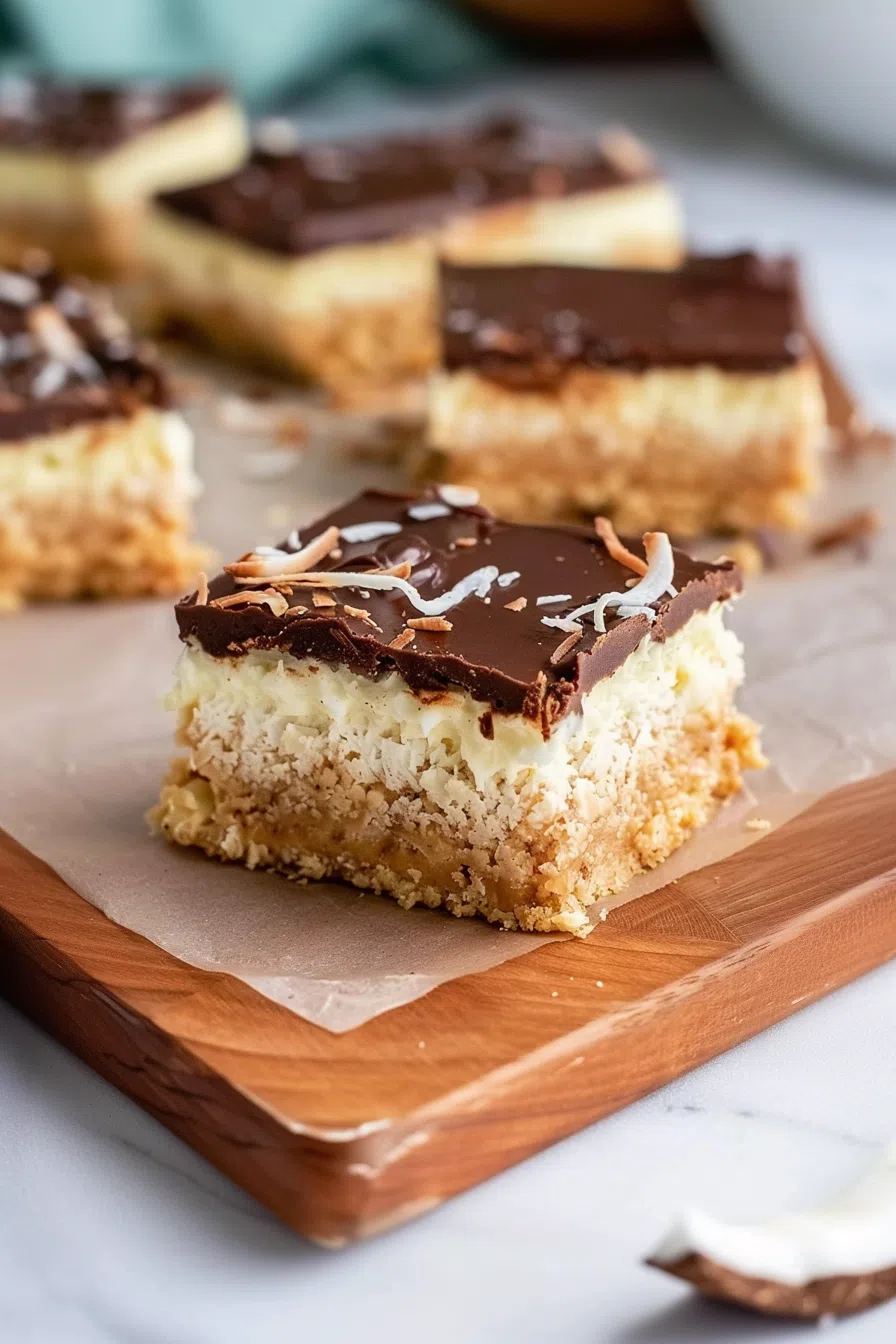
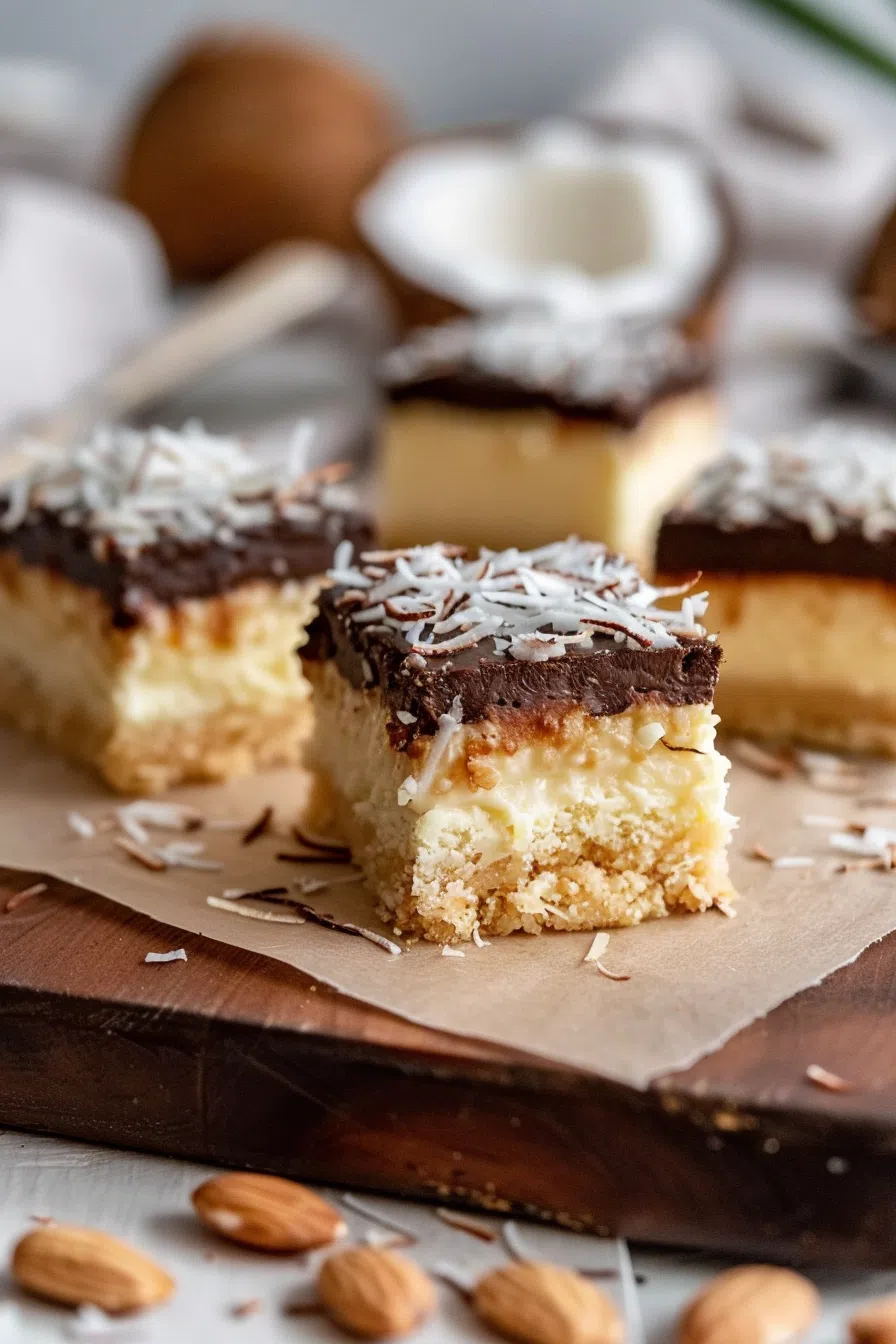
Coconut Dream Bars – Indulge in the flavors of these tempting Coconut Dream Bars. This dessert brings together the taste of coconut, chocolate and a crispy graham cracker crust. Catering to those who savor the fusion of these elements. With 30 minutes of preparation time. These bars serve as a charming treat for any event.


The first occasion I whipped up a batch of these Coconut Dream Bars was on a chilly evening. That yearned for a hint of sunshine. As the kitchen filled with the scent of coconut. I sensed that I had discovered something truly special. Even my husband. Who typically leans towards savory dishes. Was captivated by the aroma. His first bite sealed the deal. And even my picky child requested seconds. It felt like a triumph. A recipe that brought a touch of the tropics to our home. And put smiles on my family’s faces.
What makes these Coconut Dream Bars truly special?
With half an hour needed to prepare them. These bars are simple to make. And offer a treat without any hassle. The blend of coconut and chocolate whisks your senses away to a getaway. Whether it’s for holidays, celebrations. Or simply, as a snack anytime you desire. You can even make them ahead. Freeze for those moments when you crave a retreat.

What You Need To Make This Coconut Dream Bars Recipe?
Graham Cracker Crumbs (or Digestive Biscuit Crumbs): These crumbs form the foundation of our bars. Providing a texture. And a touch of sweetness to pave the way for the luscious layers ahead. Picture it as the base of a home reliable.
Granulated Sugar: A sprinkle of sugar to sweeten the base. It’s akin to a whisper of joy. Brightening up the graham cracker crumbs.
Melted Unsalted Butter: The enchanting binder. It brings together the crumbs and sugar. Establishing a foundation for our bars. Its decadent flavor is like an embrace that invites you into the recipe.
Sweetened Condensed Milk: The essence of our bars. This thick sweet milk blends with coconut. To form an absolutely irresistible layer.
Unsweetened Shredded Coconut: The shining star. It introduces a crunch. And an explosion of coconut essence. Making each mouthful feel like an escape.
Vanilla Extract: A hint of vanilla imparts warmth. And richness subtly elevating the coconut and chocolate flavors. It serves as the undertone that binds everything harmoniously.
Semisweet Chocolate Chips: The chocolate topping. This layer provides a velvety finish. That complements perfectly with the sweetness. And the texture of the underlying layers.
Unsalted Butter or Heavy Cream: You have the option to personalize the chocolate topping. Butter provides a firmer consistency. Whereas heavy cream offers a creamier texture. Both ways lead to a chocolate experience.
Steps To Make Coconut Dream Bars:
Step 1: Start by preheating your oven to 350 degrees Fahrenheit (175 degrees Celsius). Prepare a 9×9 inch baking pan. By greasing it. And lining it with
Step 2: In a bowl. Mix together the butter, graham cracker crumbs and sugar. Until the texture resembles sand. Press this mixture into your pan to create a sturdy base for your bars. Bake this layer for 10 minutes to set the foundation for the magic
Step 3: While the crust is turning golden and fragrant in the oven. Combine sweetened condensed milk, shredded coconut and vanilla extract in another bowl. This blend forms the essence of Coconut Dream Bars. Promising a moist. And flavorful topping over the crust.
Step 4: Once the crust is done baking. Evenly spread the coconut mixture on top with attention and care. Pop it back into the oven for another 10 to 15 minutes. Keep an eye out for the edges to take on a hue. That’s your cue to take them out of the oven. Remember, patience is key here. Overbaking will rob these bars of their moisture.
Want To Save This Recipe?
Step 5: Once the bars have cooled down in the pan. Melt the chocolate chips along with butter or heavy cream. Until they form a smooth mixture. Pour this chocolate over the coconut layer. Ensuring it coats every bit of it. Allow this chocolate topping to set for an hour. Creating a finish that perfects the bars.
Step 6: Slice into squares. And serve. Savoring each bite that brings happiness and a tropical flavor to your loved ones.
Tip:
One great tip. To take your Coconut Dream Bars to the next level. Is done by toasting the coconut before mixing it into the sweetened condensed milk blend. Toasting enhances both the flavor and texture of the coconut. Giving your bars a nuttier taste. And a satisfying crunch. Here’s how you can accomplish it:
- Lay out the coconut in a thin layer on a baking sheet.
- Pop it in an oven set at 350°F (175°C). For around 5 to 10 minutes. Stirring occasionally. Until the coconut turns a golden brown.
Keep an eye on it because toasted coconut can quickly go from perfect to burnt. Once it’s perfectly toasted. Let it cool down before combining it with the sweetened condensed milk and vanilla extract. This no-frills trick carries your bars from tasty to divine. Enjoy the aroma. And enhanced taste that toasted coconut brings to your Coconut Dream Bars!
Frequently Asked Questions:
Can I use sweetened coconut instead of unsweetened?
Make sure to adjust the sugar in the crust. Or opt for a type of condensed milk. To maintain a balanced level of sweetness.
How long do these bars keep in the freezer?
If stored properly in an airtight container. They should keep well for up to 3 months. Making them an ideal treat to prepare in advance.
Can I use a different type of chocolate for the topping?
While semisweet chocolate chips offer a classic flavor. You’re welcome to experiment with chocolate for a more intense taste. Or milk chocolate for a sweeter twist.
Keep the Flavor Coming – Try These:

Coconut Dream Bars
Ingredients
- 2 c graham cracker crumbs or digestive biscuit crumbs
- 1/4 c sugar
- 1/2 c unsalted butter melted
- 1 can sweetened condensed milk 300ml in Canada, 14 ounces in the US
- 2 c unsweetened shredded coconut
- 2 teaspoon vanilla extract
- 1 1/4 c semisweet chocolate chips
- 3 tablespoon unsalted butter or heavy cream
Instructions
- Start by preheating your oven to 350°F (175°C). Grease a 9x9-inch pan. Line it with parchment paper. To make it easier to remove the bars later.
- Prepare the Crust: Begin by melting 1/2 cup of butter and mixing it with 2 cups of graham cracker crumbs and 1/4 cup of sugar. Press this mixture into the bottom of your pan.
- Place the pan in the oven. Bake for around 10 minutes. Until lightly golden.
- Make the Filling: While the crust is baking. Mix together one can of sweetened condensed milk, 2 cups of coconut and 2 teaspoons of vanilla extract in a bowl.
- Add Filling & Bake Again: Spread this coconut mixture evenly over the crust. Return it to the oven. Bake for 10 to 15 minutes. Until slightly golden on top. Be cautious not to overbake.
- Once baked. Remove from oven. Allow it to cool completely at room temperature.
- Chocolate Topping: Melt 1 1/4 cups of chocolate chips with either 3 tablespoons of butter or heavy cream. Spread this melted chocolate evenly over the coconut layer.
- Allow the chocolate topping to set for an hour. Before cutting into squares. Enjoy your treat!
Notes
I’m Bitty, owner of nodashofgluten.com, where I share simple, delicious recipes for all tastes, including gluten-free. Check out my “About Me” page for more info!