Cream cheese, sweetened condensed milk, and mini chocolate chips come together in this rich and dreamy Chocolate Chip Cheesecake Recipe.
Okay, let’s talk cheesecake—not just any cheesecake, but that one. You know the kind that makes people look at you differently after the first bite? This Chocolate Chip Cheesecake Recipe has been my secret weapon for years.


I made it for a holiday dinner once, on a total whim. I wasn’t even trying to show off. But the look on my cousin’s face? Priceless. She went from “oh cool, another dessert” to “what is this magic and how do I get more?” in about 15 seconds. My uncle legit offered to pay me to make him one for New Year’s. I laughed… then totally took him up on it. No shame here.
Since then, this cheesecake has been my go-to whenever I want to impress someone, bribe someone, or just treat myself after a long week.
Why You’ll Love This Chocolate Chip Cheesecake Recipe?
Let me give it to you straight—this is not one of those complicated cheesecakes that needs a water bath, a fancy topping, or seven different types of cheese. Nope. It’s humble, honest, and 100% dreamy.
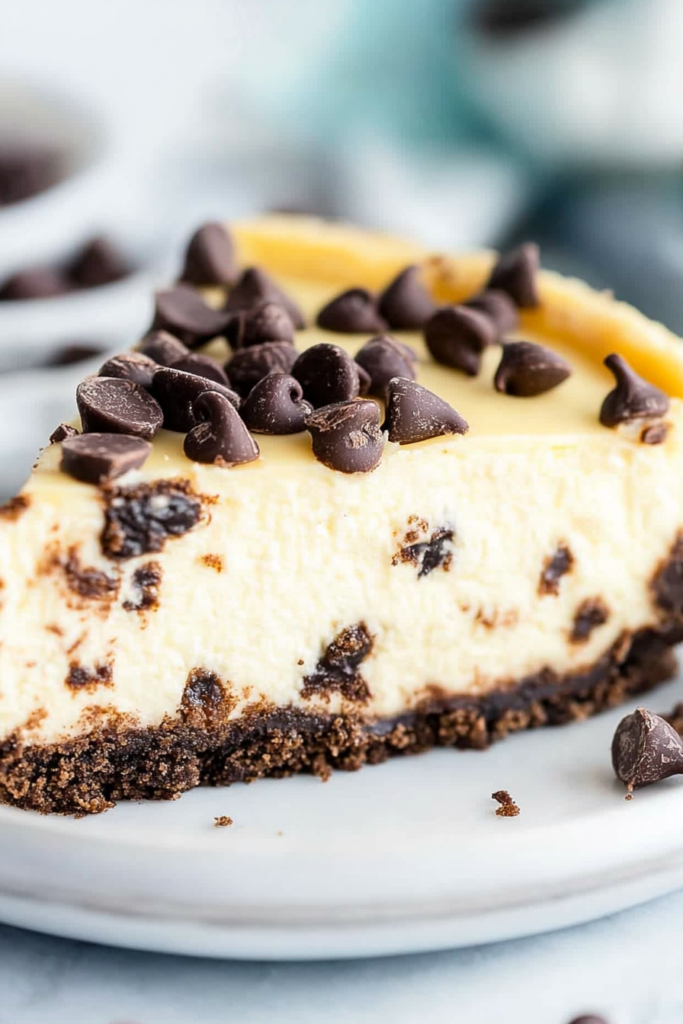
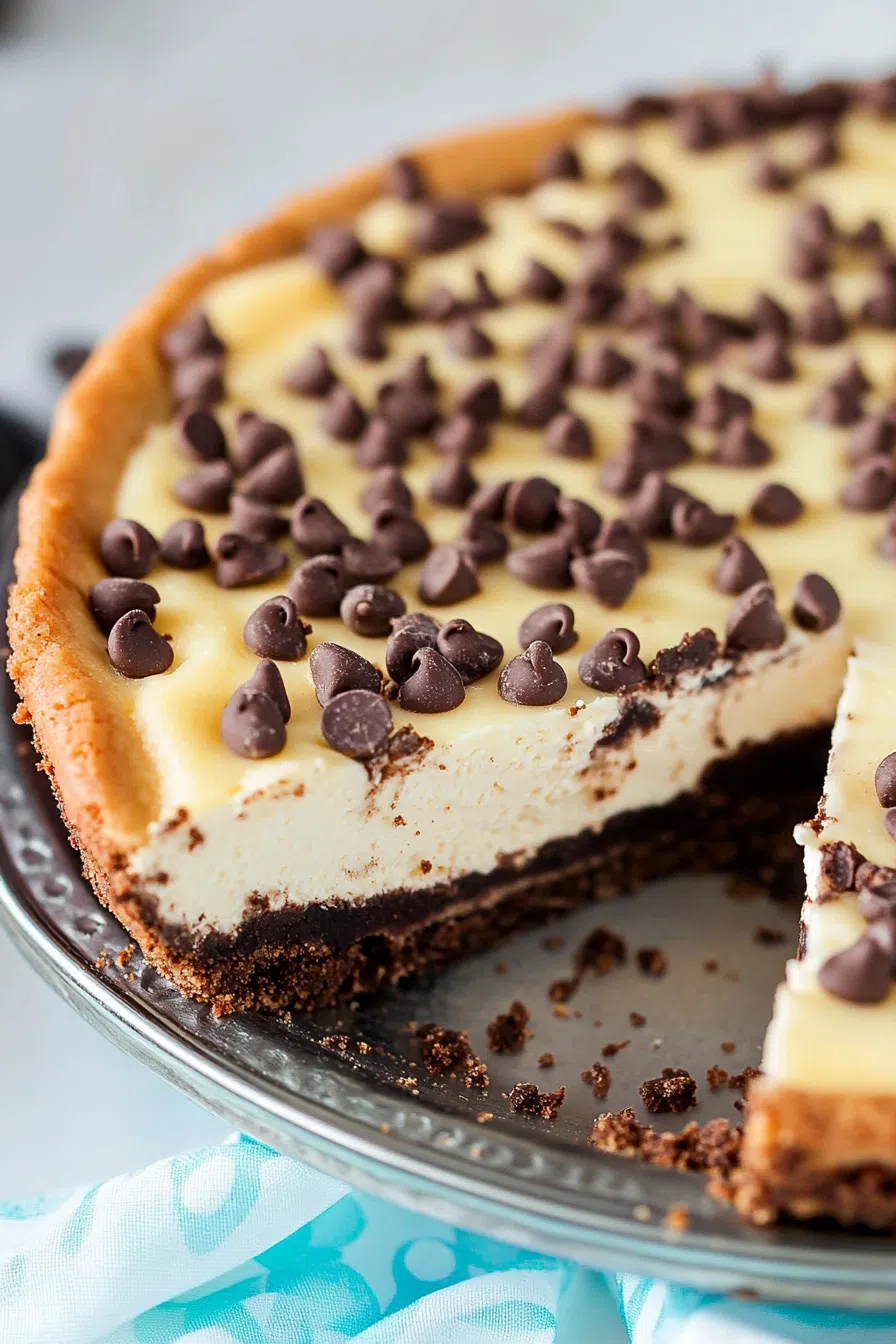
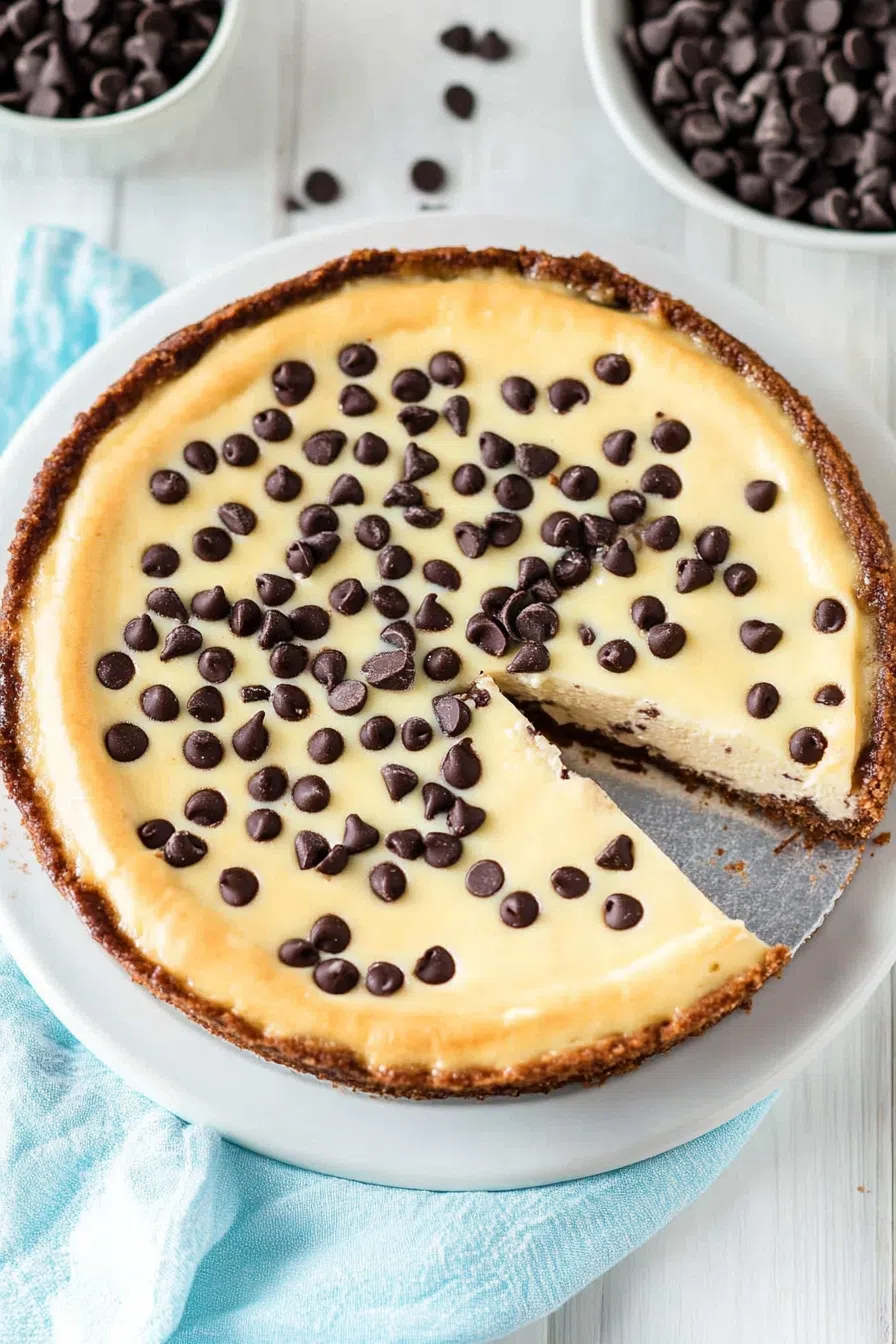
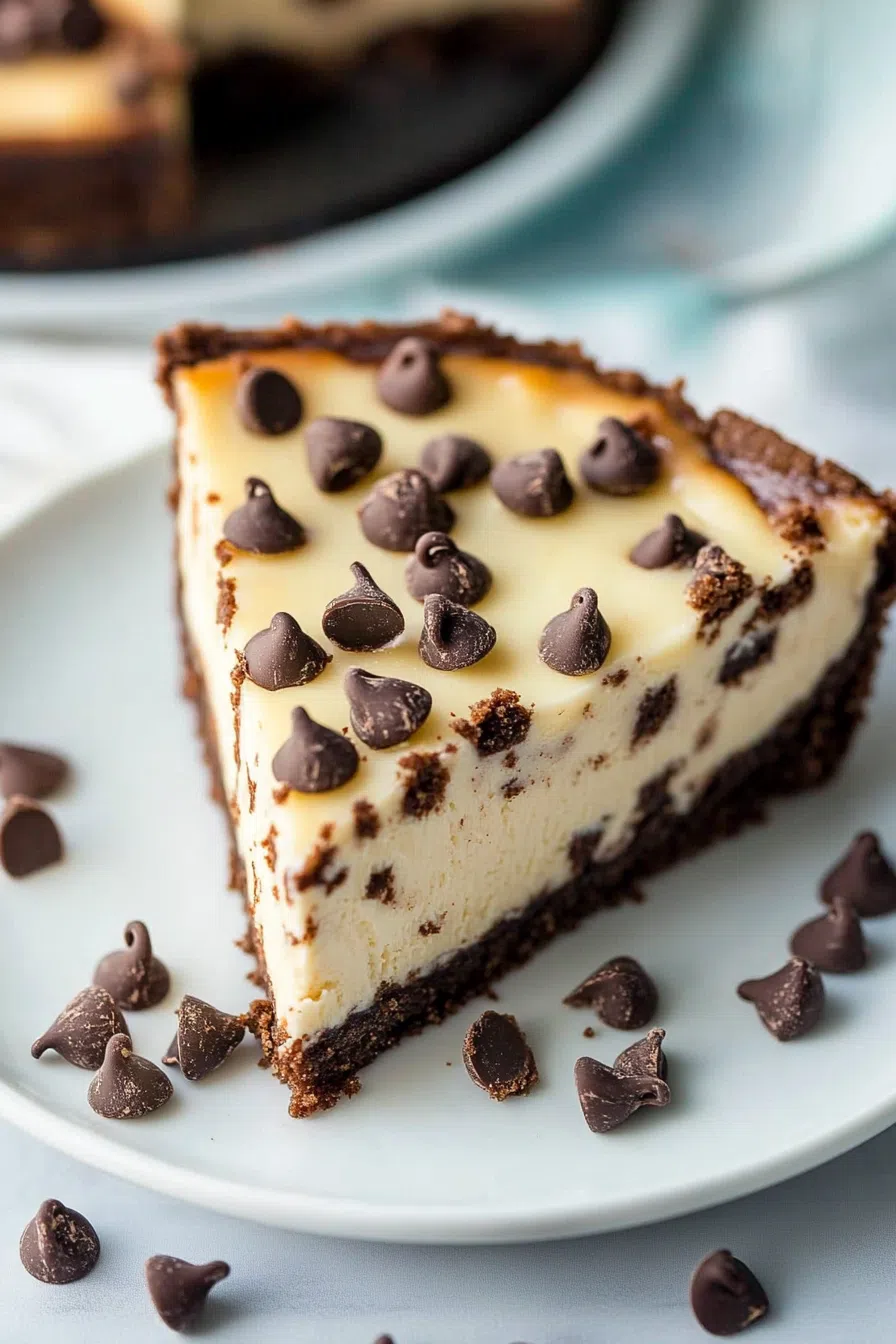
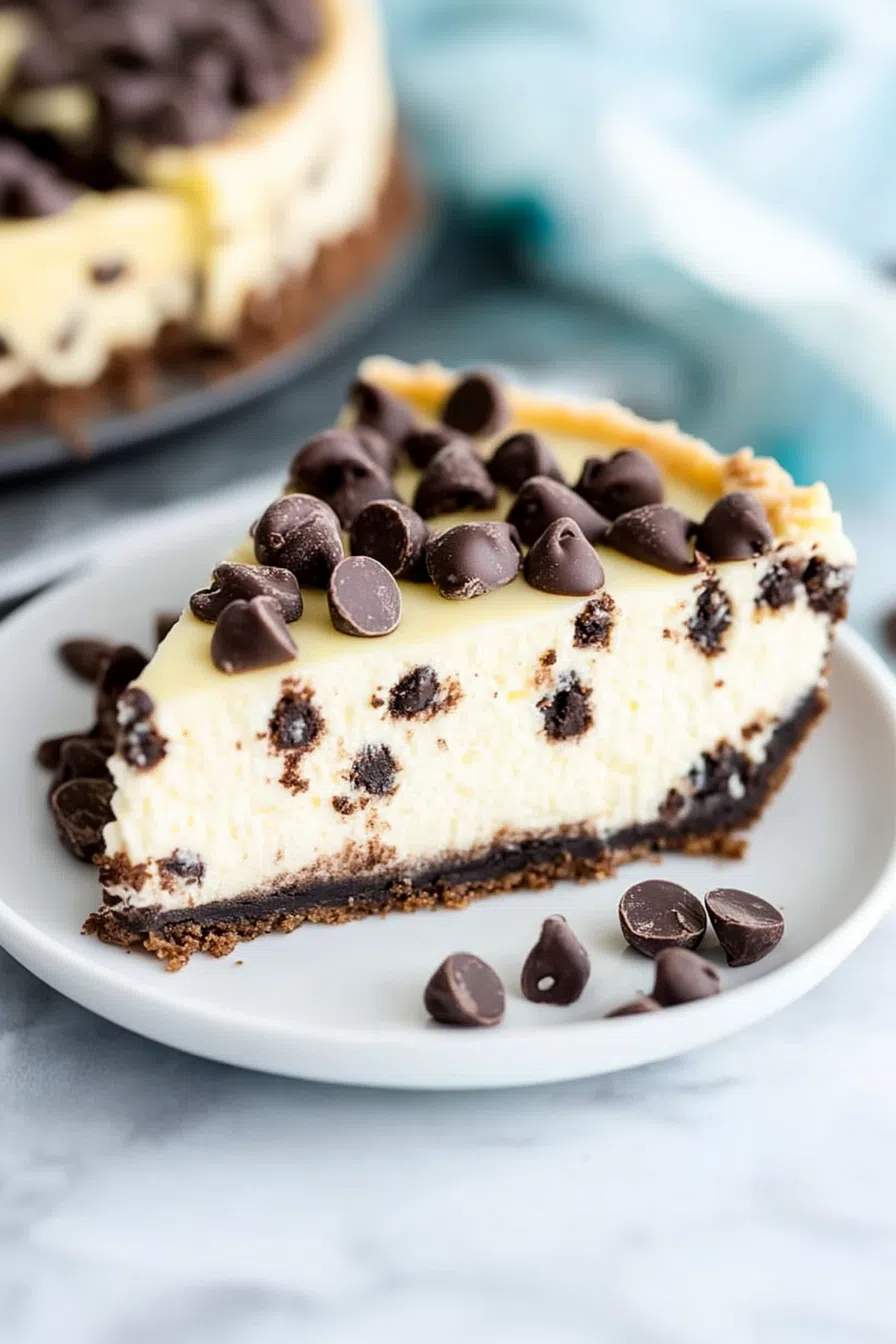
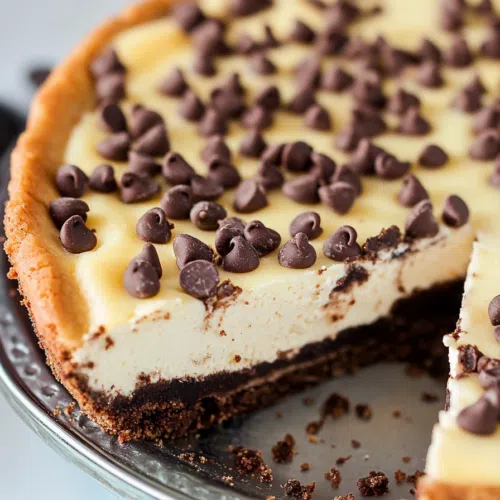
You’ve got this deep chocolatey graham cracker crust (with cocoa powder mixed in, because regular just didn’t cut it). The filling? Creamy, rich, and laced with mini chocolate chips that don’t sink thanks to a little flour trick. The result is a cheesecake that’s equal parts smooth, sweet, and speckled with little chocolate surprises in every bite.

Ingredient Notes:
Not gonna lie, the ingredient list is refreshingly short. And every item is easy to find—most of this might already be in your kitchen. Here’s what we’re working with:
-
Cream Cheese (3 blocks): Go full-fat here, friends. The texture depends on it.
-
Sweetened Condensed Milk: This gives the filling that luscious sweetness and creamy texture. It’s kind of the magic glue.
-
Graham Cracker Crumbs + Cocoa Powder: A little twist on the classic base. The cocoa makes the crust rich and chocolatey, which honestly just feels right.
-
Mini Chocolate Chips: Don’t use regular-sized chips—they’ll sink to the bottom. The minis stay put and make every slice feel chocolate-studded.
-
Eggs + Vanilla: The binding and the warmth. Classic cheesecake essentials.
-
Butter + Sugar (for the crust): Nothing wild here—just your regular pantry staples pulling their weight.
-
Flour: Just a teaspoon to coat some of the chips and keep them from dropping straight to the bottom of the pan.
How To Make Chocolate Chip Cheesecake?
Step 1: Prep the Crust
Preheat your oven to 300°F (yep, low and slow is the vibe). Mix graham cracker crumbs, sugar, cocoa powder, and melted butter until it feels like wet sand. Press that mixture into your springform pan and slightly up the sides. No need to bake the crust first—trust the process.
Step 2: Make the Filling
Beat your cream cheese until it’s smooth and creamy, no lumps allowed. Gradually add in the sweetened condensed milk. Then the eggs and vanilla. Mix until it’s just combined. You don’t want to overbeat it—we’re making cheesecake, not whipped air.
Step 3: The Chip Trick
Toss about a third of the mini chocolate chips in a bit of flour—just enough to coat them. This keeps them from sinking like chocolatey anchors. Fold those into your batter. Pour everything into your crust, then sprinkle the rest of the chips on top. (It looks super cute and also ensures maximum chip-to-bite ratio.)
Step 4: Bake & Chill
Bake for 1 hour. Do not open the oven door. When the hour’s up, turn the oven off and leave the cheesecake inside for another hour. It cools gently and helps avoid cracking. Then let it cool on the counter and refrigerate for a few hours before slicing.
Step 5: Eat the Dang Cheesecake
Serve cold or at room temp, but definitely with a fork. Unless you’re me, in which case… fingers work too when no one’s watching.
Storage Options:
Wrap it tightly and pop it in the fridge—it’ll last 4–5 days. Honestly, I think it tastes better the next day when all the flavors have settled in and gotten cozy.
Want To Save This Recipe?
You can also freeze it. Slice it up, wrap individual pieces in plastic wrap and foil, then freeze for up to 2 months. Defrost in the fridge overnight. Or eat it frozen straight out of the freezer like the little cheesecake goblin you are. I won’t tell.
Variations and Substitutions:
There’s plenty of wiggle room here if you’re the creative type:
-
White chocolate chips or dark chocolate chunks instead of semisweet minis.
-
Raspberry or strawberry swirl added into the batter? YES PLEASE.
-
Swap the graham crust for an Oreo crust if you’re feeling extra indulgent.
-
Want it gluten-free? Use gluten-free graham crackers and double-check your chocolate chips are certified GF.
What to Serve with Chocolate Chip Cheesecake?
Besides a second slice? Glad you asked.
-
A strong cup of black coffee. Total vibe.
-
Berries or a berry sauce. That little bit of tartness really balances the sweet.
-
Whipped cream. If you want it to feel a bit more special.
-
Wine pairing? Try a late harvest red or a little Port. It’s dessert on dessert and it works.
Frequently Asked Questions:
Can I use regular chocolate chips?
You can, but they’ll probably sink. Stick with the minis—they’re the real MVPs.
Do I need a water bath?
Nope! That slow cooling step in the oven does the trick to prevent cracks. Zero stress.
Can I make this ahead of time?
Absolutely! It actually gets better after a night in the fridge.
This Chocolate Chip Cheesecake Recipe has been part of so many good memories in my house—birthdays, holidays, random Tuesdays where I just needed something sweet and nostalgic. I hope it brings some joy (and maybe a few bribes) to your kitchen too.
Let me know if you try it! I’d love to hear how it turns out—or who you ended up impressing with it.
Keep the Flavor Coming – Try These:

Chocolate Chip Cheesecake Recipe
Ingredients
For the Crust:
- 1 ½ cups graham cracker crumbs
- ⅓ cup granulated sugar
- ⅓ cup unsweetened cocoa powder
- ⅓ cup unsalted butter melted
For the Cheesecake Filling:
- 3 packages 8 oz each cream cheese, softened
- 1 can 14 oz sweetened condensed milk
- 3 large eggs
- 2 teaspoons pure vanilla extract
- 1 cup mini semi-sweet chocolate chips divided
- 1 teaspoon all-purpose flour
Instructions
Preheat the Oven:
- Preheat your oven to 300°F (150°C). Lightly grease a 9-inch springform pan or line the bottom with parchment paper for easier removal.
Prepare the Crust:
- In a medium mixing bowl, combine the graham cracker crumbs, granulated sugar, and unsweetened cocoa powder. Stir in the melted butter until the mixture resembles wet sand. Firmly press the mixture into the bottom and about 1 inch up the sides of the prepared pan. Set aside.
Make the Cheesecake Filling:
- In a large mixing bowl, beat the softened cream cheese until smooth and lump-free. Slowly add the sweetened condensed milk, beating continuously until fully incorporated. Add the eggs, one at a time, followed by the vanilla extract. Mix just until smooth; avoid overbeating.
Fold in the Chocolate Chips:
- Toss one-third of the mini chocolate chips with the teaspoon of flour (this helps prevent them from sinking to the bottom). Gently fold the floured chips into the batter. Pour the cheesecake filling into the prepared crust. Sprinkle the remaining chocolate chips evenly over the top.
Bake the Cheesecake:
- Place the cheesecake in the preheated oven and bake for 1 hour. Once the baking time has elapsed, turn off the oven but leave the cheesecake inside—without opening the door—for an additional hour to allow gradual cooling.
Cool and Chill:
- Remove the cheesecake from the oven and allow it to come to room temperature. Refrigerate for at least 4 hours, preferably overnight, before removing the sides of the springform pan and slicing to serve.
Notes
I’m Bitty, owner of nodashofgluten.com, where I share simple, delicious recipes for all tastes, including gluten-free. Check out my “About Me” page for more info!