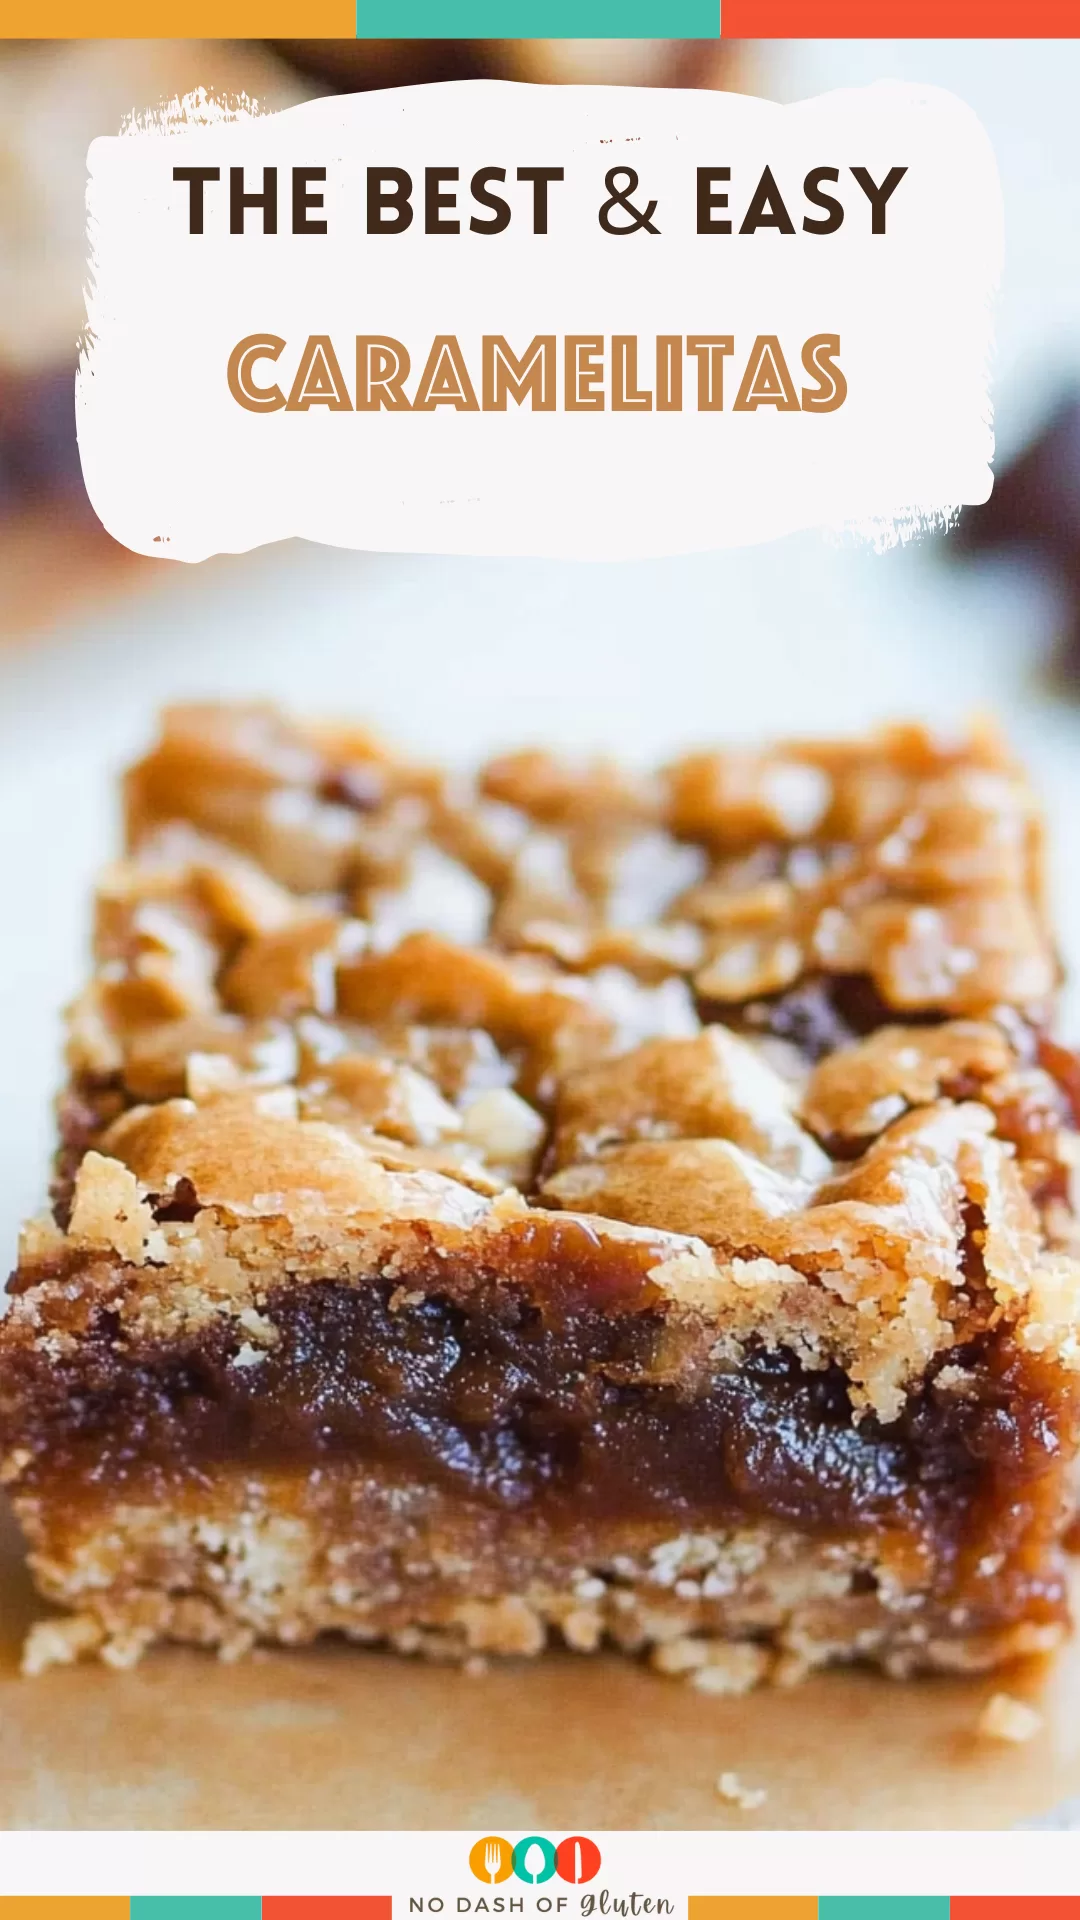
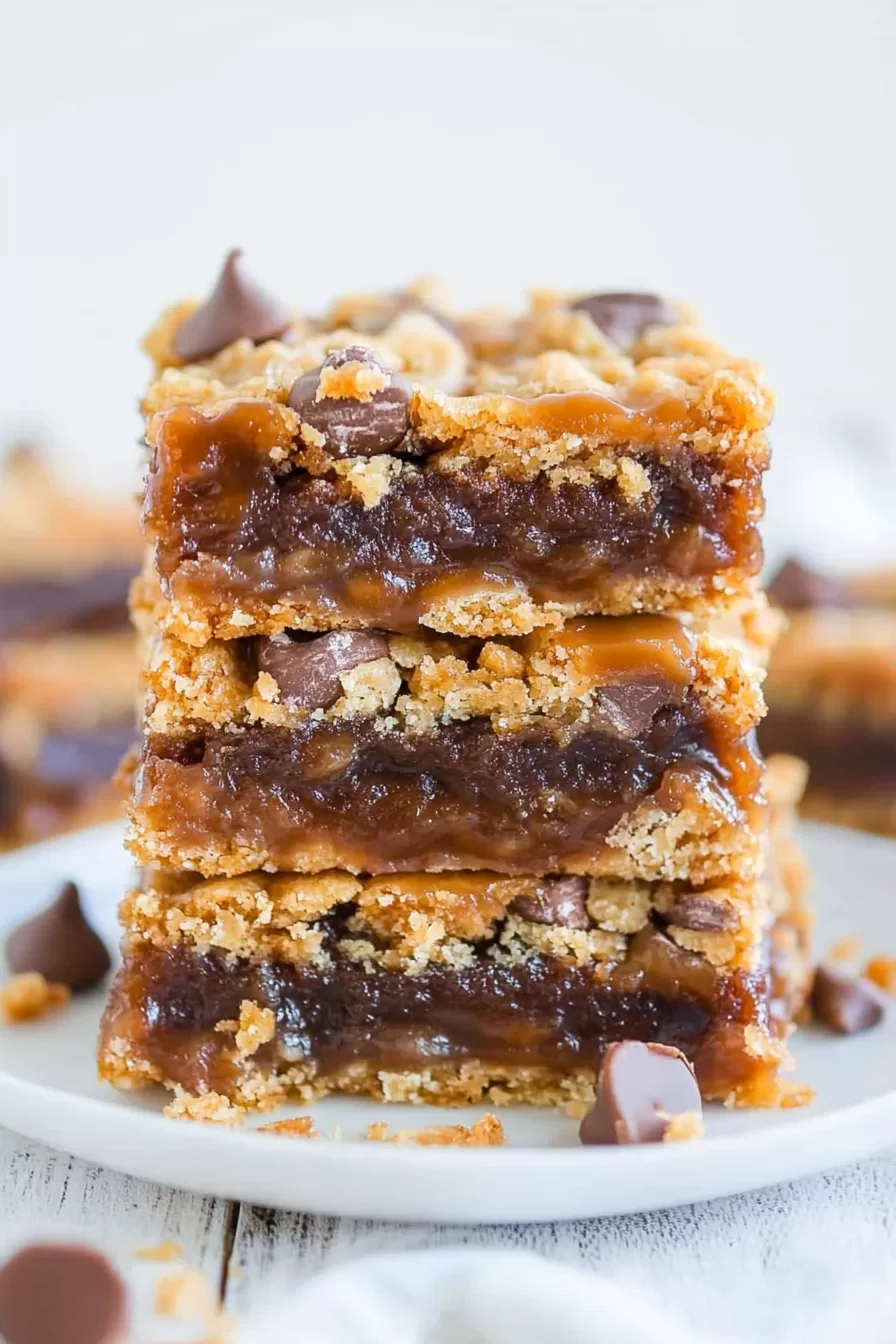
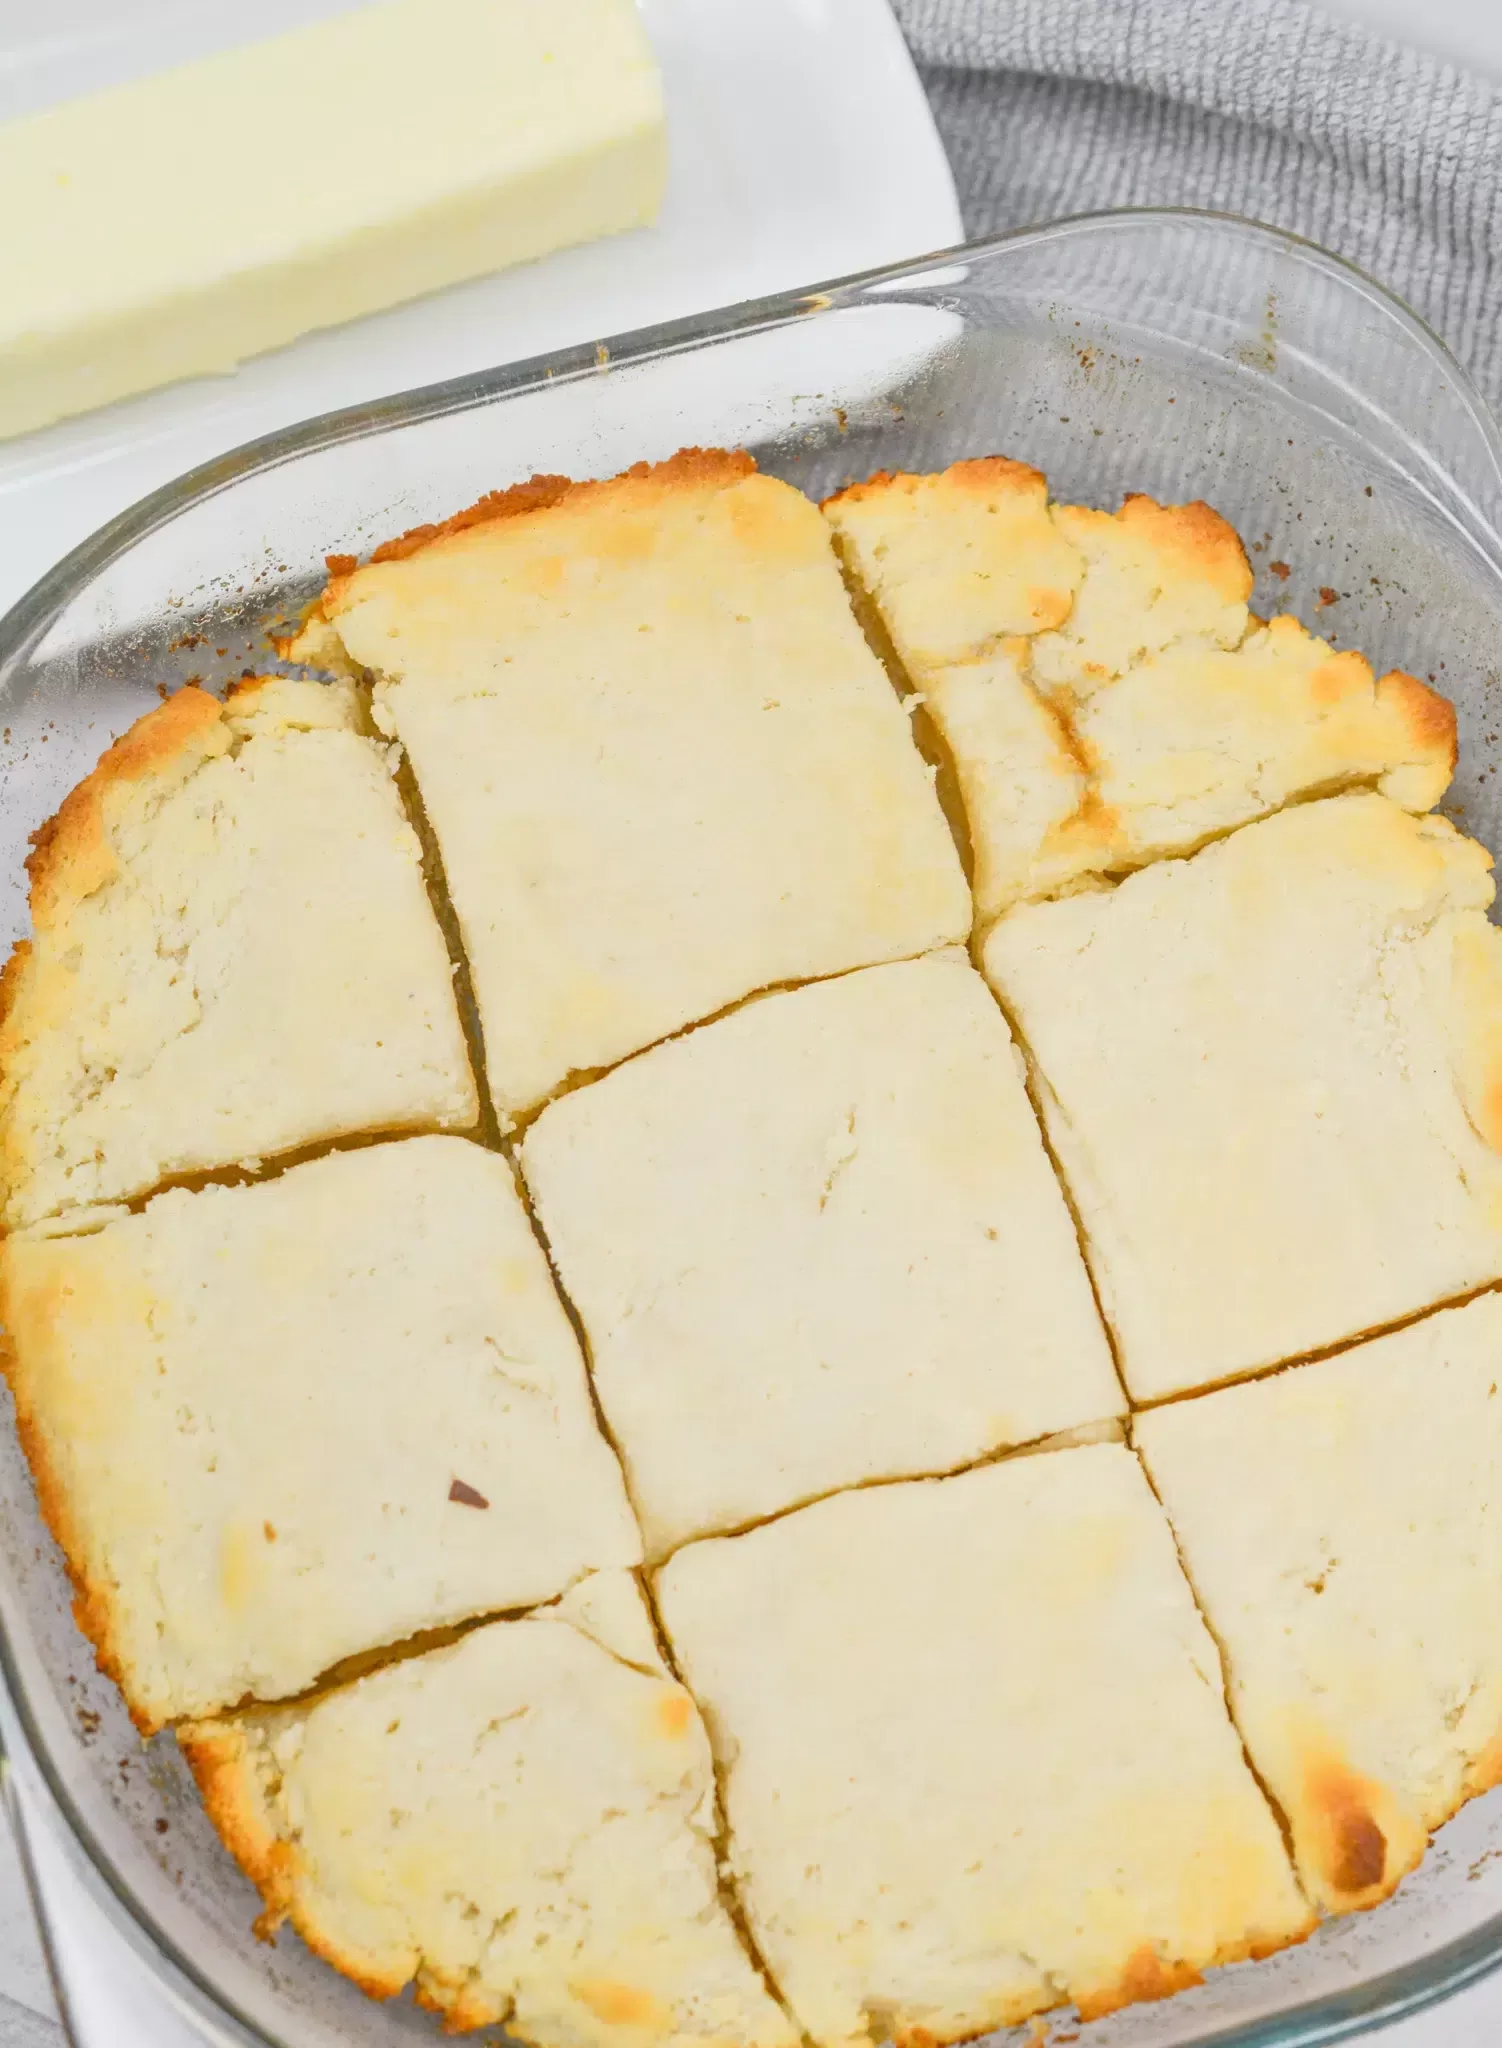
These Caramelitas AKA Easy Caramel Oat Bars, combine gooey caramel, melty chocolate, and chewy oat layers for a dessert that’s dangerously addictive.
Gluten-Free Disclaimer: This original recipe is not gluten-free. However, gluten-free variations are provided in the recipe card below for easy adaptation.
You know how some desserts just hit different? That’s Caramelitas for me. I stumbled on them completely by accident during a chaotic Saturday afternoon when I was convinced my pantry had nothing. I mean, I had random oats, a forgotten bag of caramels, and just enough chocolate chips left over from another baking session. You know the vibe—How am I going to pull off something good with this?
I threw those ingredients together, layered everything up, and baked it like I was winging a Bake-Off challenge. And when I pulled the pan out of the oven, it was love at first sight. The chocolate was perfectly melted, the caramel oozed just slightly through the crumbly oat topping, and—I kid you not—the smell could’ve sold real estate.


Since then, these bars have been my go-to for pretty much everything: potlucks, bake sales, or those nights when I want something obnoxiously good without fancy steps or equipment. People always ask me what they’re called, and when I say “Caramelitas,” I get this mix of intrigue and hunger—like they need the recipe immediately.
So here it is, in all its buttery, gooey glory. If you’ve got 20 minutes and a sweet tooth, you’re about to fall in love, too.
What People Are Saying: Real-Life Caramelitas Stories
Alright, so you don’t just have to take my word for it—Caramelitas have sparked more passionate debates and enthusiastic reviews than any dessert I’ve baked. Let’s talk about the feedback (aka the wild ride) from folks who’ve given these gooey bars a spin in their own kitchens.
Butter: The Decadence Factor
First up, let’s address the elephant in the mixing bowl—yes, these bars are undeniably buttery, rich, and a little over-the-top. Some bakers were surprised at just how much butter went into the mix and, occasionally, worried the dough felt a little greasy before baking.
Sticky Situations
Others discovered that lining the pan with foil doesn’t always play nice. PSA: If you want fuss-free removal, give your pan a good greasing or line it with parchment paper. This way, you won’t end up performing delicate surgery to separate the bar from the wrapper (trust me, I’ve wrestled with stubborn foil myself more times than I care to admit).
Obsessions, Traditions, and Raving Fans
Here’s where things get fun. People have called Caramelitas “dangerously addictive,” “the best bar cookie I’ve ever made,” and “my go-to potluck hero.” One person’s partner accused them of putting “love juice” in the bars (which, I mean, could be the butter talking). These bars have also become beloved holiday traditions, making annual appearances at Christmas and bake sales alike.
Pro Tips from the Trenches
- Measure your caramel sauce, using about 1 cup to keep the texture right.
- Planning for a crowd? You can double the recipe, just keep an eye on the baking time and be ready for even more gooey deliciousness.
- Bake, let cool, and prepare for people to immediately ask for the recipe.
In short? Whether you’re a first-timer or a seasoned Caramelita addict, these bars inspire love, laughter, and maybe a few debates about butter.
Why You’ll Love This Caramelitas Recipe
- Unbeatable texture: Buttery, chewy oats, melty chocolate, and gooey caramel. Every bite is next-level good.
- Easy to make: This is a “no-stress, just layer and bake” kind of recipe. Zero need for perfection here.
- Crowd-pleaser: If you show up with these, people will treat you like the hero you are. I’ve seen it happen.
- Stores beautifully: You can make them in advance, freeze them, or just sneak a bar from the counter all week long.
Ingredient Notes:
These chocolate caramel oatmeal bars, or Caramelitas as I like to call them, don’t need anything fancy—just a few pantry staples and a whole lot of love.
- Melted Butter: Butter is the foundation here. It holds the oat mixture together while making everything rich and slightly indulgent.
- Brown Sugar: Adds that warm molasses flavor that balances the sweetness of the caramel.
- Old-Fashioned Oats: You need these for chewiness. Skip the quick oats—they’re too powdery and won’t give you the right texture. If you’re curious about why oats are such a powerhouse ingredient (hello, fiber and heart health), Healthline has a great article that breaks down all their benefits.
- All-Purpose Flour: The structure for the oat layers. Simple but essential.
- Baking Soda: It keeps the base soft and prevents the oat mixture from turning into a brick.
- Baking Caramels + Heavy Cream: The caramels melt into a thick, gooey sauce that’s so good, you’ll want to eat it straight from the pan (I’ve been there).
- Semi-Sweet Chocolate Chips: Perfectly melty and not too sweet, they balance out the caramel like a dream. Use dark chocolate if you’re feeling fancy.
Doubling the Recipe (and Handling All That Butter)
Whether you’re making one pan or two, butter is the heart of this recipe. It’s what gives the oat layers their soft chew and keeps everything together.
Sometimes you just know one pan of Caramelitas won’t cut it. If you’re scaling up (say, making two pans or using a 9×13-inch dish), here’s how to do it right—without losing that chewy, gooey texture.
- Double everything—including the butter. Yes, even if it feels wild. The butter is what keeps the oat layers soft and cohesive.
- Adjust bake time—a 9×13 pan may need a few extra minutes until golden and bubbling at the edges.
- Expect a buttery mix—the dough will feel rich, and you may even see some pooling during baking. That’s normal and part of what makes these bars melt-in-your-mouth.
- Optional lighter version—you can reduce butter by 2–4 tablespoons, but the bars will be slightly firmer and less decadent.
Bottom line: if you want the full gooey fantasy, don’t skimp on the butter. For a slightly lighter bite, cut back just a touch—but know you’re trading off some of that signature softness.
How To Make Caramelitas?
I promise you, this is one of the easiest desserts you’ll ever make. Layer, bake, and try not to eat half the pan before it cools.
Step 1 – Preheat the Oven: Start by preheating your oven to 350°F. Grease an 8×8-inch baking dish or line it with parchment paper. Parchment paper is game-changing here—trust me, you’ll thank yourself when it’s time to slice the bars.
Lining Your Pan: Foil Tips & Picks:
If you want those Caramelitas to pop out of the pan as easily as they disappear from the plate, your liner choice matters. While parchment paper is my top pick (so easy, so mess-free), I get asked about foil all the time—so here’s the scoop.
If you reach for foil, spring for the non-stick, heavy-duty stuff. Regular foil tends to cling to melted caramel like a stage-five clinger, leaving you peeling bits off your masterpiece. Non-stick foil (like Reynolds Release, Glad Non-Stick, or Kirkland Signature Non-Stick Aluminum Foil) makes a world of difference—the bars lift out cleanly and you’re not left performing delicate surgery with a paring knife.
- Non-stick foil: The secret weapon for gooey bar desserts.
- Heavy duty: This holds up better to thick oat layers (and wild knife work).
- Spray, if in doubt: Give your liner a quick mist of non-stick spray for easy insurance.
But honestly, if you’ve got parchment paper, you’ve got a ticket to slice-and-lift heaven—no sticking, no fuss, just a flawless dessert reveal. Use foil only if you prefer extra structure for lifting, but always choose non-stick to avoid caramel sticking.
Step 2 – Make the Caramel Sauce: In a medium saucepan, combine the unwrapped caramels and heavy cream. Melt them over medium heat, stirring constantly until you get a silky, spoon-worthy caramel sauce. Set it aside to cool slightly while you prep the rest.
Step 3 – Mix the Oat Crust: In a large bowl, stir together the melted butter, brown sugar, flour, oats, and baking soda until the mixture is crumbly but holds together when pressed. It’s buttery, a little sticky, and that’s exactly what you want.
Step 4 – Press and Bake the Base: Press half of the oat mixture into the bottom of your prepared baking dish. Make sure it’s nice and even so it bakes evenly. Pop it into the oven for about 10 minutes—just until it’s lightly golden and set enough to hold the caramel.
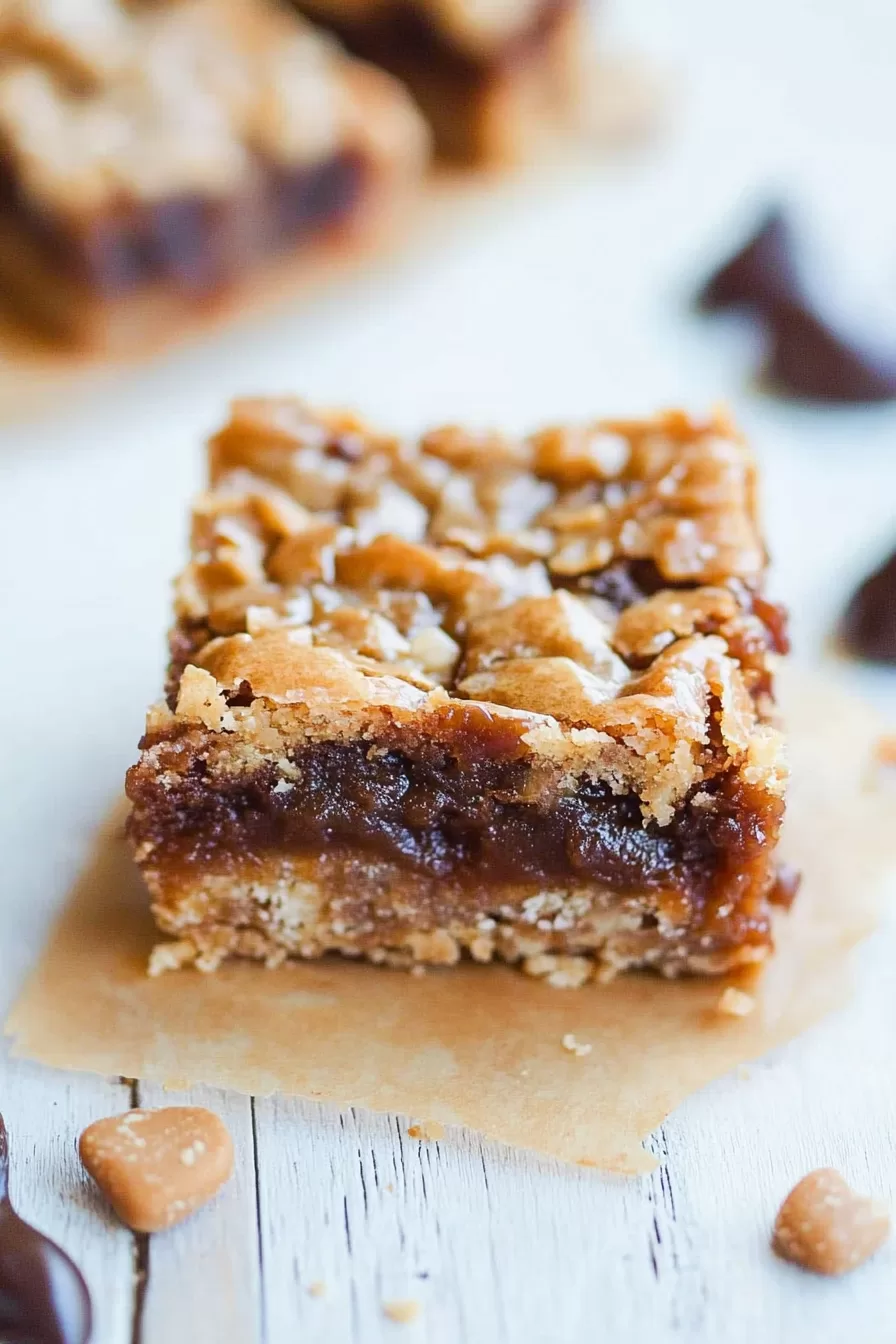
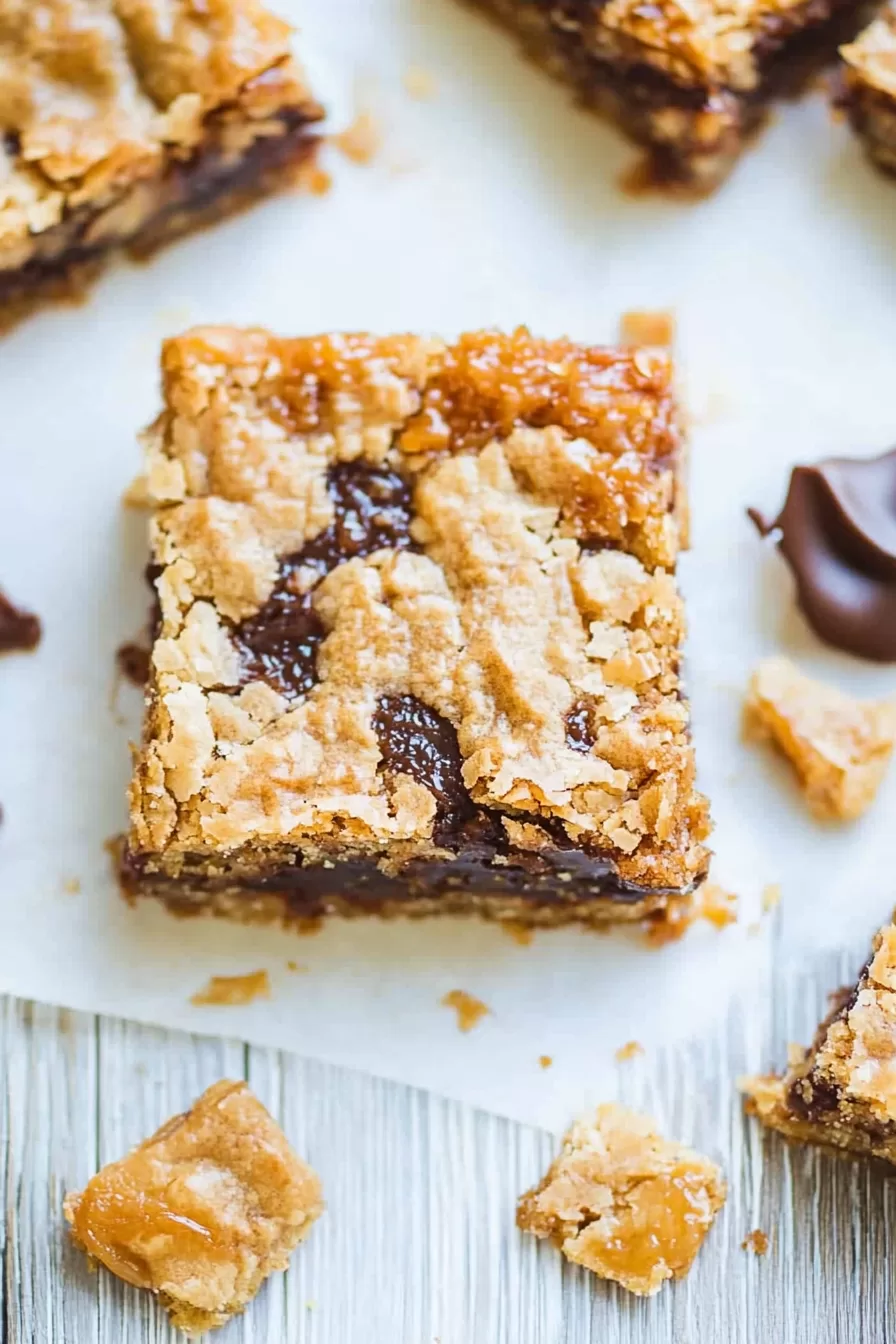
Step 5 – Layer the Goodness: Here comes the magic. Sprinkle the chocolate chips evenly over the baked base. Then, pour that gorgeous caramel sauce all over the top. Don’t worry if it looks a little messy—it’s part of the charm. Crumble the remaining oat mixture over everything, leaving little bits of caramel peeking through.
Step 6 – Bake Again: Return the dish to the oven and bake for another 18–20 minutes, or until the topping is golden brown and the caramel is bubbling gently around the edges. Perfection.
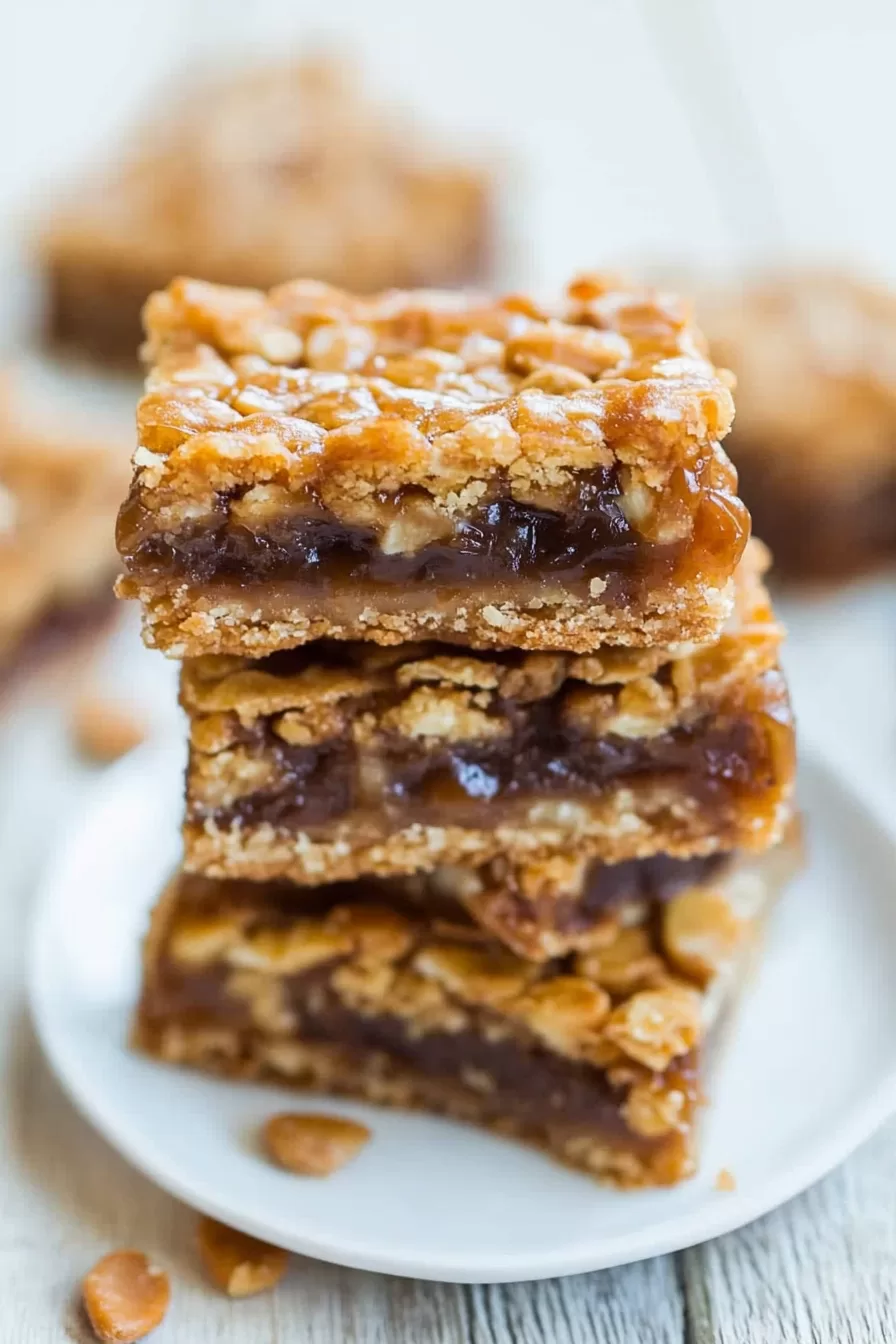
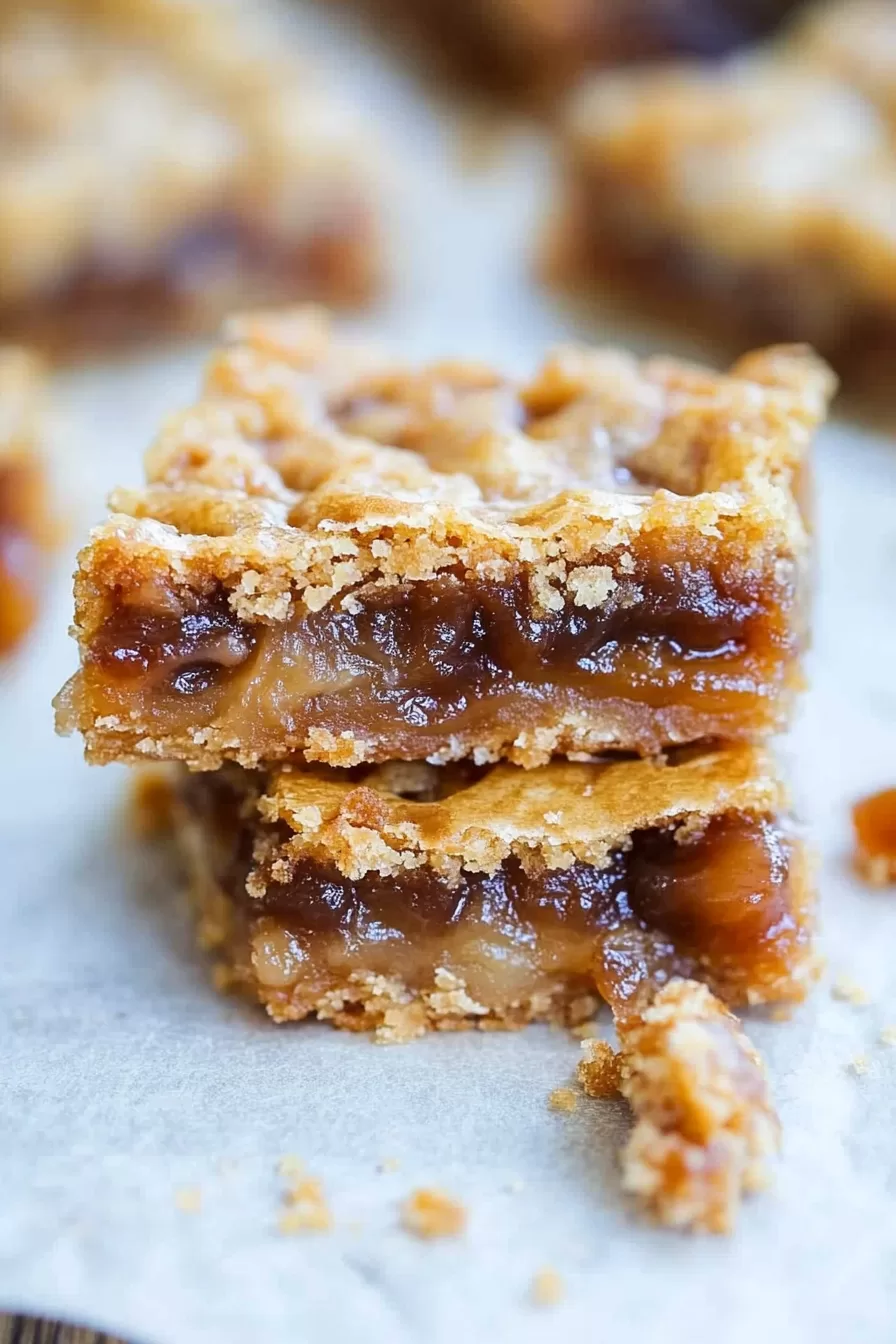
Step 7 – Cool Completely (I Know, It’s Hard): Cool for at least 2 hours at room temperature. I’ll be honest—this part is pure torture. Let the bars cool completely before slicing. The caramel needs time to set so you get those clean, gooey-but-firm layers. If you’re impatient, I won’t judge you for sneaking a corner while they’re still warm.
But here’s the (admittedly torturous) truth: patience pays off. Letting them cool at room temperature can take up to 4 hours, or you can leave them overnight if you have the willpower. If you’re in a hurry, sliding the pan into the fridge speeds things up—just make sure they’re totally cool before you cut. Slice too soon, and you’ll end up with molten caramel lava and chocolate everywhere. Tasty? Absolutely. Instagram-worthy bars? Not so much.
Want To Save This Recipe?
Trust me, these bars actually get even better after a good rest. The flavors meld, the caramel and chocolate settle into every oat-filled nook, and you’re rewarded with slices that hold together beautifully. So, if you can, wait it out—your taste buds (and your kitchen counters) will thank you.
Storage Options:
- Room Temperature: Store the bars in an airtight container for up to 4 days. They’re dangerously good at room temp.
- Refrigerator: Keep them in the fridge if you want a firmer caramel layer. They’ll last up to a week this way.
- Freezer: Freeze individual bars wrapped in plastic wrap, then toss them in a freezer bag. They’ll keep for up to 4 months in the freezer, best flavor within 2 months.
Variations and Substitutions:
Want to mix things up? Go for it!
- Switch the Chocolate: Use dark, milk, or even white chocolate chips. You can’t go wrong here.
- Add Nuts: Sprinkle chopped pecans or walnuts over the caramel layer for a little crunch.
- Sea Salt Topping: A light sprinkle of flaky sea salt on top before serving takes these bars over the edge. Fun fact: Salted caramel didn’t just appear out of nowhere; it was invented by pastry chef Henri Le Roux in Brittany in the 1970s. The Nibble has a charming rundown of the backstory if you’re curious.
- Make Them Gluten-Free: Use a 1:1 gluten-free flour blend and certified gluten-free oats.
Does Adding Salt Affect the Sweetness of the Bars?
Absolutely! If you find these bars a tad too sweet or rich for your taste, a simple sprinkle of salt can work magic. Not only does it cut through the sugary intensity, but a pinch in the oat crust or stirred into the caramel sauce actually transforms the flavor profile. Suddenly, you get all that gooey, decadent caramel with a sophisticated, salted twist that balances every bite. Give it a whirl—your taste buds will thank you.
What to Serve with Bars?
Caramelitas are a dessert that doesn’t need much, but if you want to take them to the next level:
- Vanilla Ice Cream: Warm up a bar and add a scoop of ice cream. You’re welcome.
- Coffee or Espresso: The bitterness of coffee pairs perfectly with the rich caramel.
- Whipped Cream: Just a little dollop on top feels fancy.
- Hot Chocolate: For the ultimate cozy dessert moment.
Frequently Asked Questions:
Can I make these ahead of time?
Absolutely! They keep well for days, so they’re perfect for baking ahead. In fact, many people love making these treats as part of their yearly holiday traditions—they hold up beautifully and taste just as delicious after a few days. Whether you’re prepping for a festive gathering or gifting a batch to friends, these are a reliable, make-ahead option that won’t disappoint.
What if my caramel oozes everywhere?
It probably didn’t cool long enough before slicing. Give it a little more time to set, and you’ll get perfect layers.
Can I use quick oats instead of old-fashioned oats?
I don’t recommend it. Quick oats are too fine and won’t give you that chewy texture. They absorb more moisture and create a dense layer
Can I Make a Double Batch?
Absolutely! If one pan just isn’t enough (and let’s be honest, it rarely is), you can easily double all the ingredients. Just grab a 9×13-inch baking dish, follow the same directions, and keep an eye on the baking time—sometimes a few extra minutes is all you need for that golden, gooey perfection. Sharing is optional, but highly recommended if you want to keep friends.
Can I Use Caramel Sauce Instead of Caramel Squares?
You can swap homemade caramel sauce for the classic melted caramel squares if you’re short on time or feeling a little rebellious. Just be sure to pick a thick, high-quality caramel sauce—think something you’d sneak a spoonful of straight from the jar (Ghirardelli and Bonne Maman are both dreamy). Avoid the thin, runny ice cream toppings; they’ll melt away and won’t give you those luscious, gooey pockets you’re after.
If you go this route, use about 1 to 1½ cups—enough to blanket the chocolate chip layer in sweet, caramel goodness. Your bars will still turn out fudgy, decadent, and totally irresistible!
Gluten-Free Success Stories
Curious about making these Caramelitas gluten-free? Good news—yes, you absolutely can! Many bakers have swapped in a cup-for-cup gluten-free flour blend (like Bob’s Red Mill 1:1 or King Arthur Measure for Measure) with great results. Combine that with certified gluten-free oats, and you’ll be serving up bars that are just as gooey, chewy, and delicious as the original.
- No major adjustments needed: Simply use your favorite 1:1 gluten-free flour blend in place of regular all-purpose flour, and keep the rest of the recipe the same.
- Texture and taste: The bars hold together beautifully and stay just as flavorful, so no one will guess they’re gluten-free.
So whether you’re baking for a crowd with dietary restrictions or just want to switch things up, these gluten-free Caramelitas have proven themselves to be a hit all around.
What Do Readers Say About This Caramelitas Recipe?
Wondering if these bars are worth the hype? Let’s just say, you won’t be the only one sneaking bites. Here’s what real-life taste-testers (also known as friends, family, and enthusiastic dessert lovers) have raved about:
- Perfect Party Dessert: Folks love making these for birthdays, holidays, and family gatherings. Some even say they’re so easy that even notorious non-bakers end up with rave reviews.
- Make-Ahead Magic: Multiple bakers swear these bars taste even better the next day. (If you can wait that long. No judgment if you can’t.)
- No-Fail Favorite: Even those who usually avoid the oven say the recipe is simple, straightforward, and nearly foolproof. Step-by-step guidance = baking confidence.
- Addictive Goodness: The most common warning? You may not want to share. People can’t stop at just one bar, thanks to ooey, gooey caramel and the perfect amount of chocolate in every bite.
Readers routinely add these to their permanent recipe collections, and many say it’s become a legendary staple in their dessert lineup. So, if you’re looking for a dessert that’ll win you fans, this is it!
Craving More Bar Magic?
Can’t get enough of those caramel-oozed bites? Try these other fan-favorite bar recipes that deliver the same indulgent, gooey goodness, with a twist:
- Caramel Bars: Classic caramel bliss packed into buttery layers—pure nostalgia in every bite.
- Caramel Crush Bars: Sweet, crumbly, and totally addictive. Warning: you probably won’t be able to stop at one.
- Caramel Chocolate Crunch Bars: Think chewy oats, melty caramel, plus a satisfying chocolate crunch. Childhood memories in bar form.
- Lemon Crumb Bars: Bright and tangy with buttery crumbs—perfect for when you want a refreshing change-up.
Feel like mixing it up? These bars are the perfect excuse to stay in your cozy kitchen and bake again and again.
There you have it—Caramelitas that are gooey, chewy, and insanely delicious. They’re the kind of treat you make once and keep in your back pocket forever because everyone loves them. So, what do you think? Are you team caramel or team chocolate—or both? Give these a try, and let me know how they turn out! Just don’t blame me when you eat half the pan yourself.
Keep the Flavor Coming – Try These:
Caramelitas
Ingredients
- ¾ c melted butter
- 1 c all-purpose flour
- 1 c old-fashioned oats
- ¾ c packed brown sugar
- 1 tsp baking soda
- 11 ounces bag of baking caramels
- ½ c heavy whipping cream
- 1 c semi-sweet chocolate chips
Instructions
- Preheat your oven to 350°F. Prepare an 8x8 baking dish by either greasing it or lining it with parchment paper.
- In a saucepan, over medium heat melt the caramels with the heavy cream stirring until you achieve a smooth consistency. Set aside for now.
- In a bowl combine the butter brown sugar, flour, oats and baking soda until mixed.
- Press half of the oat mixture into the baking dish. Bake for approximately 10 minutes. After that sprinkle chocolate chips on top, pour the caramel sauce over them and finish by adding the remaining oat mixture.
- Return the dish to the oven. Bake for 18 to 20 minutes more.
- Allow it to cool completely before cutting into bars. Enjoy!
Notes
Nutrition
I’m Bitty, owner of nodashofgluten.com, where I share simple, delicious recipes for all tastes, including gluten-free. Check out my “About Me” page for more info!