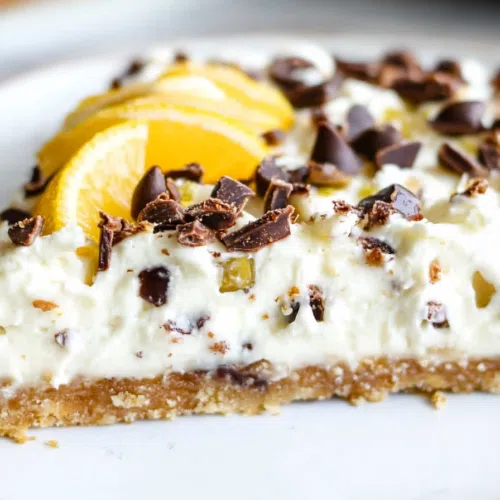
This Cannoli Pie Recipe has everything you love about cannoli—creamy ricotta filling, chocolate chips, and pistachios—all in a buttery crust.
You ever take a bite of something and immediately think, This is the only part I care about? That’s me with cannoli. Don’t get me wrong—the crispy shell is great, but let’s be honest. We’re all here for the filling. That sweet, creamy ricotta with little bursts of chocolate and pistachios? That’s the good stuff.


So one day, I had this thought: Why not just skip straight to the best part? Enter Cannoli Pie—all the flavors of a classic cannoli but with a buttery graham cracker crust that holds everything together without the deep-frying or delicate shell breaking into a million pieces on the first bite (because that always happens).
And the best part? It’s stupidly easy to make. No special equipment, no long ingredient list, just simple, delicious goodness. It’s become my go-to dessert for holidays, birthdays, and, let’s be real—those days when I just want a creamy, dreamy slice of something sweet in my fridge.
Why You’ll Love This Cannoli Pie Recipe?
- No frying, no mess – Forget the shells. We’re going all in on the filling.
- Lusciously creamy – Ricotta, cream cheese, and whipped cream make for the smoothest, dreamiest texture.
- Buttery, crunchy crust – A solid base that holds up to all that creamy goodness.
- Perfect for making ahead – The longer it chills, the better it gets.
- Tastes like cannoli, but without the hassle – Basically, it’s like a shortcut to happiness.

Ingredient Notes:
This pie doesn’t need a ton of ingredients, but each one plays a big role in making it ridiculously good.
For the Crust:
- Graham Cracker Crust – Store-bought or homemade, it gives that perfect sweet crunch.
For the Cannoli Filling:
- Heavy Whipping Cream – Whipped to soft peaks for an airy, velvety filling.
- Cream Cheese – Adds structure and a slight tang that balances the sweetness.
- Powdered Sugar – Sweetens the filling without making it gritty.
- Ricotta Cheese – The heart of any good cannoli dessert. Always go full-fat.
- Vanilla Extract – A little warmth and depth to round out the flavors.
- Kosher Salt – A pinch makes the sweetness shine.
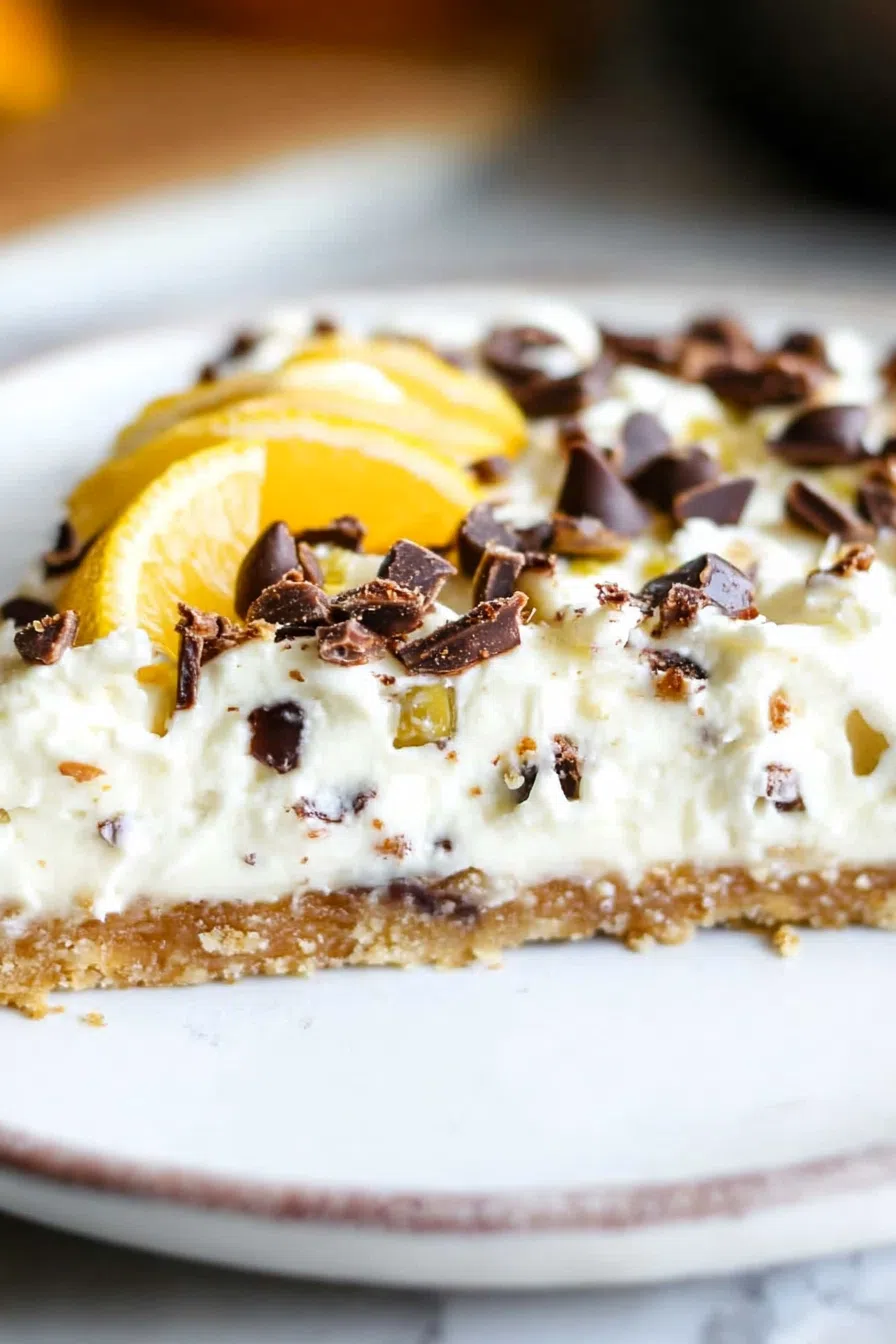
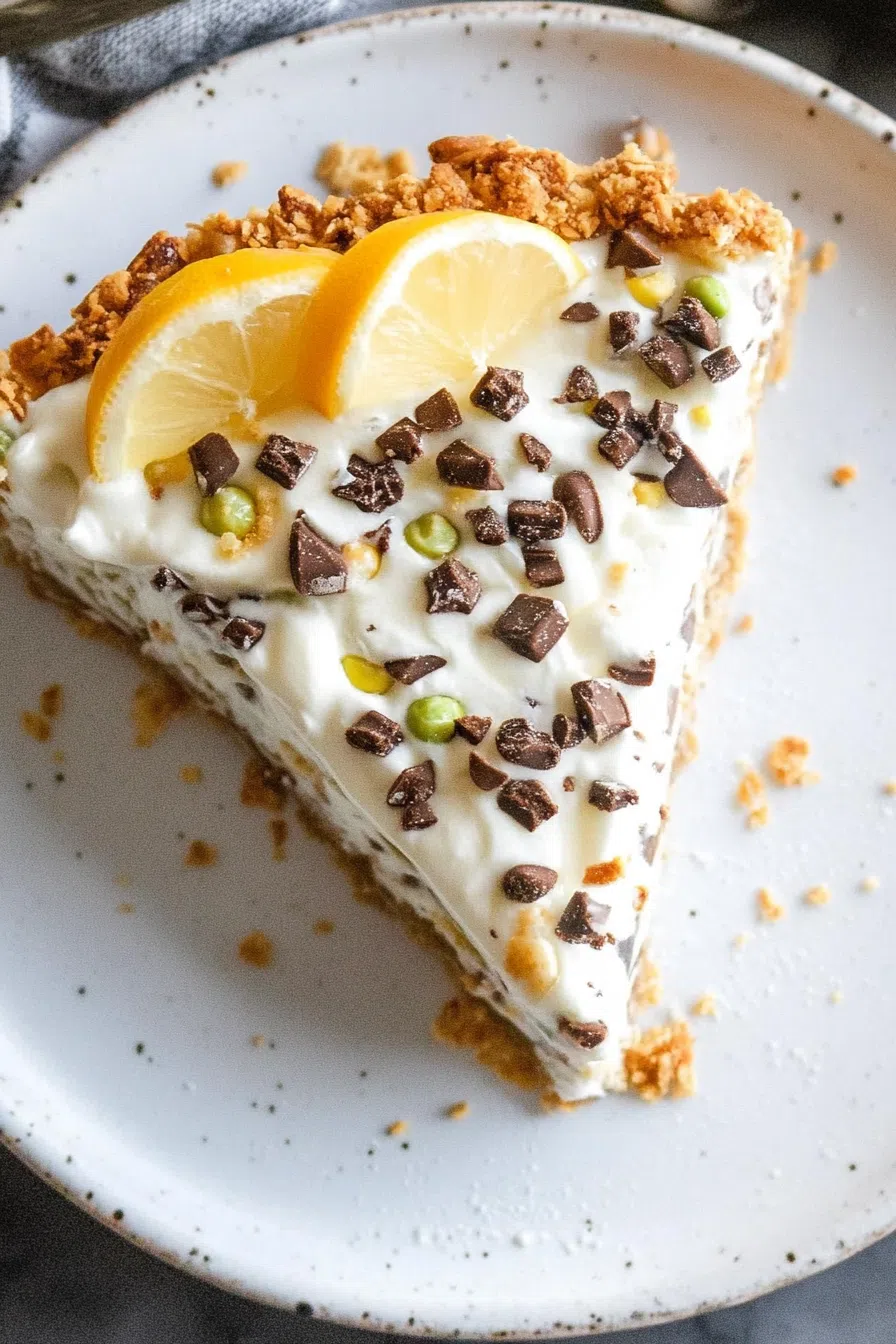
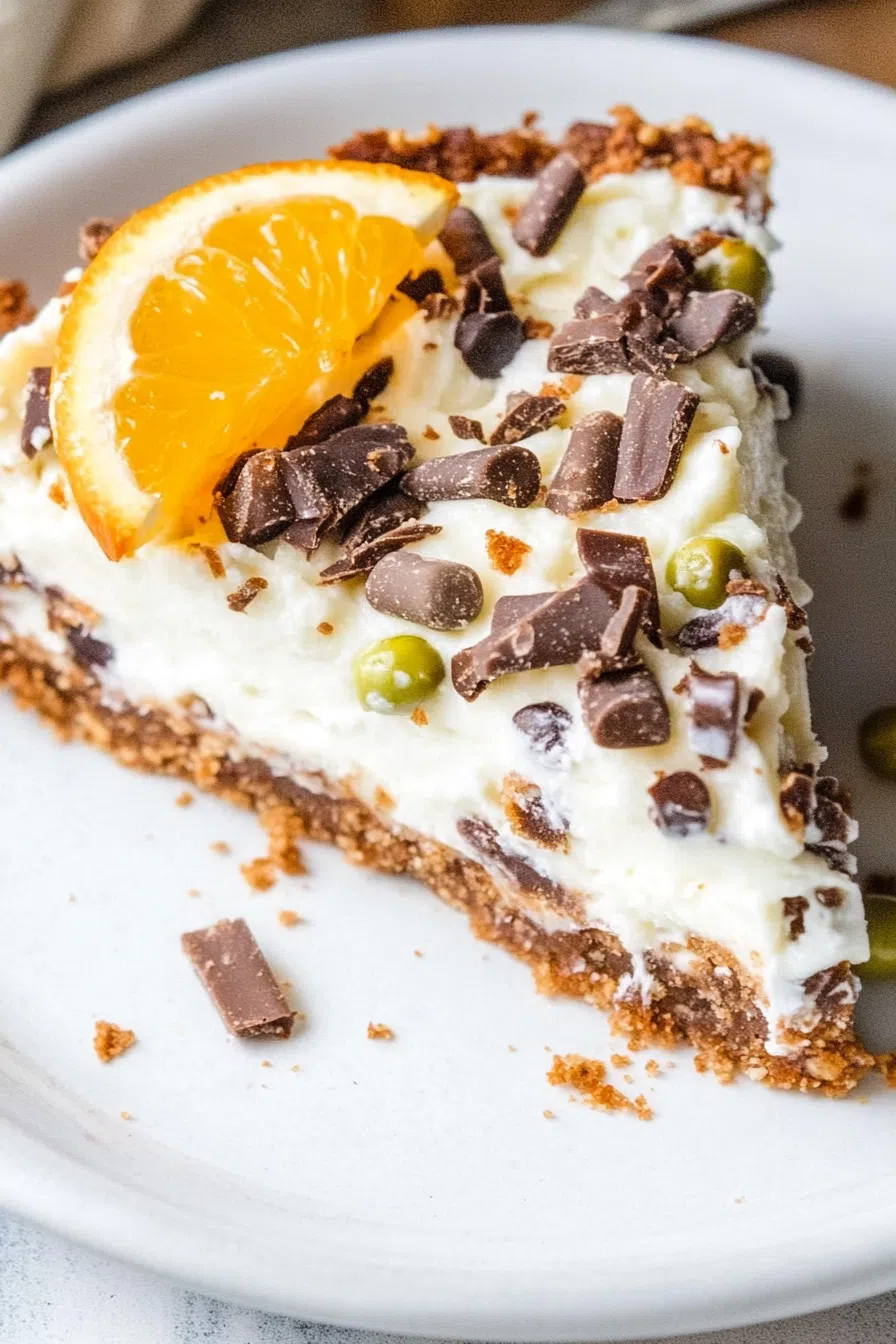
- Mini Chocolate Chips – Because you can’t have cannoli without chocolate.
- Lightly Salted Pistachios – Adds crunch and a little contrast to the sweetness.
Pro Tip: Use full-fat ricotta for the best texture. Low-fat ricotta tends to be watery, and nobody wants a runny pie filling.
How To Make Cannoli Pie?
This pie looks fancy, but don’t let that fool you—it’s embarrassingly easy to make.
Step 1: Prep the Crust
If you’re using a store-bought graham cracker crust, you can skip this part.
If making your own, preheat the oven to 325°F (165°C) and bake for 10 minutes until golden brown. This helps it hold together better once you add the filling.
Let the crust cool completely before moving on.
Step 2: Whip the Cream
In a mixing bowl, beat the heavy whipping cream until stiff peaks form. This means when you lift the beaters, the cream stands up and doesn’t flop over.
Set it aside for now—we’ll fold it in later.
Step 3: Make the Cannoli Filling
In a separate bowl, beat the cream cheese and powdered sugar together until smooth and lump-free.
Next, mix in the ricotta, vanilla extract, and salt. Stir until everything is creamy and well combined.
Step 4: Fold It All Together
Now for the magic!
Want To Save This Recipe?
Gently fold the whipped cream into the ricotta mixture, being careful not to deflate it. You want to keep things light and airy.
Then, fold in the mini chocolate chips and chopped pistachios.
Step 5: Assemble & Chill
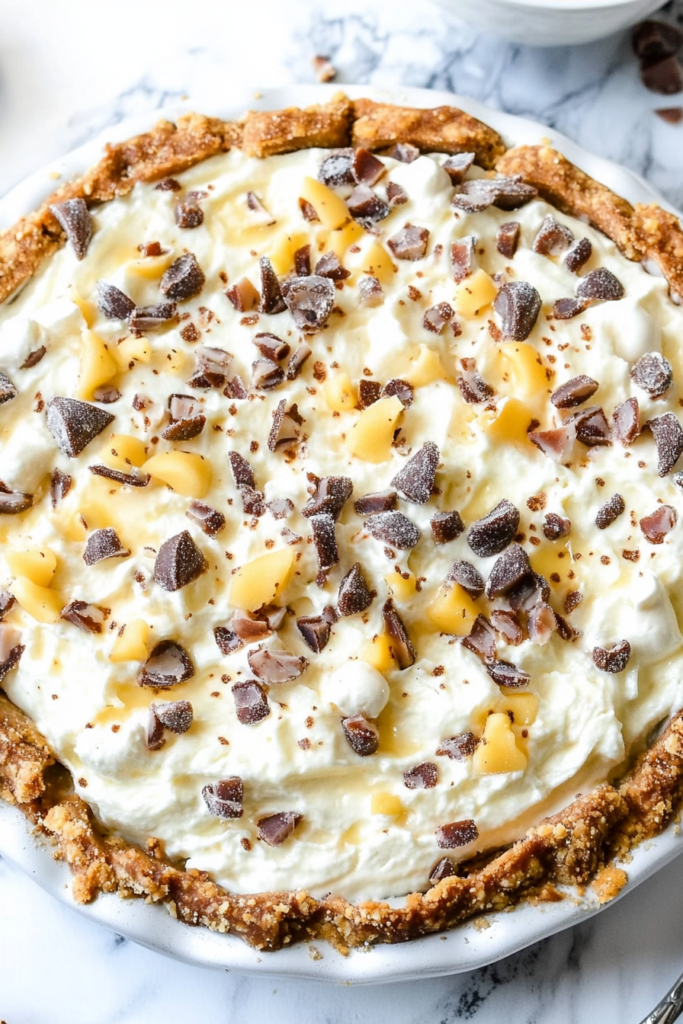
Pour the filling into the cooled pie crust and spread it out evenly.
For a little extra pizzazz, sprinkle some mini chocolate chips on top.
Now comes the hardest part: waiting. Cover the pie and refrigerate for at least 5 hours—overnight is even better. This step is key because it allows the filling to firm up and develop that perfect texture.
When you’re ready to serve, grab a sharp knife, slice, and enjoy every creamy, crunchy bite.
Storage Options:
- Refrigerator: Cover and store for up to 3 days. Honestly, it gets even better the next day.
- Freezer: Slice and wrap individual pieces in plastic wrap. Store for up to 1 month and thaw in the fridge before serving.
Variations and Substitutions:
Want to put your own spin on this? Try these ideas:
- Use a Chocolate Crust – Swap the graham cracker crust for a chocolate cookie crust for an even richer dessert.
- Add Orange Zest – A little citrus zest in the filling gives it that classic Sicilian flavor.
- Make It Nut-Free – Skip the pistachios if you’re not a fan (or have allergies).
What to Serve with Cannoli Pie?
While it’s perfect on its own, you can make it extra special with these pairings:
- Espresso or Cappuccino – The slight bitterness balances the sweet, creamy filling perfectly.
- Fresh Berries – Strawberries or raspberries add a tart contrast.
- A Drizzle of Chocolate Sauce – Because more chocolate is always a good idea.
Frequently Asked Questions:
Can I make this ahead of time?
Absolutely! It actually tastes better after chilling overnight.
Do I have to bake the crust?
If you’re using a store-bought crust, nope! But baking it for 10 minutes gives it a firmer texture.
Can I use mascarpone instead of cream cheese?
Yes! Mascarpone gives it a richer, more traditional Italian flavor.
This Cannoli Pie Recipe is proof that you don’t need to spend hours in the kitchen to make something impressive. It’s creamy, dreamy, and packed with all the flavors of a classic cannoli—minus all the work.
So, tell me—are you a chocolate chip overload kind of person, or do you keep things classic? Let’s chat in the comments!
Happy baking!

Keep the Flavor Coming – Try These:

Cannoli Pie Recipe
Ingredients
For the Crust:
- 1 9-inch prepared graham cracker crust
For the Cannoli Filling:
- 1 cup heavy whipping cream
- 1 8-ounce package cream cheese, softened to room temperature
- 1 cup confectioner's sugar
- 1 ½ cups full-fat ricotta cheese
- 1 teaspoon vanilla extract
- ½ teaspoon kosher salt
- ½ cup chopped lightly salted pistachios
- ½ cup mini chocolate chips plus extra for garnish
Instructions
Prepare the Crust
- Preheat the oven to 325°F (165°C). If using a store-bought graham cracker crust, this step is optional.
- Place the graham cracker crust on a baking sheet and bake for 10 minutes, or until golden brown and fragrant. This enhances the flavor and helps the crust hold its shape. Allow it to cool completely before adding the filling.
Whip the Cream
- In a clean mixing bowl, beat the heavy whipping cream using an electric mixer until stiff peaks form. This process will create a light and airy texture in the filling. Set aside.
Prepare the Cannoli Filling
- In a separate bowl, beat the cream cheese and confectioner’s sugar together until smooth and creamy. Ensure there are no lumps for a uniform texture.
- Fold in the ricotta cheese, vanilla extract, and kosher salt, stirring gently until fully incorporated.
Combine the Components
- Carefully fold the whipped cream into the ricotta mixture, ensuring not to deflate the air incorporated during whipping. The goal is to maintain a light, creamy consistency.
- Once the mixture is fully combined, fold in the chopped pistachios and mini chocolate chips, distributing them evenly throughout the filling.
Assemble the Pie
- Pour the prepared filling into the cooled graham cracker crust and spread it evenly with a spatula.
- For additional texture and decoration, sprinkle extra mini chocolate chips over the top.
Chill and Serve
- Cover the pie and refrigerate for at least 5 hours, preferably overnight. Chilling allows the filling to firm up, making it easier to slice and enhancing the flavors.
- Once properly set, slice and serve chilled.
Notes
- Replace the graham cracker crust with a gluten-free graham cracker crust or use crushed gluten-free cookies as a base.
- Ensure that the powdered sugar, vanilla extract, and chocolate chips are certified gluten-free.
- The remaining ingredients are naturally gluten-free, making this an easy adaptation.
I’m Bitty, owner of nodashofgluten.com, where I share simple, delicious recipes for all tastes, including gluten-free. Check out my “About Me” page for more info!