

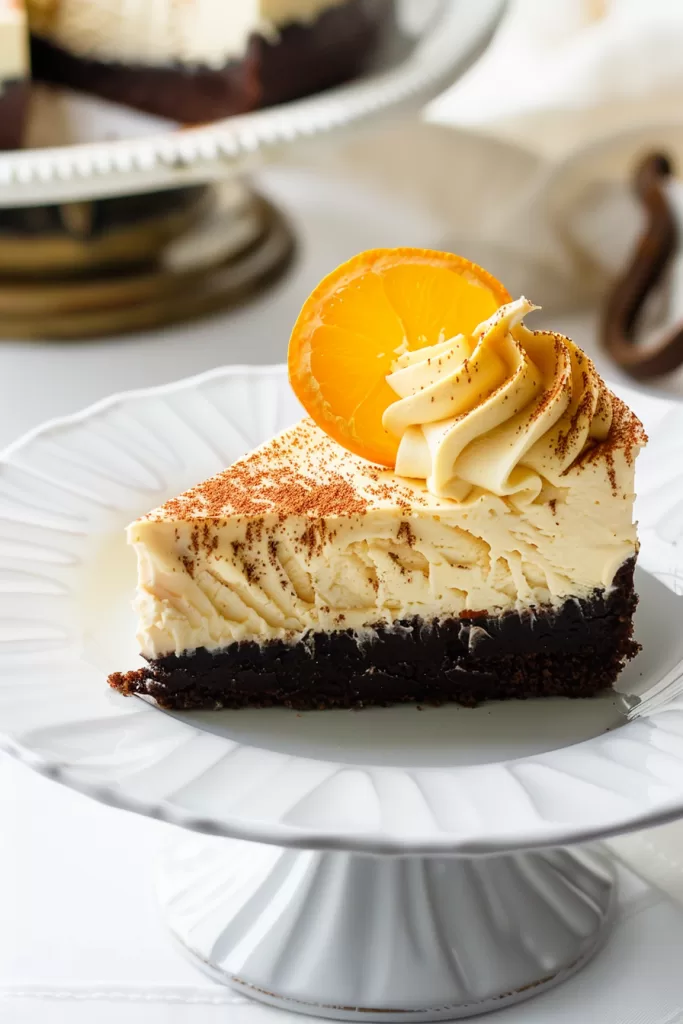
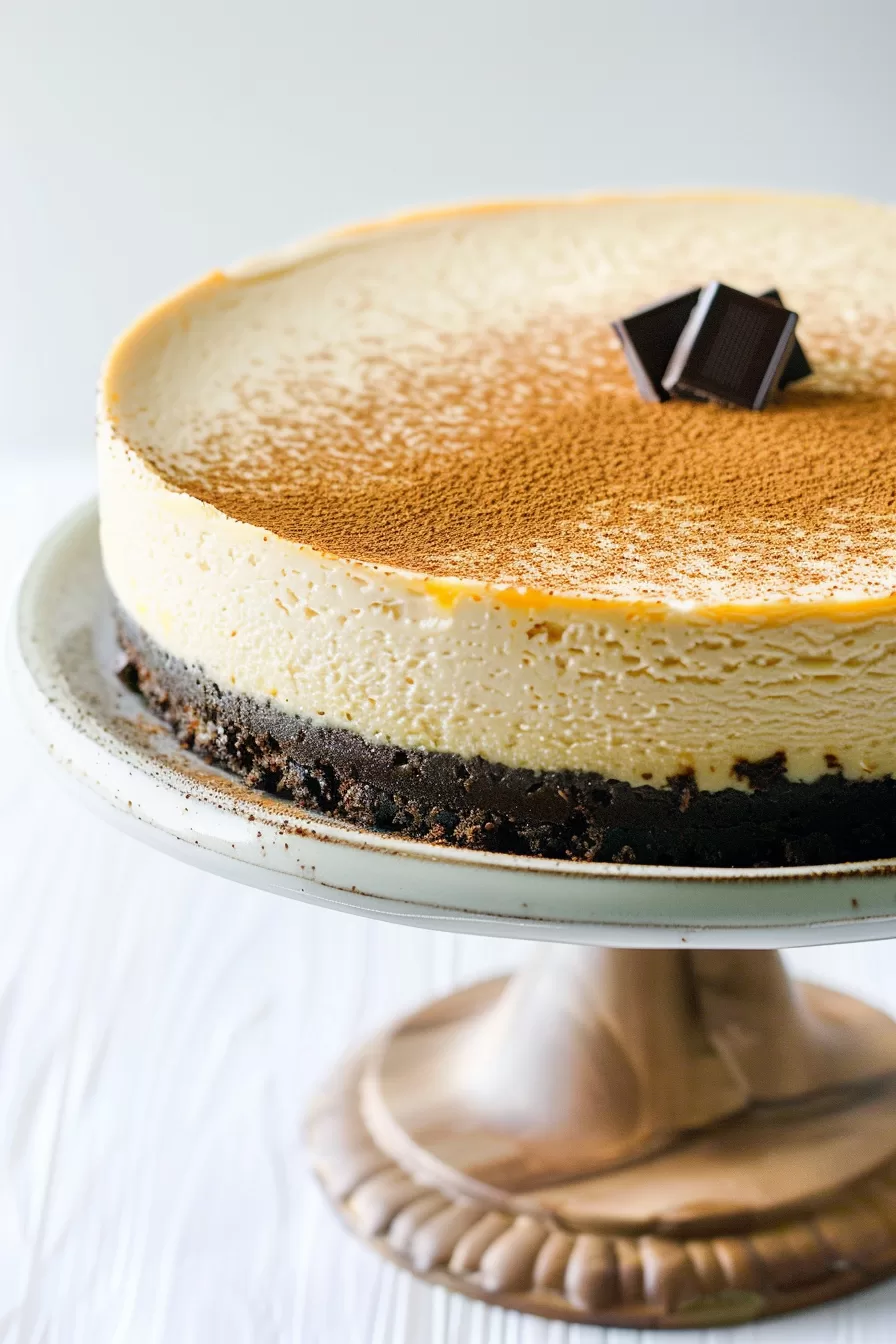
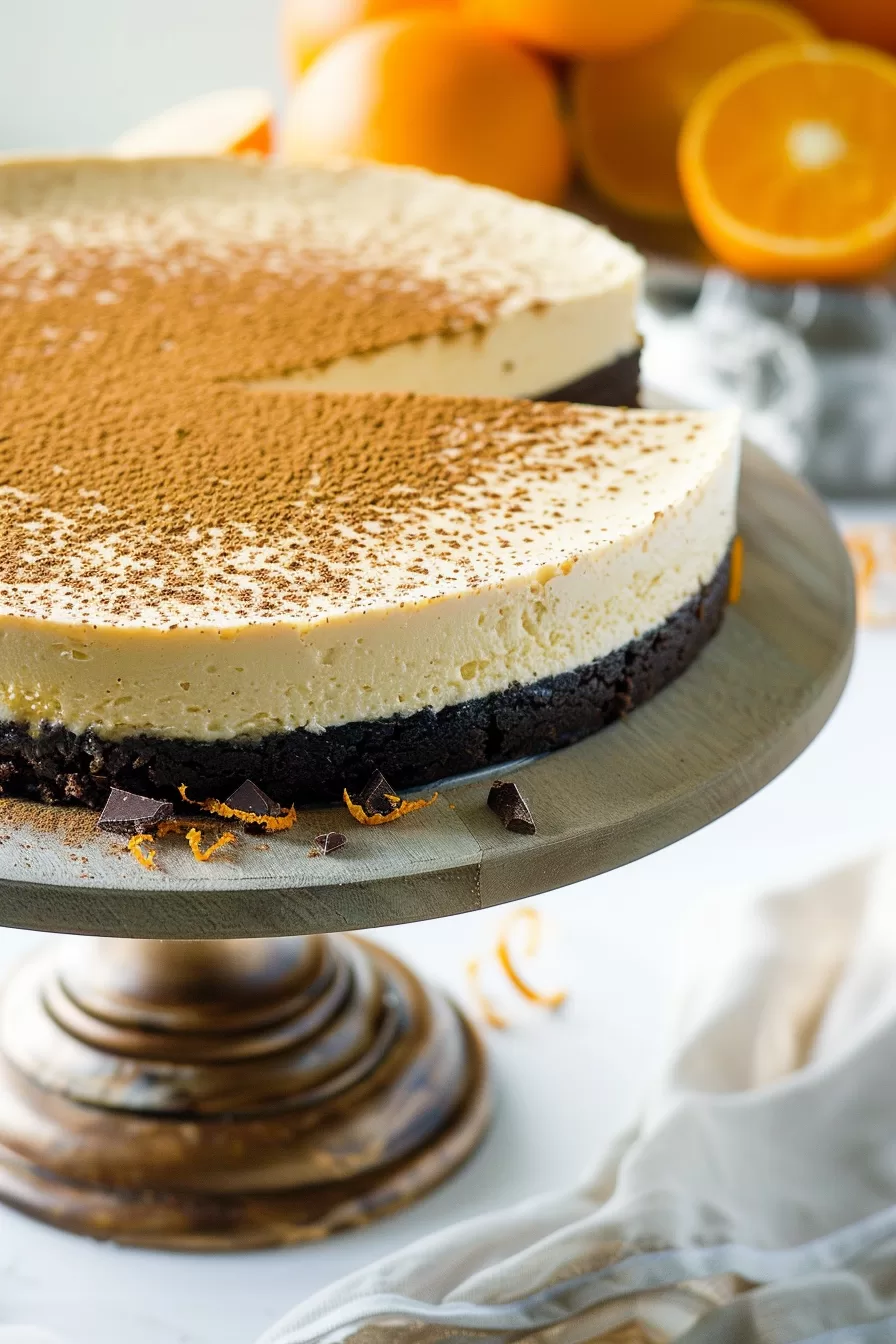
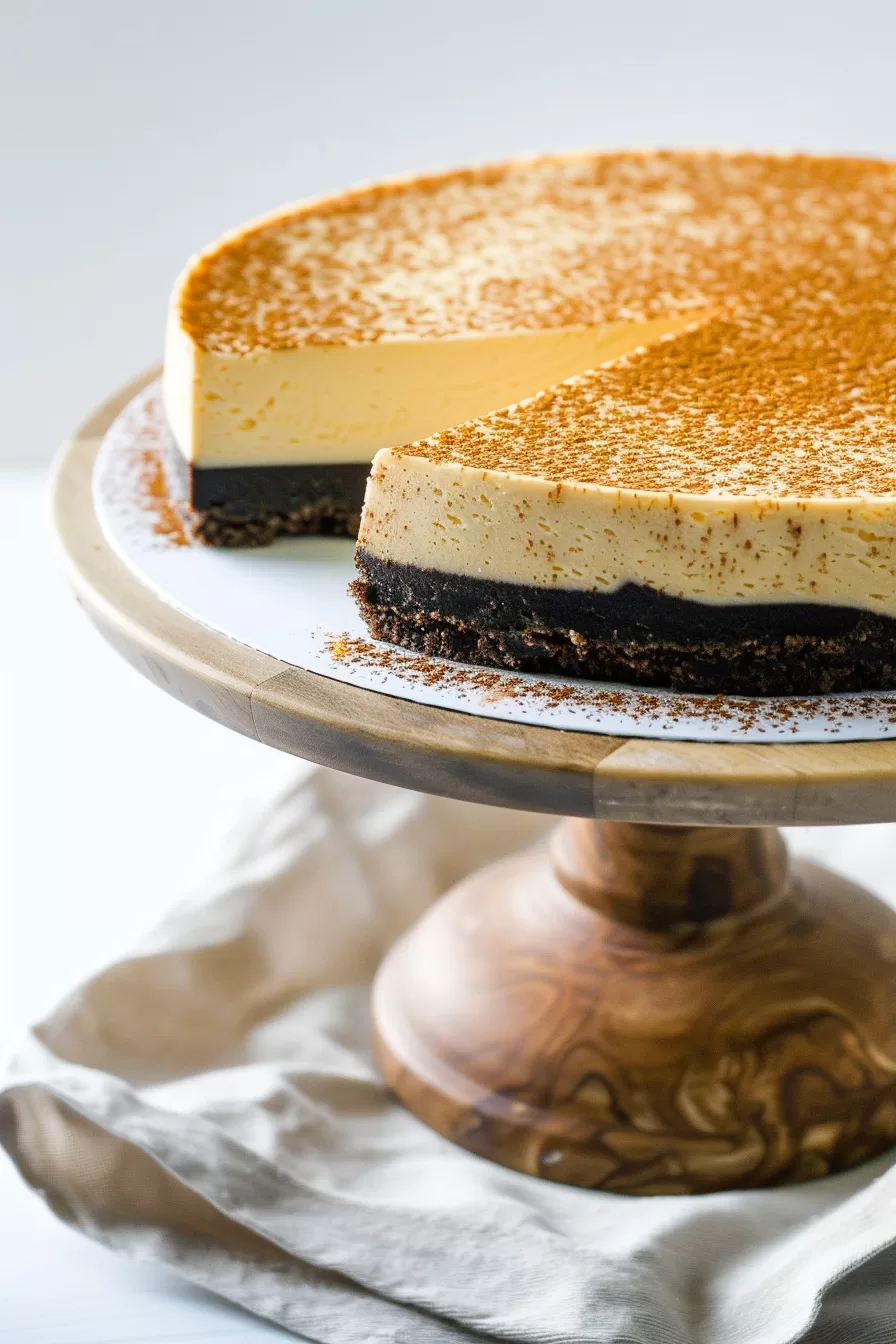
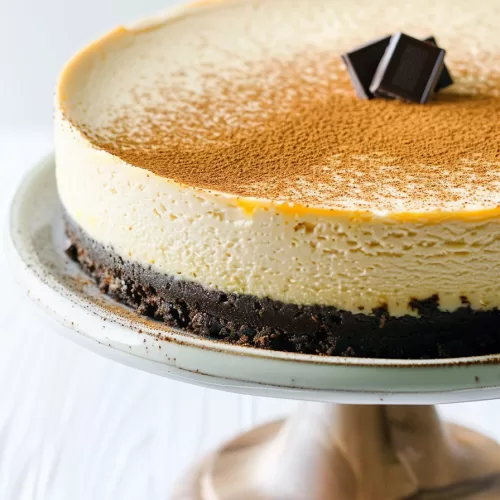
Rich Chocolate Orange Cheesecake – So, picture this: rich, creamy cheesecake with just the right amount of chocolate, and then—boom!—a burst of fresh, tangy orange. Yeah, this Rich Chocolate Orange Cheesecake is like a flavor party in your mouth. It’s the kind of dessert that gets people talking, and with that Oreo crust holding everything together? You’ve got a slice of heaven right there. And, let’s be honest, we all need a little more cheesecake in our lives, don’t we?


The first time I made this cheesecake, I wasn’t sure how it would go down. I mean, chocolate and orange together? Could’ve been a disaster, right? But let me tell you, it was a home run! My husband, who’s normally pretty chill about desserts, practically inhaled his slice. And my kid? The pickiest eater in the world? Even he devoured it! Honestly, I didn’t even get a chance to wrap up the leftovers—by the next morning, it had magically disappeared. This cheesecake became an instant family favorite, and now it’s my secret weapon whenever I need to impress.
What makes this Rich Chocolate Orange Cheesecake truly special?
Here’s the deal: this cheesecake is everything. You get that deep, decadent chocolate flavor mixed with this bright, zesty orange that just lifts the whole thing. It’s smooth and creamy, with a crunchy Oreo base that gives it a little texture—just the right amount of bite. And the best part? You can make it ahead of time. So, if you’re hosting a party (or just feel like treating yourself), you can whip this up the night before, pop it in the fridge, and forget about it until it’s time to slice and serve. Honestly, who doesn’t love a dessert that does all the work for you?

What You Need To Make This Rich Chocolate Orange Cheesecake Recipe?
Oreo Cookies: Okay, let’s be honest, Oreos are always a win. They’re the perfect combo of sweet and just a little salty, and when you crush them up for the crust, they give the cheesecake this awesome chocolatey crunch. Pro tip: make sure you really press the crumbs down into the pan—it’s what gives the whole thing a solid base. And hey, if a few extra cookies sneak into your mouth during the process, no judgment.
Unsalted Butter: Butter is what holds the crust together and gives it that rich flavor. We’re using unsalted here so we don’t end up with a salty surprise. Melt it down, but don’t burn it (trust me, I’ve been there). Just let it cool off a bit before mixing it with the Oreos—nobody wants a soggy crust!
Cream Cheese: This is the heart and soul of the cheesecake. You want it smooth and creamy, so make sure it’s at room temperature before you start mixing. Cold cream cheese leads to lumpy cheesecake, and we’re not about that life. If you’re in a rush, pop it in the microwave for a few seconds—just enough to soften it up.
Orange Zest: This is where that citrusy punch comes in! Fresh orange zest makes all the difference here. Just make sure to only zest the bright orange part of the peel—if you go too deep and hit the white pith, it’ll taste bitter. And trust me, that’s not the vibe we’re going for.
Frozen Orange Concentrate: This stuff is the secret weapon. It’s way more intense than fresh orange juice, which is exactly what we want to really make the orange flavor pop. Just let it come to room temp before you use it, or you’ll end up with a chunky mess when it hits the cream cheese.
Sour Cream or Greek Yogurt: Both of these give the cheesecake its signature tangy, creamy finish. Full-fat is where it’s at—if you’re going for indulgent, might as well go all in, right? Plus, it helps balance out the sweetness of the Oreos and the richness of the cream cheese. Just make sure they’re at room temp too, so everything blends nice and smooth.
Egg: Just one, but it’s doing a lot of heavy lifting here. It helps bind everything together so your cheesecake doesn’t fall apart when you slice it. And yep, room temperature again (I know, I keep saying it, but it’s really important!). Cold eggs can mess with the texture, and we want this cheesecake to be silky smooth.
Steps To Make Rich Chocolate Orange Cheesecake:
Get That Crust Ready:
Preheat your oven to 375°F. Now, grab a blender or food processor and toss in those Oreo cookies with the melted butter. Pulse it all up until you’ve got a nice crumbly, sandy texture. Press that mixture into the bottom of a 9-inch springform pan—don’t forget to push it up the sides a bit too. Pop it into the oven and bake for about 10 minutes. When it’s done, set it aside and let it cool off.
Mixing Up the Filling:
Lower the oven to 300°F—cheesecakes like to take their time. In a big bowl, beat together the cream cheese, flour, sugar, salt, orange zest, and a few drops of food coloring if you’re feeling fancy. Keep mixing until it’s all nice and smooth, no lumps allowed! Now, slowly add the orange concentrate, sour cream (or Greek yogurt if that’s your jam), and finally, the egg. Stir it all together until it’s just combined—you don’t want to overmix or you’ll lose that creamy texture we’re going for.
Want To Save This Recipe?
Let’s Add Some Steam:
Okay, here’s a little trick to keep your cheesecake from cracking. Fill an oven-safe dish with boiling water and place it on the same rack where you’ll be baking the cheesecake. The steam will keep things nice and moist, preventing any cracks on top. Now, pour the cheesecake filling into your prepared crust.
Time to Bake:
Carefully transfer the cheesecake into the oven, right next to that pan of water. Let it bake for about 60 minutes. After that, turn off the oven but—here’s the key—don’t open the door! Let the cheesecake sit in there with the oven off for another 45 minutes. If you want to be extra cautious, wedge a wooden spoon in the oven door to let it cool down slowly. This prevents sudden temperature changes that could mess with the texture.
Cool It Down:
After those 45 minutes, take the cheesecake out of the oven and let it chill out at room temperature for another 45 minutes. Resist the urge to dig in! Once it’s cooled, move it to the fridge and let it set for at least 4 hours—overnight is even better if you’ve got the patience.
Time to Decorate and Serve:
When you’re finally ready to serve, grab a handful of extra Oreos (either crushed or sliced, your choice) and press them gently into the top of the cheesecake. Slice it up into 12 beautiful pieces, and that’s it—dessert is served! Enjoy the praises that are sure to follow.
Tip:
Here’s the thing about cheesecakes—they can be a little temperamental, but this one’s worth the extra care. The key to a perfectly smooth, crack-free cheesecake is all about temperature and moisture. First, make sure all your ingredients—especially the cream cheese, sour cream, and egg—are at room temperature. Trust me, cold ingredients will make the batter lumpy, and nobody wants a lumpy cheesecake. Next, the water bath trick is a lifesaver. I know it might seem like an extra step, but that steam keeps the cheesecake from drying out and helps it bake evenly. Also, don’t rush the cooling process. Let it cool in the oven with the door slightly open for about 45 minutes before you take it out—this prevents cracks by letting the cheesecake adjust to room temp slowly. After that, let it cool completely on the counter before moving it to the fridge. It might sound like a long wait, but letting it chill overnight gives you the creamiest, dreamiest cheesecake texture ever. Patience, my friend, really pays off with this one!
Frequently Asked Questions:
Can I skip the water bath?
Technically, yes, you could skip it, but I wouldn’t recommend it. The water bath (or the steam trick) really helps keep the cheesecake moist and prevents those dreaded cracks. Without it, you might end up with a dry cheesecake and a few cracks on top—not the end of the world, but why risk it when it’s so easy to do?
Do I have to use food coloring?
Nope! The food coloring is totally optional. It’s just there to give the cheesecake a nice orange hue, but it doesn’t affect the flavor at all. If you’re not into it or don’t have any on hand, feel free to skip it—it’ll still taste amazing.
How long can I keep this cheesecake in the fridge?
You can keep this cheesecake in the fridge for up to 4-5 days. Just make sure it’s well-covered to keep it fresh. Honestly, though, it probably won’t last that long—once people get a taste, it’ll be gone in no time! If you want to store it longer, you can freeze individual slices wrapped in plastic wrap and foil for up to 2 months. Just thaw in the fridge when you’re ready to indulge.
Rich Chocolate Orange Cheesecake
Ingredients
For the crust:
- 30 Oreo cookies crushed (plus a few extra for garnishing, if you’re feeling fancy)
- 4 tbsp unsalted butter melted
For the filling:
- 3 packages cream cheese 8 ounces each, softened to room temp
- 1/3 c granulated sugar
- 5 tbsp all-purpose flour
- 1/4 tsp salt
- Zest of 1 large orange go for the brightest, juiciest one you can find
- A few drops of yellow or orange food coloring totally optional, but fun if you like color
- 3/4 c frozen orange concentrate thawed to room temp
- 1 1/4 c sour cream or Greek yogurt at room temp
- 1 egg room temp
Instructions
- First things first—preheat your oven to 375˚F. Toss your crushed Oreos and melted butter into a blender or food processor and give it a good pulse until it turns into a nice, sandy mixture. Take that crumbly goodness and press it firmly into the bottom of a 9-inch springform pan, pushing it up the sides just a little. Pop it in the oven and bake for about 10 minutes, then pull it out and let it cool off while you prep the filling.
- Now, lower the oven temperature to 300˚F. Grab a big bowl and mix together the cream cheese, flour, sugar, salt, orange zest, and a few drops of food coloring if you’re using it. You want the mixture to be smooth and creamy—no lumps! Once it’s looking good, stir in the thawed orange juice concentrate, sour cream, or Greek yogurt, and finally, the egg. Mix until everything is just combined, but don’t overdo it.
- Here’s a little trick to help keep your cheesecake nice and moist: fill an oven-safe dish with boiling water and place it on the same rack where your cheesecake will bake. This creates a steamy environment and helps prevent cracks. Carefully pour your filling into the cooled crust and gently transfer the pan into the oven. Let it bake for 60 minutes.
- Once the time’s up, switch off the oven, but let the cheesecake stay inside. Prop the oven door open slightly with a wooden spoon and let the cheesecake cool in there for about 45 minutes.
- Once you take the cheesecake out of the oven, give it another 45 minutes to cool at room temperature. After that, transfer it to the fridge for at least 4 hours—overnight is even better if you can wait that long. When you’re ready to serve, top with some extra crushed or sliced Oreos for a little extra flair, slice it up into 12 pieces, and enjoy!
Notes
I’m Bitty, owner of nodashofgluten.com, where I share simple, delicious recipes for all tastes, including gluten-free. Check out my “About Me” page for more info!