
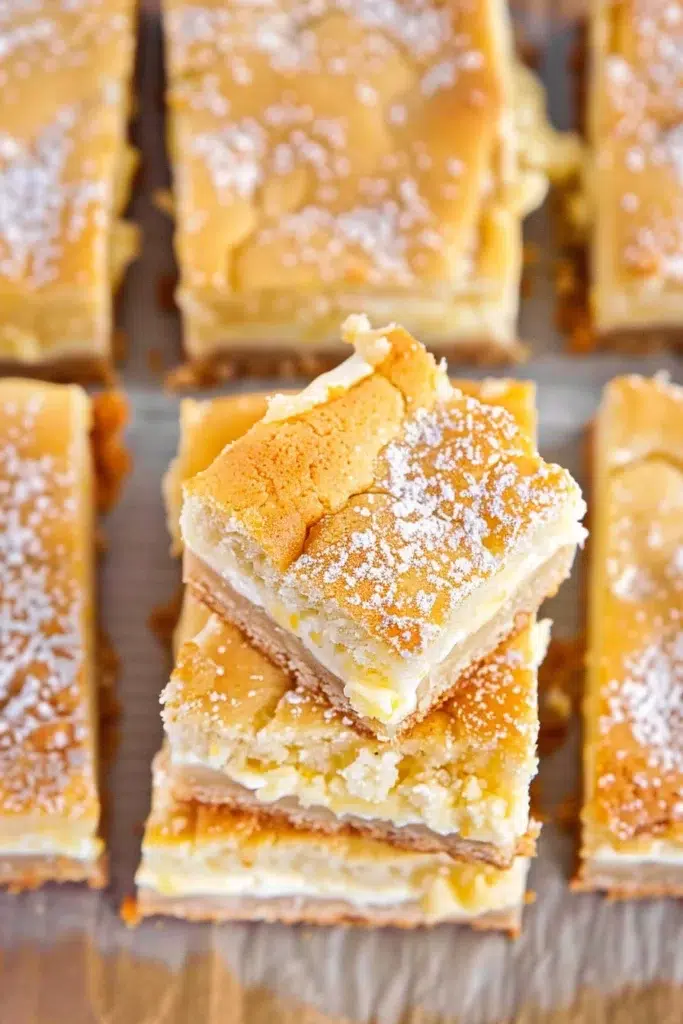
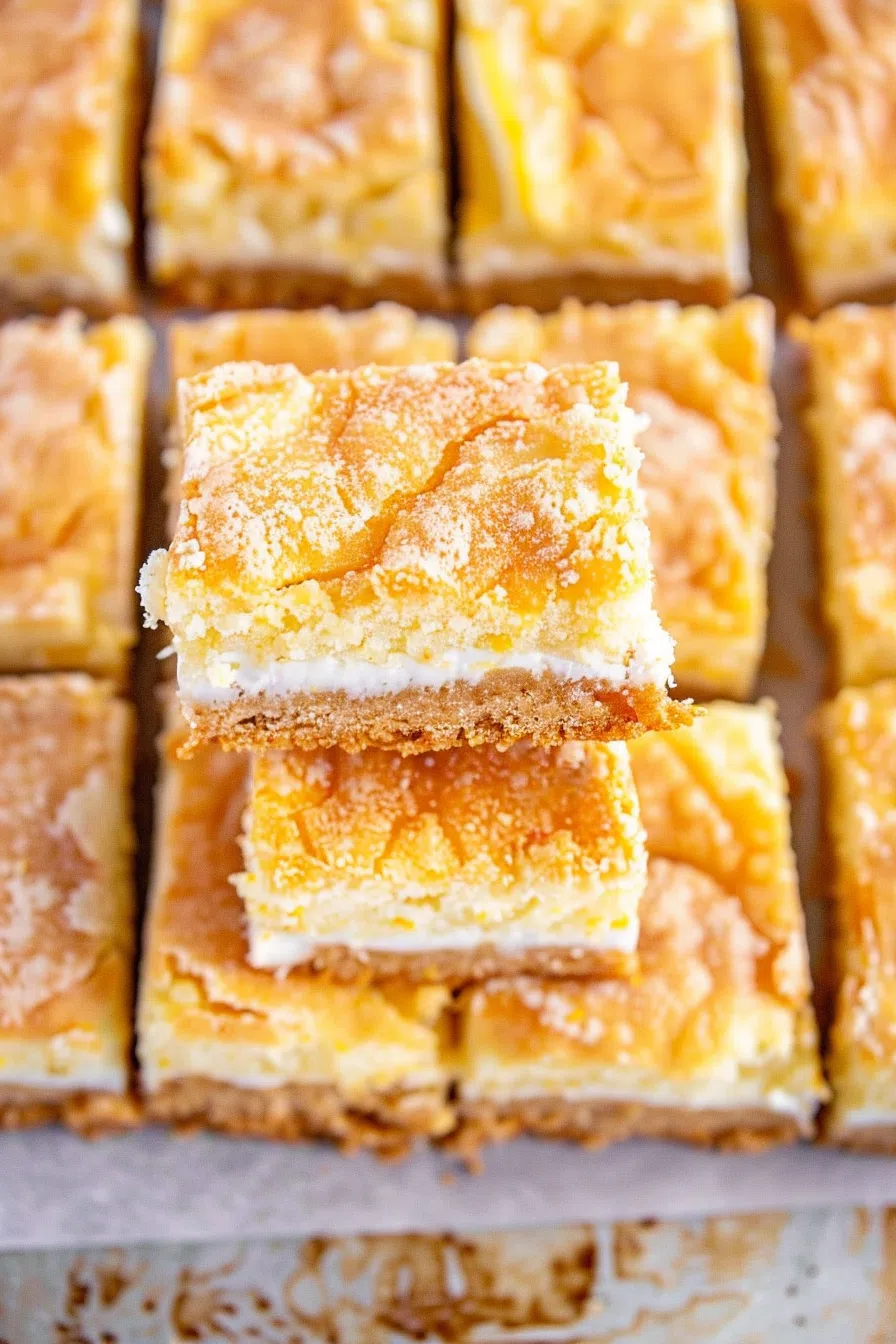
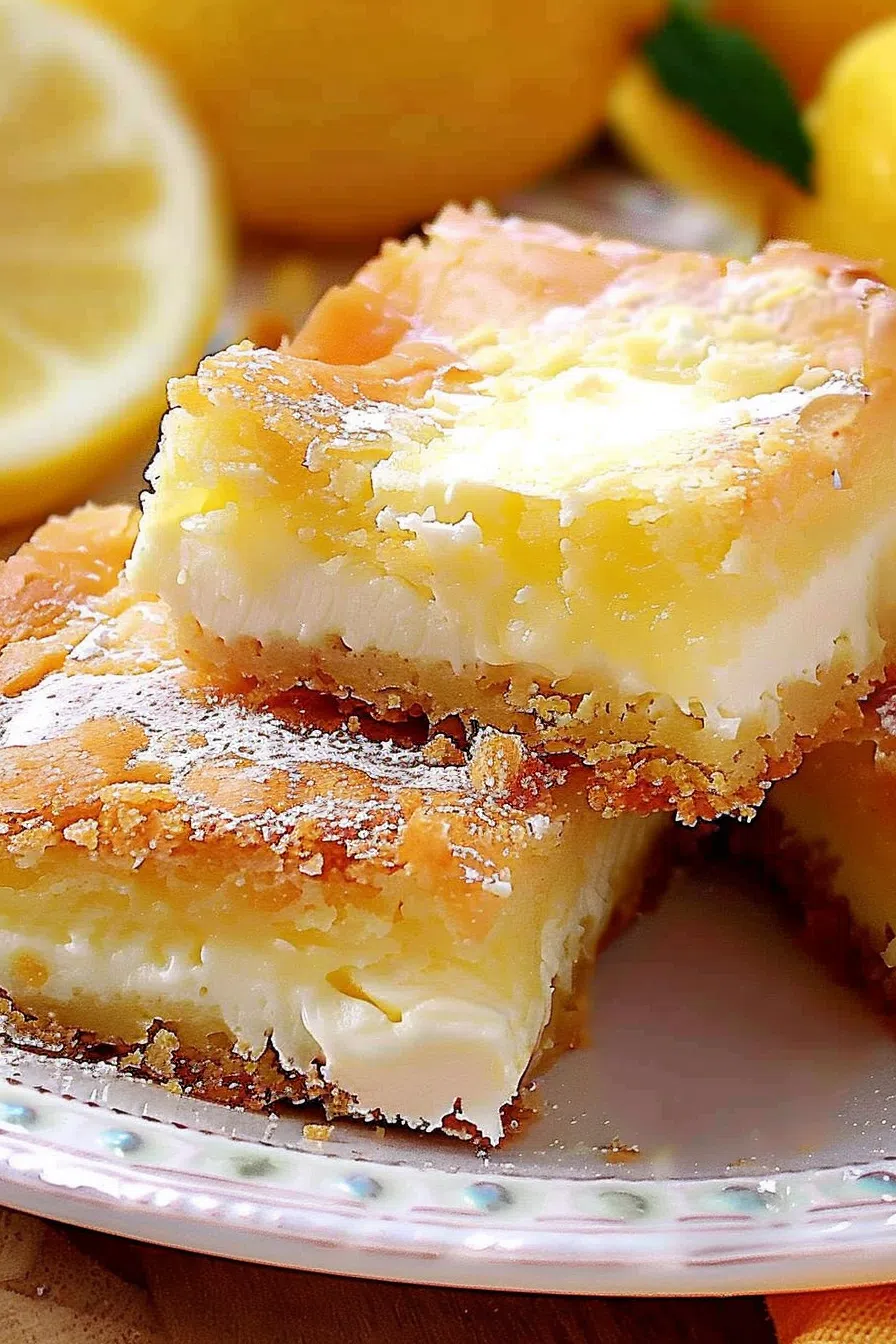
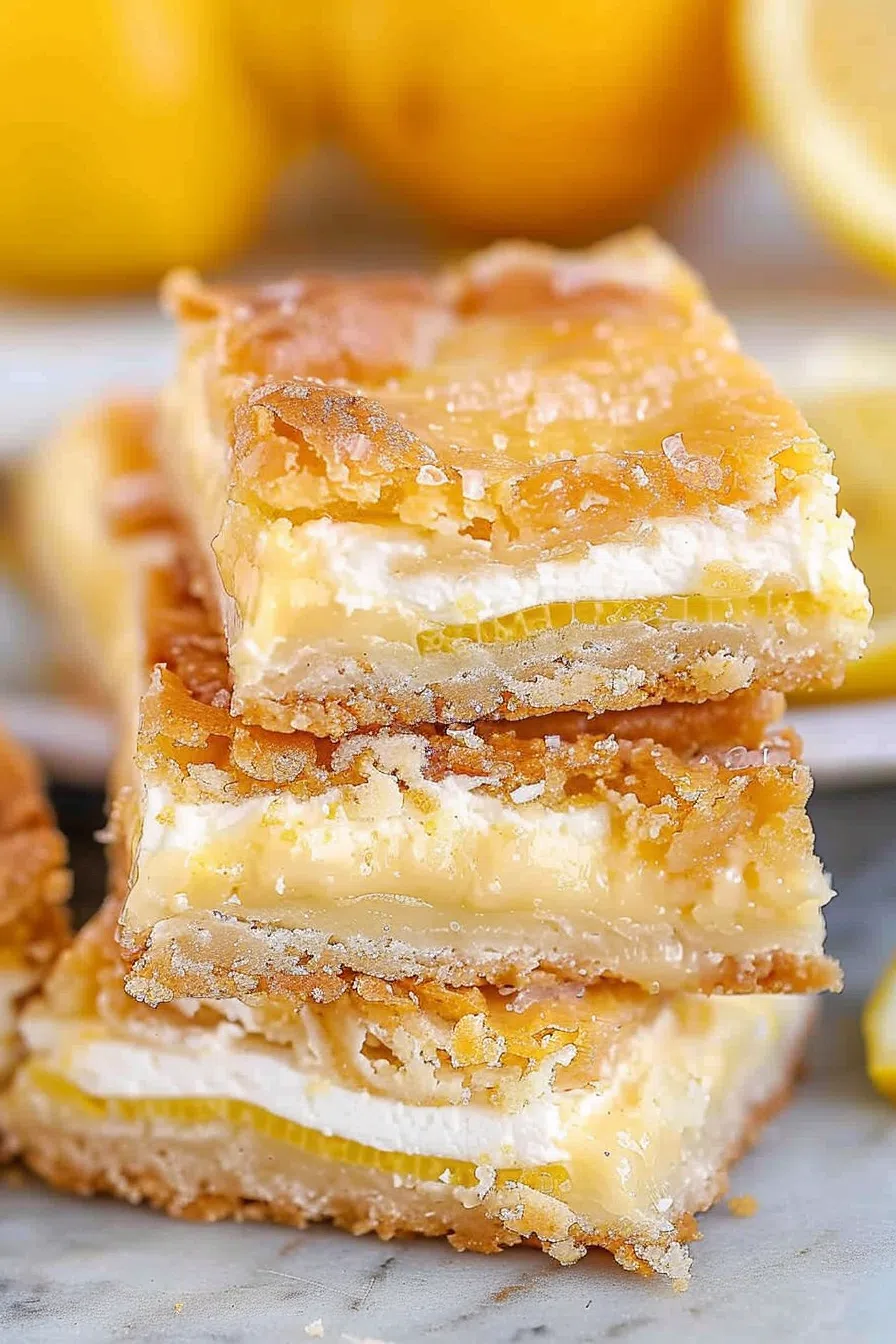
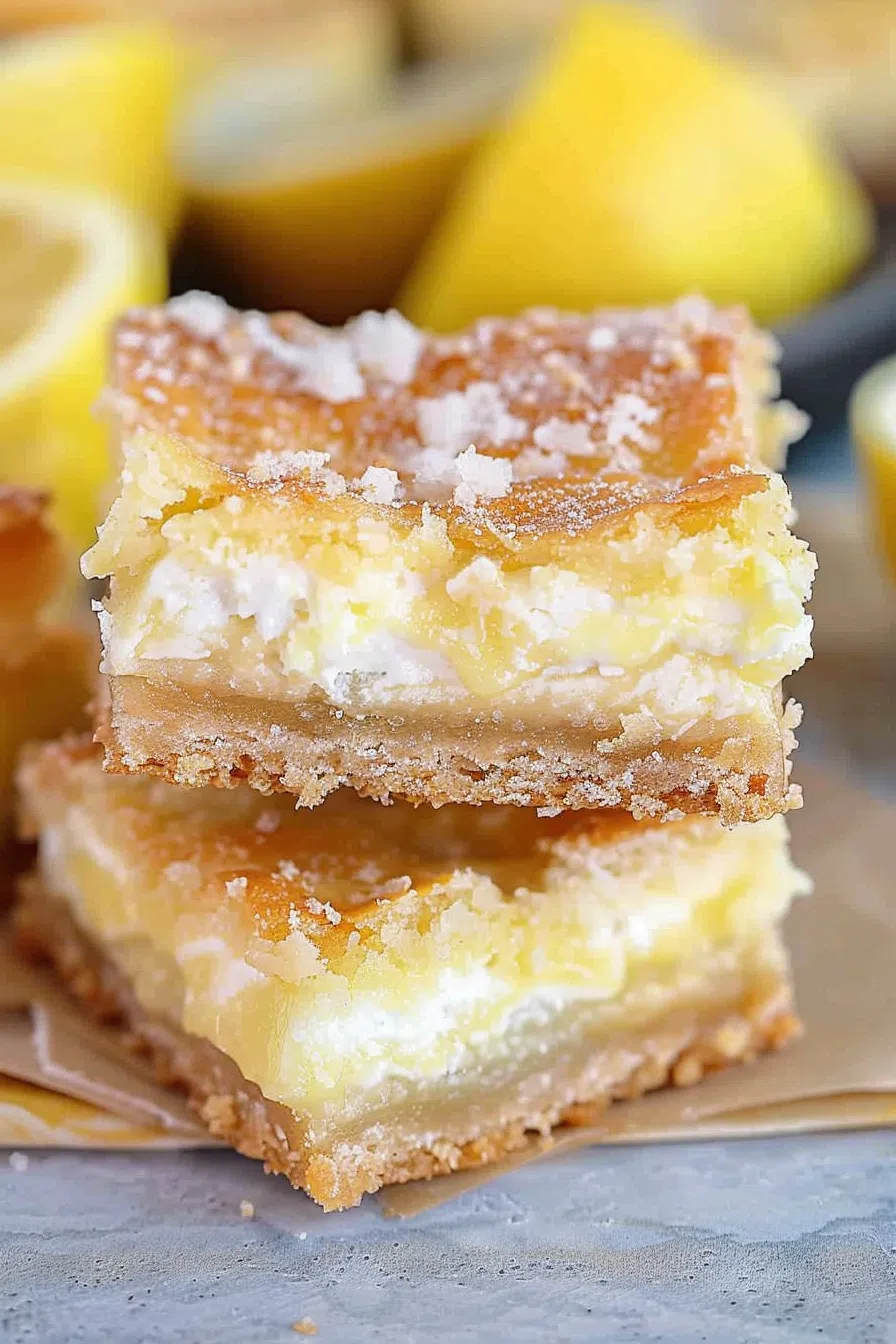
Cream cheese, lemon zest and juice, crescent roll dough, and sugar come together in these Lemon Cream Cheese Bars—a quick, tangy-sweet treat that’s way easier than it looks.
Alright, confession time: I didn’t plan on making Lemon Cream Cheese Bars that day. It started with a craving, a leftover tube of crescent dough that had somehow survived a month in my fridge, and two slightly wrinkly lemons that had been sitting in the fruit bowl looking judgy.


I was supposed to be cleaning. I’d already pulled the vacuum out and everything. But somehow, I found myself elbow-deep in cream cheese instead, thinking, “Hey, lemon and cream cheese sounds… actually really good right now?”
Twenty minutes later, my house smelled like a bakery that specializes in spring. And honestly? I forgot all about the vacuum. These bars are the kind of dessert that makes you feel like you’ve got your life together, even if you’re eating them off a paper towel while standing over the sink. Been there.
Why You’ll Love This Lemon Cream Cheese Bars Recipe?
Let me put it this way: if a lemon bar and a cheesecake had a baby, and that baby grew up to wear a flaky, buttery crust like a jacket? Yeah. That’s this.
Here’s why I keep making them (probably too often):
-
They’re ridiculously easy. No mixer needed (though it helps). You don’t even need a separate bowl if you’re feeling wild and washing dishes sounds like a scam.
-
The flavor hits every note. Sweet, tangy, creamy, buttery. I’m not saying it’s perfect, but… it kind of is?
-
They’re flexible. I’ve swapped citrus, added berries, sprinkled flaky salt, even once threw in a few crushed raspberries that were about to go soft. Still good.
-
They travel well. I’ve taken them to potlucks, picnics, and yes, awkward family brunches where someone will ask for the recipe before dessert is over.

Ingredient Notes:
Okay, here’s what you’ll need—and a few notes that make the difference.
-
Crescent roll dough (2 tubes): The “Recipe Creations” sheets are ideal, but regular crescents work too. Just pinch the seams closed. It’s a little fiddly, but you’ll survive.
-
Cream cheese (2 blocks): Full-fat. Please. The reduced-fat stuff turns kind of… sad.
-
Lemons (2): Zest and juice. Skip bottled lemon juice. It’s fine for cleaning your microwave but not for these bars.
-
White sugar: Some goes in the filling, some on top. Easy.
-
Butter (melted): For brushing the top. It helps the sugar zest mix stick and gives you that beautiful golden finish.
How To Make Lemon Cream Cheese Bars?
Alright, here’s how I make them—and yeah, I do cut corners sometimes (but not the good kind of corners, like the edge piece with extra sugar crust).
Step 1: Preheat and prep.
Heat your oven to 350°F. Line a 9×13 pan with foil and spray it with cooking spray. Don’t skip the foil. You’ll thank me when you’re lifting the bars out without a spatula acrobat routine.
Step 2: Lay down the base.
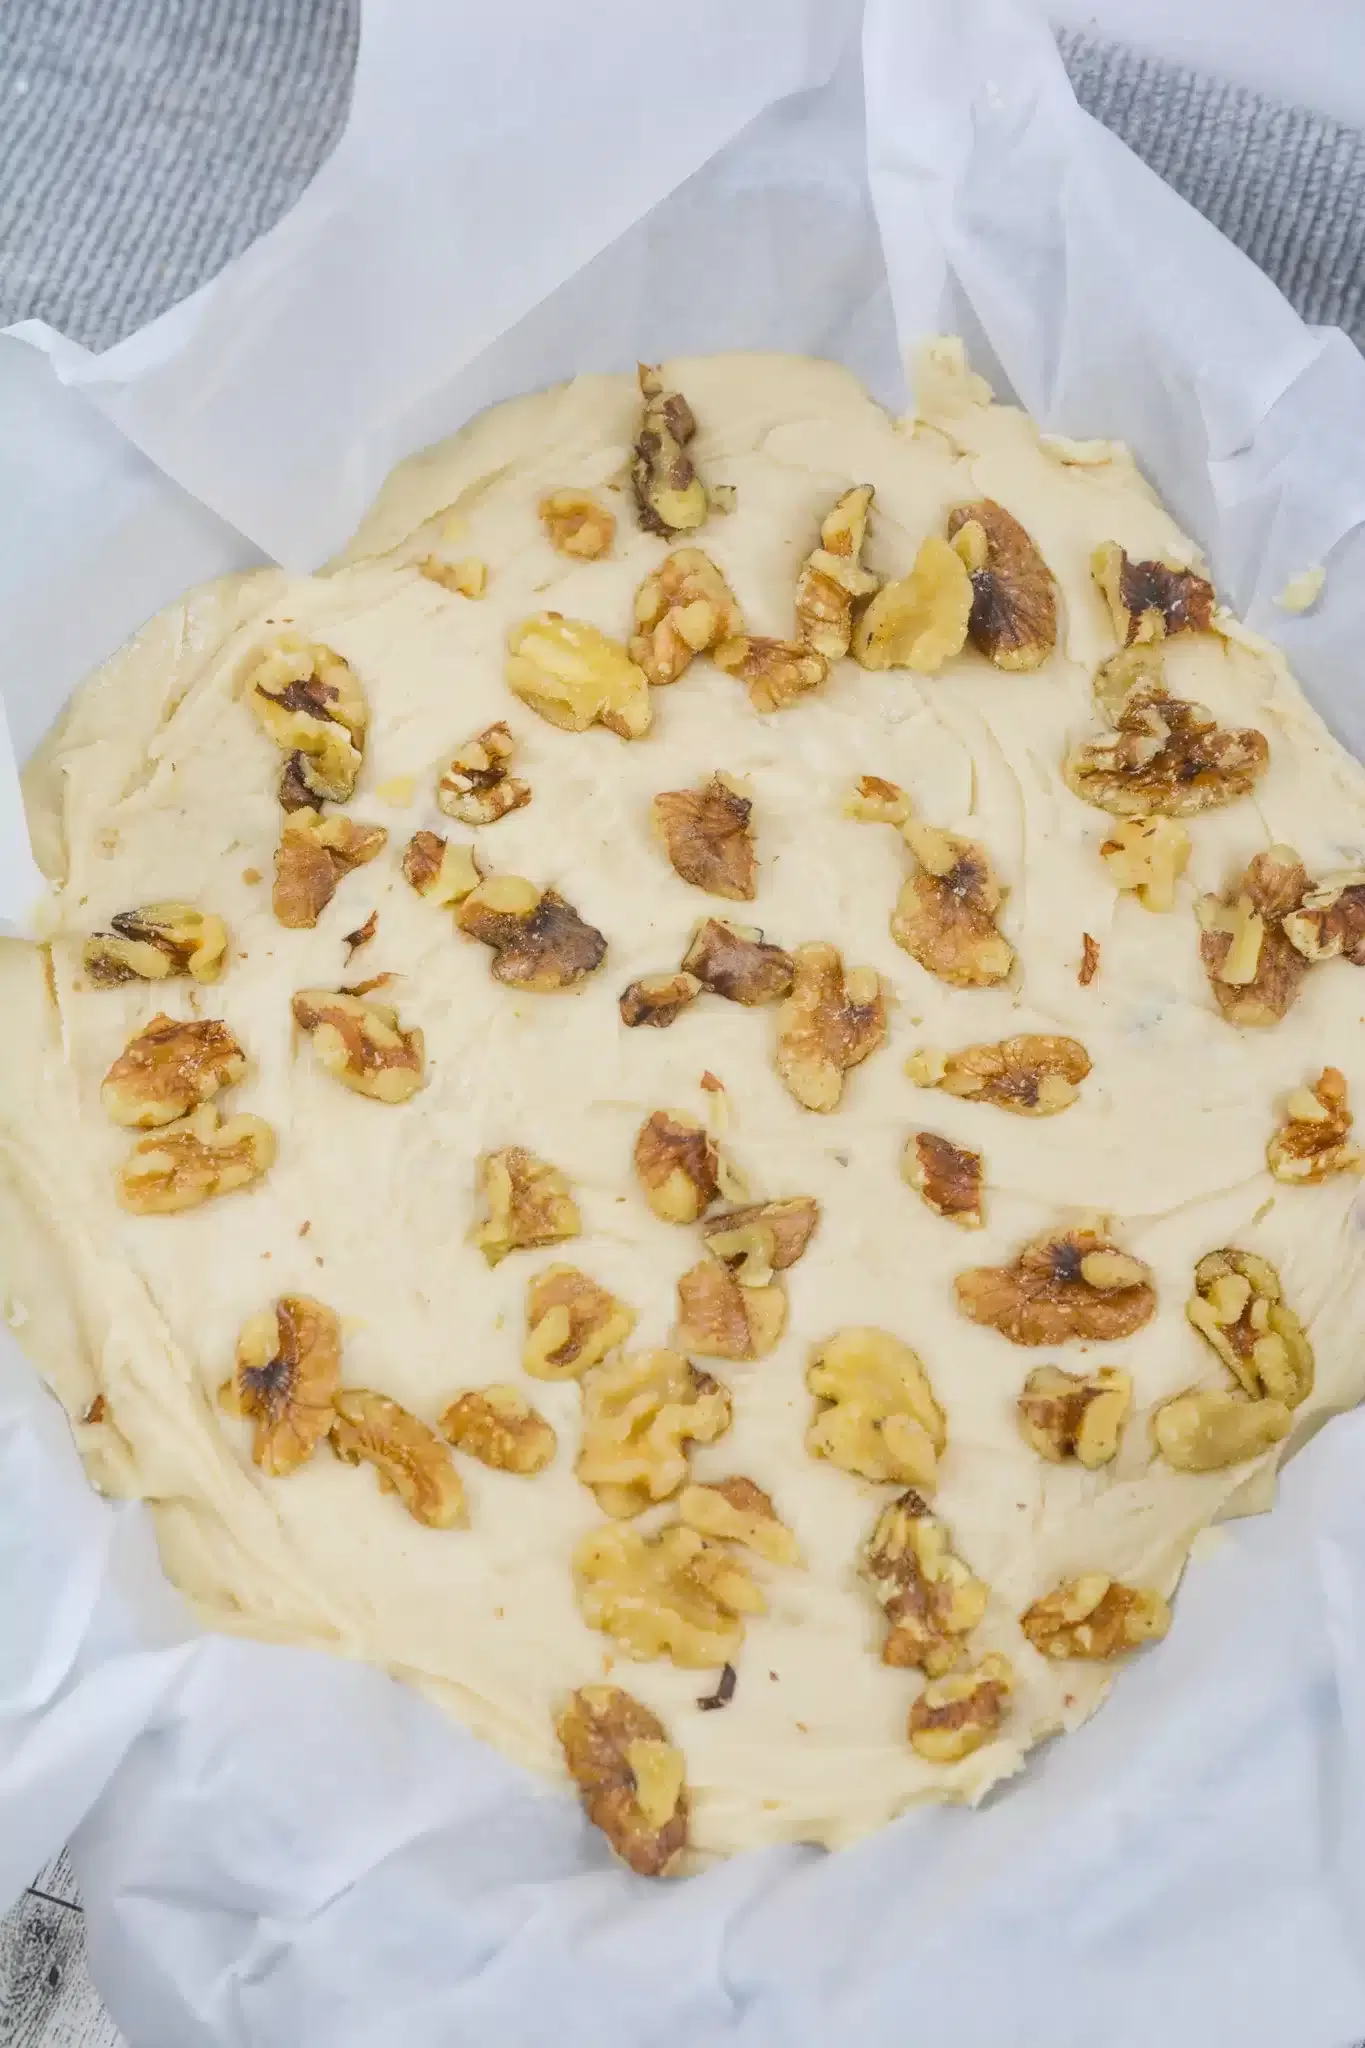
Unroll one tube of dough and press it into the pan. It’ll fight you a little. It’s fine. Patch up the tears. It’s a dessert, not a wall.
Step 3: Whip up the filling.
In a bowl, mix the cream cheese, ½ cup sugar, lemon juice, and most of the zest. Save a little zest for the topping. Beat until smooth. Taste it. It should be creamy, lemony, and make your face do that happy little squint.
Step 4: Layer it up.
Spread the filling over the dough. Gently. Don’t rip it—though, if you do, the dough will forgive you. It puffs up and hides a lot of sins.
Step 5: Top layer.
Unroll the second tube of dough and lay it on top of the filling. Stretch it gently. If it looks uneven, just call it “rustic.” Works every time.
Step 6: Butter + sugar magic.
Brush the top with melted butter. Then mix 3 tbsp of sugar with the leftover zest and sprinkle it generously over everything. It’ll melt into this sparkly, lemony crust that makes people go, “Wait, what is that topping?!”
Want To Save This Recipe?
Step 7: Bake.
Into the oven for 30-ish minutes. You’re looking for golden brown and a little puff around the edges. If your oven runs hot, check at 25. If you forget and it goes to 35, it’ll still taste good—just a little extra crisp on the edges.
Step 8: Cool, chill, slice, try not to eat half immediately.
Let it cool for 20 minutes. Then lift it out with the foil and slice into bars. I like to chill them for at least an hour before serving. They’re so much better cold, with that cheesecake texture.
Storage Options:
Once cool, stick them in the fridge. They’ll keep for about five days—if they last that long. You can freeze them too. Just wrap tightly in foil or stack them with parchment paper in between. Defrost in the fridge when you’re ready. I may or may not have eaten a frozen one once. Not terrible.
Variations and Substitutions:
-
Lime or orange instead of lemon: Totally different flavor profile, still works.
-
Add berries: Blueberries and raspberries are both solid choices.
-
Glaze it: Powdered sugar + lemon juice = optional drizzle that makes them extra dessert-y.
-
Salt it up: A teeny pinch of flaky salt before baking makes them pop. Sounds weird. Tastes amazing.

What to Serve with Lemon Cream Cheese Bars?
-
Hot tea or coffee: Classic combo. Bright lemon, cozy drink. You’re basically at a cafe now.
-
Whipped cream or vanilla ice cream: Okay, now you’re showing off—but it is delicious.
-
Fresh berries: For a little color and a “this is healthy, right?” moment.
-
Brunch spread: Serve these next to a fruit salad and a quiche and pretend you didn’t use canned dough. No one will question it.
Frequently Asked Questions:
Can I use low-fat cream cheese?
Technically? Yes. Emotionally? I say go full-fat. It’s dessert. Let it live.
Do I really need to chill them?
You could eat them warm, but they’re firmer and more flavorful after some fridge time. Totally worth it.
Can I double the recipe?
Yes, but use a sheet pan or two 9x13s. And maybe invite a few friends over… or don’t.
And there you go. Lemon Cream Cheese Bars, the little lemony lifesaver I didn’t know I needed until one weird afternoon turned into dessert therapy. They’re unfussy, bright, sweet in a slightly tangy way, and comforting in a “mom would be proud” kind of vibe—even if you totally forgot to do the dishes afterward.
So what do you think? Gonna try it? Let me know how it turns out—or how you improvised your way through it. I’m always up for swapping kitchen wins (and flops).
Keep the Flavor Coming – Try These:


Zesty Lemon Cream Cheese Bars
Ingredients
- Cooking spray
- 2 packages refrigerated crescent roll dough 8 oz each, such as Pillsbury® Recipe Creations®, divided
- 2 lemons zested and juiced, divided
- 2 packages cream cheese 8 oz each, softened
- 1/2 c white sugar
- 2 tbsp butter melted
- 3 tbsp white sugar
Instructions
Prep the Oven and Pan:
- Heat your oven to 350°F (175°C).
- Line a 9x13-inch baking dish with foil. And spray it with cooking spray.
Prepare the Base:
- Unroll one package of crescent roll dough. And press it into the bottom of the prepared dish. Stretching to the edges.
Make the Filling:
- In a large bowl, combine the juice and most of the zest from two lemons.
- Add the cream cheese and 1/2 cup sugar. And beat with a mixer until smooth.
- Spread this mixture over the dough. In the baking dish.
Add the Top Layer:
- Unroll the second dough package. And lay it over the filling, stretching it to fit.
- Brush the dough with melted butter.
Add Topping:
- Mix 3 tablespoons of sugar. With the remaining lemon zest.
- Sprinkle this mixture over the buttered dough.
Bake:
- Bake for about 30 minutes. Until the top is golden.
- Cool in the pan for 20 minutes. Then lift out using the foil and cut into squares.
Chill:
- Place the cut bars back in the pan. And refrigerate for at least 1 hour before serving.
Notes
I’m Bitty, owner of nodashofgluten.com, where I share simple, delicious recipes for all tastes, including gluten-free. Check out my “About Me” page for more info!

