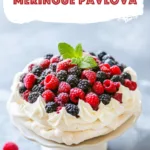
Egg whites, sugar, cream, vanilla bean, and berries come together in this light, crisp Vanilla Bean Berry Meringue Pavlova.
Okay, so here’s the thing about pavlovas: every time I make one, I get this feeling like I’ve briefly become the type of person who buys fresh flowers “just because.” You know what I mean? They’re elegant in that effortless way—except the effort definitely isn’t effortless, but we’ll pretend it is when guests arrive.
My first Vanilla Bean Berry Meringue Pavlova came from a wildly impulsive mood during a summer heatwave. The kind of day where the air feels like warm soup and you open the fridge just to stand there for relief. I saw a carton of berries—raspberries, blueberries, the whole farmers-market vibe—and something in me went, Yep. Pavlova day. Meanwhile my house looked like I’d lost an argument with a laundry basket, but whatever. Sometimes you need dessert more than dignity.


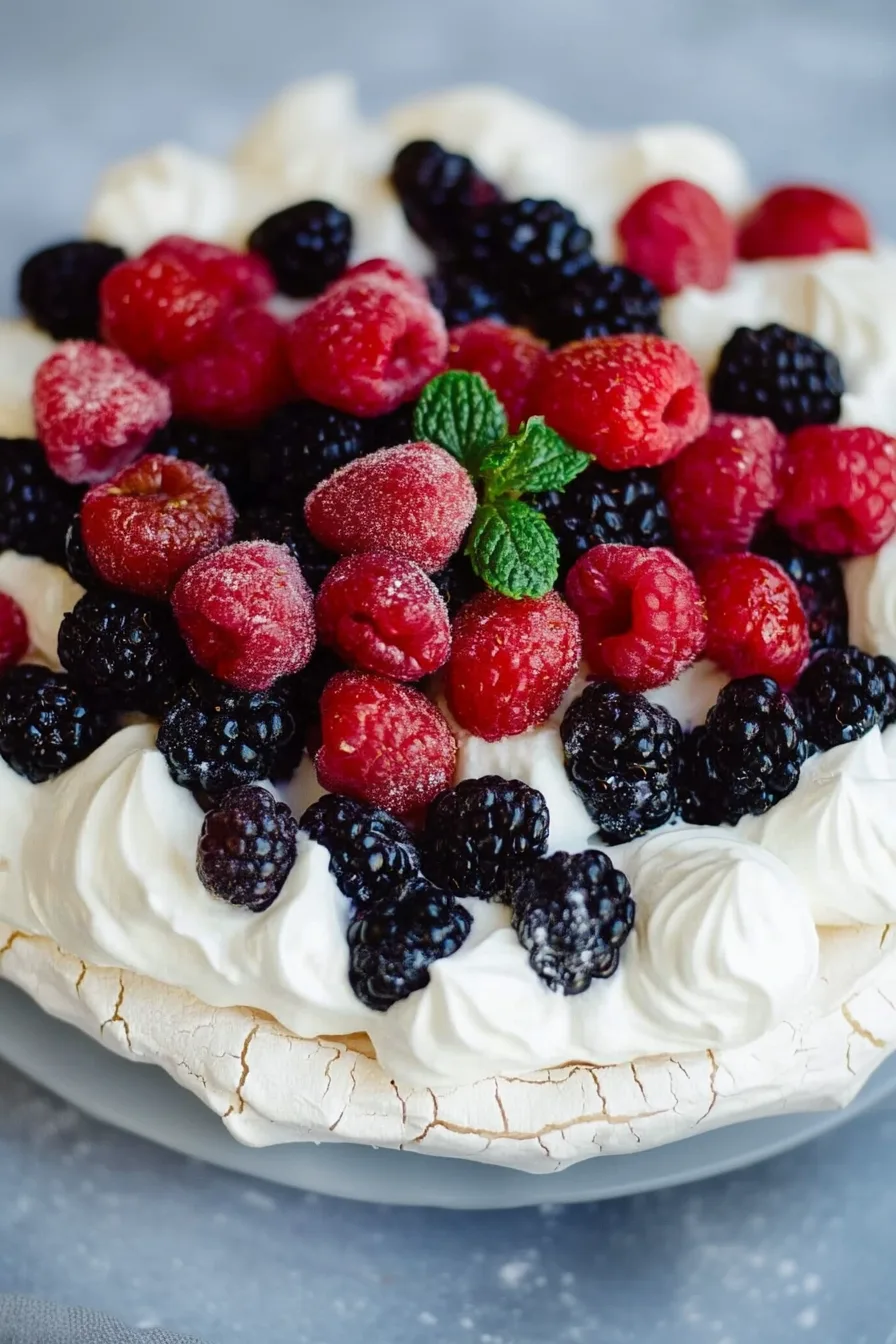
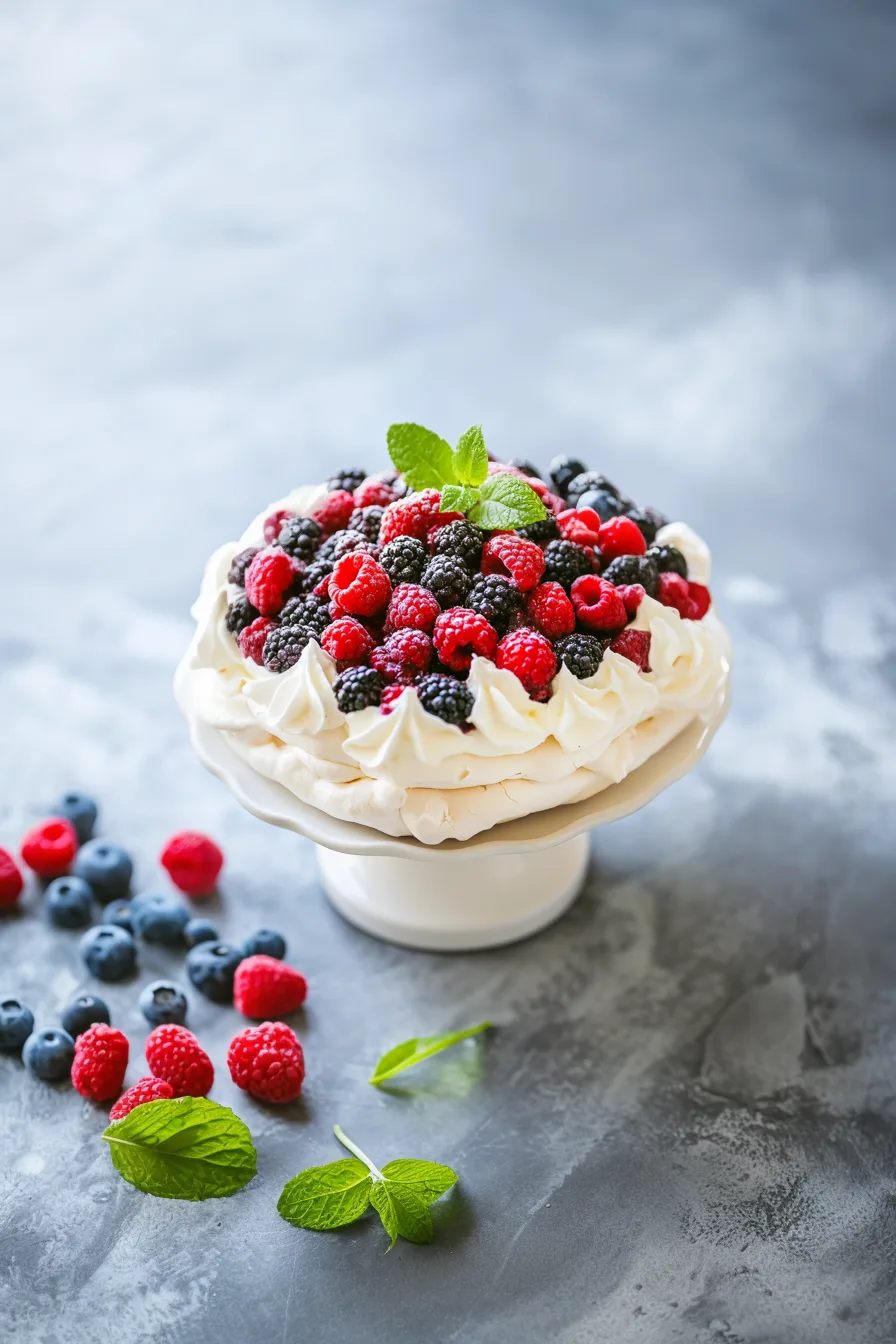
When that pavlova shell came out of the oven, it looked like a giant sugar cloud that had been on a spiritual journey. All crackly and glossy and slightly lopsided in the way that makes you think, “Well… maybe it’ll photograph better from one angle.” But once I scooped on that vanilla bean cream—little black flecks everywhere like confetti—and piled on the berries, I swear it looked like something that should cost $14 a slice in a tiny café where they write the menu on chalkboards.
And it tasted even better. That weird mix of crispy edges, marshmallowy center, cold cream, bright berries… it’s like all the seasons happening at once on your tongue. I still don’t totally understand the alchemy of pavlova, but man, I love it.
Why You’ll Love This Vanilla Bean Berry Meringue Pavlova Recipe?
You know how some desserts feel “heavy” and some feel “light,” but then there are the rare ones that manage to be both at the same time? That’s what this pavlova does. It’s a paradox, like wearing slippers with a fancy dress. Somehow it works.
The crisp shell is sweet and shattery (in the good way). The inside is soft and almost marshmallow-like—like the meringue decided halfway through baking that it wanted to be a cloud instead. The vanilla bean whipped cream brings the whole “luxury resort dessert” energy, even if you made it while wearing mismatched socks. And the berries add that tart pop that keeps it from being too sweet, so you can absolutely justify a second slice. Or third. No judgment.
Plus, the Vanilla Bean Berry Meringue Pavlova looks dramatic even if it cracks or sags a little… honestly, the imperfections make it look more artistic. Like something made by a human being instead of a robot, which I personally appreciate these days.

Ingredient Notes:
Let’s walk through the cast of characters because some of them can be a little temperamental:
- Egg Whites
Room temp, please. Cold egg whites whip like they’re still asleep. - Sugar
Superfine dissolves faster, but regular granulated sugar absolutely gets the job done. We’re not auditioning for The Great British Bake Off today. - Cream of Tartar
Think of this as the meringue’s emotional support friend. Helps it hold itself together. - Vanilla Extract + Vanilla Bean
The combo feels a little extra, I know, but it makes this Vanilla Bean Berry Meringue Pavlova taste like it came from a pastry shop that charges you more if you sit by the window. - Heavy Cream
It must be cold. Warm cream will look at the mixer like, “You expect me to do what?” - Fresh Berries
Use whatever you can find. The pavlova doesn’t care. Berries are berries.
How To Make Vanilla Bean Berry Meringue Pavlova?
Step 1. Making the Meringue Shell
Add the egg whites and vanilla extract to a bowl—not plastic if you can avoid it, because plastic likes to hold onto invisible grease forever. Start whisking on low and let the bubbles happen. It always looks wrong at this stage, like you’re making bubble bath instead of dessert, but stay with me.
Once soft peaks form, add your sugar slooooowly. One tablespoon at a time. I know it’s tedious, but pavlovas respond well to patience—kind of like toddlers.
Whip until it’s glossy, thick, and forms stiff peaks. You’ll know it’s right when you lift the whisk and the meringue stands up like it’s showing off.
Step 2. Forming and Baking
Draw a circle on parchment (I trace a dinner plate), spread the meringue inside, and build up the sides like a little nest.
Bake low and slow at 250°F. It should be crisp on the outside, soft inside, and absolutely not brown. If you see color, you’ve gone too far… unless you like toasted pavlova, in which case, go you.
Turn the oven off and let the pavlova cool inside. Think of it as a spa day for your dessert.
Step 3. Making the Vanilla Bean Cream
Want To Save This Recipe?
Split the vanilla bean, scrape out the flecks—honestly one of the most satisfying kitchen tasks ever—and whip your cream until it thickens. Add powdered sugar and keep whipping until soft peaks form. Don’t overdo it unless you’re in the mood to accidentally make butter.
Step 4. Putting It All Together
Spoon the cream into the pavlova shell. It’ll look like an edible cloud. Pile on the berries like you’re building a berry mountain. And then… admire your masterpiece.
Eat immediately, preferably with people who will tell you how talented you are.

Storage Options:
The pavlova shell stays crisp 2–3 days if kept airtight and away from humidity (honestly a losing battle where I live, but we try). Once you add cream and berries, it’s best eaten right away. leftovers will soften but still taste great.
Variations and Substitutions:
- Add cocoa to make a chocolate pavlova
- Use lemon curd for sharper flavor
- Swap the berries for tropical fruit
- Add a splash of liqueur to the whipped cream
- Replace vanilla bean with extract—still delicious
I’ve even made a fall version once with roasted figs and honey. It was… chaotic looking but unexpectedly delightful.

What to Serve with Vanilla Bean Berry Meringue Pavlova?
- Lemon curd
- Raspberry or strawberry sauce
- Fresh mint
- Rosé
- Vanilla or berry ice cream
It already shines on its own, but pairing never hurts.
Frequently Asked Questions:
Why did my pavlova crack?
Because it’s a pavlova. They crack. It’s part of their personality.
Can I prep the shell in advance?
Yes! Just keep it dry.
Can I freeze it?
Nope. Don’t even try. It’ll dissolve into sadness.
If you end up making this Vanilla Bean Berry Meringue Pavlova, tell me everything—what berries you chose, if your shell cracked dramatically, or if your whipped cream tried to turn into butter. I love hearing those little details.
Keep the Flavor Coming – Try These:
Vanilla Bean Berry Meringue Pavlova
Ingredients
Meringue Shell
- 3 large egg whites at room temperature
- ¾ cup granulated sugar superfine sugar preferred
- ¼ teaspoon cream of tartar
- Pinch of salt
- ½ teaspoon vanilla extract
Vanilla Bean Whipped Cream
- 2 cups cold heavy whipping cream
- 3 tablespoons powdered sugar
- 1 vanilla bean split and scraped
Topping
- 1 –2 pints fresh mixed berries, raspberries, blueberries, blackberries, strawberries
Instructions
Prepare the Meringue Shell
- In a large mixing bowl or the bowl of a stand mixer, combine the egg whites and vanilla extract.
- Using a whisk attachment on low speed, beat the egg whites until small, uniform bubbles begin to form, approximately 3–5 minutes.
- Increase the mixer speed to medium and continue beating until soft peaks develop.
- Reduce the speed to low and gradually add the granulated sugar, one tablespoon at a time, ensuring each addition is fully incorporated before adding the next.
- Increase the speed to medium and continue mixing until the meringue becomes thick and glossy, 7–10 minutes.
- Add the cream of tartar and salt, then beat on high speed for 1–2 minutes, or until stiff peaks form.
- Preheat the oven to 250°F (120°C).
- Draw a 9-inch circle onto a sheet of parchment paper. Flip the parchment over and place it on a baking sheet.
- Using a spatula, transfer the meringue onto the parchment, shaping it within the circle and creating slightly raised sides to form a shallow well.
Bake the Meringue
- Bake the pavlova for 75–90 minutes, or until the shell is firm, dry, and pale.
- Turn off the oven and allow the pavlova to cool inside the oven for at least 1 hour (or overnight for best results).
Prepare the Vanilla Bean Whipped Cream
- Split the vanilla bean lengthwise and scrape the seeds into a small dish.
- In a clean mixing bowl, beat the cold heavy cream on medium speed until it begins to thicken.
- Add the powdered sugar and vanilla bean seeds, then increase the speed to high.
- Continue whipping until the mixture forms soft to medium peaks. Avoid over-whipping.
Assemble the Pavlova
- Once the meringue shell has fully cooled, spoon the whipped cream into the center, spreading it evenly.
- Top with fresh berries, arranging them as desired.
- Serve immediately.
Notes
- Ensure all ingredients, including vanilla extract and powdered sugar, are certified gluten-free, as some brands may include additives or be processed on shared equipment.
- If adding additional toppings (such as lemon curd or fruit sauces), verify that those products are gluten-free as well.
I’m Bitty, owner of nodashofgluten.com, where I share simple, delicious recipes for all tastes, including gluten-free. Check out my “About Me” page for more info!